

Browse All Articles > Creating a Hyper-V Cluster on Windows 2012
Introduction
Windows 2012 is here - it is upon us, and I hope that like me, you will upgrade your Hyper-V to the new version which has been promised to be a lot more stable, flexible and powerful than its predecessor in Windows 2008 R2. Setting up Hyper-V in a clustered environment is relatively easy, and this guide is intended to help you along the way.I'm not going to bore you with screenshot after screenshot, and I'm only going to screenshot interesting or key bits.
This guide will not cover:
The installation of Windows 2012
The installation of SCVMM 2012
Prerequisites
You will need the following:
One or more servers with one or more network interfaces in each
Windows 2012 installed (you can choose to use Standard or Datacenter, Gui or Core)
Shared Storage attached. (Remember to install MPIO and DSM's where necessary)
Preparation
If like me, you are intending to take advantage of Microsoft's Teaming which is a built in part of the Windows 2012 Operating system, then you should team the network interface now, ready for the Hyper-V Role installation. Do it as follows: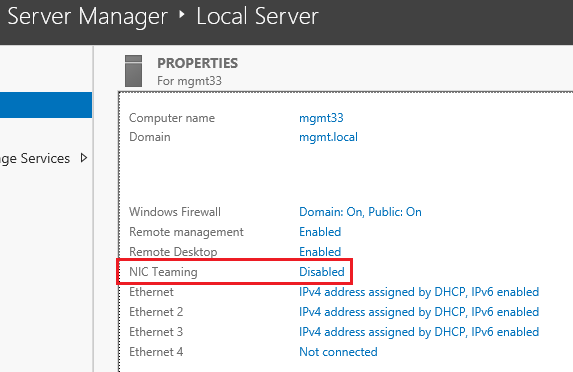
Find "NIC Teaming" through Server Manager
Click on "Disbled" to bring up the teaming dialog box
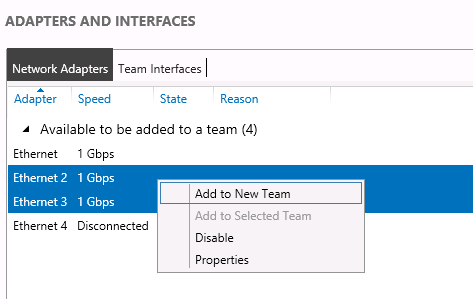
Select the ports you want to add to the team, right click and then select "Add to New Team"
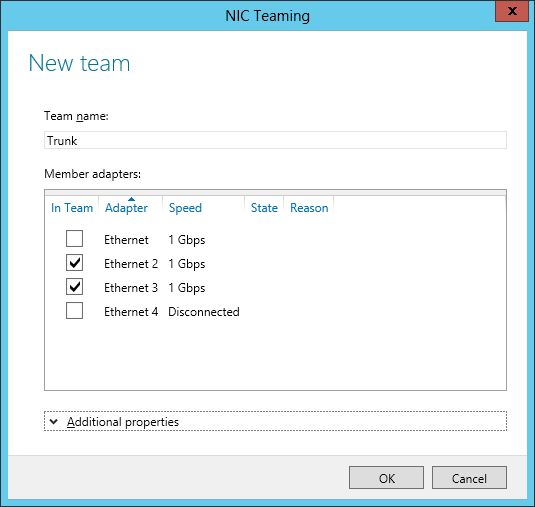
Enter a name for the team (this can be anything, and doesn't have to be the same name on all hosts in the cluster)
Don't change any of the Additional properties, unless your network administrator advises you to.
Only set the VLAN if you are teaming all the adapters on the host (i.e. you have no other way to connect to the host), and you do not have native VLAN configured on your switch.
Once you have your Team set up, it will take a few seconds for the team to converge and become OK. If it's good, it will have a Green Up symbol next to "OK" in the Status column.
Installing
Let's go ahead and install Hyper-V and Failover Clustering at the same time.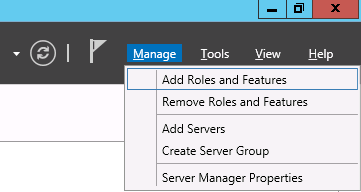
Start up "Add Roles and Features" using any method you prefer
Before you begin - Feel free to check "Skip this page by default"
Installation Type - Role-based or feature-based installation
Server Selection - Select the server from the server pool (already selected if you're doing this from the local server
Server Roles - Check "Hyper-V"
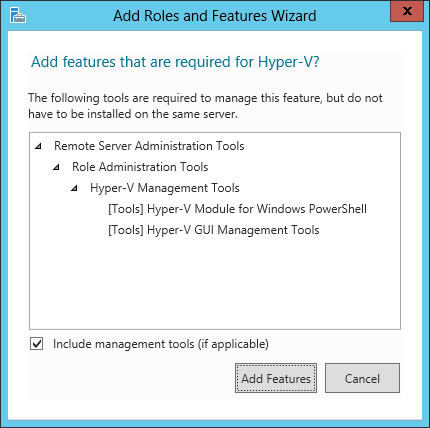
Confirm the Add features that are required for Hyper-V by clicking "Add Features"
Click Next to go to Features
Features - Check "Failover Clustering"
Confirm the Add features that are required for Failover Clustering by clicking "Add Features"
Click "Next" to go to Hyper-V
Hyper-V - read the note and then click "Next"

Check the Trunk you created earlier. If you don't plan to bind your Virtual Switch to a team, then just select a standard adapter. You cannot bind one switch to two adapters like you can in VMware, so make sure you've created your team(s) first! You can also skip this step and not check a network adapter at all, and create your virtual switch later.
Click "Next" to continue
Migration - Do not check the box, even though it seems like the right thing to do. This Virtual Machine Migration option here is for connecting 3rd party Hyper-V machines, and NOT for Hyper-V machines in the same cluster.
Click "Next" to continue
Default Stores - Change where necessary, but since we'll be attaching this to a cluster and using Cluster Shared Volumes, leaving this as is is fine
Click "Next" to continue

Click "Install" to continue
The installation won't take long, and will require a reboot to complete. Reboot at your leisure, and then proceed to the next section or repeat installation on other servers that will participate in the cluster.
Configuring
Prior to creating the cluster, it's best to configure the Networking in Hyper-V. This is an optional step, but recommended. Failover Clustering is a sensitive beast, and if you only have one network for host communication, cluster communication and Virtual machine communication, the Failover Clustering might miss a heartbeat due to contention and cause all sorts of problems. In an ideal world, you would have 3 or more networks in your cluster - one dedicated to cluster (and host) communications, one dedicated to guest communications (usually your team), and one dedicated for Live-Migrations. If you plan to use Cluster Replication (not covered in this article), I would even strongly recommend a 4th dedicated network.
Run Hyper-V Manager, and if necessary, add the host(s) you wish to prepare.

Open up the Virtual Switch Manager

Rename the already created Virtual Switch to be something a bit more simple (the default name is a bit long), and specify the VLAN ID (if required).
If you have no Virtual Switch (you skipped this during the installation), then add a virtual switch using the Team or Network Interface dedicated for your guests.
Your Virtual Switch names should be identical on all hosts in the cluster.
Please read the Cautionary Notes below for important Information!
Repeat above for all hosts that will participate in the cluster.
Creating the Cluster
Once you have installed the software on all the nodes, rebooted and configured the networking, you're now ready to create the cluster.
Launch Failover Cluster Manager
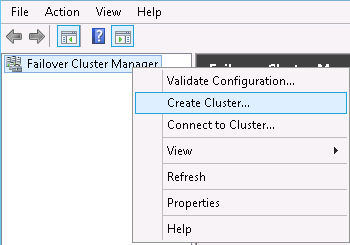
Right click "Failover Cluster Manager" and "select "Create Cluster"
Before you Begin - Feel Free to "Do not show this page again" and then click "Next"
Select Servers - Browse or enter the server names of each server that will participate in the cluster. Once you have all the servers added to the list, click "Next"
Validation Warning - Of course you want Support from Microsoft. Leave the default option of Yes checked and click Next. N.B. You will not be prompted for this if you've already done a cluster validation on all nodes. Skip the next 4 lines.
Before you Begin - Feel Free to "Do not show this page again" and then click "Next"
Testing Options - Keep the "run all tests" slected. You will not be able to continue cluster creation unless you run all tests. Click "Next" to proceed
Confirmation - Click "Next" to continue testing. Don't be too alarmed if you see items in red.
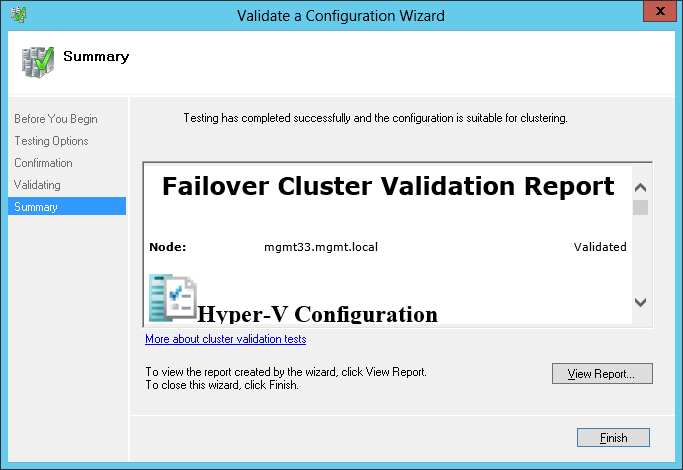
After the tests are done, it will either come back saying that the configuration is suitable for clustering, or not suitable. If it is not suitable, then click "View Report", and navigate to the items which Failed. Resolve these, and then run the tests again.

Access point for Administering the cluster - Give your cluster a unique name.
Confirmation - Click "Next" if you are happy with this screen. NOTE - If you see only one IP Address (subnet) Listed, but are expecting to see more, then re-read the networking information above, and in the Cautionary Notes below.
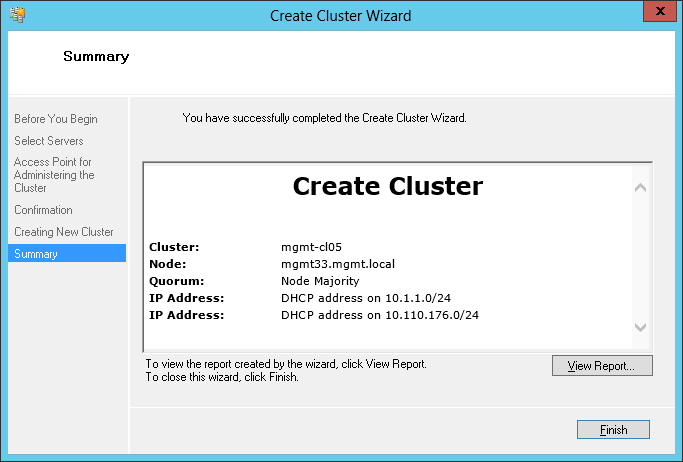
Summary - Click "Finish"
Your cluster has now been created. The next three sections are optional, but included because they are common tasks.
Cluster Shared Volumes
Cluster shared volumes are what are used to host Virtual Machines. In Failover Cluster Manager in Windows 2008 R2, you had to enable cluster shared volumes before being able to allocate any. With this new version, this is no longer required.
1. Prepare the volume
Perform the following on any one node of the cluster. This only has to be done on one node, and not every node.
- Use DISKPART or Disk Management to locate the Disk
- Rescan for new disks (if necessary)
- Bring the Disk Online (if necessary)
- Initialize the disk as a GPT Disk (or convert from MBR to GPT) (if necessary)
- Create a Simple Volume - Do not assign a drive letter
- Format with NTFS - Give volume a meaningful name
- Take the disk offline
2. Add Disk to Cluster
Perform the following using Failover Cluster Manager
- Select the "Disks" Node
- Under "Actions", click "Add Disk" (or right click Disks, and select "Add Disk"
- Available Disks will be listed, and all checked by default. Click OK to add the disks to your cluster
- Rename the disks to be something more readable
3. Convert Cluster Disk to Cluster Shared Volume
Perform the following using Failover Cluster Manager
- Right click the target disk
- Select "Add to Cluster Shared Volumes". The volume is mounted under C:\ClusterStorage on all hosts as the next consecutive number.
Quorum Disk
Quorum Disks are only required if you have an even amount of nodes. If you have an odd amount of nodes, it's still good to perform the first two steps, so that you have a Quorum Disk ready in the event that you add another node, or remove a node from the cluster.
1. Prepare the volume
Perform the following on any one node of the cluster. This only has to be done on one node, and not every node.
- Allocate a small partition (1 GB is fine) on your shared storage, and
Use DISKPART or Disk Management to locate the Disk
- Rescan for new disks (if necessary)
- Bring the Disk Online (if necessary)
- Initialize the disk as a GPT Disk (or convert from MBR to GPT) (if necessary)
- Create a Simple Volume - Assign a drive letter that would be unique (for example, Q:)
- Format with NTFS - Give volume a meaningful name (Quorum)
- Take the disk offline
2. Add Disk to Cluster
Perform the following using Failover Cluster Manager
- Select the "Disks" Node
- Under "Actions", click "Add Disk" (or right click Disks, and select "Add Disk"
- Available Disks will be listed, and all checked by default. Click OK to add the disks to your cluster
- Rename the quorum disk to be something more readable
3. Add Quorum Disk to Cluster Quorum
Perform the following using Failover Cluster Manager. Remember, only do this if you have an even number of Cluster Nodes. If you have an odd number of Cluster Nodes, then
- Right click Cluster
- Select "More Actions" and then "Configure Cluster Quorum Settings"
- Read the Wizard Notes, then click Next
- Select "Add or change the quorum witness"
- Select "Configure a disk witness"
- Select the volume you have dedicated for the Disk Quorum
- Confirm the Quorum Settings
- Finish the Wizard
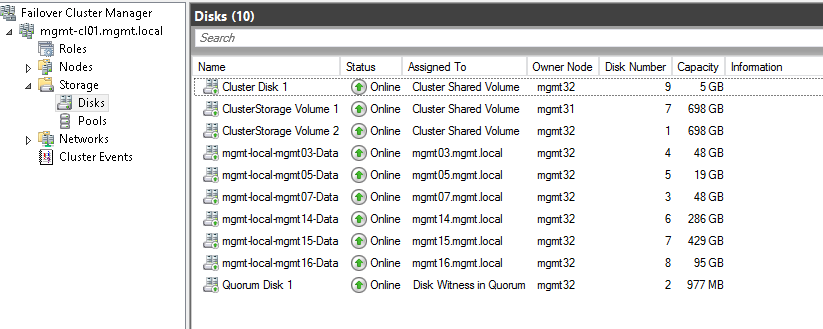 Above is a view showing standard Cluster Disks, Cluster Shared Volumes and the Disk Witness in Quorum.
Create a Virtual Machine
While many of you are already familiar with this process, I won't go into very much detail, but I am including it because of a minor issue I've come across.
Right Click Roles, select "Virtual Machines" and then "New Virtual Machine"
Select the desired node, then click OK
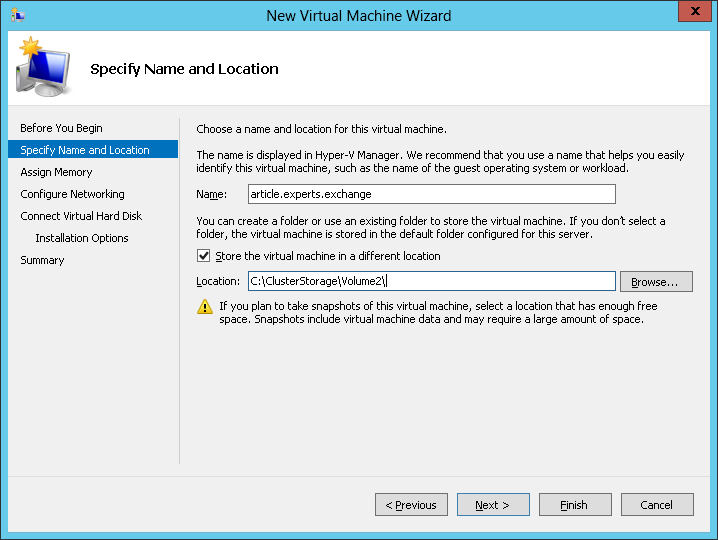
Check "Store the virtual machine in a different location", even if the path shown is correct. If you do not check this box, then the virtual machine is actually created in the path shown, rather than creating a subfolder with the virtual machine name!
Allocate the memory you want
Connect it to the virtual Switch
Select a Disk size.
Choose Installation Options. Depending on your choice here, it will create the network as legacy or non-legacy.

Fine tune your virtual machine prior to starting up - for example, set the VLAN for the Virtual Machine Network Adapter
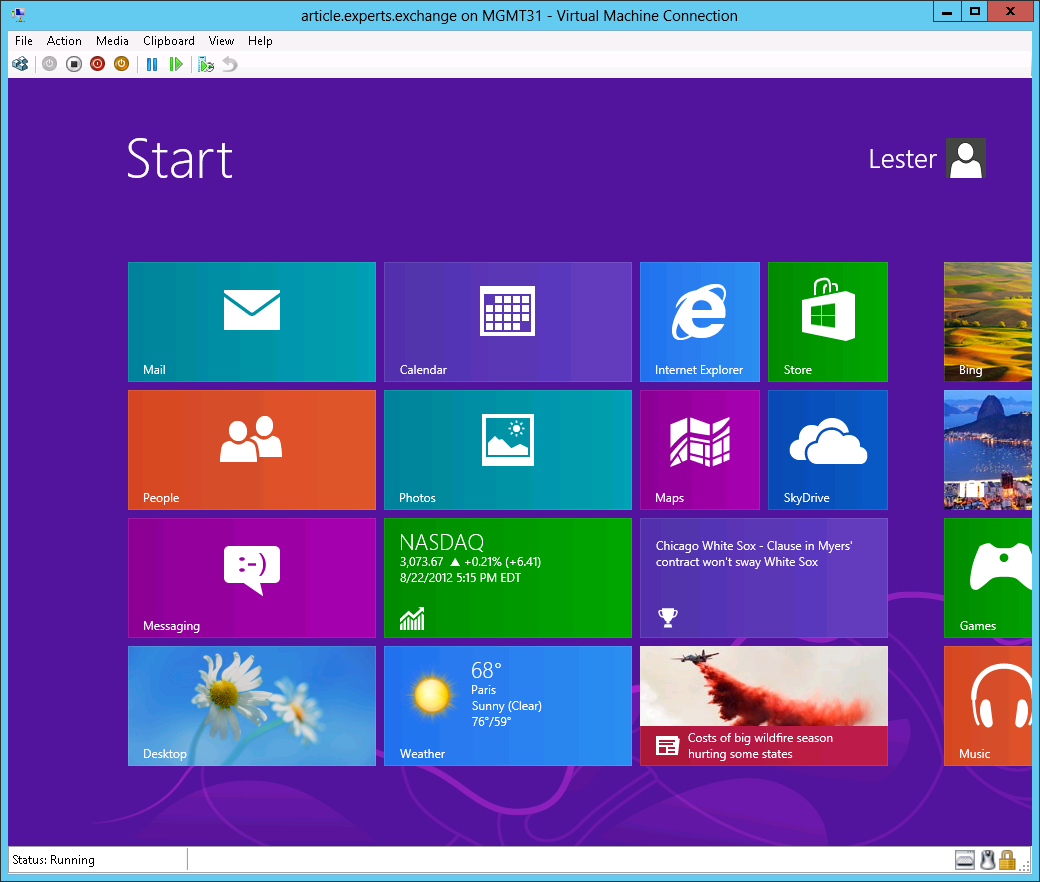
Start your virtual machine
Use it :)
Cautionary Notes
You should be aware of the following limitations or caveats:
Your Virtual Switch can act as an additional Cluster Network. Do this by allowing the management operating system to share the network adapter. Be sure that this network is on a different VLAN (or specificaly, a different IP Subnet) than your dedicated host connection, otherwise Failover Clustering will NOT recognise a 2nd network, and also randomly choose either the host NIC or the vSwitch interface as its cluster communications. You could end up with a situation where you have 1 cluster network, and on host A it's using the Host's interface, and on Host B it's using the vSwitch Interface.
If you Set or Change the VLAN ID on a Virtual Switch which has "Allow management operating system to share this network adapter", then you will have to do an IPCONFIG /RENEW (or IPCONFIG /RELEASE && IPCONFIG /RENEW). Despite changing the configuration, the OS doesn't realise it's been changed, and doesn't automatically renew for you.
You cannot manage a 2008 R2 Hyper-V Cluster through the 2012 Hyper-V Cluster Management Tools (or vice versa)
Do not use Dynamic disks anywhere in your cluster
Never defrag a dynamically expanding virtual disk
Virtual Machines which have pass-through disks attached may fail to live migrate from one host to another. They will quick migrate though. This issue has been reported to Microsoft through an MVP.
Teamed network interfaces do not work well with NLB (Network Load Balancing). Be sure that if you want to do NLB inside virtual guests, these guests use a virtual switch which is connected to a physical adapter, and not a virtual teamed adapter.
The above guide was written during installation of a production Hyper-V Cluster on top of nodes running Windows 2012 Datacenter version 6.2.9200.
Have a question about something in this article? You can receive help directly from the article author. Sign up for a free trial to get started.
Comments (2)
Commented:
Really very helpful.
Was looking for some thing like this for last few weeks .
Commented:
Thank you for posting the article and it has come out nice.
Thanks,
Naveen