Loading XML Using SSIS


1998: C++ - SQL Server 6.5
2000-2007: C++, VB6, C#, java - SQL Server 7.0-2005
2008-...: SQL Server 2005-2016
2014-2017: MVP Data Platform
2000-2007: C++, VB6, C#, java - SQL Server 7.0-2005
2008-...: SQL Server 2005-2016
2014-2017: MVP Data Platform
Published:
Browse All Articles > Loading XML Using SSIS
Introduction
SQL Server Integration Services can read XML files, that’s known by every BI developer. (If you didn’t, don’t worry, I’m aiming this article at newcomers as well.)But how far can you go? When does the XML Source component become unusable? Let’s find out!
To create the examples I’m using the Microsoft SQL Server 2008 R2 (RTM) - 10.50.1600.1 (X64).
Basic Example
This first example is a really simple XML file containing a list of colors with their corresponding RGB code.<colors>
<color RGB="FF0000">Red</color>
<color RGB="00FF00">Green</color>
<color RGB="0000FF">Blue</color>
<color RGB="FFFFFF">White</color>
<color RGB="000000">Black</color>
</colors>Let’s import this into a database. Open up the BIDS, create an SSIS project and throw a Data Flow Task into the package and open it up.
The component that we’re now most interested in is the XML Source, one of the components in the Data Flow Sources category in the Toolbox.
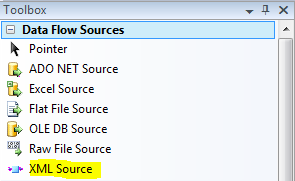 Add one of those to your Data Flow and double-click it to open up the XML Source Editor.
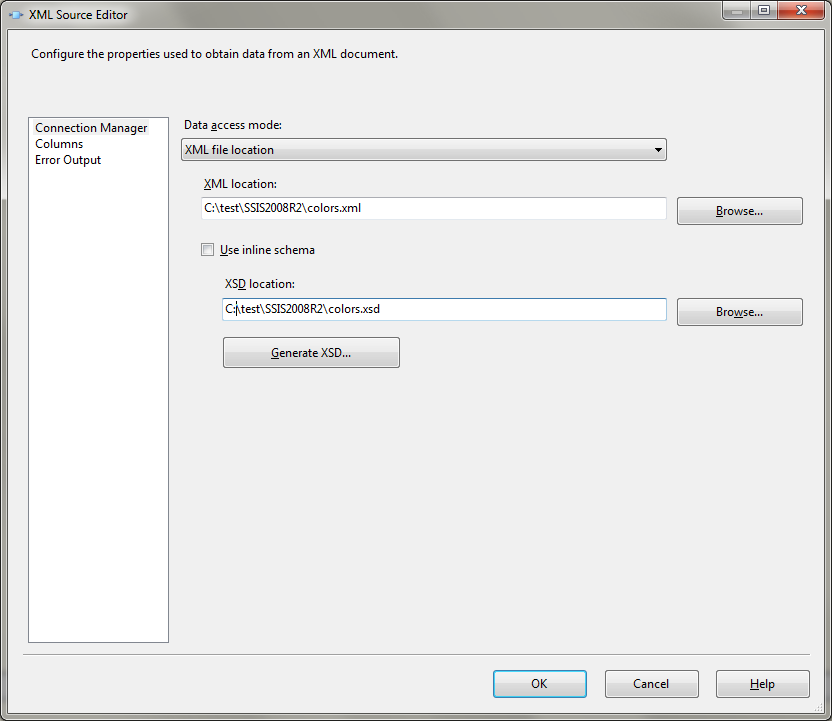
The Data Access Mode should be set to XML file location, which is the default setting. The other options are XML file from variable – useful if you’ve got the file path and name of the XML file in a variable – and XML data from variable – interesting if your XML data is actually stored in a variable.
As XML Location, select the .xml file. Our XML sample does not have an inline schema, so we can’t use that checkbox. And we can’t click the OK button either, it’s grayed out. The source component really expects a description of the XML structure before the editor can be closed.
The bottom of the screen even shows a warning with the following message:
XML Schema (XSD) is not specified. Select an existing XSD or click Generate XSD to create an XSD from the XML file.So, what are you waiting for, Click the Generate XSD button to let the XML Source Editor generate the XSD schema for us. Real easy, right?
Remember where you save the file, and when it’s generated, select the .xsd file in the XSD location textbox. As you can see, the OK button will become available. But don’t click it just yet.
Here’s what the XML Source Editor now looks like:
 Let’s now move on to the second page of the XML Source Editor, called Columns. When you open it, you’ll receive the following popup with a couple of warnings:
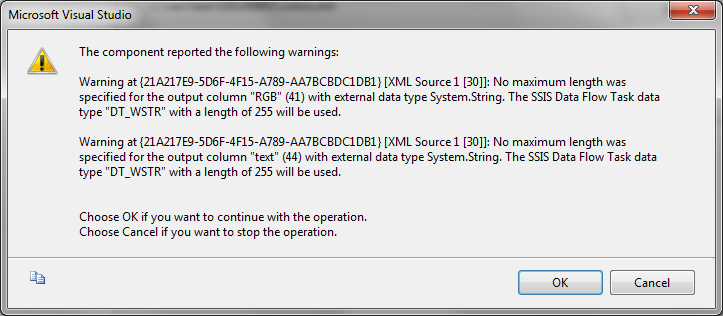 The editor is letting us know that the columns that are being generated do not have a maximum length specified. So it’s setting them to Unicode (DT_WSTR) with a length of 255. Click the OK button to get rid of that message and to be able to see the generated columns.
Note: if your data elements or attributes may contain longer strings then you should have a look at modifying the length specification. This can be done through the Advanced Editor, which is opened by right-clicking the XML Source. The Input and Output Properties page is the one you’re after.
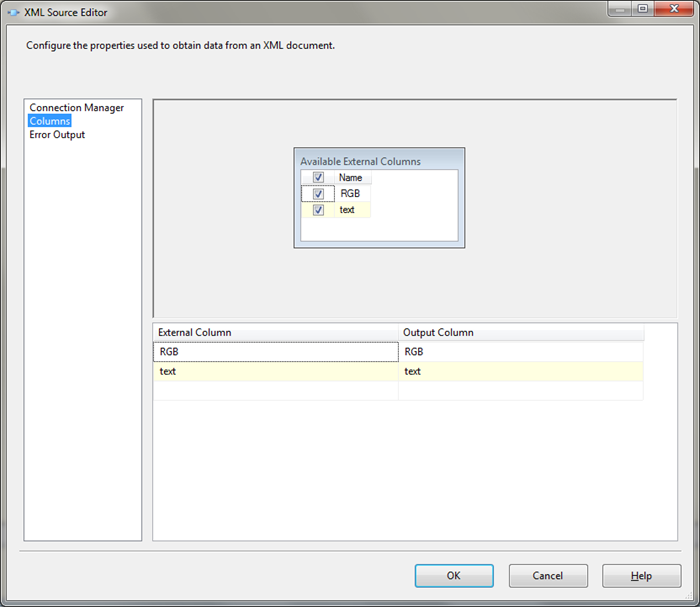 As you can see, our only attribute – RGB, is nicely put in a column with the same name. The value of each <color> node however is not put in a column called Color. By default, this value is put into a column called “text”. Which is a weird name for a column in an SSIS data flow if you ask me. The good thing is that you can just rename it by changing the Output Column value.
Let’s test this out. My favorite way is to add a Multicast component to the Data Flow, then add a Data Viewer on the connector (right-click the green arrow, select Data Viewers, click Add > OK > OK). Now execute the package to get this result:
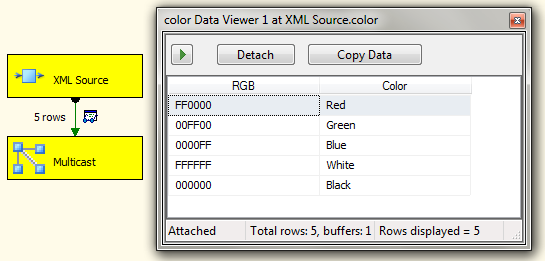 Mission accomplished, we’ve retrieved data from a very basic XML file!
Adding Some Complexity
Let’s move on to the second example of this article. The difference with the previous example is that now we’ve got multiple nested structures to deal with.The example represents a list of book reviews, including some details on the books themselves. A book can have multiple writers and obviously multiple reviews as well.
<books>
                          <book pages="300">
                              <title>Microsoft SQL Server 2008 R2 Master Data Services</title>
                              <category>Information Technology</category>
                              <authors>
                                  <author>Jeremy Kashel</author>
                                  <author>Tim Kent</author>
                                  <author>Martyn Bullerwell</author>
                              </authors>
                              <reviews>
                                  <review>If you're looking for an excellent book on the new Master Data Services component of SQL Server 2008 R2, definitely check this one out!  To be released in June 2011 by Packt Publishing!</review>
                              </reviews>
                          </book>
                          <book pages="832">
                              <title>Inside Microsoft SQL Server 2008: T-SQL Querying</title>
                              <category>Information Technology</category>
                              <authors>
                            <author>Itzik Ben-gan</author>
                            <author>Lubor Kollar</author>
                            <author>Dejan Sarka</author>
                            <author>Steve Kass</author>
                              </authors>
                              <reviews>
                                  <review>Every "Inside SQL Server" book can be recommended, especially when written by Itzik!</review>
                              </reviews>
                          </book>
                          <book pages="1137">
                              <title>The Lord of the Rings</title>
                              <category>Fantasy</category>
                              <authors>
                                  <author>J.R.R. Tolkien</author>
                              </authors>
                              <reviews>
                                  <review>Like fantasy?  What are you waiting for then?  It's a classic!</review>
                                  <review>If you liked the movie, you'll love the book.</review>
                              </reviews>
                          </book>
</books>Configure an XML Source so that it uses the books.xml file, generate the XSD and specify its location. I’m not going into details on that, the procedure is the same as in our first example above.
Now open up the Columns page to have a closer look at how the XML data is going to get imported.
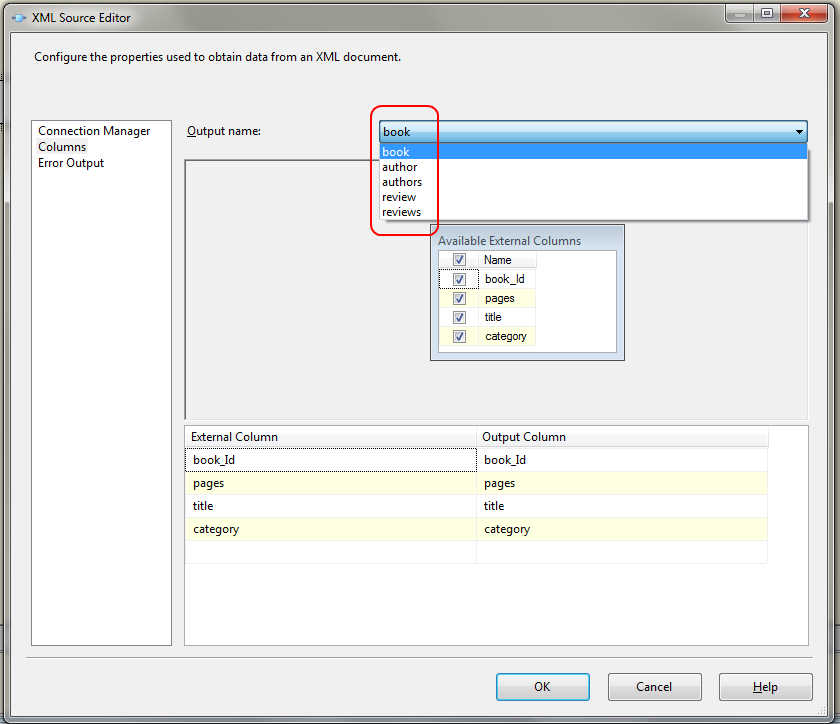 So how does the XML Source component deal with the multiple nested structures? It generates multiple outputs! If you select another output from that dropdown, you get to see its fields.
To get a clear understanding of what exactly is going on, let’s connect each output with an OLE DB Destination component. The target table can be generated based on the incoming fields by clicking the New button. Replace the table name in the generated CREATE TABLE script with a clear one that fulfills your naming convention requirements – such as NO SPACES IN A TABLE NAME for instance – and hit the OK button.
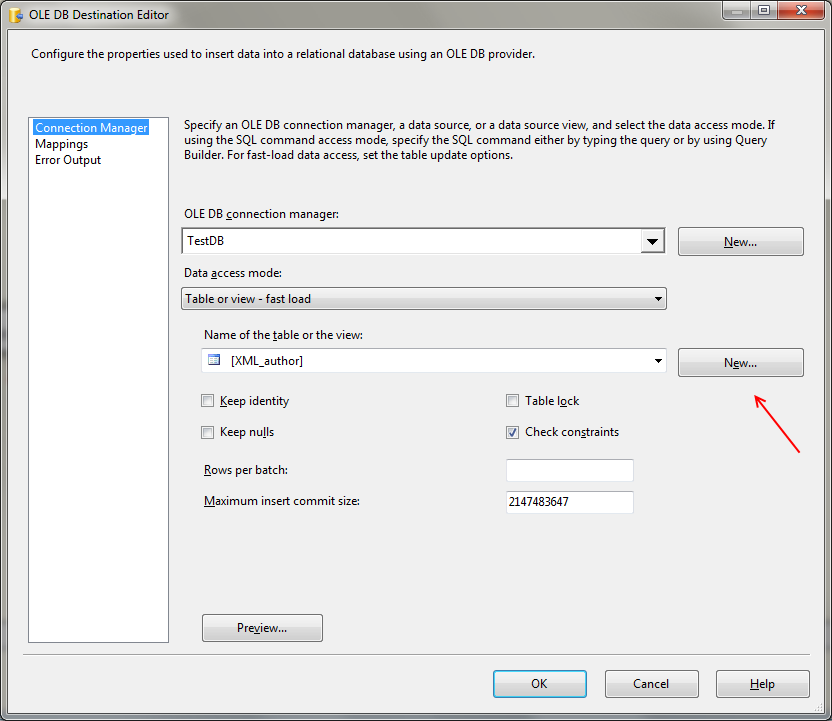 Now that the table is created, it will be automatically selected in the Name of the table or the view dropdown. Don’t forget to visit the Mappings page so that the, well, mappings are created. If no field names were modified in the CREATE TABLE script then all fields should be mapped automatically based on their names.
With all five destinations added, execute the package.
 So now we’ve loaded the data from our XML file into a database, but the data is spread over five tables. How do we retrieve that data? Join them together!
select * from XML_book
                      inner join XML_authors on XML_authors.book_Id = XML_book.book_Id
                      inner join XML_author on XML_author.authors_Id = XML_authors.authors_Id
                      inner join XML_reviews on XML_reviews.book_Id = XML_book.book_Id
inner join XML_review on XML_review.reviews_Id = XML_reviews.reviews_Id;And the result looks like this:

Conclusion
We have managed to flatten the data from an XML file containing multiple nested repeating nodes, nice huh? But do you also feel the limitation using this method? In terms of modern XML, this was still a fairly easy XML file and yet we already needed five tables to store the data. Can you imagine what this will give with a really complex file?Watch this site for the follow-up article where I will try to import data from a really complex XML file!
Have fun!
PS: is it a Yes, is it a No, just click one before you go!
Valentino.
References
XML Source component
Originally appeared at my own website: http://blog.hoegaerden.be/
1998: C++ - SQL Server 6.5
2000-2007: C++, VB6, C#, java - SQL Server 7.0-2005
2008-...: SQL Server 2005-2016
2014-2017: MVP Data Platform
2000-2007: C++, VB6, C#, java - SQL Server 7.0-2005
2008-...: SQL Server 2005-2016
2014-2017: MVP Data Platform
Have a question about something in this article? You can receive help directly from the article author. Sign up for a free trial to get started.
Comments (4)
Commented:
Author
Commented:Commented:
I really like your article, very useful and helpful as you integrated images so I can follow your steps
Commented: