Windows 2012 server - setup print server for both 32bit & 64bit OS clients how-to


Published:
Browse All Articles > Windows 2012 server - setup print server for both 32bit & 64bit OS clients how-to
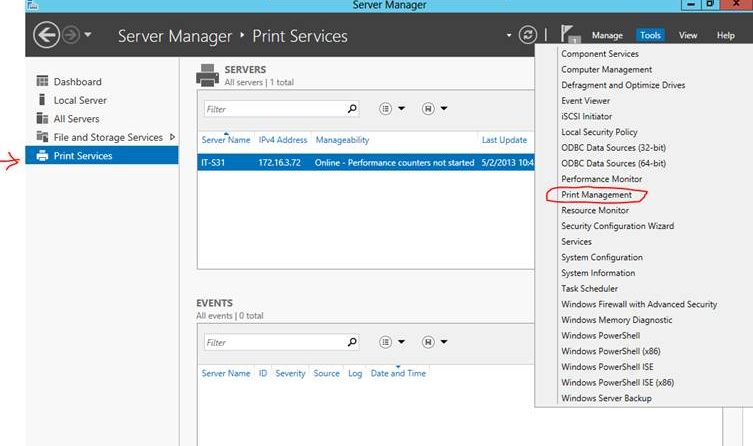
Many things have changed in Windows Server 2012. To setup the print server, you can use the old way through Control Panel / Hardware / View devices and printers > Add a printer in which the wizard will discover all the network printers for you to add. However, you need to add a new Role Service for Print and Document Services (Figure 1 & Figure 2) to manage all the print drivers in a single pane of glass management (Figure 3).
Figure 1
![Fig.1]() Figure 2
Figure 2
![Fig.2]() Figure 3
Figure 3
![Fig.3]()
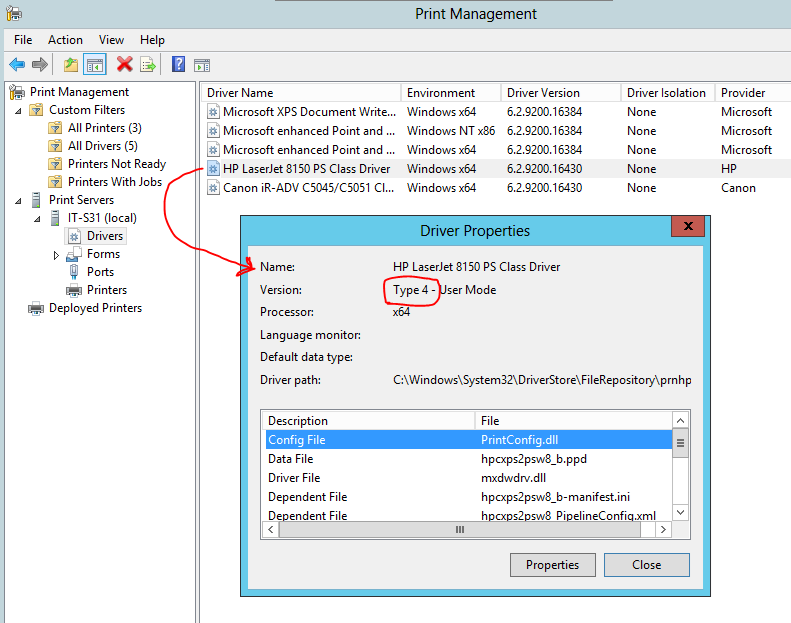
In Windows server 2008R2 x64, you need to install both 32/64bit printer drivers for Windows7/8 32/64bit OS clients. Windows server 2012 is straightly x64bit OS only. It introduces the support for x64 Type 4 printer drivers which support both Windows7/8 32/64bit OS clients without installing x86 printer drivers (Figure 4).
Figure 4
![Fig.4]()
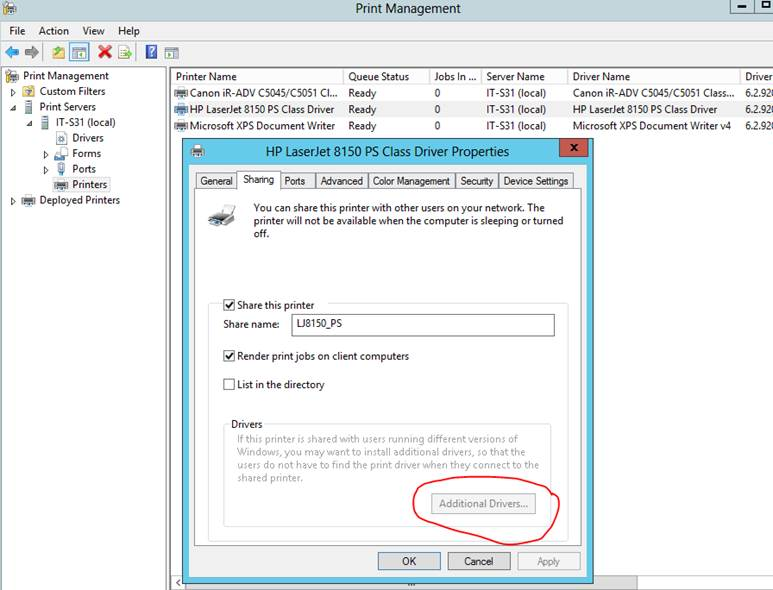
When you have installed the x64 Type 4 printer driver for a printer, the “Additional Drivers…” button will be grayed out (Figure 5).
Figure 5
![Fig.5]()
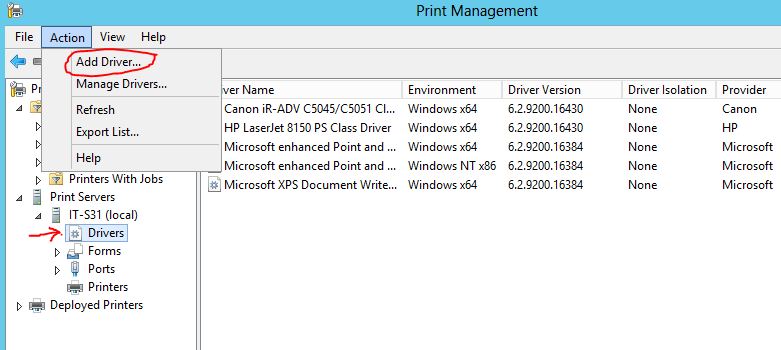
In most cases, Windows server 2012 will find the x64bit Type 4 print driver for your printer. If Windows server 2012 cannot find the driver for your printer, you need to download both x86/x64 print drivers unless it is the Type 4 print driver. For most HP printers, you can download the PS/PCL6 Type 3 Universal Print Driver (UPD).
Figure 6
![Fig. 6]()
Under the Processor Selection, check the box for x86 (Figure 7) and continue to locate the downloaded print driver. If you have two different drivers, select either x64 or x86 and continue to the end. At the end, the wizard will show you the drive name and type (Figure 8).
Figure 7
![Fig. 7]() Figure 8
Figure 8
![Fig. 8]()
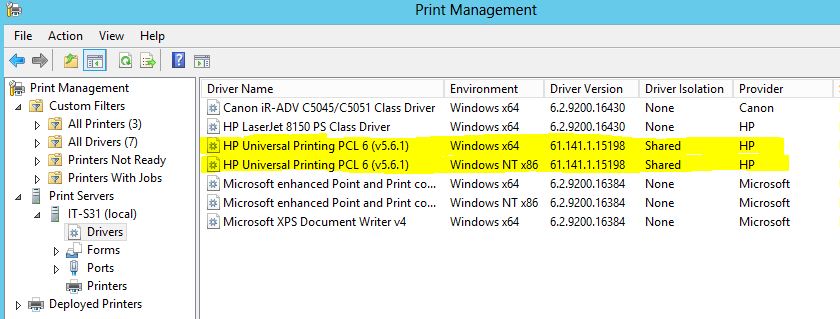
The wizard will prompt you to select the missing driver that you didn't select after you click Finish. Now you have two new HP x86/x64 UPD PCL (Figure 9).
Figure 9
![Fig. 9]()
Figure 10
![Fig. 10]()
Figure 1
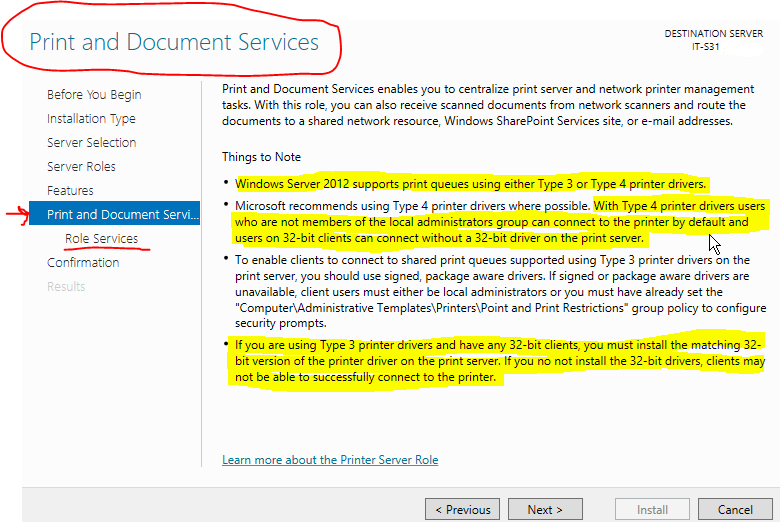 Figure 2
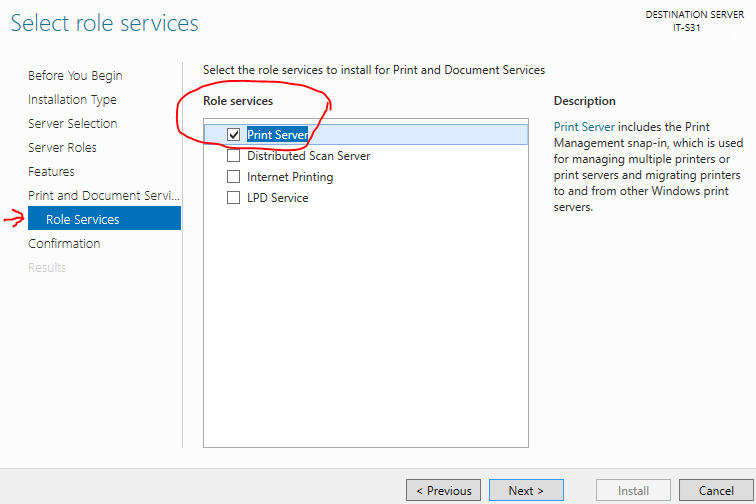 Figure 3
In Windows server 2008R2 x64, you need to install both 32/64bit printer drivers for Windows7/8 32/64bit OS clients. Windows server 2012 is straightly x64bit OS only. It introduces the support for x64 Type 4 printer drivers which support both Windows7/8 32/64bit OS clients without installing x86 printer drivers (Figure 4).
Figure 4
When you have installed the x64 Type 4 printer driver for a printer, the “Additional Drivers…” button will be grayed out (Figure 5).
Figure 5
In most cases, Windows server 2012 will find the x64bit Type 4 print driver for your printer. If Windows server 2012 cannot find the driver for your printer, you need to download both x86/x64 print drivers unless it is the Type 4 print driver. For most HP printers, you can download the PS/PCL6 Type 3 Universal Print Driver (UPD).
Add New Print Drivers
To install the additional print drivers, click on Drivers under Print Management / Print Servers / your_print_servername>, then click on Action > Add Driver... button to begin (Figure 6).Figure 6
Under the Processor Selection, check the box for x86 (Figure 7) and continue to locate the downloaded print driver. If you have two different drivers, select either x64 or x86 and continue to the end. At the end, the wizard will show you the drive name and type (Figure 8).
Figure 7
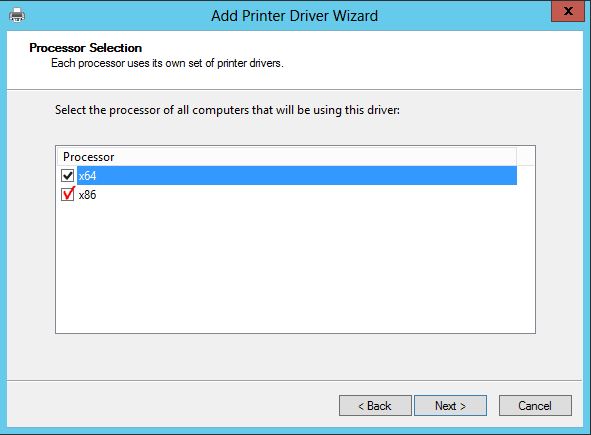 Figure 8

The wizard will prompt you to select the missing driver that you didn't select after you click Finish. Now you have two new HP x86/x64 UPD PCL (Figure 9).
Figure 9
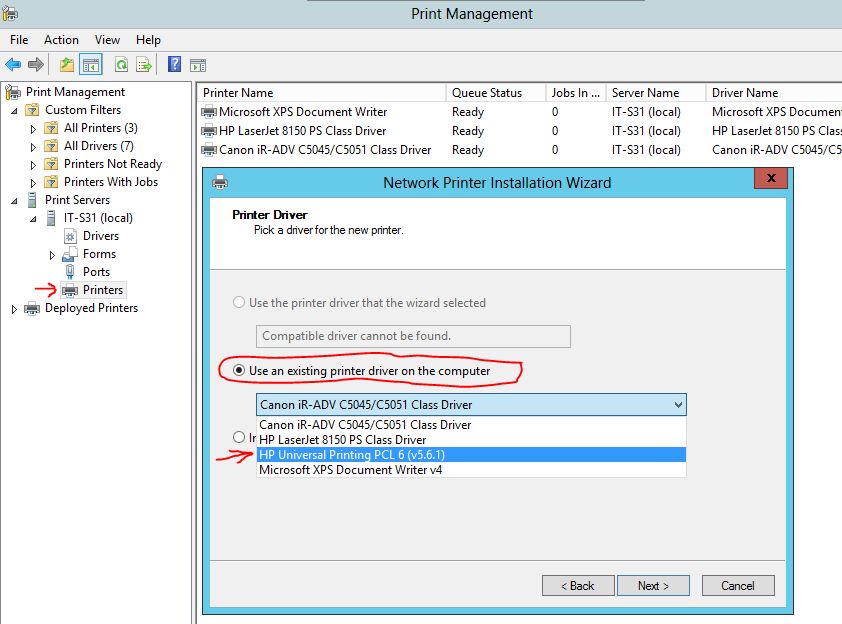
Add New Printers
Now you have the new print drivers that ready to be assigned to a new printer. Similar to the steps to add drivers except you nevigate to Printers, then click on Action > Add Printer... button to begin. At the Printer Driver wizard page, select "Use an existing printer driver on the computer" and choose the newly installed print driver from the dropdown list (Figure 10), then continue next to Finish.Figure 10
Have a question about something in this article? You can receive help directly from the article author. Sign up for a free trial to get started.
Comments (0)