

Browse All Articles > Installing Client Hyper-V
With the release of Windows 8, the program called Virtual PC has disappeared. Instead Windows 8 includes the Hyper-V features that are available in Server 2012. Windows 8 is lacking a few features when compared to the server role such as GPU virtualization and Fibre Channel support.
This absence of the complete feature set can make testing a VM on your workstation behave differently than it would on a Server OS install. If you are going to use your workstation for testing and pre-deployment please keep this in mind. With Windows 8 using the similar feature set as the Windows Server 2012 you can even migrate from Windows 8 to a server, but first you need to get the Hyper-V installed on your workstation if you want to take advantage of that.
If you want to install VMs to test before you deploy them to a server or run one of the various Linux distros at home and don't have multiple PCs, this tutorial will walk you through installing the Hyper-V role on Windows 8 Pro or Enterprise to accomplish just that. It is a short guide with screenshots meant to help you find where the role has moved to in Windows 8.
Step 1: Press the Windows key to bring up the start screen if you are not already there.
Step 2: Type "Features" and then click on "Settings".
Step 3: Click on "Turn Windows features on or off".![Steps 1-3]() Step 4: Select all of the Hyper-V components available after you are taken to the desktop and the box pops up. Click OK. After the install you will be prompted to restart your computer.
Step 4: Select all of the Hyper-V components available after you are taken to the desktop and the box pops up. Click OK. After the install you will be prompted to restart your computer.![Step 4]() Step 5: Once your computer has restarted you will see two new tiles on the Start screen. One is the Hyper-V Virtual Machine Connection and the other is the Hyper-V Manager that you will use to create and manage things like vSwitches and VMs.
Step 5: Once your computer has restarted you will see two new tiles on the Start screen. One is the Hyper-V Virtual Machine Connection and the other is the Hyper-V Manager that you will use to create and manage things like vSwitches and VMs.![Step 5]() You should now be able to create VMs and vSwitches using Hyper-V manager. If you computer is a member of a domain you can also manage existing Hyper-V servers in your environment. Using the same interface and management tools across both the Desktop and Server platforms has for me been a great asset in not only learning more about Hyper-V but making future management easier.
You should now be able to create VMs and vSwitches using Hyper-V manager. If you computer is a member of a domain you can also manage existing Hyper-V servers in your environment. Using the same interface and management tools across both the Desktop and Server platforms has for me been a great asset in not only learning more about Hyper-V but making future management easier.
This absence of the complete feature set can make testing a VM on your workstation behave differently than it would on a Server OS install. If you are going to use your workstation for testing and pre-deployment please keep this in mind. With Windows 8 using the similar feature set as the Windows Server 2012 you can even migrate from Windows 8 to a server, but first you need to get the Hyper-V installed on your workstation if you want to take advantage of that.
If you want to install VMs to test before you deploy them to a server or run one of the various Linux distros at home and don't have multiple PCs, this tutorial will walk you through installing the Hyper-V role on Windows 8 Pro or Enterprise to accomplish just that. It is a short guide with screenshots meant to help you find where the role has moved to in Windows 8.
This guide does not cover enabling virtualization in you computer's BIOS; every manufacturer's BIOS settings are different and I recommend consulting with your computer manufacturer's documentation before proceeding with the install of the Hyper-V role. Certain systems will not support this role at all due to lack of hardware support in certain CPUs. Microsoft has a great article that they published when Windows 7 came out and many people were using XP Mode. It contains a download for a tool to check your computer and instructions for many popular PC manufacturers. You can find that article here: http://www.microsoft.com/windows/virtual-pc/support/configure-bios.aspx
Something else to keep in mind is that Hyper-V works at a much closer level to the hardware layer than previous versions of Virtual PC. This can cause issues with certain games and other applications not seeing the video card properly. Netflix, which uses Silverlight, will not play videos properly at the time this was written while the Hyper-V role is installed. Now that we have that out of the way let's start the install.
Step 1: Press the Windows key to bring up the start screen if you are not already there.
Step 2: Type "Features" and then click on "Settings".
Step 3: Click on "Turn Windows features on or off".
 Step 4: Select all of the Hyper-V components available after you are taken to the desktop and the box pops up. Click OK. After the install you will be prompted to restart your computer.
 Step 5: Once your computer has restarted you will see two new tiles on the Start screen. One is the Hyper-V Virtual Machine Connection and the other is the Hyper-V Manager that you will use to create and manage things like vSwitches and VMs.
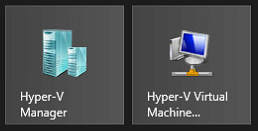 You should now be able to create VMs and vSwitches using Hyper-V manager. If you computer is a member of a domain you can also manage existing Hyper-V servers in your environment. Using the same interface and management tools across both the Desktop and Server platforms has for me been a great asset in not only learning more about Hyper-V but making future management easier.
Have a question about something in this article? You can receive help directly from the article author. Sign up for a free trial to get started.
Comments (0)