Simple COM for beginners using ATL.


Provide training in Advanced C++ and working as a software Engineer since 2003
Published:
Browse All Articles > Simple COM for beginners using ATL.
Abbreviations:
COM - Component Object Model.
ATL - Active Template Library.
TLB- Type Library
Why Using ATL?
It Provides ready made stuffs needed for creating and using COM component.
Why Use COM?
COM is language independent. Any client(C++/scripting) can use COM component.
Brief Description about COM:
Steps for creating Server:
![Settings11.jpg]()
![Settings8.jpg]()
![Settings7.jpg]()
![Settings6.jpg]()
![Settings5.jpg]()
![Settings4.jpg]()
![Settings3.jpg]()
- As many as you want for a function.
- You want a function to return any value.
- Generally it is optional. As you know function may or may not return any value.
- It can only be one for a function.
![Code2.jpg]()
![cmdP2.jpg]()
Steps for creating Client:
![Settings2.jpg]()
![Settings1.jpg]()
![cmdP.jpg]()
IDemoMathPtr pCom; // IDemoMathPtr is the Smart pointer created while we are importing the type library.
pCom.CreateInstance("COMSample");// Creates the component object.
std::cout << "Sum = " << pCom->Sum(10, 20);
![Code.jpg]()
Points Of Interest:
![ImportHash.jpg]()
COM - Component Object Model.
ATL - Active Template Library.
TLB- Type Library
Why Using ATL?
It Provides ready made stuffs needed for creating and using COM component.
Why Use COM?
COM is language independent. Any client(C++/scripting) can use COM component.
Brief Description about COM:
- Interface is the base class and Component is the derive class.
- Component class implements the methods inside interface to make it usable.
- All COM components derived from IUnknown interface(provides AddRef(),Release() and QueryInterface()).
- We needn’t have to implement these interfaces as wizard will do the implementation for us inside our component class.
- All these stuffs would be taken care by ATL COM Wizard.
- IUnknown interface does Life time management of the component.
- Any method we want to implement needs to be added to the interface and we have to implement those methods inside component class.
- Once our component is ready, we have to register the component dll in windows registry by using regsvr32. It’s inbuild in windows OS.
- To Use any COM component, we need 2 files. DLL and TLB(Type Library)
- DLL holds actual COMPONENT and .tlb having details information about the component. Like function parameter/Argument type/return type and which interface this component implements.
Steps for creating Server:
- Open Visual Studio 2010
- File->New->Project->create
ATL project, name it as DemoServer.
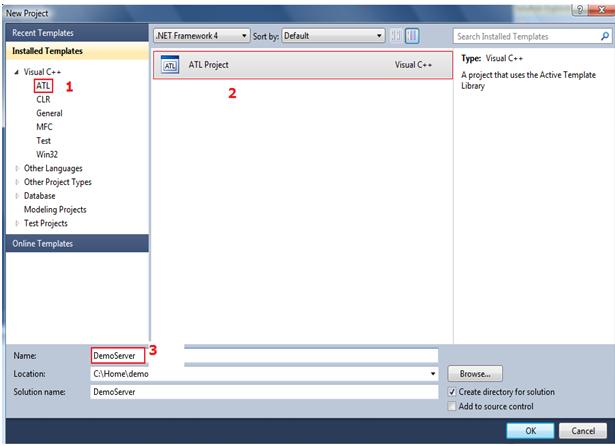
Click OK.
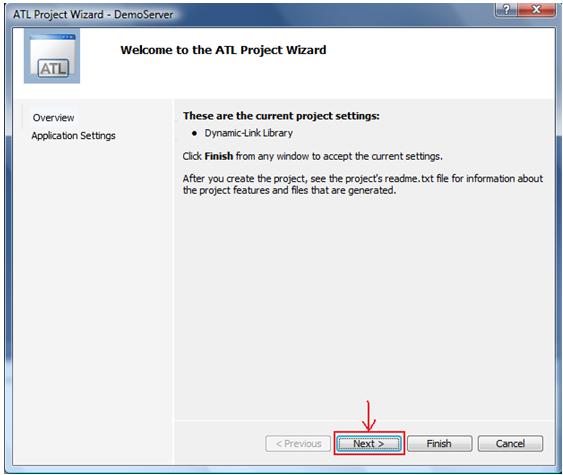
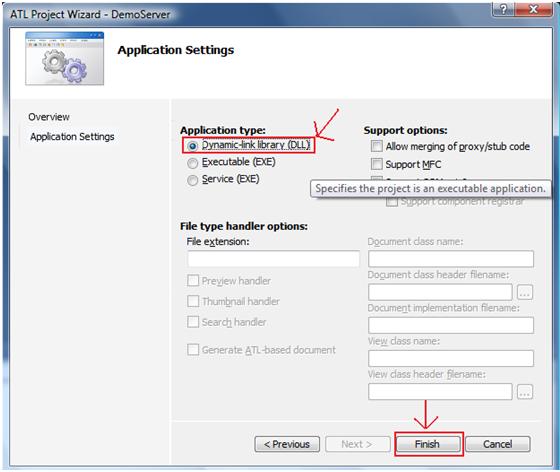
- Now our ATL project is ready.
- We need to create component.
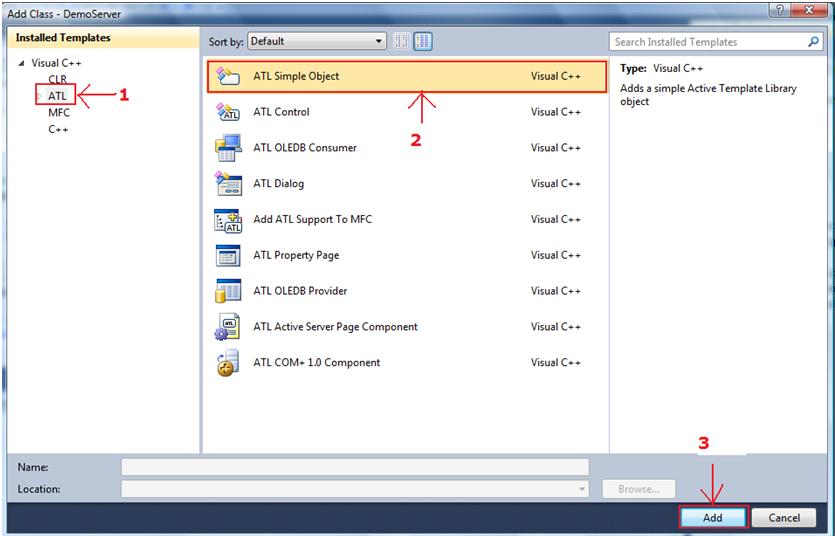
- In solution explorer, right click and Add->Class.

- Select ATL->SimpleObject->Add.
- Supply the name of the component class. Here I’m using it as “DemoMath”. As and when you type, it’ll automatically updated in class/interface field with it’s corresponding name as shown below. But remeber to provide the progID you want to use in client application to use this component. Generally it is {ModuleName}.{ComponentNam
e} ex:DemoServer.DemoMath. Here we are using COMSample.

- Observe carefully, here component class name is “CDemoMath” and COM Interface is “IDemoMath”, Now our Module(DemoServer) and Component(DemoMath) is ready.
- We need to add methods to Interface (IDemoMath).Go to Class View tab and right click on IDemoMath interface and add methods as shown below.
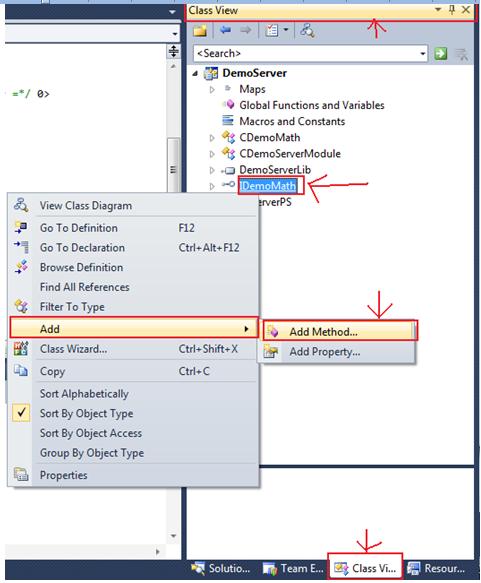
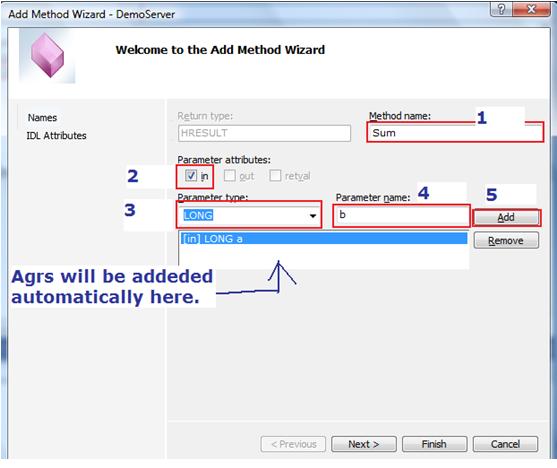
- Generally COM methods returns HRESULT. So we only supply name of the method and arguments and click add. Supply name of the method as “Sum”
- Select ‘in’ as the parameter attribute
- Parameter Type as “LONG”
- Parameter name as “a”.
- Click Add.
Follow the same method for adding second parameter b.
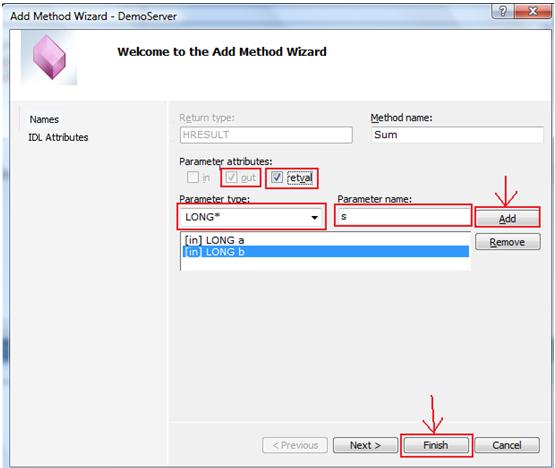
- Now add 3rd parameter as follows.
- Parameter Type as LONG*
- Parameter Arg as “OUT”, “RETVAL”
- Name as “s”
- Click on Add button
- Click Finish button.
- NOTE: What are Parameter attributes?
- In – Input parameter
- As many as you want for a function.
- Out – Output Parameter
– This is something output from a function.
-Helpful while you want a function to return more than one value.
-As many as you want.
- It’s always a pointer type.
- Retval – return value parameter.
- Generally it is optional. As you know function may or may not return any value.
- It can only be one for a function.
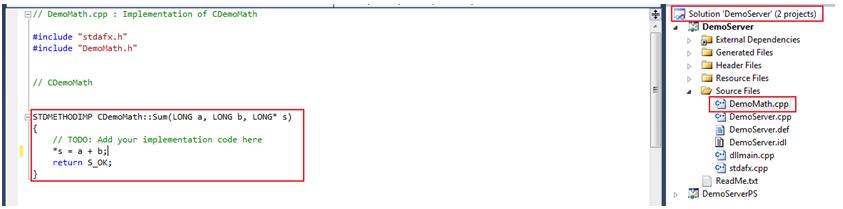
- Now Wizard will add the function definition with empty content in our component class.
- Go to Solution Explorer and Open the component class DemoMath.cpp.
- Add the Sum() definition as follows.
- Now Build your project.
- You may get some build error. But don’t worry, it’s because of credential. If running Visual Studio in admin rights, then you will not face this issue. During Build process, it’s trying our component to register in windows registry.
- As already discussed, we can use regsvr32 to register our component.
- Run cmd.exe as admin and run regsvr32 DemoServer.dll. You will get a message that your component is registered successfully.
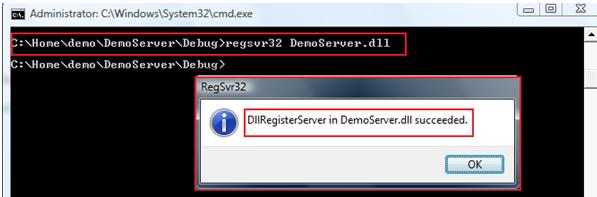
- Now component DLL is ready to use.
Steps for creating Client:
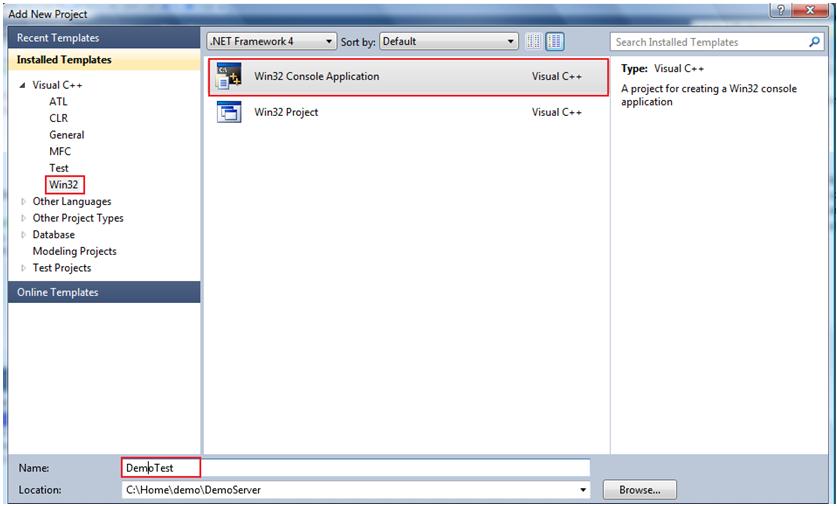
- Create a WIN32 Console application to test the component.
- Add a new project to existing one or you can create a different project.
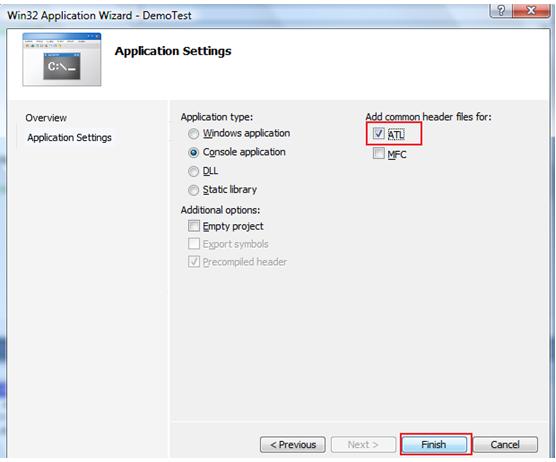
- Select ATL header to be added. So wizard will add necessary headers for us. and click finish.
- Now find out where .tlb is created? We need to import the .tlb to our client application.
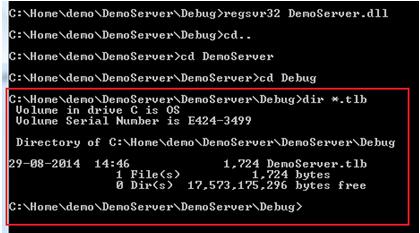
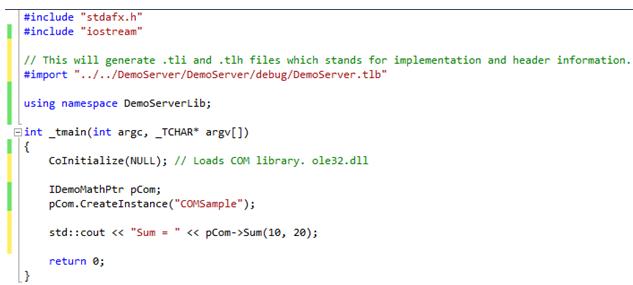
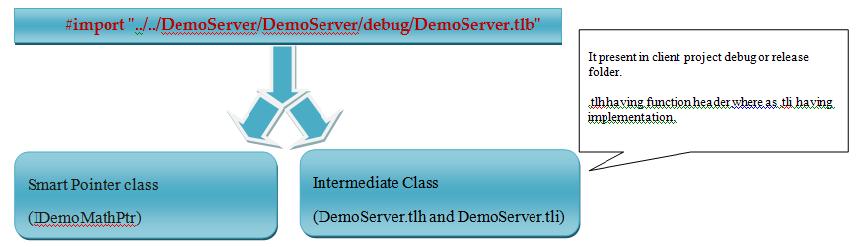
- #import "../../DemoServer/DemoServ
er/debug/D // This will generate .tli and .tlh files which stands for implementation and header information.emoServer. tlb" - using namespace DemoServerLib;// This is because our component class belongs to DemoServerLib namespace.(Open DemoServer.tl
h file to confirm. Generally wizard uses convention like {modulename}+”Lib” ex:{DemoServer}+”Lib” for creating namespace for component class )
- In main() write code as follows.
IDemoMathPtr pCom; // IDemoMathPtr is the Smart pointer created while we are importing the type library.
pCom.CreateInstance("COMSa
std::cout << "Sum = " << pCom->Sum(10, 20);
Points Of Interest:
- CoInitialize() – Loads COM library(OLE32.dll)
- CreateInstance() does following things.
- Calls CLSIDFromProgID() – Gets the CLSID from the .tlb file. It is difficult to remember 32-bit CLSID So we are using progID. We can get the progID from the .tlb file(This can be opened using OLE-COM Object viewer, present in windows system). Open DemoServer.tlh , you can find progID - DemoMath.
- CLSID would be search in registry in HKEY/CLASS_ROOT and from there path of the component DLL would be find out.
- ::LoadLibrary() API would be called to load the component DLL.
- Now call to CoCreateInstance() would be made to create the COM object.
- CoCreateInstance() takes help of Class Factory present in our component to create the COM object.
- Now call to QueryInterface() would be made to check what interface functions are implemented in Component class.
- AddRef() would be called to increment the reference counter.
- ATL wizard creates class factory while we are creating COM component.
- Now component object is created and it’s address would be setup in the intermediate pointer.(To be explained more in Next Article- This is related to smart pointer. While we call any component function we have to use this intermediate pointer. To call COM library functions(Ex:CreateInstance()), use . operator while for Component functions(Ex: Sum()) use -> operator. This -> operator is overloaded in smart pointer class(IDemoMathPtr) which returns address of component object.)
- Though CreateInstance() and other functions like QueryInterface(), AddRef() etc belongs to COM library, we have to load the library first to make use of these calls. So we are using CoInitialize() first.
- Like AddRef() will need to call Release() to decrement the reference counter. It’ll not unload the component DLL unless reference counter is 0. Because somebody else might be using the component.
- Like CoInitialize(), we need to call CoUninitialize() to decrement the reference counter and unload COM library. This also will be unloaded only if reference counter is 0.
- QueryInterface(), AddRef(), Release() are pure virtual functions implemented in our component class to do the life time management of the component. We are not implementing it. ATL COM Wizard is implementing it for us. So we are using ATL for creating our COM component:)
- Here we are calling 2arg. Sum(10,20) present in .tlb file. You can see it in DemoServer.tli file which in tern calls our 3arg sum() present in Component class(Have you remembered while writing definition of Sum(), we wrote as *s = a + b;).
- You can also directly call 3 arg Sum() by calling raw_Sum().This is possible only if you are C++ client which knows about pointer. The 2 arg. Sum() can be called by scripting client.
- See what happens when importing type library.
Provide training in Advanced C++ and working as a software Engineer since 2003
Have a question about something in this article? You can receive help directly from the article author. Sign up for a free trial to get started.
Comments (2)
Commented:
Commented:
Example I have a simple array at Server side as long int arr[10]={1,2,3,4,5,6,7,8,9