

Browse All Articles > Create a Win7 DropTarget Gadget
This article shows how to make a Windows 7 gadget that accepts files dropped from the Windows Explorer. It also illustrates how to give your gadget a non-rectangular shape and how to add some nifty visual effects to text displayed in a your gadget.
![The DropTarget gadget]() In previous articles, Create a Win7 Gadget and Create a Win7 Maze Gadget, we covered the basics of creating a Windows 7/Vista gadget -- a small application program with an HTML U/I that you can drag from the Win7 Gadget Gallery and drop onto your desktop. Please read those two articles to see how to get started creating your own gadgets.
In previous articles, Create a Win7 Gadget and Create a Win7 Maze Gadget, we covered the basics of creating a Windows 7/Vista gadget -- a small application program with an HTML U/I that you can drag from the Win7 Gadget Gallery and drop onto your desktop. Please read those two articles to see how to get started creating your own gadgets.
Gadgets are easy to write, in either JScript or VB Script, and they can use ActiveX objects, as well as a special set of gadget tools, so they are powerful and flexible. And, let's face it, they are cute.
Transparency
First, let's look at how to make a completely transparent gadget. The trick is to use the g:background tag. Gadgets run in a special process, sidebar.exe, that provides the HTML rendering and script support. It gets to look for its own namespaces and process them in special ways. The g: namespace includes g:background, g:image, and g:text.
g:background is a property of the body element in your HTML. It sets the background, but in addition to the regular things you can do with a document.background, it supports a few more methods and attributes. The following is a complete gadget implementation (you would need only write gadget.xml as described here):
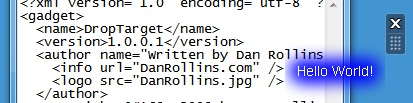
![Transparent body, but "pink" text!]() By setting the background to have an opacity of 0 (line 16), the gadget is transparent; whatever is behind it shows through. Thus, the only displayed element is the friendly greeting in the <span> element (line 17).
By setting the background to have an opacity of 0 (line 16), the gadget is transparent; whatever is behind it shows through. Thus, the only displayed element is the friendly greeting in the <span> element (line 17).
You'll notice, however the strange pink coloring around the outside of the text. This is a well-known issue related (somehow) to mathematical rounding errors when rendering cleartype text on a transparent background. There is a standard workaround -- you can create a g:text object via script and set all kinds of cool attributes for it. For instance:
![Using g:text object attributes]()
A Round Gadget
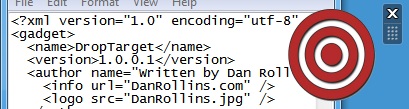
In order to create a partially-transparent gadget, as in the "bullseye" or CPU Meter from Fig. 3-1, you need to provide a PNG file that has transparent portions. I tried hard to find a way to do that in Win7 MsPaint, but I got nowhere. I ended up with a very excellent (and totally free) graphics file editor called paint.net that you can get here:
http://www.getpaint.net/index.html
With paint.net, I created 100x100 PNG file and drew a red-and-white target on it. I then selected the "magic wand" tool and clicked in a corner and then pressed the Delete key. In the program, the "transparent" part is displayed as a checkerboard pattern. I saved the file as "Bullseye.PNG" and I changed my HTML like this:
![Partially transparent gadget, round, not rectangular]() Handling Dropped Files
Handling Dropped Files
Now, we'll add some Drag-and-Drop functionality to the gadget. There is a trick to this. The gadget <body> can set an onDrop handler, but it must also take care to handle onDragEnter and onDragOver as well. Here's the simplest way to set up a file-drop handler:
DropTarget.HTML
As you drag the file over the target, the cursor changes to the standard "OK to Drop Here" cursor. You could be a lot more sophisticated than that if you provided a handler for onDragEnter. My tip-of-the-hat to user feedback is that lines 37-40 display a verification message, then erase it after five seconds.
In this example, the program takes each dropped file and moves it to a particular folder. As it does that, it renames it by pre-pending the current date. This is a sort of archiving technique that I first presented in a previous article.
Since this is a simple demonstration, I have not included a settings dialog (see here for information on how to do that) and you would certainly want to make this gadget programmable to the extent of letting the user specify a particular target folder. The program is also missing the logic to test for, and handle the situation when, you drop a folder on the target. These finish-up tasks I'll leave as an exercise to the reader.
Summary:
We saw how to use <g:background> to set a transparent background for the gadget, and how to display a partially-transparent PNG image, with the result that the gadget has a non-rectangular appearance. We used addTextObject to put some text on our background and add some interesting visual effects.
We use System.Shell to enable a file-drop event on the gadget, and we saw how to process the files that are dropped. System.Shell has lots of other methods. I'll bet that if you read through the documentation, you'll have plenty of new ideas for things you can do with your own gadgets.
Resources:
Create a Win7 Gadget
Create a Win7 Maze Gadget
Create a Win7 Gadget with a Flyout Panel
Drag and Drop to Move and Rename a File
System.Shell Object
http://msdn.microsoft.com/en-us/library/ms723241(VS.85).aspx
System.Shell.Item Object
http://msdn.microsoft.com/en-us/library/ms723202(VS.85).aspx
FileSystemObject Object
http://msdn.microsoft.com/en-us/library/z9ty6h50(VS.85).aspx
Download paint.net (supports PNG files with transparency)
http://www.getpaint.net/index.html
Developing a Gadget for Windows Sidebar (for Vista, but it mostly applies)
http://msdn.microsoft.com/en-us/library/bb456468(VS.85).aspx
=-=-=-=-=-=-=-=-=-=-=-=-=-=-=-=-=-=-=-=-=-=-=-=-=-=-=-=-=-=-=-=-=-=-=-=-=-=-=-=-=-=
If you liked this article and want to see more from this author, please click the Yes button near the:
Was this article helpful?
label that is just below and to the right of this text. Thanks!
=-=-=-=-=-=-=-=-=-=-=-=-=-=-=-=-=-=-=-=-=-=-=-=-=-=-=-=-=-=-=-=-=-=-=-=-=-=-=-=-=-=
 In previous articles, Create a Win7 Gadget and Create a Win7 Maze Gadget, we covered the basics of creating a Windows 7/Vista gadget -- a small application program with an HTML U/I that you can drag from the Win7 Gadget Gallery and drop onto your desktop. Please read those two articles to see how to get started creating your own gadgets.
Gadgets are easy to write, in either JScript or VB Script, and they can use ActiveX objects, as well as a special set of gadget tools, so they are powerful and flexible. And, let's face it, they are cute.
Transparency
First, let's look at how to make a completely transparent gadget. The trick is to use the g:background tag. Gadgets run in a special process, sidebar.exe, that provides the HTML rendering and script support. It gets to look for its own namespaces and process them in special ways. The g: namespace includes g:background, g:image, and g:text.
g:background is a property of the body element in your HTML. It sets the background, but in addition to the regular things you can do with a document.background, it supports a few more methods and attributes. The following is a complete gadget implementation (you would need only write gadget.xml as described here):
<html>
                      <head>
                      <script>
                      function Init() {
                          document.body.style.width = 100;
                          document.body.style.height = 100;
                      }
                      </script>
                      </head>
                      <body onload="Init();">
                          <!-- whiteBackground.png is any image that's 100x100 -->
                          <g:background
                              id="imgBackground"
                              src="whiteBackground.png"
                              style="position:absolute;top:0;left:0;"
                              opacity="0">
                          <span>Hello World!</span>
                      </body>
</html> By setting the background to have an opacity of 0 (line 16), the gadget is transparent; whatever is behind it shows through. Thus, the only displayed element is the friendly greeting in the <span> element (line 17).
You'll notice, however the strange pink coloring around the outside of the text. This is a well-known issue related (somehow) to mathematical rounding errors when rendering cleartype text on a transparent background. There is a standard workaround -- you can create a g:text object via script and set all kinds of cool attributes for it. For instance:
function Init() {
                          document.body.style.width = 100;
                          document.body.style.height = 100;
                          // imgBackground is the id of the <g:background> body element
                          var oText = imgBackground.addTextObject("","",0,"White", 10,50);
                          oText.value = "Hello World!";
                          oText.font = "Arial";
                          oText.fontSize = "14";
                          oText.addGlow( "Blue", 20, 100);
                      }
A Round Gadget
In order to create a partially-transparent gadget, as in the "bullseye" or CPU Meter from Fig. 3-1, you need to provide a PNG file that has transparent portions. I tried hard to find a way to do that in Win7 MsPaint, but I got nowhere. I ended up with a very excellent (and totally free) graphics file editor called paint.net that you can get here:
http://www.getpaint.net/index.html
With paint.net, I created 100x100 PNG file and drew a red-and-white target on it. I then selected the "magic wand" tool and clicked in a corner and then pressed the Delete key. In the program, the "transparent" part is displayed as a checkerboard pattern. I saved the file as "Bullseye.PNG" and I changed my HTML like this:
<script>
                      function Init() {
                          document.body.style.width = 100;
                          document.body.style.height = 100;
                          // imgBackground is the id of the <g:background> body element
                          // bullseye.png is transparent around the outside
                          imgBackground.addImageObject( "bullseye.PNG", 0, 0 ); // <<--- added
} Handling Dropped Files
Now, we'll add some Drag-and-Drop functionality to the gadget. There is a trick to this. The gadget <body> can set an onDrop handler, but it must also take care to handle onDragEnter and onDragOver as well. Here's the simplest way to set up a file-drop handler:
<body onload="Init();"
                          ondragenter="event.returnValue= false"
                          ondragover="event.returnValue= false"
                          ondrop="ProcessItemsFromDrop()">
                      ...
</body>DropTarget.HTML
<html><head>
                      <script>
                      function Init() {
                          document.body.style.width = 100;
                          document.body.style.height = 100;
                          // bullseye.png is transparent around the outside
                          imgBackground.addImageObject("bullseye.png", 0, 0);
                      }
                      var gsDestFolder = "c:\\temp\\bullseye\\";
                      //--------------------------------
                      // for this example, we'll move a file to a specific folder
                      // prefixing its name with today's date
                      //
                      function ProcessOneFile( sSrcFile ) {
                          var oFSO = new ActiveXObject("Scripting.FileSystemObject");
                          var oDt = new Date();
                          var sRenPrefix = oDt.getFullYear()
                          + ("0" + (oDt.getMonth() + 1)).slice(-2) // 01 to 12
                          + ("0" + oDt.getDate()).slice(-2)       // 01 to 31
                          + ("_");

                          var sFilename = oFSO.GetFileName(sSrcFile);  // e.g., filename.ext
                          var sDestFile = gsDestFolder;
                          sDestFile += sRenPrefix;  // e.g., 20090714_
                          sDestFile += sFilename;   // e.g., SomeFile.txt
                          oFSO.MoveFile( sSrcFile, sDestFile ); // move & rename to target folder
                      }
                      //-----------------------------------------
                      function ProcessItemsFromDrop()
                      {
                          var intIndex = 0;
                          var oItem;
                          while (oItem = System.Shell.itemFromFileDrop(event.dataTransfer, intIndex)) {
                              ProcessOneFile( oItem.path );
                              intIndex++;
                          }
                          var sHtml = "<br><center><b>" + intIndex + "</b> file(s)<br>processed</center>";
                          document.all.resultsMsg.innerHTML = sHtml;
                          // clear the message after 5 seconds
                          window.setTimeout("document.all.resultsMsg.innerHTML='';", 5000);
                      }
                      </script>
                      </head>
                      <body onload="Init();"
                          ondragenter="event.returnValue = false"
                          ondragover="event.returnValue = false"
                          ondrop="ProcessItemsFromDrop()">
                          <!-- whiteBackground.png is any image that's 100x100 -->
                          <g:background
                              id="imgBackground"
                              src="whiteBackground.png"
                              style="position:absolute;top:0;left:0;"
                              opacity="0">
                          <span id="resultsMsg"></span>
                      </body>
</html>As you drag the file over the target, the cursor changes to the standard "OK to Drop Here" cursor. You could be a lot more sophisticated than that if you provided a handler for onDragEnter. My tip-of-the-hat to user feedback is that lines 37-40 display a verification message, then erase it after five seconds.
In this example, the program takes each dropped file and moves it to a particular folder. As it does that, it renames it by pre-pending the current date. This is a sort of archiving technique that I first presented in a previous article.
Since this is a simple demonstration, I have not included a settings dialog (see here for information on how to do that) and you would certainly want to make this gadget programmable to the extent of letting the user specify a particular target folder. The program is also missing the logic to test for, and handle the situation when, you drop a folder on the target. These finish-up tasks I'll leave as an exercise to the reader.
Summary:
We saw how to use <g:background> to set a transparent background for the gadget, and how to display a partially-transparent PNG image, with the result that the gadget has a non-rectangular appearance. We used addTextObject to put some text on our background and add some interesting visual effects.
We use System.Shell to enable a file-drop event on the gadget, and we saw how to process the files that are dropped. System.Shell has lots of other methods. I'll bet that if you read through the documentation, you'll have plenty of new ideas for things you can do with your own gadgets.
Resources:
Create a Win7 Gadget
Create a Win7 Maze Gadget
Create a Win7 Gadget with a Flyout Panel
Drag and Drop to Move and Rename a File
System.Shell Object
http://msdn.microsoft.com/en-us/library/ms723241(VS.85).aspx
System.Shell.Item Object
http://msdn.microsoft.com/en-us/library/ms723202(VS.85).aspx
FileSystemObject Object
http://msdn.microsoft.com/en-us/library/z9ty6h50(VS.85).aspx
Download paint.net (supports PNG files with transparency)
http://www.getpaint.net/index.html
Developing a Gadget for Windows Sidebar (for Vista, but it mostly applies)
http://msdn.microsoft.com/en-us/library/bb456468(VS.85).aspx
=-=-=-=-=-=-=-=-=-=-=-=-=-
If you liked this article and want to see more from this author, please click the Yes button near the:
Was this article helpful?
label that is just below and to the right of this text. Thanks!
=-=-=-=-=-=-=-=-=-=-=-=-=-
Have a question about something in this article? You can receive help directly from the article author. Sign up for a free trial to get started.
Comments (0)