HOW TO SET UP ANDROID SDK EMULATOR

Nadir ALTINBAS![]() GSM Mainten. &Commis. Engr BS.,A. Ec., Professional | IBM z/OS Mainframe Practitioner
GSM Mainten. &Commis. Engr BS.,A. Ec., Professional | IBM z/OS Mainframe Practitioner
 GSM Mainten. &Commis. Engr BS.,A. Ec., Professional | IBM z/OS Mainframe Practitioner
CERTIFIED EXPERT
Published:
Browse All Articles > HOW TO SET UP ANDROID SDK EMULATOR
Setting up an android development enviroment on windowsfor smartphone programming as an interface.As an example of Emulators, the Android Virtual Device in Android SDK will be discoursed. The recommended R14 is the latest revision # in the year of 2012 for SDK setting will be discussed step by step
Android SDK is used for creating an android software application. It includes document and tools which are necessary to develop applications with java. In fact Android SDK is harder than other software infrastructure, because there is a virtual device which would run a the program.
Before you start to create a development in an android virtual device, you should download Eclipse and JDK, and also install Android starter package as briefly mentioned article "Setting up an android development enviroment on windows". You can reach the article from here. Also worth reading a descriptive tutorial.
As an example of Emulators, the Android Virtual Device in Android SDK will be discoursed. The recommended R14 is the latest revision # in the year of 2012 for SDK setting. For Eclipse connecting with SDK, open Eclipse Plugin, as the first step, you should have to introduce Android SDK to Eclipse. You do that in the Eclipse menu;
Window>Preferences
In the new window, from the SDK Location click the "Browse…" button, select the SDK directory which includes SDK files.
SDK setting which is arranged in Eclipse is valid just for that workspace. For other workspaces you should repeat the same arrangement.
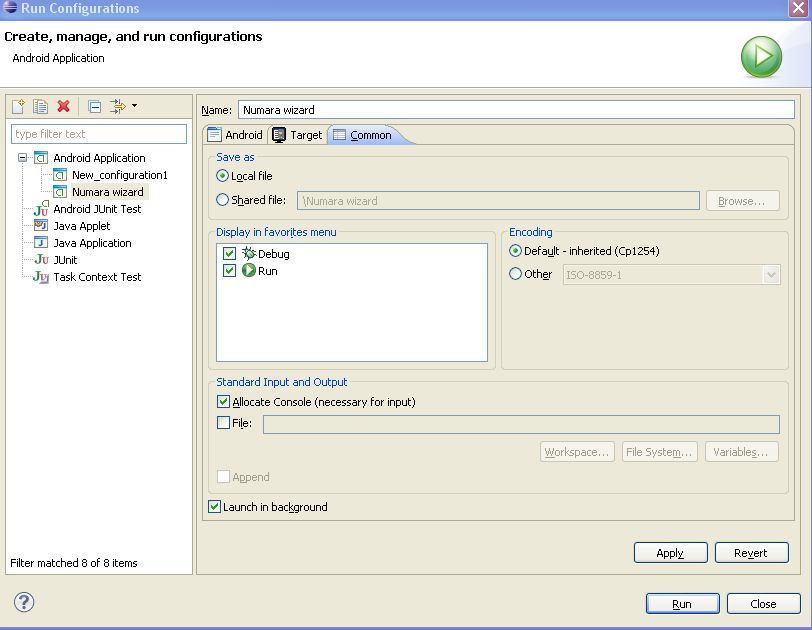
After opening new project and inserting code to XML and Java window, you can then run the application of the Project. For running it, initally, some arrangemnts will be required.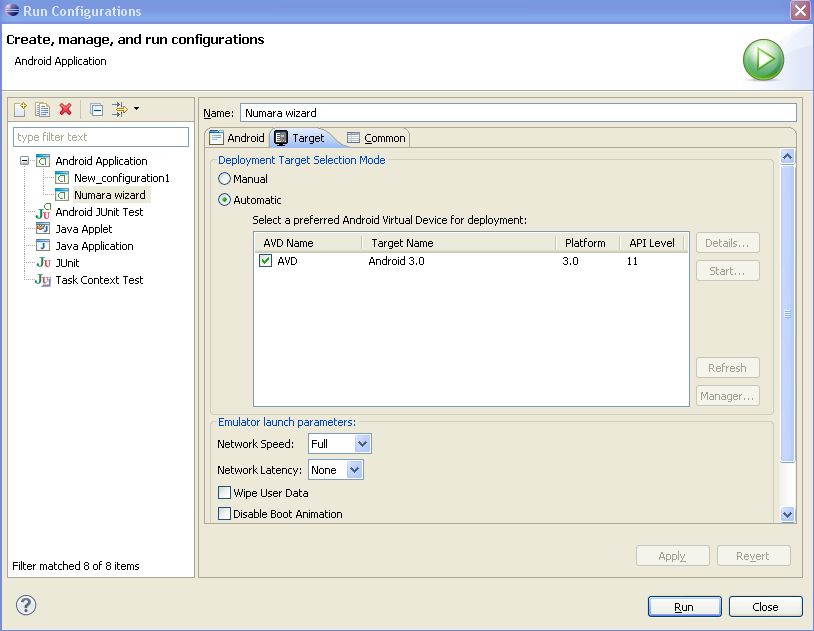 Run Configuration > Common Utf-8 coding
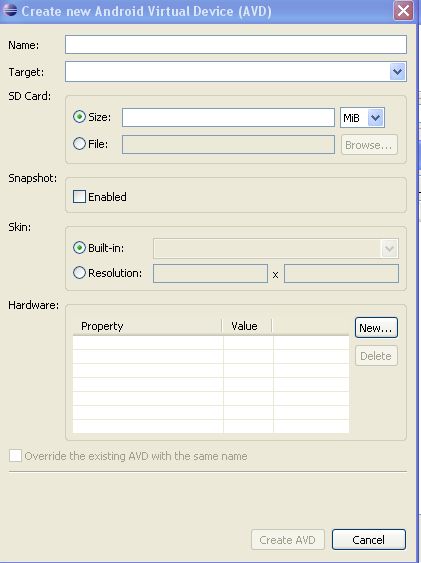
In the target; Start to set SD card specification 1024 MB or 512 MB and WGA800 default. Thus, the process should be completed...
 Then Create your virtual device by rename it. After this step go to "> Run As > Android Application" and select "Android Project". The Project which is developed on the menu in Eclipse.
LOG CAT arrangement can assist you through running process. For this setting up:
>Window>Show View>Other>Android>Log Cat
Another way to running Project is use of the CTRL+F11 shortcut command. In this option you will need to choose running "Android Device" or "Launch a new Android Virtual Device". If the second option selected, Virtual Device name must be highlighted before clicking "Ok" button.
Before you start to create a development in an android virtual device, you should download Eclipse and JDK, and also install Android starter package as briefly mentioned article "Setting up an android development enviroment on windows". You can reach the article from here. Also worth reading a descriptive tutorial.
As an example of Emulators, the Android Virtual Device in Android SDK will be discoursed. The recommended R14 is the latest revision # in the year of 2012 for SDK setting. For Eclipse connecting with SDK, open Eclipse Plugin, as the first step, you should have to introduce Android SDK to Eclipse. You do that in the Eclipse menu;
Window>Preferences
In the new window, from the SDK Location click the "Browse…" button, select the SDK directory which includes SDK files.
SDK setting which is arranged in Eclipse is valid just for that workspace. For other workspaces you should repeat the same arrangement.
After opening new project and inserting code to XML and Java window, you can then run the application of the Project. For running it, initally, some arrangemnts will be required.
Run Configuration > Common Utf-8 coding
In the target; Start to set SD card specification 1024 MB or 512 MB and WGA800 default. Thus, the process should be completed...
Then Create your virtual device by rename it. After this step go to "> Run As > Android Application" and select "Android Project". The Project which is developed on the menu in Eclipse.
LOG CAT arrangement can assist you through running process. For this setting up:
>Window>Show View>Other>Android>Log Cat
Another way to running Project is use of the CTRL+F11 shortcut command. In this option you will need to choose running "Android Device" or "Launch a new Android Virtual Device". If the second option selected, Virtual Device name must be highlighted before clicking "Ok" button.
Have a question about something in this article? You can receive help directly from the article author. Sign up for a free trial to get started.
Comments (0)