Configure Moderated Distribution Group in Exchange 2010


Published:
Browse All Articles > Configure Moderated Distribution Group in Exchange 2010
As we rely more and more on email communication, we create for ourselves easier ways to distribute our messages. One of these is the dreaded distribution group. Most companies have the “All staff” group that contains ALL users on your network. They are great for important company communications from the CEO office, or the car for sale, or the holiday Villa to rent. Once people work out they have a captive audience it quite often gets abused.
The problem then is people start ignoring messages from this group, or even worse they setup a rule to move or delete it so it’s not immediately apparent in their inbox.
Well, thanks to the moderated distribution group this problem is no more.
![distgroup-01]() The screen gives you the option to create a new group or select an existing group that has already been created in Active Directory and mail-enable it. For this article we will select new group and click next.
The screen gives you the option to create a new group or select an existing group that has already been created in Active Directory and mail-enable it. For this article we will select new group and click next.
![distgroup-02]() Give your group a name and complete the alias name then click next, new and then finish to complete the creation of the distribution group.
Give your group a name and complete the alias name then click next, new and then finish to complete the creation of the distribution group.
![distgroup-03]() From within this screen select Message Moderation and click properties. You will then see the following screen.
From within this screen select Message Moderation and click properties. You will then see the following screen.
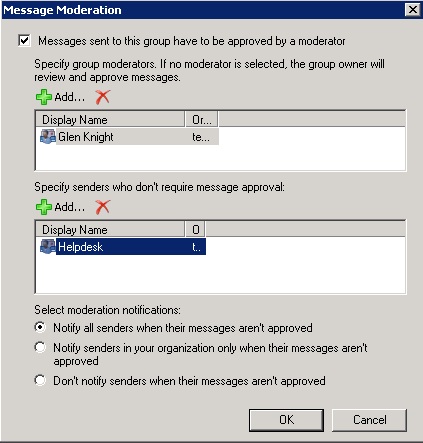
![distgroup-04]() From this screen check the box for Messages sent to this group have to be approved by a moderator and then add the moderators in to the top box.
From this screen check the box for Messages sent to this group have to be approved by a moderator and then add the moderators in to the top box.
In the second box you can chose to add users that do not require moderation.
And then finally select what level of notification you would like sent to the users trying to send messages to this distribution group.
TIP: When testing this, especially if you have added all of the company employees to the group, make sure you do not use an account that is in the moderators list. The reason, it will automatically be approved. (as both myself and another well-known Exchange expert found out to our cost :) )
Managing distribution group properties: http://technet.microsoft.com/en-us/library/bb125178.aspx
The problem then is people start ignoring messages from this group, or even worse they setup a rule to move or delete it so it’s not immediately apparent in their inbox.
Well, thanks to the moderated distribution group this problem is no more.
Create the Distribution Group
Using the Exchange Management Console under Recipient Configuration > Distribution Group click on the New Distribution Group in the action pane on the right hand side. This will start the wizard and you will see the screen below.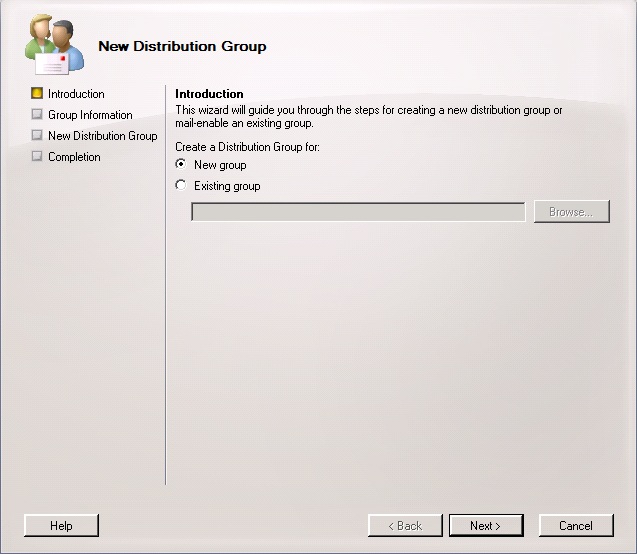 The screen gives you the option to create a new group or select an existing group that has already been created in Active Directory and mail-enable it. For this article we will select new group and click next.
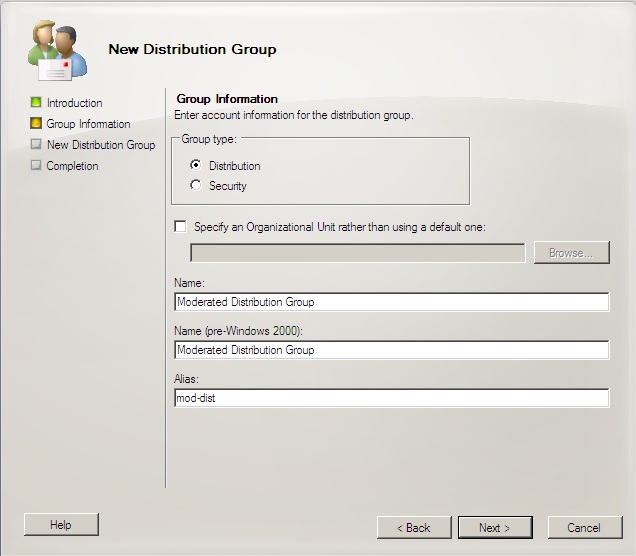 Give your group a name and complete the alias name then click next, new and then finish to complete the creation of the distribution group.
Moderation Settings
Now that we have created the group we need to specify the moderator settings. Using the Exchange Management Console navigate to Recipient Configuration > Distribution Groups and locate your distribution group. Right click and select properties. Then click the Mail Flow Settings tab.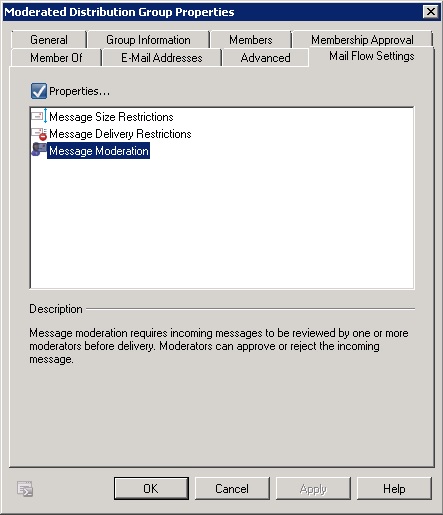 From within this screen select Message Moderation and click properties. You will then see the following screen.
 From this screen check the box for Messages sent to this group have to be approved by a moderator and then add the moderators in to the top box.
In the second box you can chose to add users that do not require moderation.
And then finally select what level of notification you would like sent to the users trying to send messages to this distribution group.
TIP: When testing this, especially if you have added all of the company employees to the group, make sure you do not use an account that is in the moderators list. The reason, it will automatically be approved. (as both myself and another well-known Exchange expert found out to our cost :) )
Summary
What Exchange 2010 brings us with moderated distribution groups is the ability for all staff to be able to send messages to the whole staff if they think it’s important enough, but importantly the content is moderated. This means that the messages are hopefully only arriving in users inboxes if they are actually important.Further Reading
Creating distribution groups: http://technet.microsoft.com/en-us/library/bb124513.aspxManaging distribution group properties: http://technet.microsoft.com/en-us/library/bb125178.aspx
Have a question about something in this article? You can receive help directly from the article author. Sign up for a free trial to get started.
Comments (0)