HOW TO: Shrink a VMware Virtual Machine Disk (VMDK) in 15 minutes

Andrew Hancock (VMware vExpert PRO / EE Fellow/British Beekeeper)![]() VMware and Virtualization Consultant
VMware and Virtualization Consultant
 VMware and Virtualization Consultant
CERTIFIED EXPERT
EE Fellow, MVE, Expert of the Year 2021,2017-11, Scribe 2016-2012, Author of the Year 2018-6,2013-2012 VMware vExpert Pro, vExpert 2022-2011
Published:
Browse All Articles > HOW TO: Shrink a VMware Virtual Machine Disk (VMDK) in 15 minutes
HOW TO: Shrink a VMware Virtual Machine Disk (VMDK) in 15 minutes
In my previous Experts Exchange Articles, most have featured Basic and Intermediate VMware and Virtualisation Topics.
If you would like to read my Basic VMware articles, they are listed here for your convenience.
During this series of articles VMware released VMware vSphere 5.5 and VMware vSphere Hypervisor ESXi 5.5. These articles are also applicable to VMware vSphere Hypervisor ESXi 5.x and 5.5. For consistency, I have used VMware vSphere Hypervisor ESXi 5.1 through this series.
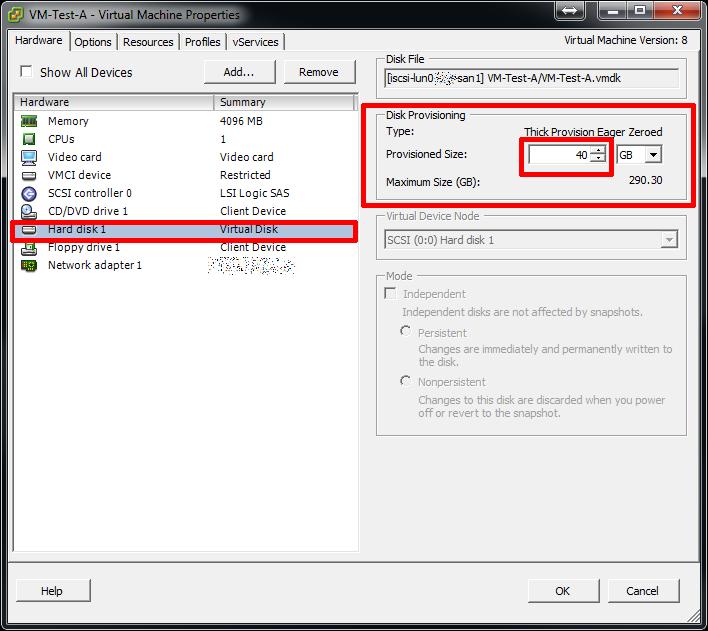
Increasing the size of a VMware Virtual Machine Disk (VMDK) is straightforward, and is supported in the vSphere Client, by selecting the virtual hard disk, and increasing the size using the up arrow. or typing in a new value. Please see my previous Experts Exchange article:
![Resize - VMDK.jpg]()
However, although there is a down arrow present, you cannot shrink the disk in this way, it's not supported. The only supported method of shrinking a VMware virtual machine disk (VMDK) is to use VMware vCenter Converter Standalone and create a virtual to virtual (V2V) conversion, a similar process to a Physical to Virtual (P2V) conversion.
Please see my previous Experts Exchange articles
V2V Disadvantages
V2V Advantages
After reading and understanding this article, you will be able to reduce the size of virtual machine disks in less than five minutes. I will let the reader decide if this is a faster method than the traditional practice of using a V2V, to change the size of a VMware Virtual Machine Disk (VMDK). On occasion we come across an installation, where an Administrator has assigned a 2TB virtual disk, and does not have the space to create a V2V!
In this article we will show you HOW TO: Shrink a VMware Virtual Machine Disk (VMDK) in 15 minutes
I feel this is a little more advanced, so I've not included it in the Basic VMware article series.
Before your start the following procedure, please ensure you have a valid and tested Full Backup of your virtual machine. This does not mean a VMware Snapshot.
Also check to see the virtual machine is NOT running on a Snapshot disk, If unsure please refer to my Experts Exchange Article
The following procedure is split into two parts
![Logon to the Virtual Machine]() Press Control-Alt-Delete to login to the virtual machine.
Press Control-Alt-Delete to login to the virtual machine.
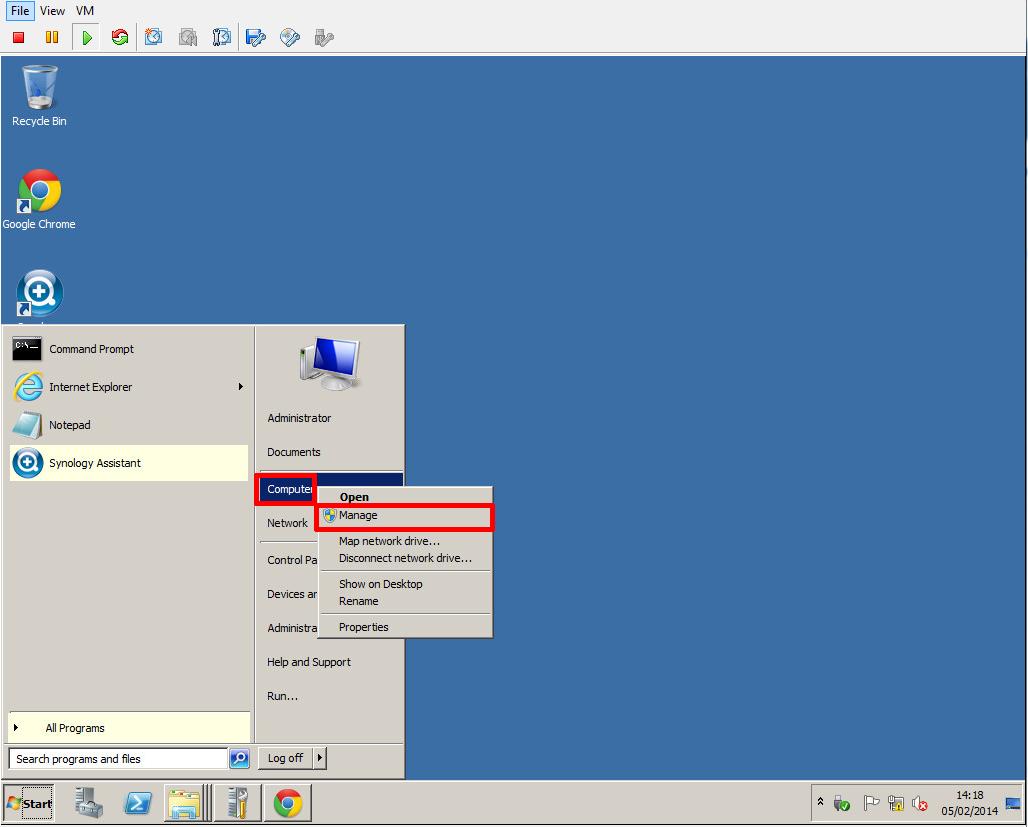
![Right Click My Computer and Select Manage]() Right Click My Computer and Select Manage
Right Click My Computer and Select Manage
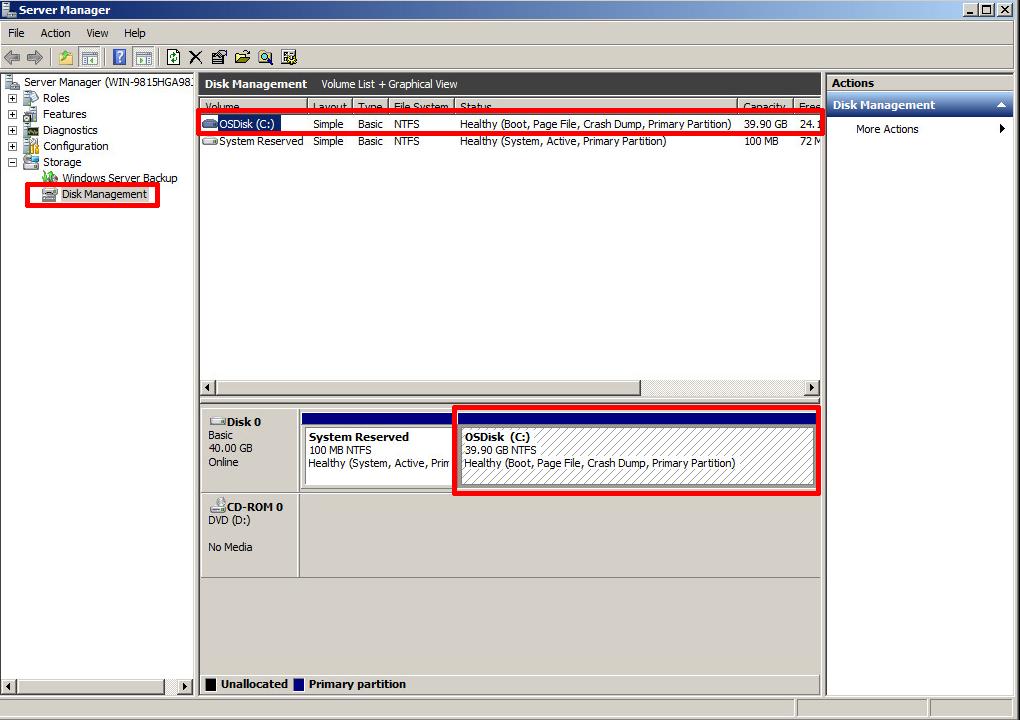
![Select Disk Management]() Select Disk Management, and select the partition you need to shrink.
Select Disk Management, and select the partition you need to shrink.
![Right Click Volume]() Right Click the Volume/Partition to shrink, and select Shrink.
Right Click the Volume/Partition to shrink, and select Shrink.
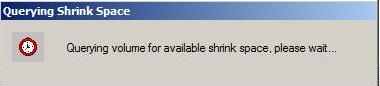
![Shrink Disk Query]() The above dialogue will briefly appear whilst the file system is queried.
The above dialogue will briefly appear whilst the file system is queried.
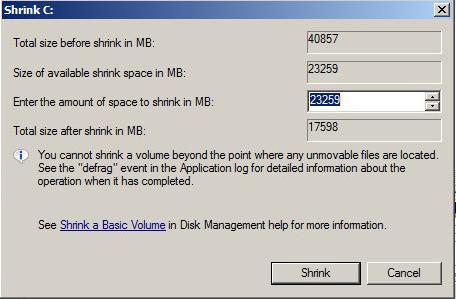
![Shrink C:]() the above dialogue will appear. Enter a size to reduce the OS partition.
the above dialogue will appear. Enter a size to reduce the OS partition.
In this example the VMware virtual machine disk (VMDK) is 40GB, and we would like to reduce the size of the VMware virtual machine disk (VMDK) to 20GB. The Disk Management utility scans the available file system, and reports a maximum size the OS partition can be reduce by, this is based on current file system usage.
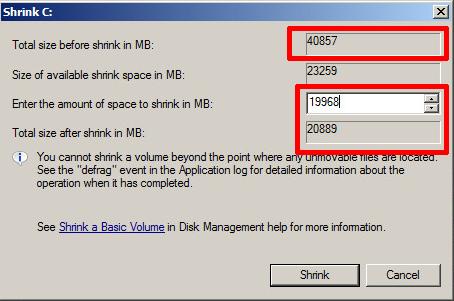
Enter the figure 19.5 (GB) x 1024 = 19968
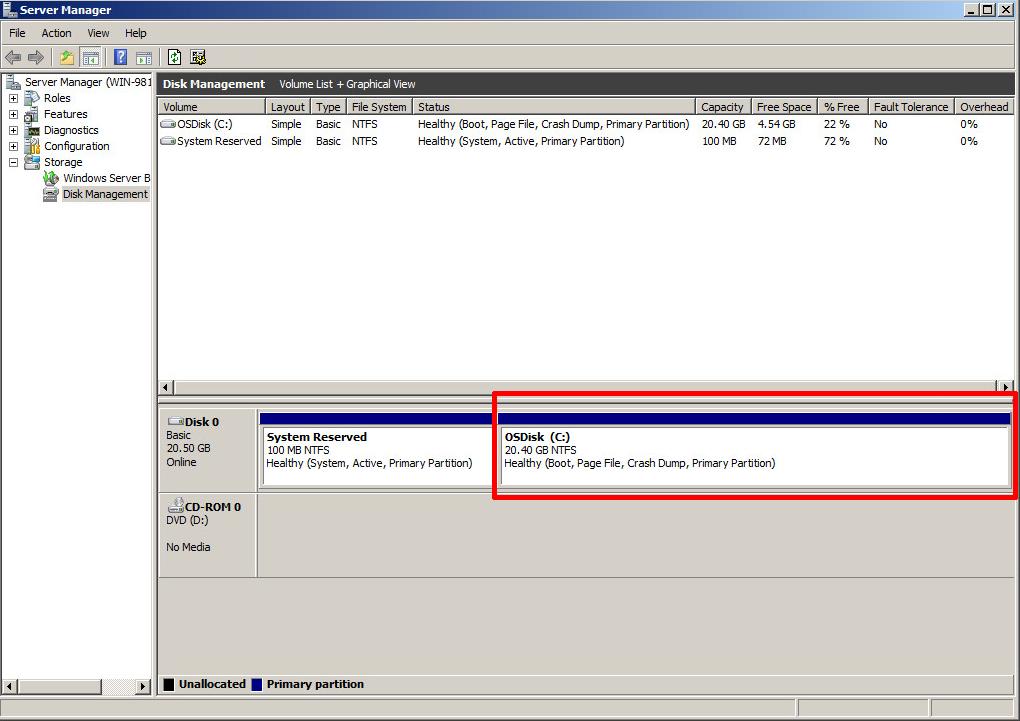
![Shrink Size]() OS Partition size after Shrink Operation.
OS Partition size after Shrink Operation.
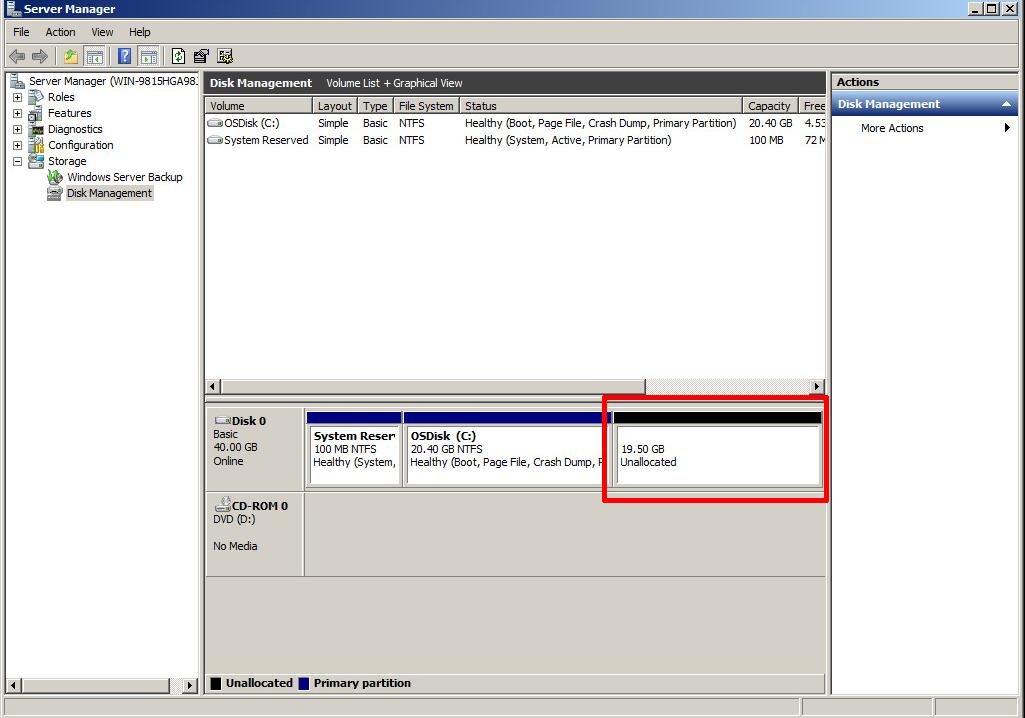
![Disk Manager after Shrink Operation]() As can be clearly seen in the above screenshot, there is now an unallocated 19.5GB space on the virtual disk, in Step 2 the VMware virtual machine disk (VMDK) will be "chopped", removing this unallocated storage space, and finally reducing the virtual machine disk (VMDK) to 20GB. Providing that we DO NOT affect the existing partitions, this is a safe operation. So in effect the "cut" will be made in the unallocated storage space, after the OS partition.
As can be clearly seen in the above screenshot, there is now an unallocated 19.5GB space on the virtual disk, in Step 2 the VMware virtual machine disk (VMDK) will be "chopped", removing this unallocated storage space, and finally reducing the virtual machine disk (VMDK) to 20GB. Providing that we DO NOT affect the existing partitions, this is a safe operation. So in effect the "cut" will be made in the unallocated storage space, after the OS partition.
Login and connect to the VMware vSphere Host ESXi server which hosts the virtual machine.
see my previous Experts Exchange articles
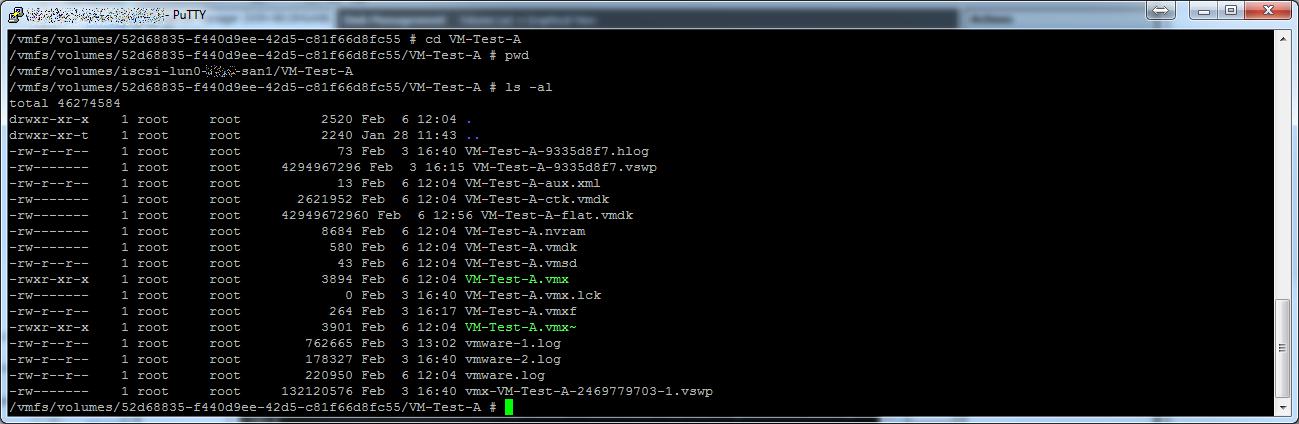
Power OFF the Virtual Machine, and change to the datastore path where the VMware virtual machine disk (VMDK) is located.
cd /vmfs/volumes/<datastore name>/<VM foldername>
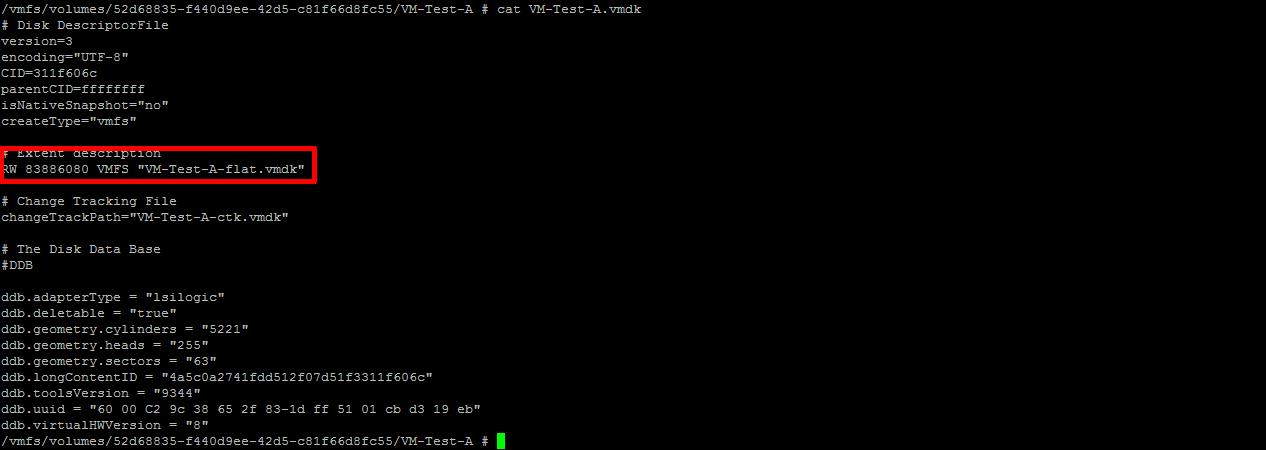
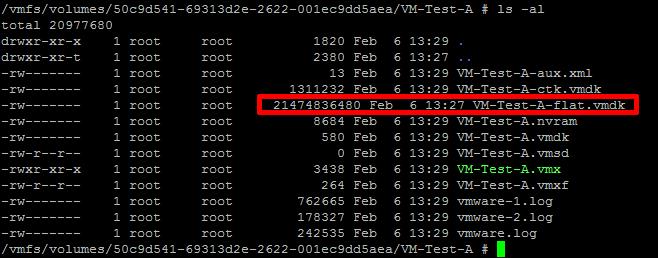
![VM Folder Path]() We need to edit the *.vmdk, which is the descriptor file, which contains the variables for the size of the *.-flat.vmdk. Using cat, this is what the descriptor file contains
We need to edit the *.vmdk, which is the descriptor file, which contains the variables for the size of the *.-flat.vmdk. Using cat, this is what the descriptor file contains
![VMDK Descriptor file]() The number highlighted above, under the heading #Extent description, after the letters RW, defines the size of the VMware virtual disk (VMDK).
The number highlighted above, under the heading #Extent description, after the letters RW, defines the size of the VMware virtual disk (VMDK).
this number - 83886080, and it's calculated as follows:
40 GB = 40 * 1024 * 1024 * 1024 / 512 = 83886080
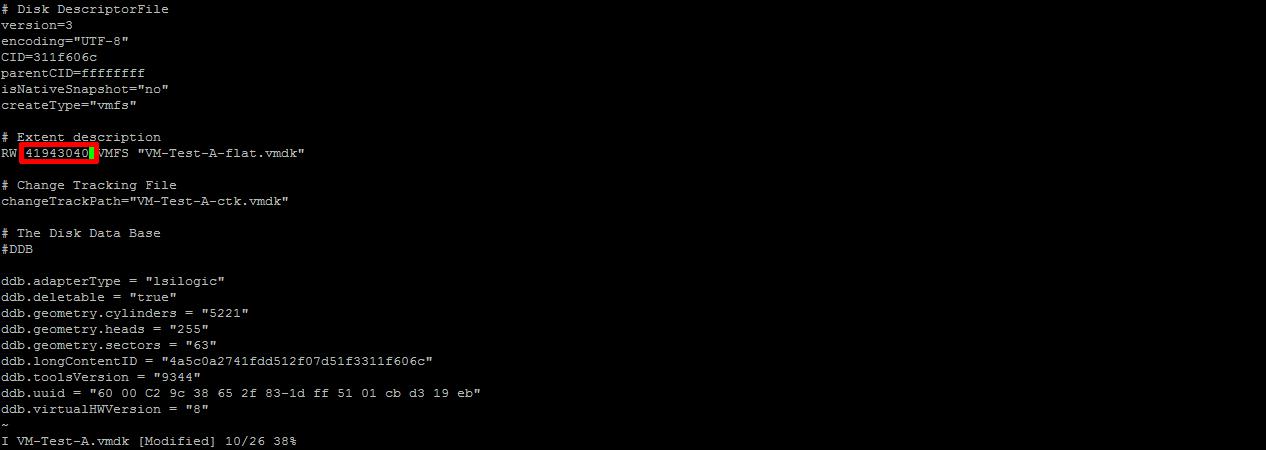
We wanted to reduce the size of the VMware virtual machine disk (VMDK) from 40 GB to 20 GB. So the value we need to enter into the descriptor file is:-
20 GB = 20 * 1024 * 1024 * 1024 / 512 = 41943040
Using vi, edit the descriptor file, and change the number from 83886080 to 41943040, and save the file.
![VMDK Edited with vi]() Migrate or Copy the virtual machine to another datastore, if you do not have the migrate option, see my Experts Exchange article here
Migrate or Copy the virtual machine to another datastore, if you do not have the migrate option, see my Experts Exchange article here
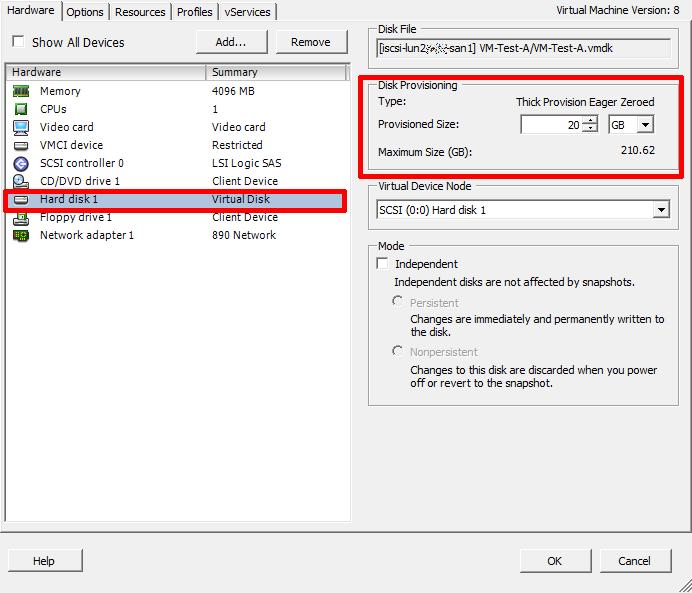
After the virtual machine disk (VMDK) has been moved, you will notice the disk size reflects the desired size of 20GB.
![Size of virtual disk, as viewed from vSphere Client]()
![Size of virtual disk as viewed from console]() After restarting the virtual machine, and checking with Disk Management, you will notice the 19.5GB unallocated storage space, has been removed, and disappeared.
After restarting the virtual machine, and checking with Disk Management, you will notice the 19.5GB unallocated storage space, has been removed, and disappeared.
![Size of virtual disk as viewed from Disk Management in the OS]()
Congratulations, you have successfully Shrunk a VMware Virtual Machine Disk (VMDK)
****************************************************************************
Thank you for reading my article, please leave valuable feedback. If you liked my VMware article and would like to see more Articles from me, please click the Yes button near the: Was this article helpful? at the bottom of this article just below and to the right of this information. Thank You. Do not forget if you have a question about this article or another VMware, Virtualisation, Windows Server 2012 question, why not post a Question for me and the other Experts Exchange Experts in the VMware, Virtualisation, Windows 2008, Windows 2012 Zones. I look forward to hearing from you. - Andy :- twitter @einsteinagogo
****************************************************************************
In my previous Experts Exchange Articles, most have featured Basic and Intermediate VMware and Virtualisation Topics.
If you would like to read my Basic VMware articles, they are listed here for your convenience.
During this series of articles VMware released VMware vSphere 5.5 and VMware vSphere Hypervisor ESXi 5.5. These articles are also applicable to VMware vSphere Hypervisor ESXi 5.x and 5.5. For consistency, I have used VMware vSphere Hypervisor ESXi 5.1 through this series.
Increasing the size of a VMware Virtual Machine Disk (VMDK) is straightforward, and is supported in the vSphere Client, by selecting the virtual hard disk, and increasing the size using the up arrow. or typing in a new value. Please see my previous Experts Exchange article:
However, although there is a down arrow present, you cannot shrink the disk in this way, it's not supported. The only supported method of shrinking a VMware virtual machine disk (VMDK) is to use VMware vCenter Converter Standalone and create a virtual to virtual (V2V) conversion, a similar process to a Physical to Virtual (P2V) conversion.
Please see my previous Experts Exchange articles
V2V Disadvantages
V2V Conversions can be slow.
You need to ensure, you have enough datastore storage space for the new virtual machine disk.
The virtual machine is converted, so there is a small risk, the conversion can cause issues with the converted virtual machine.
The converted machine can contain a different MAC address.
V2V are prone to failure.
V2V Advantages
Support end-user method of re-sizing a virtual machine disk.
GUI Interface when using VMware vCenter Converter Standalone
After reading and understanding this article, you will be able to reduce the size of virtual machine disks in less than five minutes. I will let the reader decide if this is a faster method than the traditional practice of using a V2V, to change the size of a VMware Virtual Machine Disk (VMDK). On occasion we come across an installation, where an Administrator has assigned a 2TB virtual disk, and does not have the space to create a V2V!
In this article we will show you HOW TO: Shrink a VMware Virtual Machine Disk (VMDK) in 15 minutes
I feel this is a little more advanced, so I've not included it in the Basic VMware article series.
Before your start the following procedure, please ensure you have a valid and tested Full Backup of your virtual machine. This does not mean a VMware Snapshot.
Also check to see the virtual machine is NOT running on a Snapshot disk, If unsure please refer to my Experts Exchange Article
The following procedure is split into two parts
Shrink the Operating System partition - This is covered in Step 1.
Shrink the VMware Virtual Machine Disk (VMDK) - This is covered in Step 2
1. Login to the Virtual Machine and shrink the OS Partition
Before we can shrink the VMware virtual machine disk (VMDK), we need to shrink the OS partition. (to avoid file system corruption). In this example I am using Windows 2008 R2, which has a shrink function. If you are using another OS, please see the other 3rd party partition utilities which are available, they are listed in my Experts Exchange article Using an RDP (Remote Desktop Protocol) connection or connect via the Console, using the vSphere Client, login to the virtual machine as an Administrator.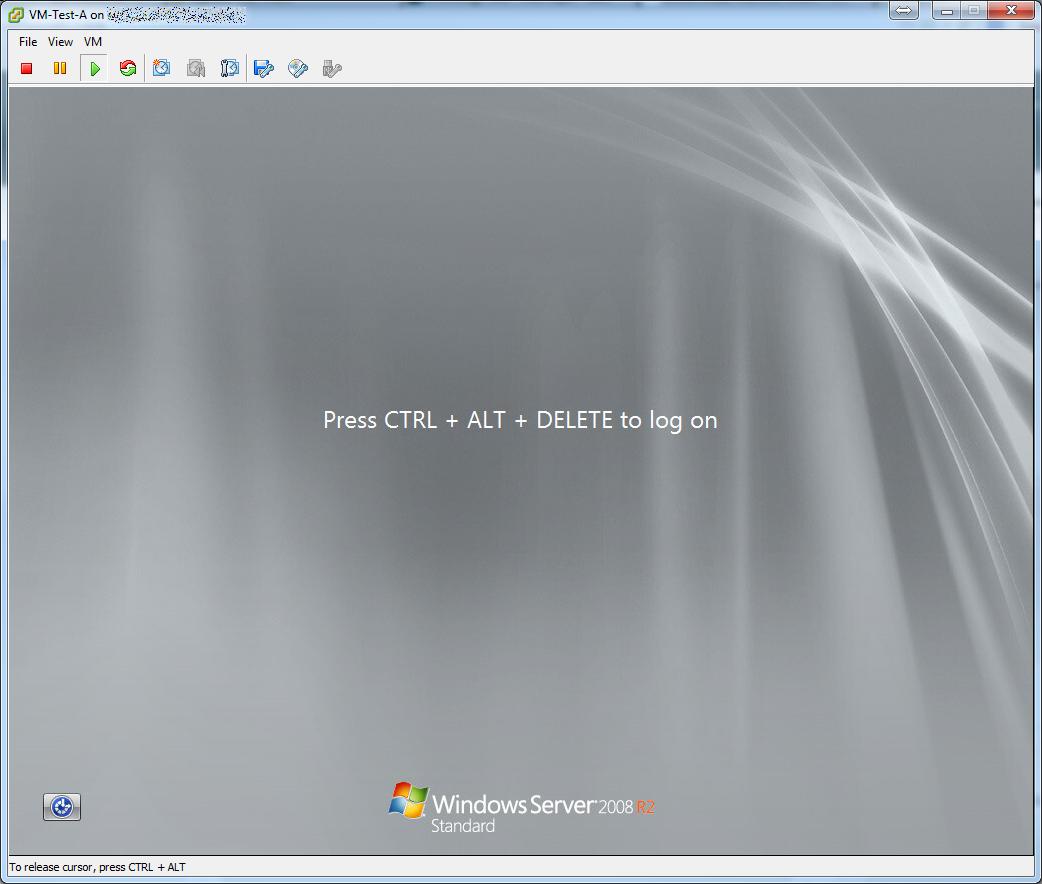 Press Control-Alt-Delete to login to the virtual machine.
 Right Click My Computer and Select Manage
 Select Disk Management, and select the partition you need to shrink.
 Right Click the Volume/Partition to shrink, and select Shrink.
 The above dialogue will briefly appear whilst the file system is queried.
 the above dialogue will appear. Enter a size to reduce the OS partition.
In this example the VMware virtual machine disk (VMDK) is 40GB, and we would like to reduce the size of the VMware virtual machine disk (VMDK) to 20GB. The Disk Management utility scans the available file system, and reports a maximum size the OS partition can be reduce by, this is based on current file system usage.
Enter the figure 19.5 (GB) x 1024 = 19968
 OS Partition size after Shrink Operation.
 As can be clearly seen in the above screenshot, there is now an unallocated 19.5GB space on the virtual disk, in Step 2 the VMware virtual machine disk (VMDK) will be "chopped", removing this unallocated storage space, and finally reducing the virtual machine disk (VMDK) to 20GB. Providing that we DO NOT affect the existing partitions, this is a safe operation. So in effect the "cut" will be made in the unallocated storage space, after the OS partition.
2. Reducing the size of the VMware Virtual Machine Disk (VMDK)
Login and connect to the VMware vSphere Host ESXi server which hosts the virtual machine.
see my previous Experts Exchange articles
Power OFF the Virtual Machine, and change to the datastore path where the VMware virtual machine disk (VMDK) is located.
cd /vmfs/volumes/<datastore name>/<VM foldername>
 We need to edit the *.vmdk, which is the descriptor file, which contains the variables for the size of the *.-flat.vmdk. Using cat, this is what the descriptor file contains
 The number highlighted above, under the heading #Extent description, after the letters RW, defines the size of the VMware virtual disk (VMDK).
this number - 83886080, and it's calculated as follows:
40 GB = 40 * 1024 * 1024 * 1024 / 512 = 83886080
We wanted to reduce the size of the VMware virtual machine disk (VMDK) from 40 GB to 20 GB. So the value we need to enter into the descriptor file is:-
20 GB = 20 * 1024 * 1024 * 1024 / 512 = 41943040
Using vi, edit the descriptor file, and change the number from 83886080 to 41943040, and save the file.
 Migrate or Copy the virtual machine to another datastore, if you do not have the migrate option, see my Experts Exchange article here
After the virtual machine disk (VMDK) has been moved, you will notice the disk size reflects the desired size of 20GB.
 After restarting the virtual machine, and checking with Disk Management, you will notice the 19.5GB unallocated storage space, has been removed, and disappeared.
Congratulations, you have successfully Shrunk a VMware Virtual Machine Disk (VMDK)
**************************
Thank you for reading my article, please leave valuable feedback. If you liked my VMware article and would like to see more Articles from me, please click the Yes button near the: Was this article helpful? at the bottom of this article just below and to the right of this information. Thank You. Do not forget if you have a question about this article or another VMware, Virtualisation, Windows Server 2012 question, why not post a Question for me and the other Experts Exchange Experts in the VMware, Virtualisation, Windows 2008, Windows 2012 Zones. I look forward to hearing from you. - Andy :- twitter @einsteinagogo
**************************
EE Fellow, MVE, Expert of the Year 2021,2017-11, Scribe 2016-2012, Author of the Year 2018-6,2013-2012 VMware vExpert Pro, vExpert 2022-2011
Have a question about something in this article? You can receive help directly from the article author. Sign up for a free trial to get started.
Comments (54)
Commented:
1. Those that say you can avoid the "Migrate or Copy the virtual machine to another datastore" step to shrink your virtual disk file, are looking only at what is reported within VMware, if they looked at the actual file size on the host system, they wouldn't be saying this.
2. As alluded by others such as 'hasayeret', the "Migrate or Copy the virtual machine to another datastore" step requires that you have sufficient free space for two copies of the virtual disk file, even if only temporarily.
3. You can also use the command "vmware-vdiskmanager -r sourceDisk.vmdk -t 2 destinationDisk.vmdk" {2 is the destination disk file type, single preallocated virtual disk} to achieve the post-hack shrink of the virtual disk file. If you don't have this tool already installed, it can be obtained under other names, such as "1023856-vdiskmanager-wind
4. If you can't edit your "sourceDisk.vmdk" file, because it's a different type (format) than presented here, you can also use the above command to convert it.
PS. VMware vCenter Converter Standalone (installed and run on the host system) is a good alternative to VMware Virtual Disk Manager (as used above). It is GUI-based, faster and more robust, especially for very large VMDK's. V5.5 is compatible with Workstation 7.x-10.x, Fusion 3.x-6.x & Player 3.x-6.x, while V6.2 is compatible with Workstation 10.x-12.x, Fusion 6.x-8.x & Player 6.x-12.x.
Commented:
Firstly, determine the size of the virtual disk in sectors. For an MBR disk, simply add the Relative Sector and Sector Count fields of the Partition Table entry. If there are multiple partitions, pick the one with the highest Relative Sector value. (BTW, you can open the image file in iBored and view the Parameter Table fields by selecting the MBR template.)
Then round up the above value to the nearest multiple of 65536 sectors, so the nearest 32MB. You can then write this value in the VMDK (text) file using MetaPad (as this supports *nix EOLN's, whereas Notepad doesn't).
It is also possible to edit VMDK binary files (the monolithic single-growable-virtual-di
Commented:
Author
Commented:Commented:
I really like your article and you transport a lot of profund VMware knowledge for those who aren‘t familiar or that familiar with VMWare.
Thanks a lot for that!
Regarding your article, there is a shorter way than „15“ minutes - which are depending on the VMDK-Size(s) - for small machine it is a good time schedule.
1. it is a lot easier and safer to do the changes of the vmdk‘s with an editor than vi, for example connect with an SCP client and update your VMDK with an editor. - For all : Please save your current values for backup purpose to another editor file...
2. And this is the shorttrack...just remove after editing the machine from inventory and load the VMX again into the inventory...all done!
It takes about 2-3 minutes to do it that way...
Regards
Lukas
View More