HOW TO: Convert a physical server or virtual server (P2V/V2V) to Microsoft Hyper-V using Microsoft Virtual Machine Converter 3.1

Andrew Hancock (VMware vExpert PRO / EE Fellow/British Beekeeper)![]() VMware and Virtualization Consultant
VMware and Virtualization Consultant
 VMware and Virtualization Consultant
CERTIFIED EXPERT
EE Fellow, MVE, Expert of the Year 2021,2017-11, Scribe 2016-2012, Author of the Year 2018-6,2013-2012 VMware vExpert Pro, vExpert 2022-2011
Published:
Browse All Articles > HOW TO: Convert a physical server or virtual server (P2V/V2V) to Microsoft Hyper-V using Microsoft Virtual Machine Converter 3.1
In my previous Experts Exchange Articles, most have featured Basic and Intermediate VMware and Virtualisation Topics. If you would like to read them they are listed at the end of this article for your convenience.
In this article, I’m going to take time out from writing a Basic VMware Article, and show you HOW TO: Convert a physical server or virtual server (P2V/V2V) to Microsoft Hyper-V using Microsoft Virtual Machine Converter 3.1.
MVMC 3.1 Pre-requisites
![bits.jpg]()
Install Microsoft Virtual Machine Converter 3.1 on the server taking note of the Pre-requisites above. In this tutorial, we've installed Microsoft Virtual Machine Converter 3.1 on the Microsoft Hyper-V server that will be hosting the converted physical server.
In this tutorial we will convert a small physical file server called FS01, which has 4GB RAM, 2 Processors, 40GB hard disk, and the operating system is Windows Server 2012 R2 Daatcenter.
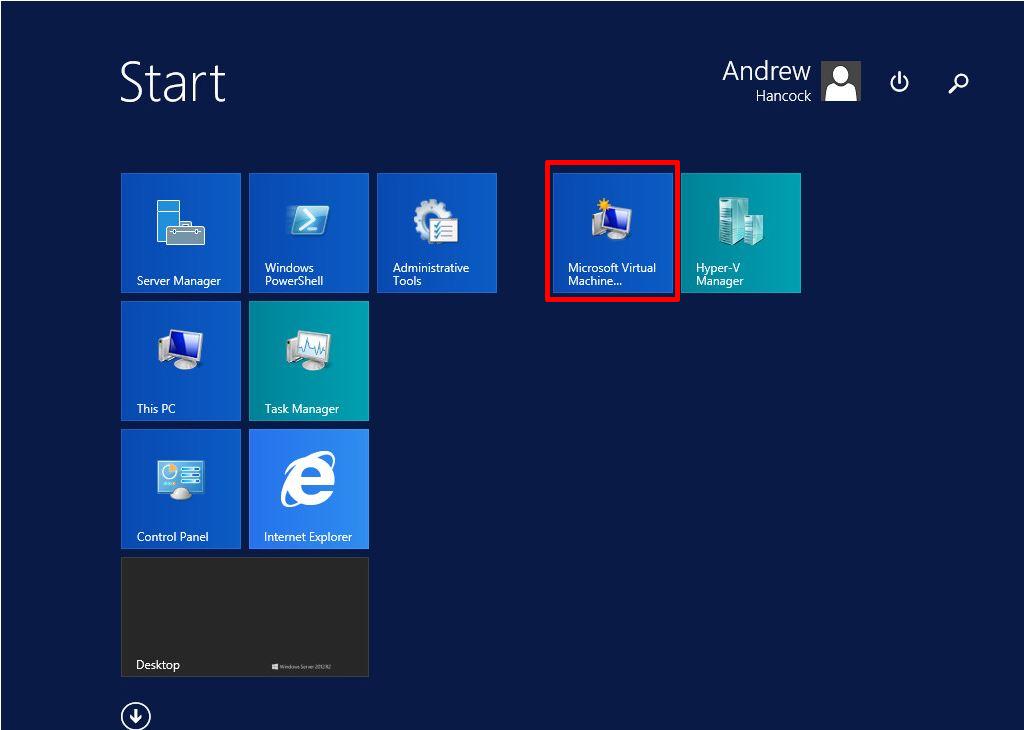
Start Microsoft Virtual Machine Converter 3.1 from the Start Menu.
![2014-12-09-14-05-56-Greenshot.jpg]()
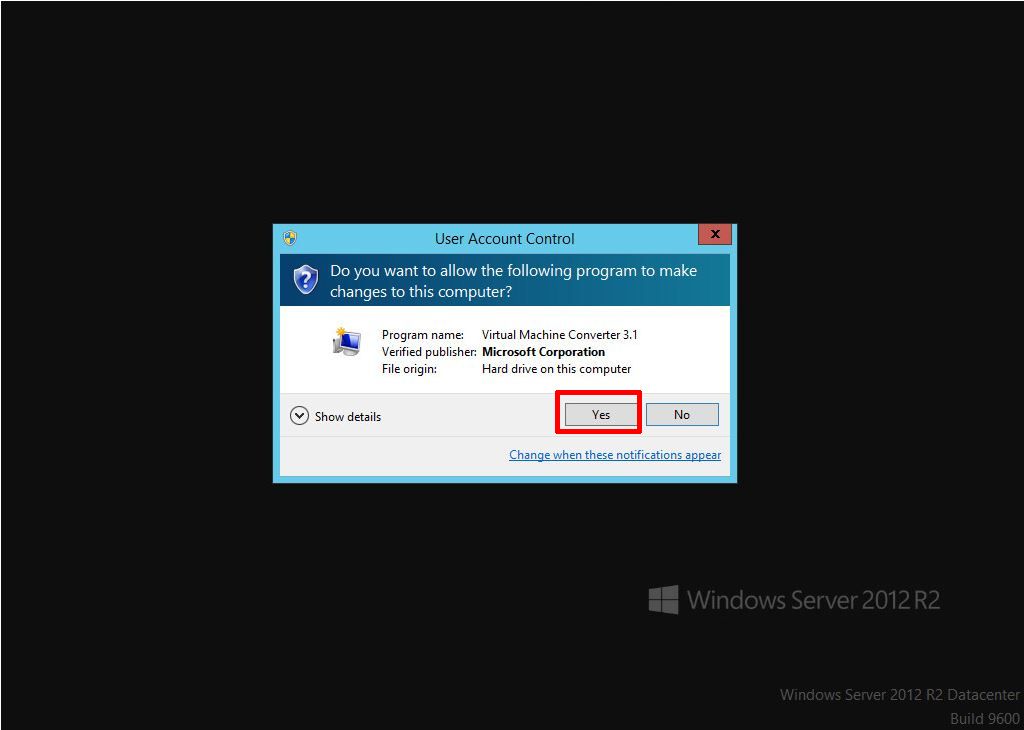
Select Yes, to the "Do you want to allow the following program to make changes to this computer?"
![2014-12-09-14-09-21-Greenshot.jpg]()
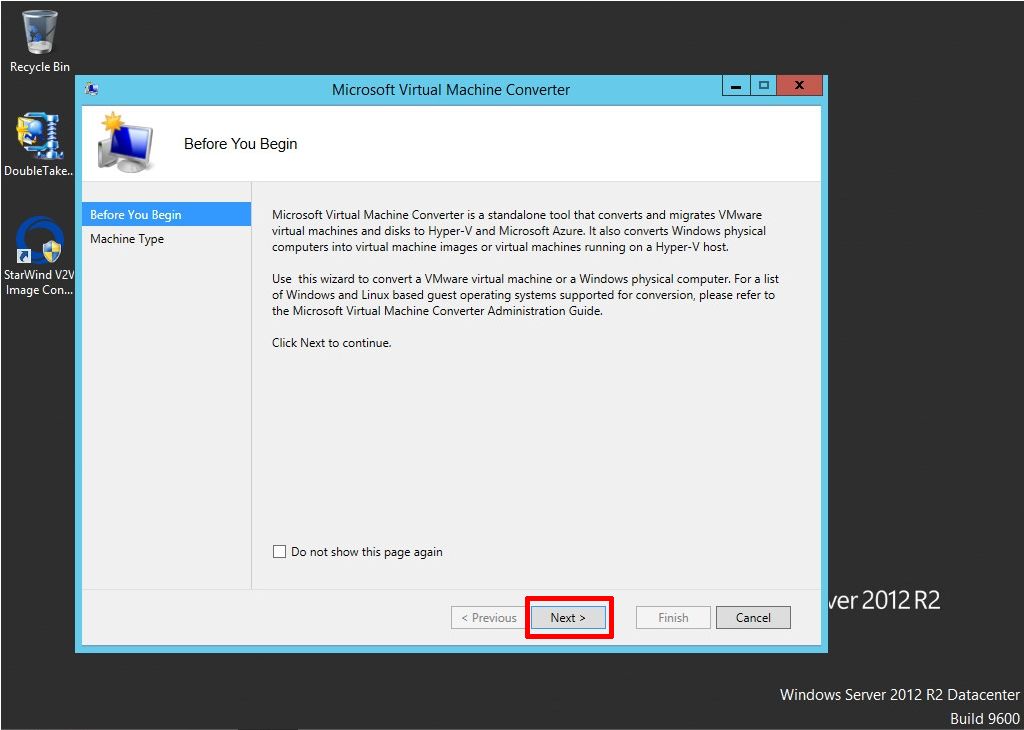
At the Microsoft Virtual Machine Converter "Before You Begin Welcome Page" select Next to continue.
![2014-12-09-14-58-37-Greenshot.jpg]()
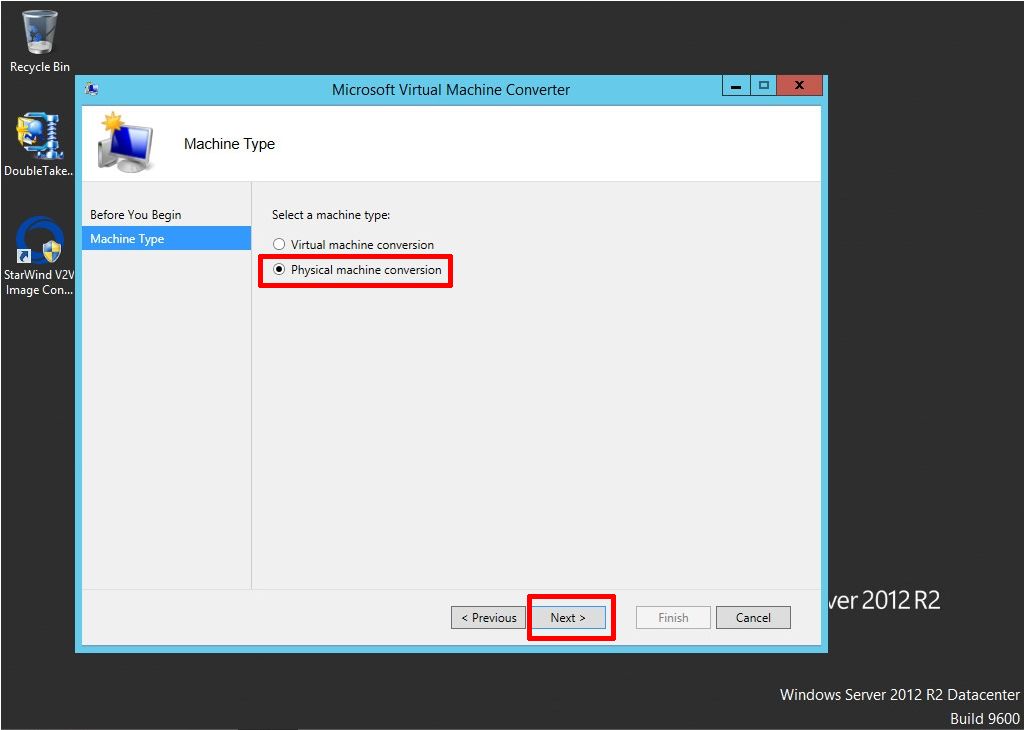
In this tutorial we will be completing a Physical machine conversion. So select Physical machine conversion and click Next to continue. If you want to complete a virtual machine conversion, select Virtual machine conversion.
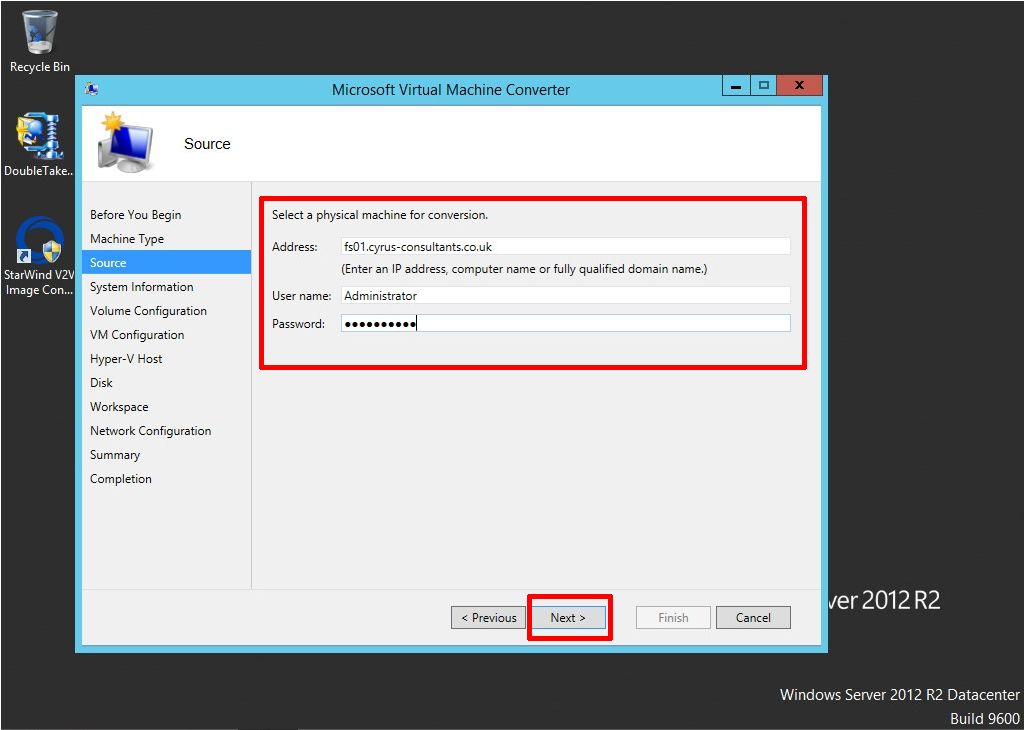
![2014-12-09-15-00-14-Greenshot.jpg]() Select the Source physical machine for conversion, by entering
Select the Source physical machine for conversion, by entering
TOP TIP No.1 I would recommend using a fully qualified domain name and Local Administrator username and password for the physical machine. It's always advised to have good working DNS for your network infrastructure.
TOP TIP No.2 I would recommend disabling the firewall on Source Physical machine!
![2014-12-09-15-03-46-Greenshot.jpg]()
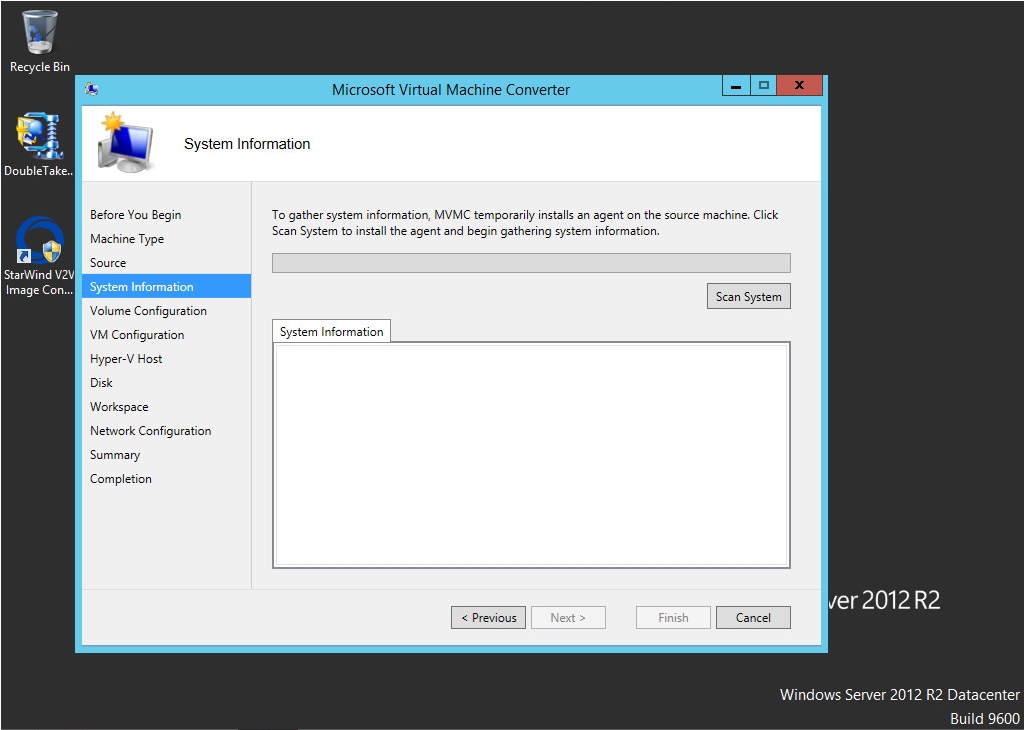
Click Scan System at the System Information page, and click Next to continue.
![2014-12-09-15-14-40-Greenshot.jpg]()
Confirm the System Information is correct, and select Next to continue.
![2014-12-09-15-16-07-Greenshot.jpg]()
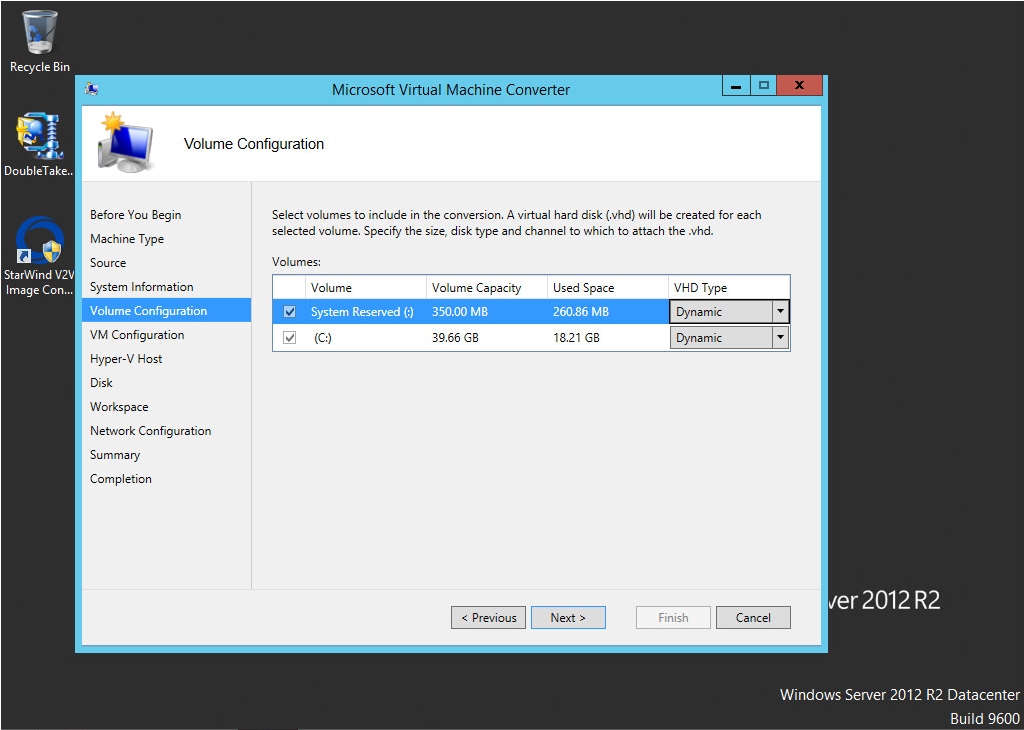
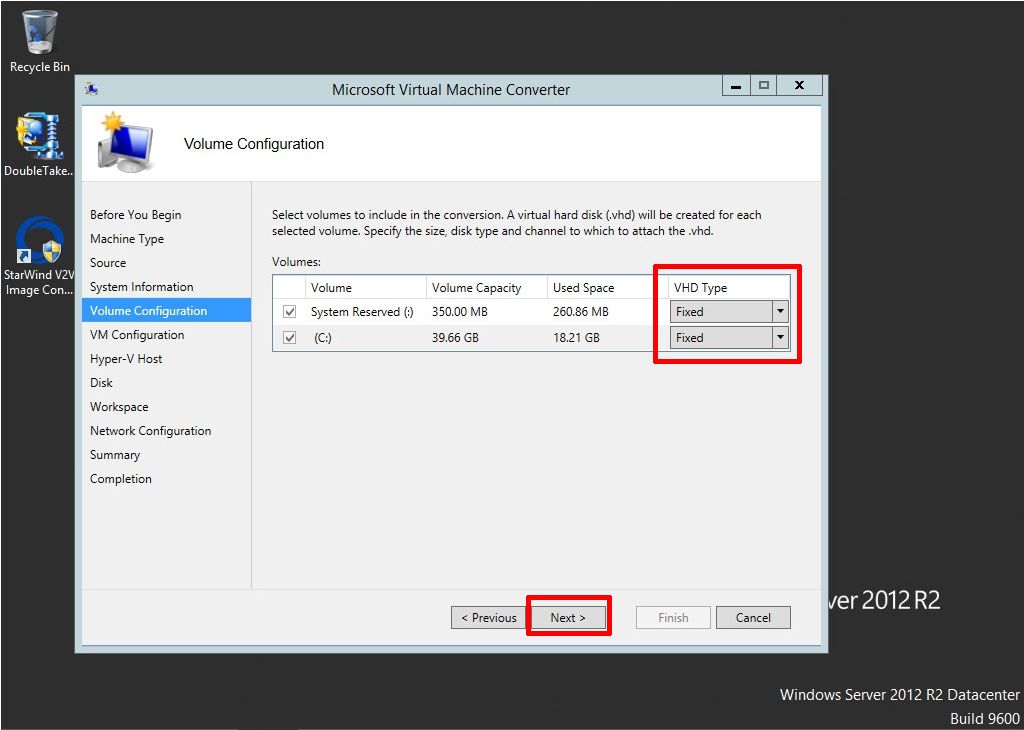
At the Volume Configuration page, select your VHD Type preference, between Dynamic (the default) or Fixed.
![2014-12-09-15-18-40-Greenshot.jpg]()
Select Next to continue.
![2014-12-09-15-19-18-Greenshot.jpg]()
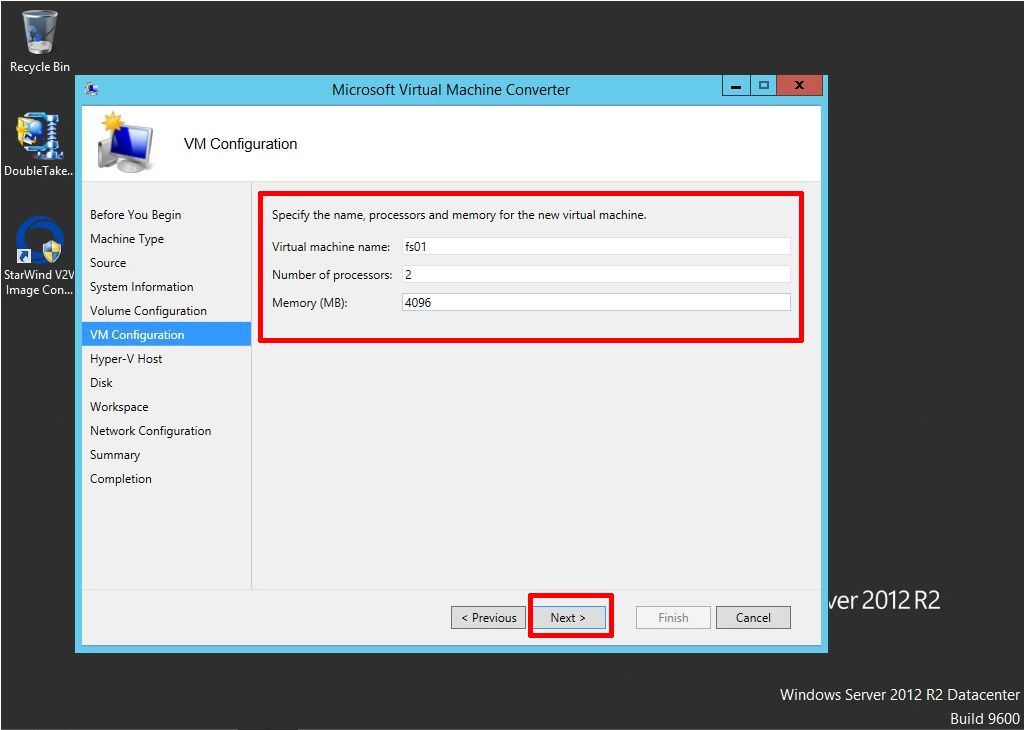
Specify the Virtual machine name as you would like it to appear in the Hyper-V inventory and enter the number of processors and total memory for the virtual machine. Click Next to continue.
![2014-12-09-15-21-58-Greenshot.jpg]()
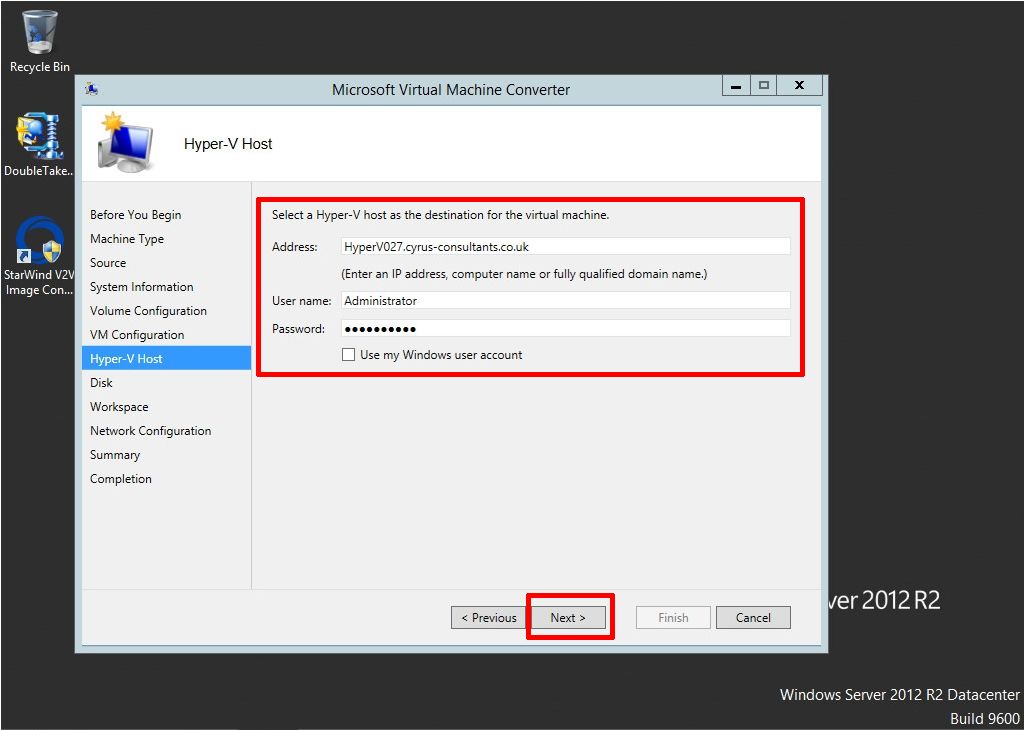
Select a Hyper-V host as the destination for the virtual machine. Enter the
![2014-12-09-15-28-49-Greenshot.jpg]()
Specify a network share on the Hyper-V server. We have created a share on the virtual machine root folder (VMs). Click Next to continue.
![2014-12-09-15-31-50-2014-12-09-15-30-29-]()
Select a location on this machine with enough free space for the converted virtual machine. (This is a temporary location used in the conversion process). Click Next to continue.
![2014-12-09-15-33-48-Greenshot.jpg]()
Select a virtual switch to connect to the virtual machine. Click Next to continue.
![2014-12-09-15-36-58-Greenshot.jpg]()
Check the Final Summary, and click Finish to submit the conversion job.
![2014-12-09-15-39-57-Greenshot.jpg]()
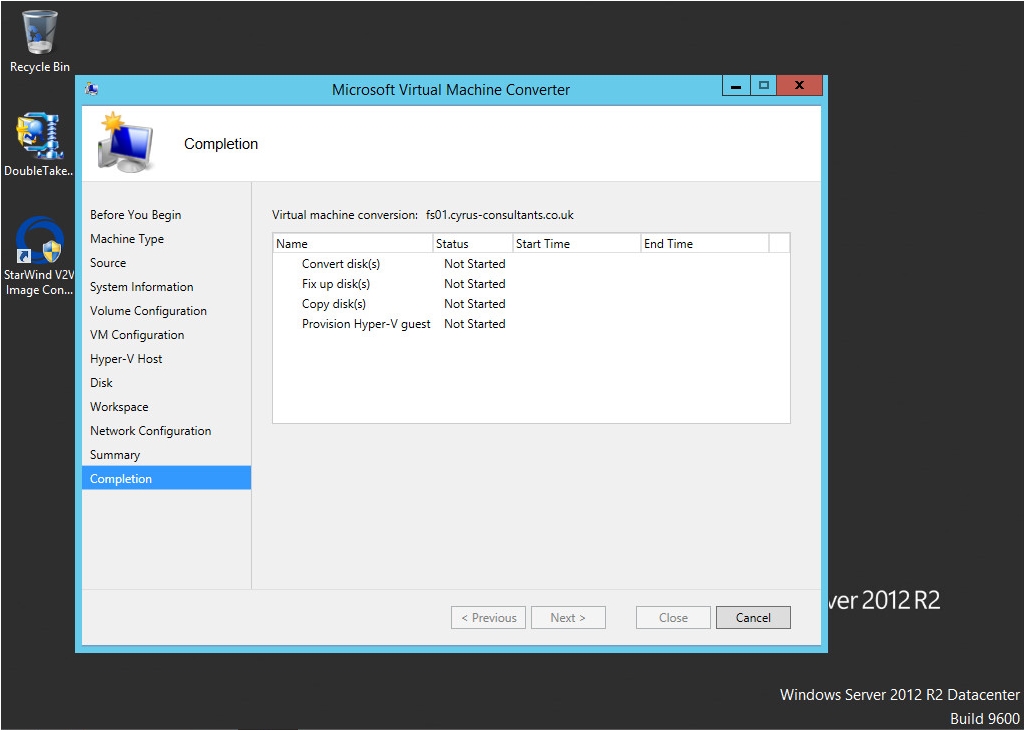
Be patient; grab a coffee whilst the job starts...
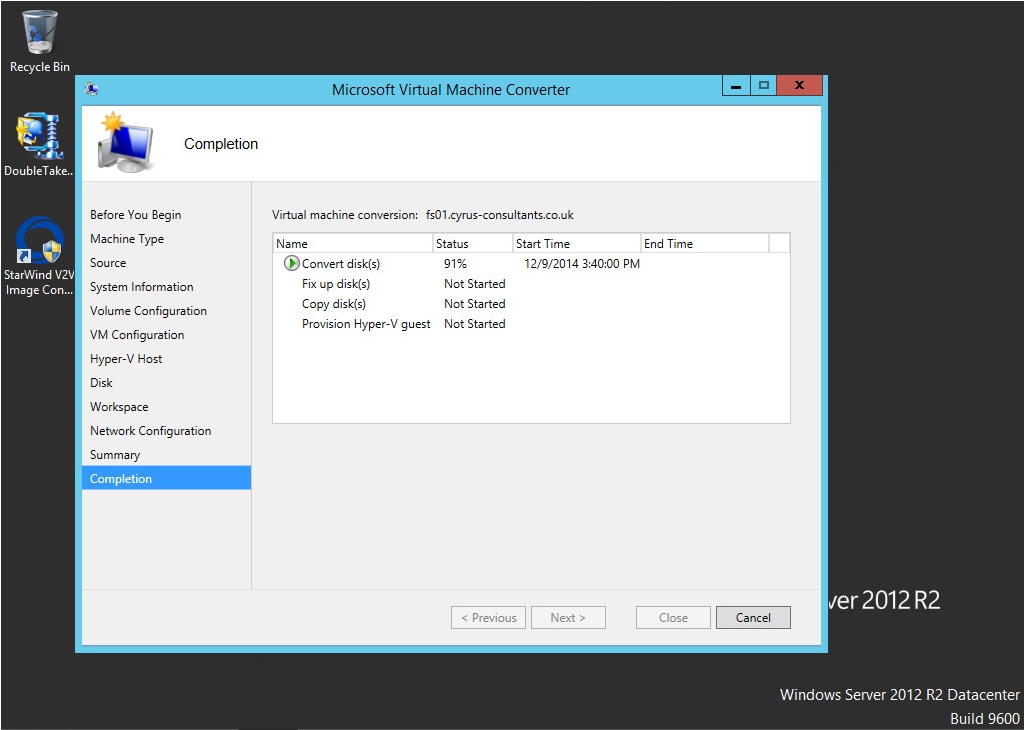
![2014-12-09-15-40-49-Greenshot.jpg]() The conversion job is in progress
The conversion job is in progress
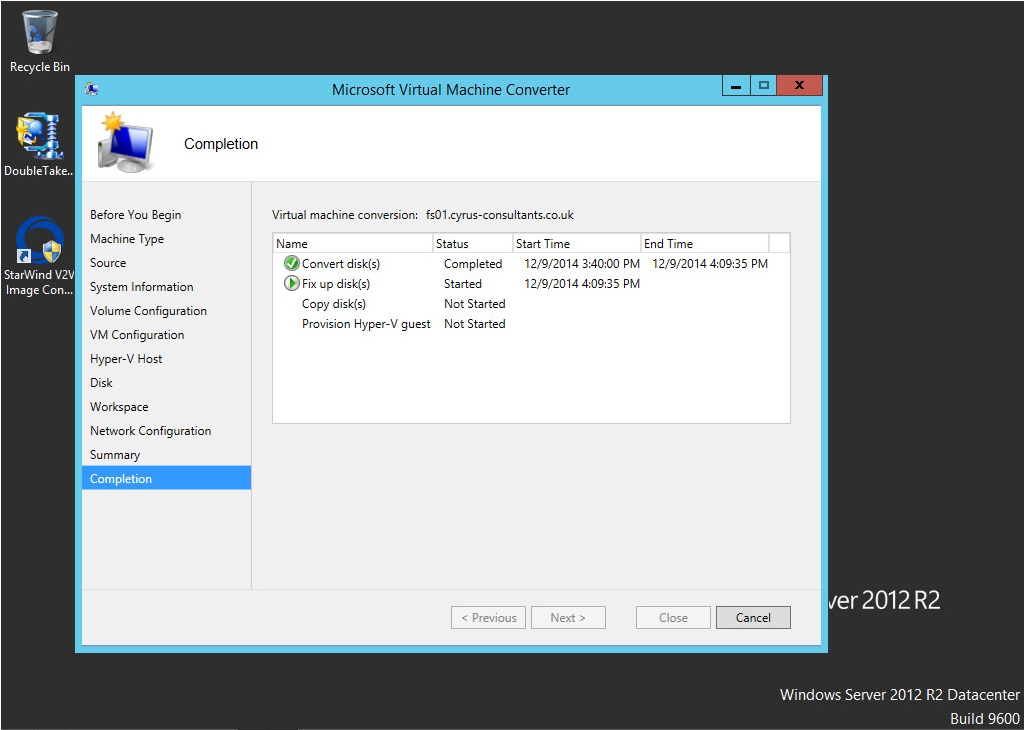
![2014-12-09-16-07-05-Greenshot.jpg]()
The disk conversion has finished, and the disks will be fixed-up.
![2014-12-09-16-09-43-Greenshot.jpg]()
The conversion was successful. The conversion from physical to virtual has taken approx 30 minutes. Click Close.
![2014-12-09-16-11-00-Greenshot.jpg]()
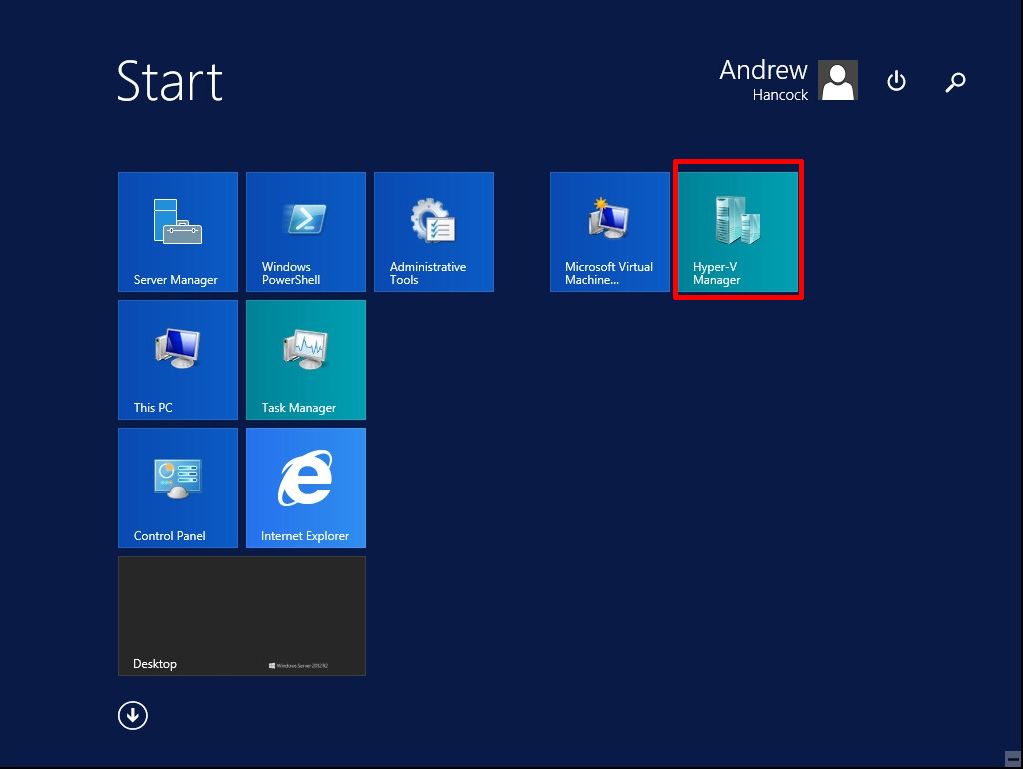
If you click Hyper-V Manager from the Start Menu, you can check and start-up the VM.
![2014-12-09-16-26-12-Greenshot.jpg]()
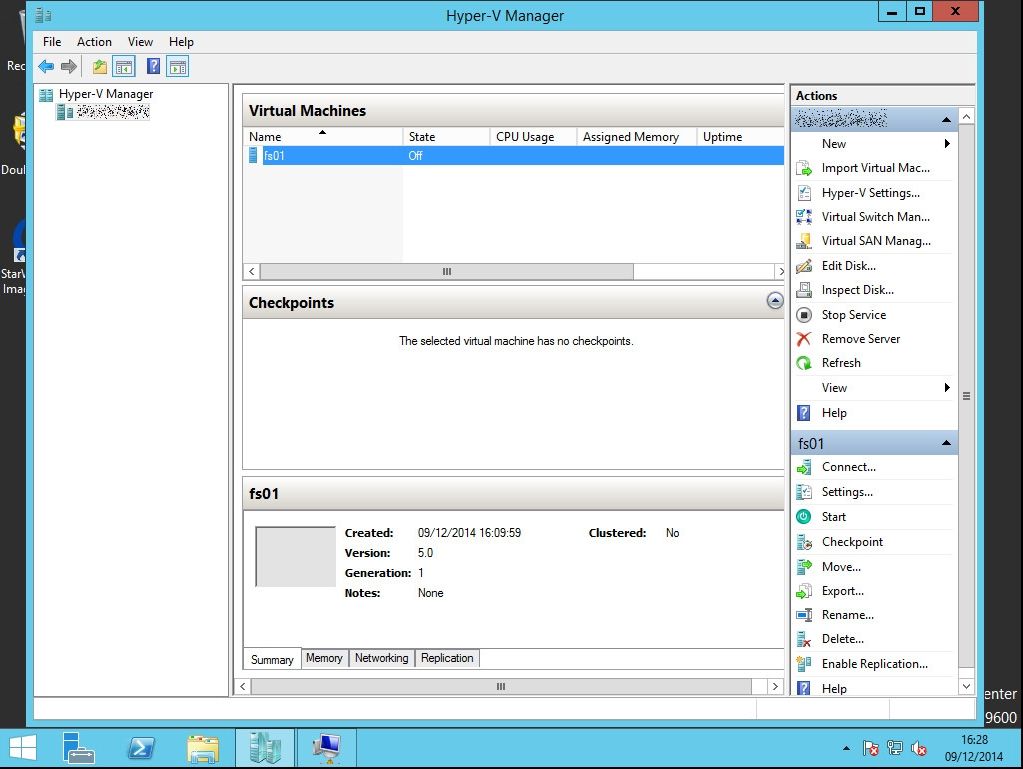
The physical machine which has been converted will be displayed in the Hyper-V inventory. Right Click the Virtual Machine fs01, and select Connect.
![2014-12-09-16-28-34-Greenshot.jpg]()
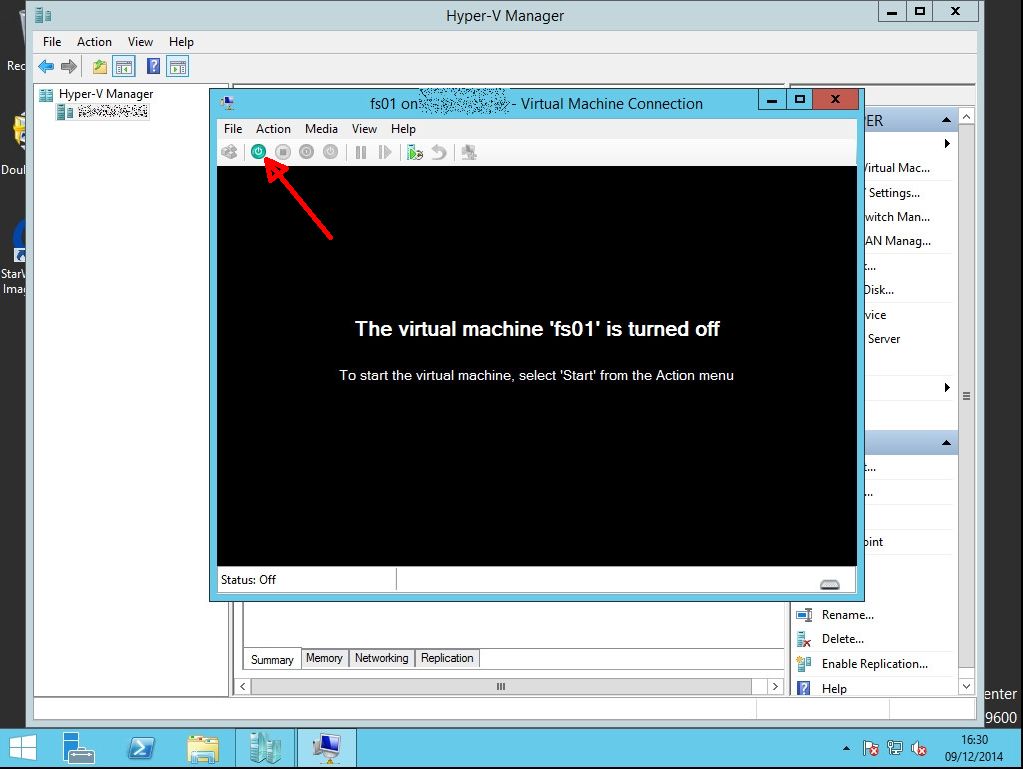
Press the Power On button highlighted to Power On the virtual machine fs01.
![2014-12-09-16-30-59-Greenshot.jpg]()
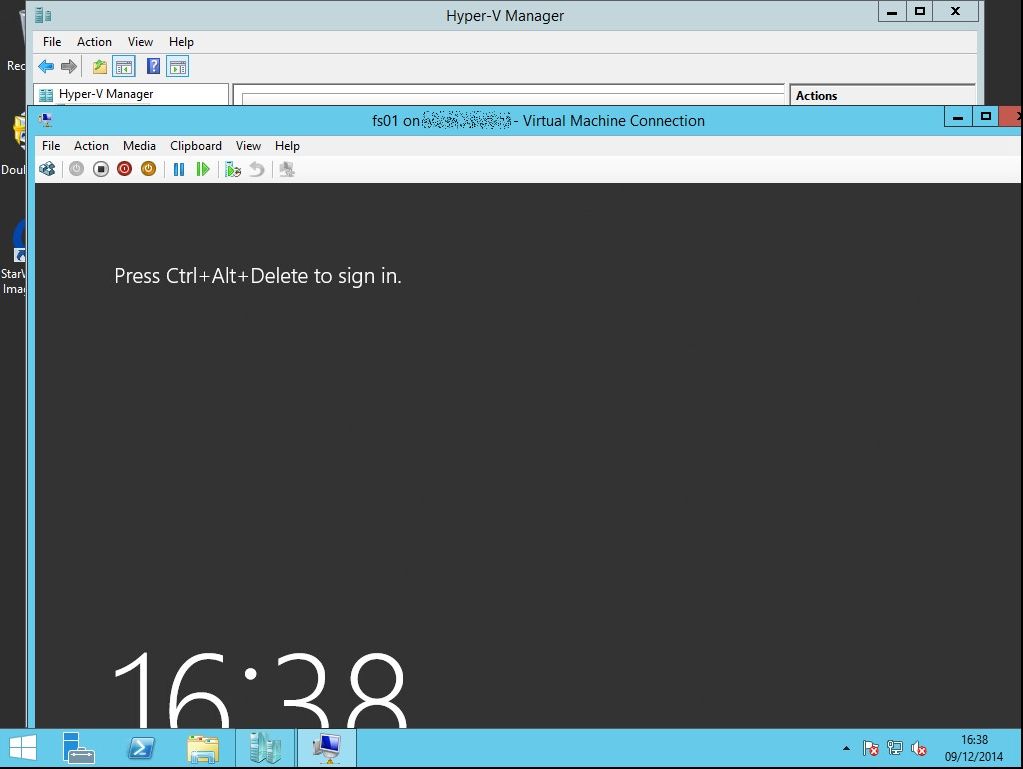
Screenshot of converted physical server fs01, running as a virtual machine hosted on Hyper-V.
![2014-12-09-16-38-02-Greenshot.jpg]()
In the above tutorial we have converted a physical server to Microsoft Hyper-V using Microsoft Virtual Machine Converter 3.1, the same process can be used to convert a virtual machine, by selefting the virtual machine selection at the beginning or the conversion job.
Congratulations, you have successfully converted a physical server to Microsoft Hyper-V using Microsoft Virtual Machine Converter 3.1.
Basic VMware Articles Series:
****************************************************************************
Thank you for reading my article, please leave valuable feedback. If you liked my VMware article and would like to see more Articles from me, please click the Yes button near the: Was this article helpful? at the bottom of this article just below and to the right of this information. Thank You. Do not forget if you have a question about this article or another VMware, Virtualisation, Windows Server 2012 question, why not post a Question for me and the other Experts Exchange Experts in the VMware, Virtualisation, Windows 2008, Windows 2012 Zones. I look forward to hearing from you. - Andy :- twitter @einsteinagogo
****************************************************************************
In this article, I’m going to take time out from writing a Basic VMware Article, and show you HOW TO: Convert a physical server or virtual server (P2V/V2V) to Microsoft Hyper-V using Microsoft Virtual Machine Converter 3.1.
MVMC 3.1 Pre-requisites
- MVMC 3.1 can only be installed on Windows Server 2008 R2 SP1, Windows Server 2012, Windows Server 2012 R2.
- Microsoft .NET Framework 3.5 and .NET Framework 4 installed.
- Background Intelligent Transfer Servers (BITS) installed.
- Feature Bits Compact server installed.

(if the last two features are not installed your conversion will fail, with a root namespace issue!).
The software download links can be found in my previous Experts Exchange article HOW TO: P2V, V2V for FREE to Hyper-V - Microsoft Virtual Machine Converter 3.1.
Install Microsoft Virtual Machine Converter 3.1 on the server taking note of the Pre-requisites above. In this tutorial, we've installed Microsoft Virtual Machine Converter 3.1 on the Microsoft Hyper-V server that will be hosting the converted physical server.
In this tutorial we will convert a small physical file server called FS01, which has 4GB RAM, 2 Processors, 40GB hard disk, and the operating system is Windows Server 2012 R2 Daatcenter.
Start Microsoft Virtual Machine Converter 3.1 from the Start Menu.
Select Yes, to the "Do you want to allow the following program to make changes to this computer?"
At the Microsoft Virtual Machine Converter "Before You Begin Welcome Page" select Next to continue.
In this tutorial we will be completing a Physical machine conversion. So select Physical machine conversion and click Next to continue. If you want to complete a virtual machine conversion, select Virtual machine conversion.
 Select the Source physical machine for conversion, by entering
- IP Address or computer name or fully qualified domain name. (fqdn)
- Username
- Password
TOP TIP No.1 I would recommend using a fully qualified domain name and Local Administrator username and password for the physical machine. It's always advised to have good working DNS for your network infrastructure.
TOP TIP No.2 I would recommend disabling the firewall on Source Physical machine!
Click Scan System at the System Information page, and click Next to continue.
Confirm the System Information is correct, and select Next to continue.

At the Volume Configuration page, select your VHD Type preference, between Dynamic (the default) or Fixed.
Select Next to continue.
Specify the Virtual machine name as you would like it to appear in the Hyper-V inventory and enter the number of processors and total memory for the virtual machine. Click Next to continue.
Select a Hyper-V host as the destination for the virtual machine. Enter the
- IP Address or computer name or fully qualified domain name (FQDN)
- Username
- Password
Specify a network share on the Hyper-V server. We have created a share on the virtual machine root folder (VMs). Click Next to continue.
Select a location on this machine with enough free space for the converted virtual machine. (This is a temporary location used in the conversion process). Click Next to continue.

Select a virtual switch to connect to the virtual machine. Click Next to continue.

Check the Final Summary, and click Finish to submit the conversion job.
Be patient; grab a coffee whilst the job starts...
 The conversion job is in progress
The disk conversion has finished, and the disks will be fixed-up.
The conversion was successful. The conversion from physical to virtual has taken approx 30 minutes. Click Close.

If you click Hyper-V Manager from the Start Menu, you can check and start-up the VM.
The physical machine which has been converted will be displayed in the Hyper-V inventory. Right Click the Virtual Machine fs01, and select Connect.
Press the Power On button highlighted to Power On the virtual machine fs01.
Screenshot of converted physical server fs01, running as a virtual machine hosted on Hyper-V.
In the above tutorial we have converted a physical server to Microsoft Hyper-V using Microsoft Virtual Machine Converter 3.1, the same process can be used to convert a virtual machine, by selefting the virtual machine selection at the beginning or the conversion job.
Congratulations, you have successfully converted a physical server to Microsoft Hyper-V using Microsoft Virtual Machine Converter 3.1.
Basic VMware Articles Series:
- Part 13: HOW TO: Configure basic networking on a VMware vSphere Hypervisor 5.1 (ESXi 5.1) Host Server
**************************
Thank you for reading my article, please leave valuable feedback. If you liked my VMware article and would like to see more Articles from me, please click the Yes button near the: Was this article helpful? at the bottom of this article just below and to the right of this information. Thank You. Do not forget if you have a question about this article or another VMware, Virtualisation, Windows Server 2012 question, why not post a Question for me and the other Experts Exchange Experts in the VMware, Virtualisation, Windows 2008, Windows 2012 Zones. I look forward to hearing from you. - Andy :- twitter @einsteinagogo
**************************
EE Fellow, MVE, Expert of the Year 2021,2017-11, Scribe 2016-2012, Author of the Year 2018-6,2013-2012 VMware vExpert Pro, vExpert 2022-2011
Have a question about something in this article? You can receive help directly from the article author. Sign up for a free trial to get started.
Comments (3)
Commented:
wonderful article
Commented:
How to overcome P2V errors with EFI or UEFI physical machines?
i am getting the following error message : "here are blocking issues for the physical-to-virtual conversion: There is no BCD boot device found in the source machine, noticing that conversion of an EFI boot machine is currently not supported"
Author
Commented:I would encourage you to post a question, and myself of other experts will be glad to assist you with your issue.