Installing and Configure single node Hadoop 2.2.0 on Oracle Linux

Alpesh Patel![]() Solution Architect at TCS (SAFe®Agilist, TOGAF® Foundation, PSM I®, MCP, MCSD)
Solution Architect at TCS (SAFe®Agilist, TOGAF® Foundation, PSM I®, MCP, MCSD)
 Solution Architect at TCS (SAFe®Agilist, TOGAF® Foundation, PSM I®, MCP, MCSD)
CERTIFIED EXPERT
Published:
Browse All Articles > Installing and Configure single node Hadoop 2.2.0 on Oracle Linux
Hello All,
In previous article we used Hortonworks sandbox to work with Hadoop. Now, lets think to create own single node Hadoop on Linux. Here we Install and Configure Apache Hadoop on UI based Oracle Linux.
I assume, you have VMware installed in your system so, As a first step download Oracle linux and follow steps to install it on VM.
Hope, you have installed Linux on VMware workstation. Now time to Install and Configure Hadoop on it.
Before Installing Hadoop you needs to be installed some prerequisites.
![JDK-Install.PNG]()
![JDK-Install2.PNG]()
![KUser1.PNG]()
![KUser2.PNG]()
Login with dedicate hadoop user and follow the steps:
SSH is required to communicate with other node of Hadoop.
To do that RUN command ssh-keygen -t rsa -P "" in terminal with newly created user and follow steps.
It will ask to provide the file name in which to save the key, you just press enter so it will generate the key at ‘/home/dedicatedhadoopuser/ .ssh’ default path.
Enable SSH access to your local machine with this newly created key RUN command in terminal
cat $HOME/.ssh/id_rsa.pub >> $HOME/.ssh/authorized_keys
The final step is to test the SSH setup by connecting to your local machine with the dedicated hadoop user. RUN command in terminal
ssh dedicatedhadoopuser@localhost
This will add localhost permanently to the list of known hosts
Open "/" root folder and goto path "/etc/" and open "sysctl.conf" file in gedit
At last add below text save and close.
Install Hadoop
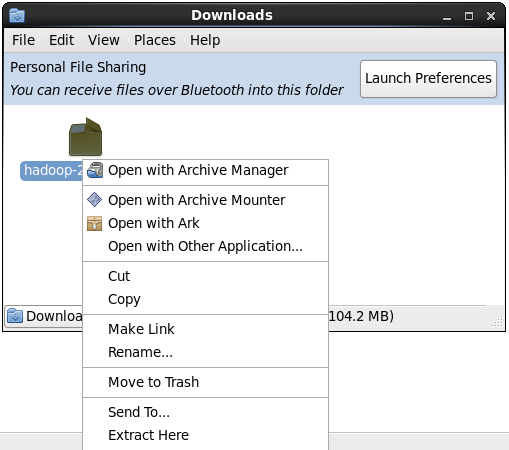
Now we are ready to install Hadoop. Please get it from here. Now extract file "hadoop-2.2..tar.gz" with "Extract Here" option
![HadoopExtract.PNG]()
Create new folder "hadoop" to "/usr/local" and copy content of extracted folder to location.
Login to terminal with root user and run Below command to give access to hadoop folder to dedicated hadoop user.
Congrated! we have completed one task of Installation.
Configure Hadoop
As a configuration steps we have to create/update below files:
Files 1 to 4 are available at "/usr/local/hadoop/etc/hadoop" folder, open it with gedit and last one is in root folder.
Note: If files are not exists then create it.
We have configured Hadoop. Now we have to format node to use it and start service.
To format run hadoop namenode -format command in terminal. make sure you are at path "/usr/local/hadoop/bin".
Now are are ready to start all services. run start-all.sh command to terminal. It will start all dependant services of Hadoop.
I think you all are thinking how to check running services. No problem go to browser and check below urls:
1. http://localhost:50070
2. http://localhost:50090 Congrats! now you have installed and Configure Hadoop on Linux.
Note: Follow same step 3 to Download and Install JDBC driver for SQL Server in previous article.
In previous article we used Hortonworks sandbox to work with Hadoop. Now, lets think to create own single node Hadoop on Linux. Here we Install and Configure Apache Hadoop on UI based Oracle Linux.
I assume, you have VMware installed in your system so, As a first step download Oracle linux and follow steps to install it on VM.
Hope, you have installed Linux on VMware workstation. Now time to Install and Configure Hadoop on it.
Before Installing Hadoop you needs to be installed some prerequisites.
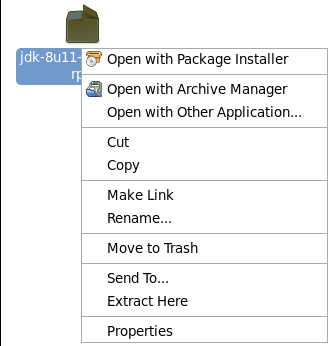
- Installing Java
Downaload Java jdk rpm file
What this installer do? It will install requied binaries to specifica location and set Java Home path as well. So no need to do it manually. To Install it follow the friendly steps.
What this installer do? It will install requied binaries to specifica location and set Java Home path as well. So no need to do it manually. To Install it follow the friendly steps.

If you wish to check version of installed java then run "java -version" command in terminal.
![javaversion.PNG]()

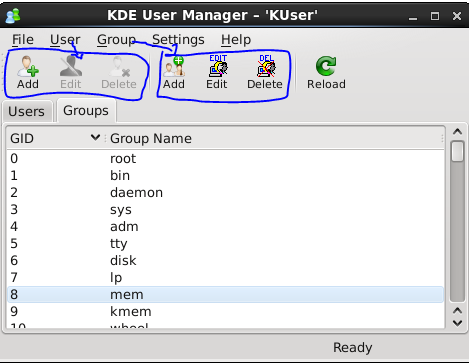
- Adding dedicated Hadoop system user.
In linux there is application KUser to create users and groups with mapping of both.

- Configuring SSH access.
Login with dedicate hadoop user and follow the steps:
SSH is required to communicate with other node of Hadoop.
To do that RUN command ssh-keygen -t rsa -P "" in terminal with newly created user and follow steps.
It will ask to provide the file name in which to save the key, you just press enter so it will generate the key at ‘/home/dedicatedhadoopuser
Enable SSH access to your local machine with this newly created key RUN command in terminal
cat $HOME/.ssh/id_rsa.pub >> $HOME/.ssh/authorized_keys
The final step is to test the SSH setup by connecting to your local machine with the dedicated hadoop user. RUN command in terminal
ssh dedicatedhadoopuser@localh
This will add localhost permanently to the list of known hosts
- Disabling IPv6.
Open "/" root folder and goto path "/etc/" and open "sysctl.conf" file in gedit
At last add below text save and close.
#disable ipv6
                      net.ipv6.conf.all.disable_ipv6 = 1
                      net.ipv6.conf.default.disable_ipv6 = 1
net.ipv6.conf.lo.disable_ipv6 = 1Now we are ready to install Hadoop. Please get it from here. Now extract file "hadoop-2.2..tar.gz" with "Extract Here" option
Create new folder "hadoop" to "/usr/local" and copy content of extracted folder to location.
Login to terminal with root user and run Below command to give access to hadoop folder to dedicated hadoop user.
sudo chown -R dedicatedhadoopuser:hadoop HadoopCongrated! we have completed one task of Installation.
Configure Hadoop
As a configuration steps we have to create/update below files:
Files 1 to 4 are available at "/usr/local/hadoop/etc/had
Note: If files are not exists then create it.
1. yarn-site.xml
At last copy below line
2. core-site.xml
At last copy below line
3. mapred-site.xml
At last copy below line
4. hdfs-site.xml
At last copy below line
Make sure namenode and datanode directories are created.
5. bashrc
At last copy below line
<configuration>
                      <property>
                      <name>yarn.nodemanager.aux-services</name>
                      <value>mapreduce_shuffle</value>
                      </property>
                      <property>
                      <name>yarn.nodemanager.aux-services.mapreduce.shuffle.class</name>
                      <value>org.apache.hadoop.mapred.ShuffleHandler</value>
                      </property>
</configuration>2. core-site.xml
At last copy below line
<configuration>
                      <property>
                      <name>fs.default.name</name>
                      <value>hdfs://localhost:9000</value>
                      </property>
</configuration>3. mapred-site.xml
At last copy below line
<configuration>
                      <property>
                      <name>mapreduce.framework.name</name>
                      <value>yarn</value>
                      </property>
</configuration>4. hdfs-site.xml
At last copy below line
<configuration>
                      <property>
                      <name>dfs.replication</name>
                      <value>1</value>
                      </property>
                      <property>
                      <name>dfs.namenode.name.dir</name>
                      <value>file:/usr/local/hadoop/yarn_data/hdfs/namenode</value>
                      </property>
                      <property>
                      <name>dfs.datanode.data.dir</name>
                      <value>file:/usr/local/hadoop/yarn_data/hdfs/datanode</value>
                      </property>
</configuration>Make sure namenode and datanode directories are created.
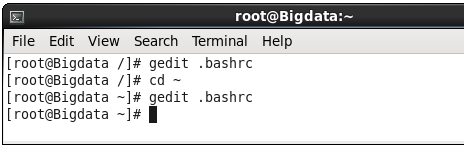
5. bashrc
open bashrc file using below command. It will open a file in editor.
![bashrc.PNG]() Configure paths, save and close file.
Configure paths, save and close file.
Now time to restart VM.
 Configure paths, save and close file.
# Set Hadoop-related environment variables

                      export HADOOP_PREFIX=/usr/local/hadoop
                      export HADOOP_HOME=/usr/local/hadoop
                      export HADOOP_MAPRED_HOME=${HADOOP_HOME}
                      export HADOOP_COMMON_HOME=${HADOOP_HOME}
                      export HADOOP_HDFS_HOME=${HADOOP_HOME}
                      export YARN_HOME=${HADOOP_HOME}
                      export HADOOP_CONF_DIR=${HADOOP_HOME}/etc/hadoop

                      # Native Path
                      export HADOOP_COMMON_LIB_NATIVE_DIR=${HADOOP_PREFIX}/lib/native
                      export HADOOP_OPTS="-Djava.library.path=$HADOOP_PREFIX/lib"

                      #Java path
                      export JAVA_HOME='/usr/local/Java'

                      # Add Hadoop bin/ directory to PATH
export PATH=$PATH:$HADOOP_HOME/bin:$JAVA_HOME/bin:$HADOOP_HOME/sbinNow time to restart VM.
We have configured Hadoop. Now we have to format node to use it and start service.
To format run hadoop namenode -format command in terminal. make sure you are at path "/usr/local/hadoop/bin".
Now are are ready to start all services. run start-all.sh command to terminal. It will start all dependant services of Hadoop.
I think you all are thinking how to check running services. No problem go to browser and check below urls:
1. http://localhost:50070
2. http://localhost:50090
Note: Follow same step 3 to Download and Install JDBC driver for SQL Server in previous article.
Have a question about something in this article? You can receive help directly from the article author. Sign up for a free trial to get started.
Comments (2)
Author
Commented:I think you have not read article carefully and precisely. You have check article contains screen shots and wordings are totally different. However, always some commands are common. If you think those are copied then I can't do anything.
Hope you read it again.
Thanks,
Alpesh
Author
Commented:Resolution:
You have to make entry in hosts file at /etc/hosts
Open in new window
Now check you hostname (are you getting IP address or not) by below command.
Open in new window
If you get Unknow host then you have to do more configuration in network file.
Make hostname entry to network file at /etc/sysconfig/network
Open in new window
Now reboot system.
Congrats! problem resolved.