Creating an Interactive PDF using the Digital Publishing Suite in InDesign


Web developer and designer skilled at creating beautiful web applications.
Published:
Browse All Articles > Creating an Interactive PDF using the Digital Publishing Suite in InDesign
You can download the files for this tutorial here. The .indd file in the InDesign files folder is a finished version of the file; you can start from scratch and work toward this. Also, you need to install the Adobe Content Viewer app to view on tablets. Just open the .folio file with the program.
This is an overview of the Digital Publishing Suite (DPS) tools in InDesign. With them, you can make interactive PDFs that can be viewed on iPads, Kindle Fire/Nook and Android tablets. I have included an example file that I made in InDesign.
This tutorial assumes that you have some experience with other Adobe programs like InDesign, Illustrator and Photoshop. If you do not know much about InDesign, don’t worry! This tutorial will go over each part in the process step-by-step. For more InDesign and DPS help, check out the official documentation on Adobe’s help site.
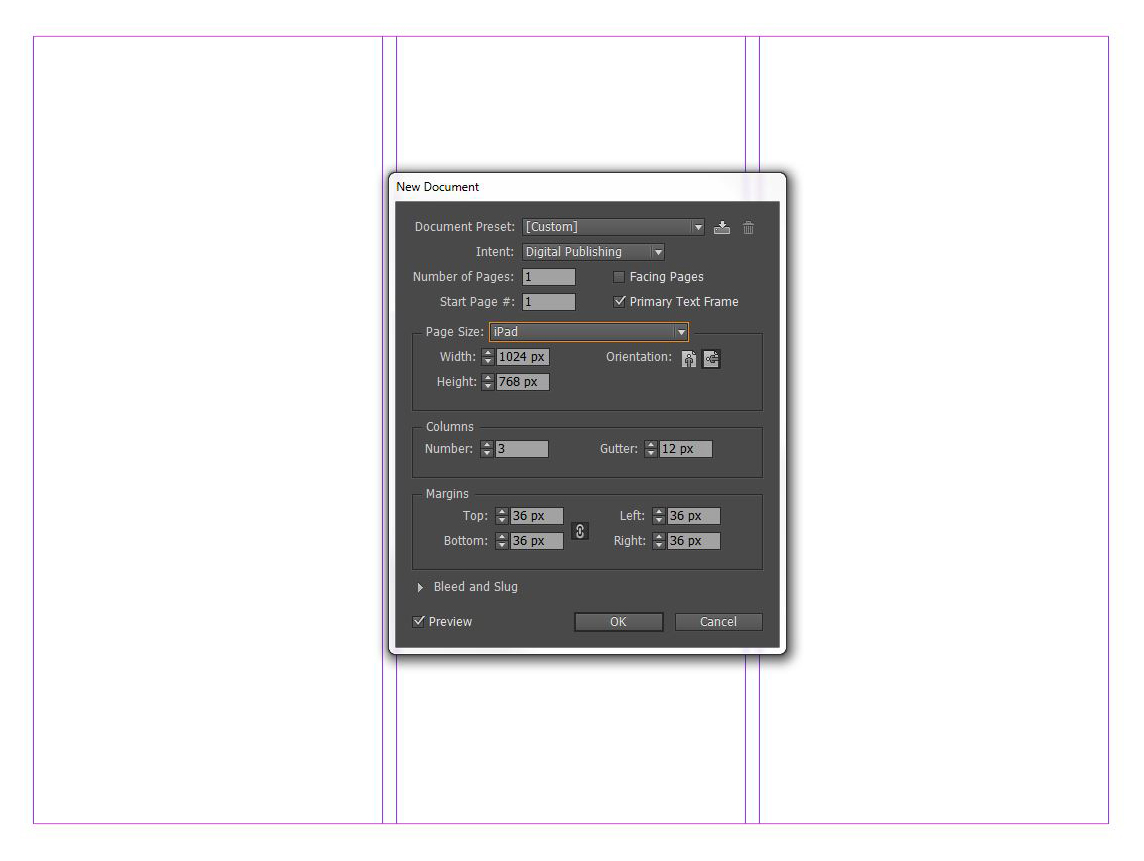
When you create your file, make sure that you select Digital Publishing from the Intent drop down menu. I choose the iPad preset for the page size, for simplicity’s sake. The rest of the settings are just fine, though I usually like to have some page margin and I like to work with a three- or five-column layout.
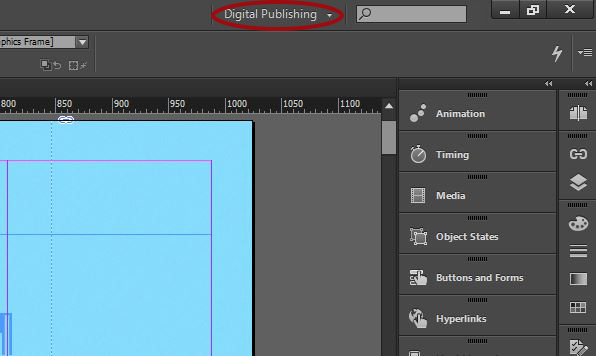
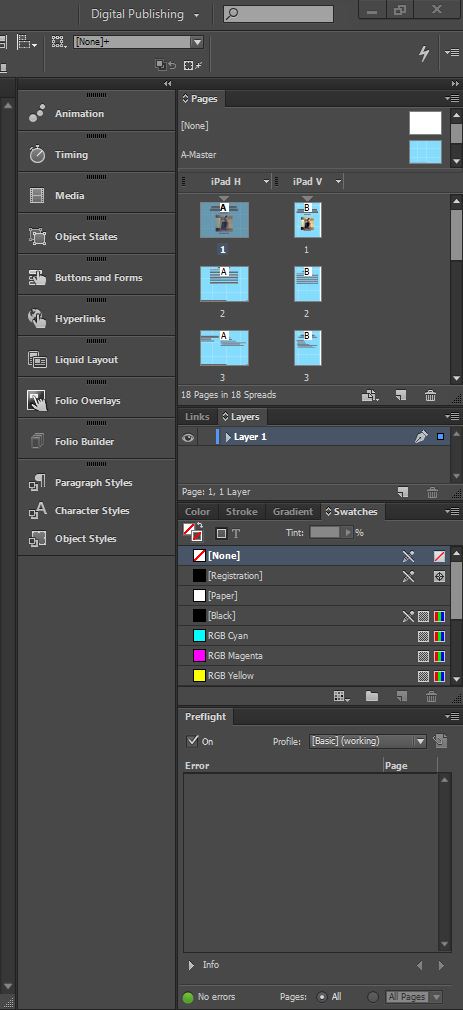
![doc-setup.JPG]() You should now switch to the Digital Publishing layout so that you can quickly and easily use the various tools. I also find it useful to open the Paragraph Styles, Character Styles and Object Styles panels.
You should now switch to the Digital Publishing layout so that you can quickly and easily use the various tools. I also find it useful to open the Paragraph Styles, Character Styles and Object Styles panels.
![tool-bar.jpg]()
![side-panel.JPG]()
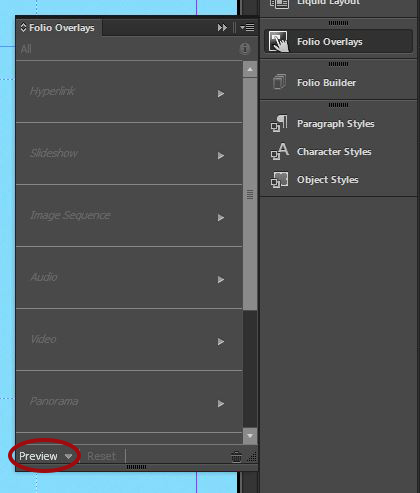
You can preview your work at any time using the Folio Overlays panel. In the bottom left corner, you should see a button that says Preview. When you click on this, you will see a flyout menu that says Preview on Desktop; it may take a couple seconds for the menu to appear, so just be patient. If you have an iPad connected with the Adobe Content Viewer app open, you should also see an option to preview on your iPad.
![preview-button.JPG]()
These are the tools that I use most often:
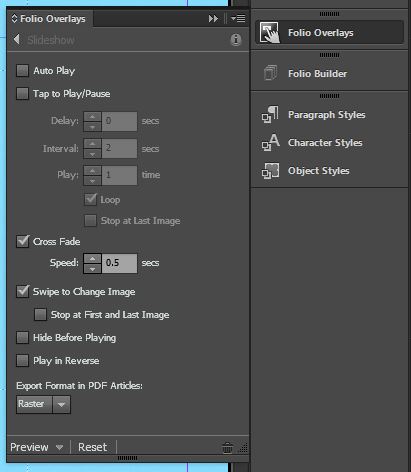
![object-states.JPG]() You should now be able to modify your groovy new multi-state object as you need. For example, to make a slideshow, open the Folio Overlays panel and it should automatically show you the options for a slideshow. On this view, you can adjust the timing, set a delay and add interactivity.
You should now be able to modify your groovy new multi-state object as you need. For example, to make a slideshow, open the Folio Overlays panel and it should automatically show you the options for a slideshow. On this view, you can adjust the timing, set a delay and add interactivity.
![slide-show-settings.JPG]()
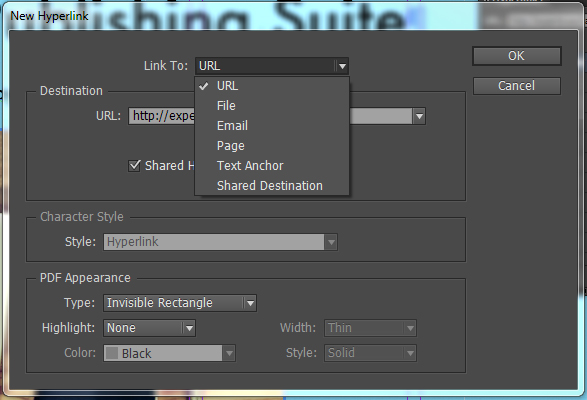
![new-hyperlink-window.JPG]()
That’s a look at how to use the DPS in InDesign to create an interactive PDF. For some more tips and goodies, go ahead and download the example file here.
I hope this has been helpful to you.
Introduction
This is an overview of the Digital Publishing Suite (DPS) tools in InDesign. With them, you can make interactive PDFs that can be viewed on iPads, Kindle Fire/Nook and Android tablets. I have included an example file that I made in InDesign.
This tutorial assumes that you have some experience with other Adobe programs like InDesign, Illustrator and Photoshop. If you do not know much about InDesign, don’t worry! This tutorial will go over each part in the process step-by-step. For more InDesign and DPS help, check out the official documentation on Adobe’s help site.
Setting Up Your File
When you create your file, make sure that you select Digital Publishing from the Intent drop down menu. I choose the iPad preset for the page size, for simplicity’s sake. The rest of the settings are just fine, though I usually like to have some page margin and I like to work with a three- or five-column layout.
 You should now switch to the Digital Publishing layout so that you can quickly and easily use the various tools. I also find it useful to open the Paragraph Styles, Character Styles and Object Styles panels.
Previewing Your Document
You can preview your work at any time using the Folio Overlays panel. In the bottom left corner, you should see a button that says Preview. When you click on this, you will see a flyout menu that says Preview on Desktop; it may take a couple seconds for the menu to appear, so just be patient. If you have an iPad connected with the Adobe Content Viewer app open, you should also see an option to preview on your iPad.
Tools to Use
These are the tools that I use most often:
Object States
Use this to create and modify multi-state objects. Multi-state objects can be used to achieve many different effects, like slideshows and animations. Here’s the basic workflow:- Place your content (Cmd + D; Ctrl + D)
- Select all the content
- Open the Object States panel and click the Convert selection to multi-state object button
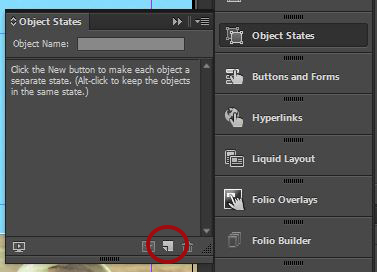 You should now be able to modify your groovy new multi-state object as you need. For example, to make a slideshow, open the Folio Overlays panel and it should automatically show you the options for a slideshow. On this view, you can adjust the timing, set a delay and add interactivity.
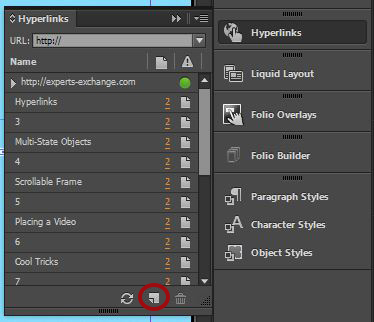
Hyperlinks
Use this to create and modify hyperlinks for text and graphics. This is how they work:- Select content you wish to make into a hyperlink (text, shapes or placed graphics)
- Open the Hyperlinks panel and click on the “Create new hyperlink” button
![hyperlinks-panel.JPG]()
- In the window that appears, select from the drop down menu at the top how you would like it to link (For example, you can link to a URL, send an email, link to another document or jump to another page)
Folio Overlays
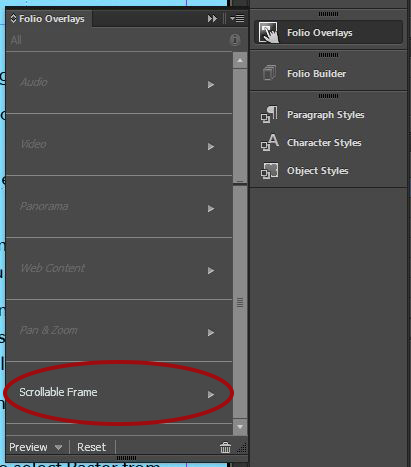
This panel is quite versatile. It essentially contains all the options you could ever need to modify the components in your document. You also use it to convert components to various interactive objects. For instance, use this to create scrollable frames or to adjust the timing of multi-state objects. Here’s a quick demo on how to make a scrollable graphic frame:- Use the Rectangle Frame Tool to create the frame that your graphic will sit in
- Select the frame and place your graphics (Cmd + D; Ctrl + D) (This will insert your graphics at their full size, which will be cut off by the frame)
- Open the Folio Overlays panel and select the Scrollable Frame option
![folio-overlay-scroll-frame.JPG]()
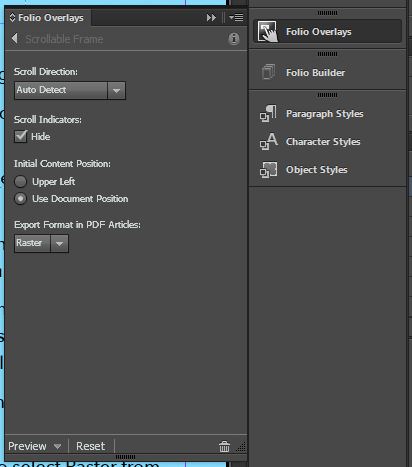
- Set the Scroll Direction to Auto Detect, make sure Hide is checked under Scroll Indicators, select Use Document Position under Initial Content Position and select Raster under Export Format in PDF Articles
![scroll-frame-settings.JPG]()
Conclusion
That’s a look at how to use the DPS in InDesign to create an interactive PDF. For some more tips and goodies, go ahead and download the example file here.
I hope this has been helpful to you.
Web developer and designer skilled at creating beautiful web applications.
Have a question about something in this article? You can receive help directly from the article author. Sign up for a free trial to get started.
Comments (0)