
Browse All Articles > Pimping Sharepoint without Server Side Code
Pimping Sharepoint 2007 without Server-Side Code
Part 1
One of my biggest frustrations with Sharepoint 2007 in the corporate world is that while good-intentioned managers lock down the more interesting capabilities of Sharepoint programming in the name of sustainable code, they often kill innovation in the process. Over the last several years, I have had the opportunity to find ways around this strict no-code policy to achieve a user experience that is reasonable while getting all the benefits of Sharepoint 2007.
In this series, I will show you how I have leveraged the existing infrastructure of Sharepoint along with the out-of-the-box Content Editor Web Part and jquery to give Sharepoint a much nicer look and feel, users more natural access to the data, and ultimately design freedom within the walls of a Sharepoint installation.
I will be making a lot of assumptions about the reader’s experience with Sharepoint and jquery. You should be able to make and manage lists, created libraries, and all the other “normal” Sharepoint administrative tasks that occur through the interface. You should also have a pretty strong working knowledge of the jquery core. If neither of those are in your wheelhouse, this article might not be for you.
Getting Started
You must have Sharepoint 2007 installed and have Full Control on a site collection. If neither of these is true, stop reading now. The rest of this article won’t matter to you.
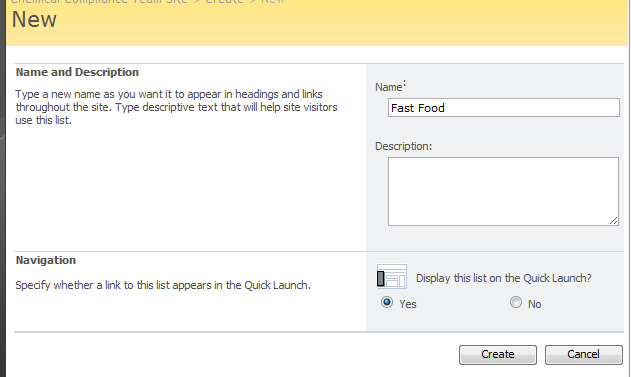
We’re going to be working with some pretty simple concepts at first. For now, let’s create a Custom List in Sharepoint. We’ll call it Fast Food. This will be a simple list of Fast Food restaurants. We’ll add a few columns to this list just to keep things interesting.
![Create List]()
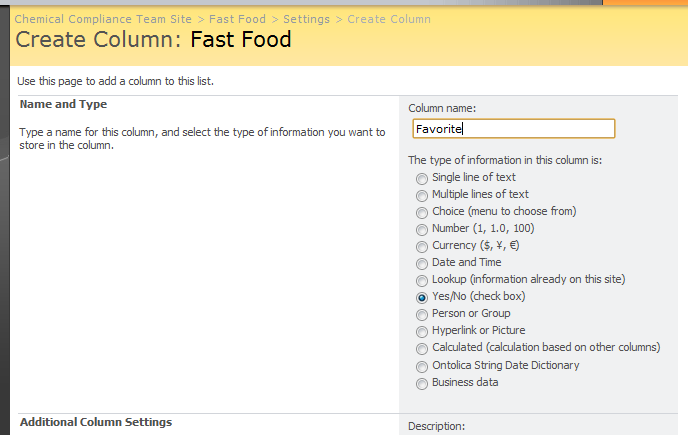
Go to Settings > List Settings > Create Column and create a Yes/No column called Favorite.
![Create custom List element]()
This will do for now. Let’s add a couple restaurants and take a look at the default view.
You should have a list page that looks something like this.
![our List]()
Creating a Content Page
Now that we have a little infrastructure, let’s create a Content page that we will actually use to interact with this list. As the name suggests, we are not going to use any of the “standard” Sharepoint methods of interactive with this list. Instead, we will be building a fully custom data view and editor. Certainly this example is trivial, but we’ll start ramping up the complexity as we go along.
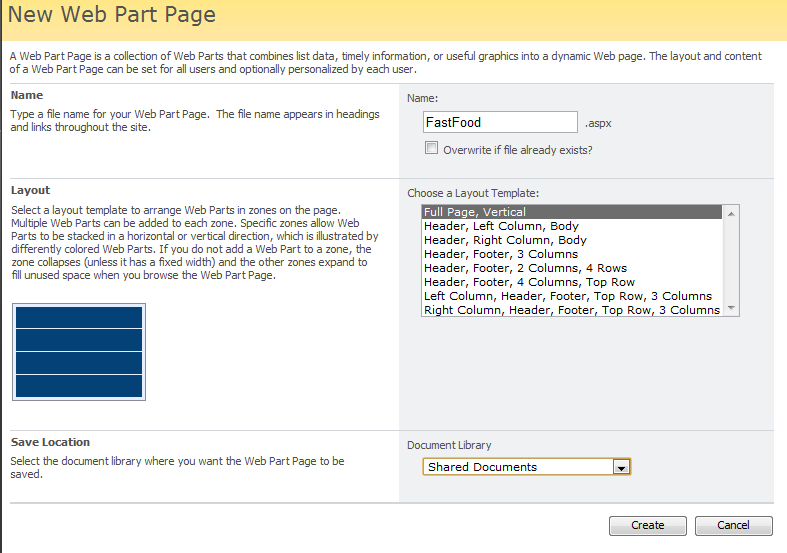
Under Site Actions in the base page of your Site Collection, select Create > Web Pages > Web Part Page > Full Page Vertical. We’ll call it FastFood. Choose to save it in your Shared Documents list.
![Create a blank Web Part Page]()
Add a Content Editor Web Part (CEWP)
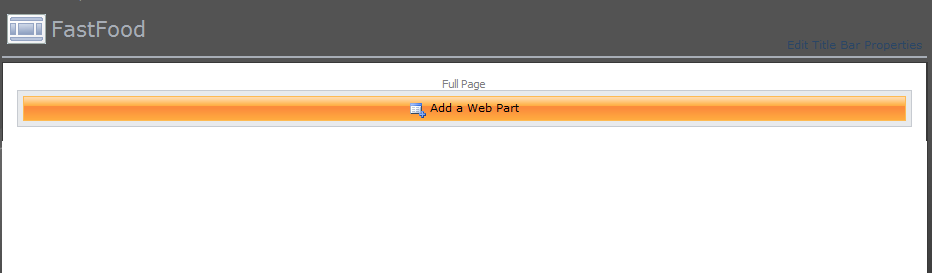
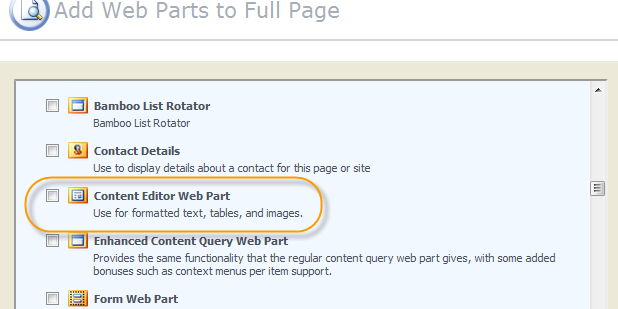
All of the work of our customization is eventually going to be saved in this Content Editor Web Part. So, let’s create one on the page. Click the Add a Web Part control and select the Custom Editor Web Part.
![Add a Custom Web Part]()
![Select Custom Web Part]()
Adding Jquery
Nothing of interest is going to happen until we hook up our new page with Jquery. There are a lot of way to handle this, but I’m going to take the most straight-forward approach and include the library in a script tag at the top of the CEWP. Copy and paste the code below into your CEWP Source Editor to confirm that you are getting Jquery properly. Do not use the Rich Text Editor.
![Adding Jquery]()
If you’ve done this properly then you should get an alert as soon as the CEWP is saved. Yeah, you’ll want to kill that alert right away – it will be quite annoying. In fact, for troubleshooting I exclusively use console.log() and F12 developer tools (available in IE, FireFox, Chrome).
![Test Jquery]()
Adding some simple HTML
You are of course free to add as many CEWP’s to the page as you like. And in fact you may want to use one of the columnar templates offered by Sharepoint and put them all over the page. Since we chose for this example a single page, I will be putting everything in one CEWP and use styles to organize the page. So, let’s get to it and add a heading and a blank list object.
Copy and paste the following directly below your Jquery include and (document).ready() section.
![Adding some HTML]()
Fetching the List Data
Now we get down to the good stuff. We are going to take advantage of Sharepoint’s built in “owssvr.dll”. This little beauty is native to Sharepoint 2007, is included with all site collections, is a part of core Sharepoint methods (that is – Sharepoint uses it itself), and therefore should be considered a stable way of working. To be more specific, this .dll can be accessed like this:
where MySite is where our Fast Food list lives.
To use this .dll we are going to be building a query string, sending it to the server via jquery’s $.get() method, retrieving the XML response, and parsing the values to display them for mere mortals through HTML.
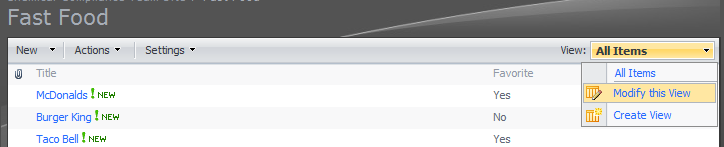
Before we can do any of that, we need to know the ID of the list we created and the default view that was created for the list as well. There is an easy way to get this information. Go to your Fast Food list and choose Modify this View (on the right-side drop-down menu).
![Finding your IDs]()
Now, take a look at the URI at the top. If you cursor just past the .aspx portion, you will see the List=, and View= designation. Mine looks like this:
List=%7BB761EFB2%2D93FC%2D41F1%2D8AEC%2D433EB56339C2%7D&View=%7B99793BF3%2DCECC%2D4868%2DB1F3%2D14AC627EB66D%7D
These are simply two GUIDs. %7B = “{“, %7D = “}”, and %2D = “-“. So, the above could be expressed like this:
List={B761EFB2-93FC-41F1-8AEC-433EB56339C2}
View={99793BF3-CECC-4868-B1F3-14AC627EB66D}
Now that we know our List ID’s and the View ID, we can test out our owssvr.dll by pasting the following in a browser address box:
If you have done everything properly, you should see the following:
![List Raw XML]()
Notice that this will give us keen insight in to the guts of our Sharepoint list. We now know the name of the fields we created – at least what Sharepoint calls them. We have ows_Favorite and ows_LinkTitle. This is what we will use when referring to the values in our jquery to extract the “data” we just got.
Setting up the $.get()
Now we are ready to get our data using jquery’s built-in ajax shorthand - $.get(). You can of course use the full $.ajax() method, but for our purposes, $.get() will work just fine. Here is the code.
Notice how we were able to pick off the data from the <rs:data> row. It’s a short putt now to displaying that data in a list. Just replace the console.log line with a line to fill up our <ul> with the ID=List:
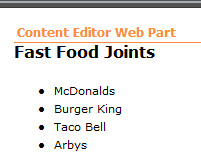
And we get:
![Final Result]()
Summary
That’s where I’ll stop for Part 1. We have just started down the rabbit hole. If there is enough interest I’ll continue with more advanced methods like Adding, Editing, and Deleting. I’ll also share some of the best-methods I’ve come up with for keeping all this hacked-together code in some semblance of order. The techniques in this post are really just a proof of concept. Once you know how to get your hands on the data, there really is no limit to the complexity you can employ.
Part 1
One of my biggest frustrations with Sharepoint 2007 in the corporate world is that while good-intentioned managers lock down the more interesting capabilities of Sharepoint programming in the name of sustainable code, they often kill innovation in the process. Over the last several years, I have had the opportunity to find ways around this strict no-code policy to achieve a user experience that is reasonable while getting all the benefits of Sharepoint 2007.
In this series, I will show you how I have leveraged the existing infrastructure of Sharepoint along with the out-of-the-box Content Editor Web Part and jquery to give Sharepoint a much nicer look and feel, users more natural access to the data, and ultimately design freedom within the walls of a Sharepoint installation.
I will be making a lot of assumptions about the reader’s experience with Sharepoint and jquery. You should be able to make and manage lists, created libraries, and all the other “normal” Sharepoint administrative tasks that occur through the interface. You should also have a pretty strong working knowledge of the jquery core. If neither of those are in your wheelhouse, this article might not be for you.
Getting Started
You must have Sharepoint 2007 installed and have Full Control on a site collection. If neither of these is true, stop reading now. The rest of this article won’t matter to you.
We’re going to be working with some pretty simple concepts at first. For now, let’s create a Custom List in Sharepoint. We’ll call it Fast Food. This will be a simple list of Fast Food restaurants. We’ll add a few columns to this list just to keep things interesting.
Go to Settings > List Settings > Create Column and create a Yes/No column called Favorite.
This will do for now. Let’s add a couple restaurants and take a look at the default view.
You should have a list page that looks something like this.

Creating a Content Page
Now that we have a little infrastructure, let’s create a Content page that we will actually use to interact with this list. As the name suggests, we are not going to use any of the “standard” Sharepoint methods of interactive with this list. Instead, we will be building a fully custom data view and editor. Certainly this example is trivial, but we’ll start ramping up the complexity as we go along.
Under Site Actions in the base page of your Site Collection, select Create > Web Pages > Web Part Page > Full Page Vertical. We’ll call it FastFood. Choose to save it in your Shared Documents list.
Add a Content Editor Web Part (CEWP)
All of the work of our customization is eventually going to be saved in this Content Editor Web Part. So, let’s create one on the page. Click the Add a Web Part control and select the Custom Editor Web Part.
Adding Jquery
Nothing of interest is going to happen until we hook up our new page with Jquery. There are a lot of way to handle this, but I’m going to take the most straight-forward approach and include the library in a script tag at the top of the CEWP. Copy and paste the code below into your CEWP Source Editor to confirm that you are getting Jquery properly. Do not use the Rich Text Editor.
<script type="text/javascript" src="http://ajax.googleapis.com/ajax/libs/jquery/1.6.2/jquery.min.js" ></script>
                      <script type="text/javascript">
                      	$(document).ready(function(){
                      		alert("hello");
                      })
                      </script>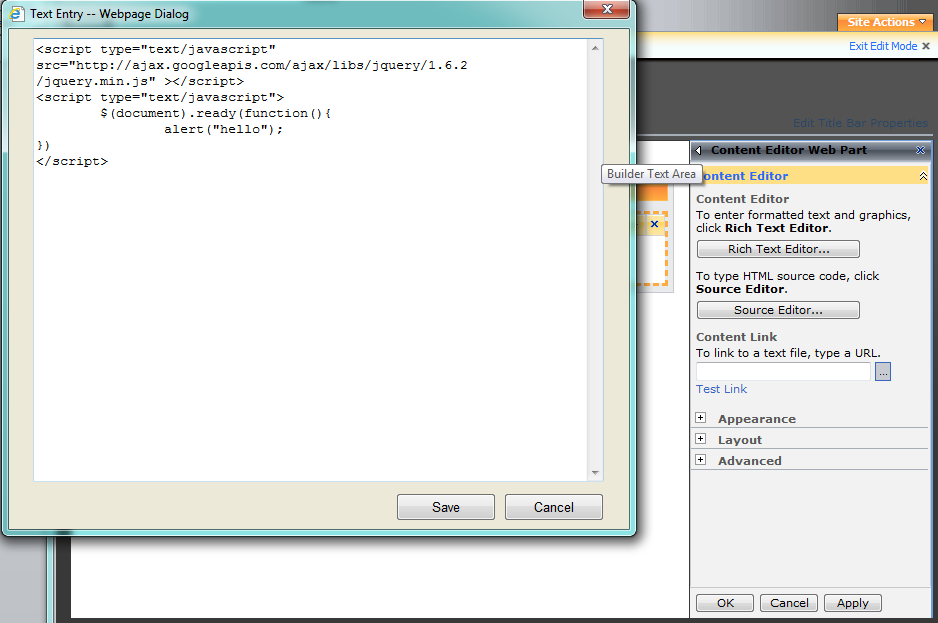
If you’ve done this properly then you should get an alert as soon as the CEWP is saved. Yeah, you’ll want to kill that alert right away – it will be quite annoying. In fact, for troubleshooting I exclusively use console.log() and F12 developer tools (available in IE, FireFox, Chrome).

Adding some simple HTML
You are of course free to add as many CEWP’s to the page as you like. And in fact you may want to use one of the columnar templates offered by Sharepoint and put them all over the page. Since we chose for this example a single page, I will be putting everything in one CEWP and use styles to organize the page. So, let’s get to it and add a heading and a blank list object.
Copy and paste the following directly below your Jquery include and (document).ready() section.
<h2>Fast Food Joints</h2>
                      <ul id="list"></ul>
Fetching the List Data
Now we get down to the good stuff. We are going to take advantage of Sharepoint’s built in “owssvr.dll”. This little beauty is native to Sharepoint 2007, is included with all site collections, is a part of core Sharepoint methods (that is – Sharepoint uses it itself), and therefore should be considered a stable way of working. To be more specific, this .dll can be accessed like this:
http://mySharepoint.com/sites/MySite/_vti_bin/owssvr.dllwhere MySite is where our Fast Food list lives.
To use this .dll we are going to be building a query string, sending it to the server via jquery’s $.get() method, retrieving the XML response, and parsing the values to display them for mere mortals through HTML.
Before we can do any of that, we need to know the ID of the list we created and the default view that was created for the list as well. There is an easy way to get this information. Go to your Fast Food list and choose Modify this View (on the right-side drop-down menu).
Now, take a look at the URI at the top. If you cursor just past the .aspx portion, you will see the List=, and View= designation. Mine looks like this:
List=%7BB761EFB2%2D93FC%2D
These are simply two GUIDs. %7B = “{“, %7D = “}”, and %2D = “-“. So, the above could be expressed like this:
List={B761EFB2-93FC-41F1-8
View={99793BF3-CECC-4868-B
Now that we know our List ID’s and the View ID, we can test out our owssvr.dll by pasting the following in a browser address box:
http://mySharepoint.com/sites/MySite/_vti_bin/owssvr.dll?Cmd=Display&List={B761EFB2-93FC-41F1-8AEC-433EB56339C2}&View={99793BF3-CECC-4868-B1F3-14AC627EB66D}&XMLDATA=TRUEIf you have done everything properly, you should see the following:
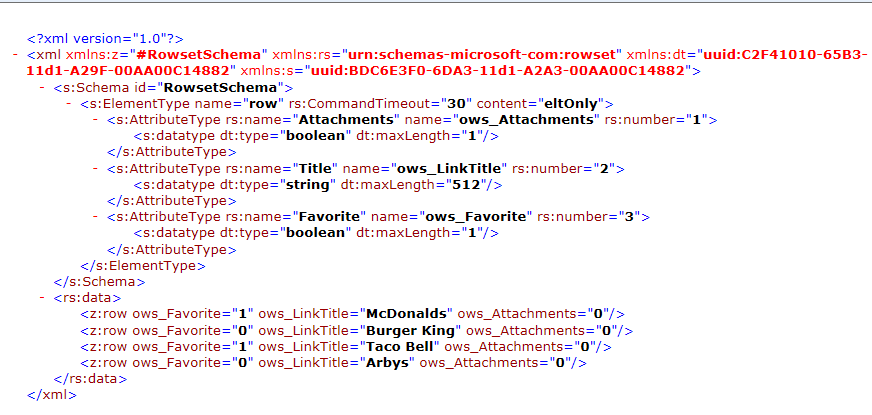
Notice that this will give us keen insight in to the guts of our Sharepoint list. We now know the name of the fields we created – at least what Sharepoint calls them. We have ows_Favorite and ows_LinkTitle. This is what we will use when referring to the values in our jquery to extract the “data” we just got.
Setting up the $.get()
Now we are ready to get our data using jquery’s built-in ajax shorthand - $.get(). You can of course use the full $.ajax() method, but for our purposes, $.get() will work just fine. Here is the code.
<script type="text/javascript">
                      	$(document).ready(function(){
                      $.get("http://mySharepoint.com/sites/MySite/_vti_bin/owssvr.dll?Cmd=Display&List={B761EFB2-93FC-41F1-8AEC-433EB56339C2}&View={99793BF3-CECC-4868-B1F3-14AC627EB66D}&XMLDATA=TRUE", function(data,textResponse){
                          $(data).find("[nodeName='z:row']").each(function(index,item){
                                console.log($(item).attr("ows_LinkTitle"))
                          })
                      })
                      })
</script>Notice how we were able to pick off the data from the <rs:data> row. It’s a short putt now to displaying that data in a list. Just replace the console.log line with a line to fill up our <ul> with the ID=List:
    $(data).find("[nodeName='z:row']").each(function(index,item){
                                $("#list").append($("<li>" + $(item).attr("ows_LinkTitle")+ "</li>"))
})And we get:
Summary
That’s where I’ll stop for Part 1. We have just started down the rabbit hole. If there is enough interest I’ll continue with more advanced methods like Adding, Editing, and Deleting. I’ll also share some of the best-methods I’ve come up with for keeping all this hacked-together code in some semblance of order. The techniques in this post are really just a proof of concept. Once you know how to get your hands on the data, there really is no limit to the complexity you can employ.

Process-first, software second.
Have a question about something in this article? You can receive help directly from the article author. Sign up for a free trial to get started.
Comments (9)
Commented:
I replaced that with my corp URL
http://teaming.xxxxxxxx.com/sites/NA_Nat_Gas/_vti_bin/owssvr.dll?Cmd=Display&List={B3EB133A-4BE3-4A0F-8A99-3
I get a "ERROR" page with this text. does this sound familiar, if not please reply when you have some extra time. Thanks a lot again.
++++++++++++++++++++++++++
Cannot complete this action.
Please try again.
Troubleshoot issues with Windows SharePoint Services.
++++++++++++++++++++++++++
Author
Commented:steve.krile(at)bluerailsol
Commented:
I will get my case on an email to you.
Thanks a lot for the attention which is immense for me.
Malli
Commented:
I have posted a Question this morning and didnt get a response yet so started browsing thru the articles and found Skrile's article addressing my concern of not doing server-side code.
Thanks for your time
Have a Good Weekend!
Malli
Author
Commented:View More