How to Install Microsoft Office Picture Manager in Office 2013
Posted on
28,117 Points
4:48
 Joe Winograd
50+ years in computers
EE FELLOW 2017 — first ever recipient of Fellow award
MVE 2015,2016,2018
CERTIFIED GOLD EXPERT
DISTINGUISHED EXPERT
EE FELLOW 2017 — first ever recipient of Fellow award
MVE 2015,2016,2018
CERTIFIED GOLD EXPERT
DISTINGUISHED EXPERT
Microsoft Office Picture Manager is not included in Office 2013. This comes as quite a surprise to users upgrading from earlier versions of Office, such as 2007 and 2010, where Picture Manager was included as a standard application. This video explains how to correct this serious omission by the folks in Redmond and install (for free!) Microsoft Office Picture Manager 2010, which plays very nicely with Office 2013. This video Micro Tutorial is fully documented in my Experts Exchange article, How to Install Microsoft Office Picture Manager in Office 2013.
Video Steps
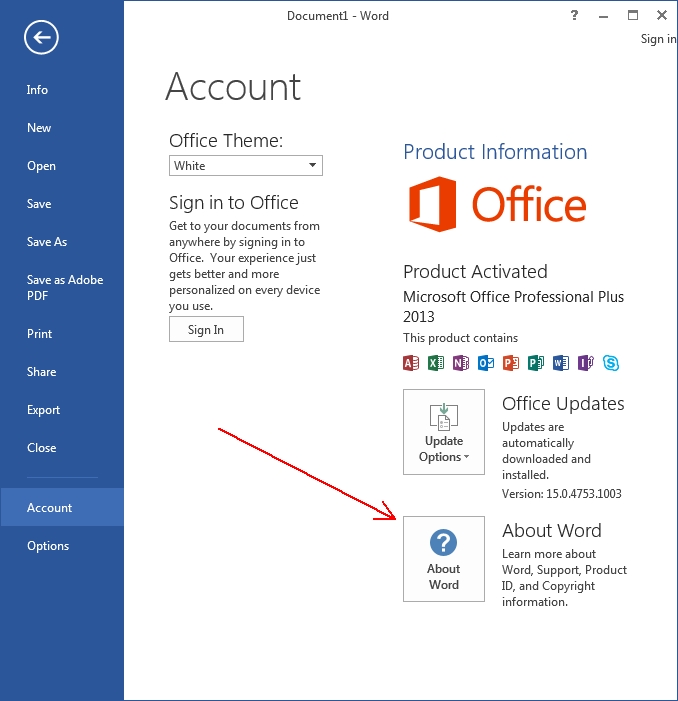
1. Determine the bit-level of your Office 2013.
Open any Word document (a new, blank one is fine).
To see if you have the 32-bit or 64-bit version of Office 2013, click the File menu, then Account, then About Word.

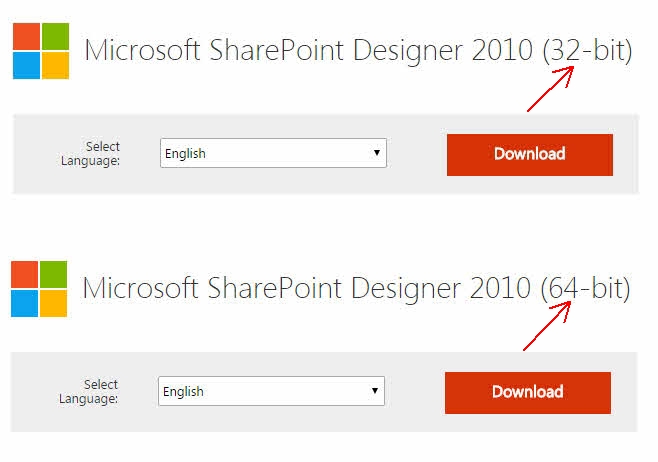
2. Download the Microsoft SharePoint Designer.
Download the matching bit-level for your Office 2013 from one of these links:
32-bit
http://www.microsoft.com/en-us/download/details.aspx?id=16573
64-bit
http://www.microsoft.com/en-us/download/details.aspx?id=24309
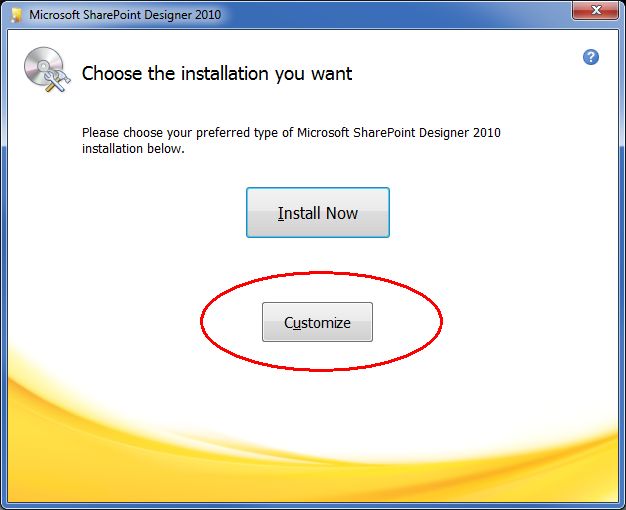
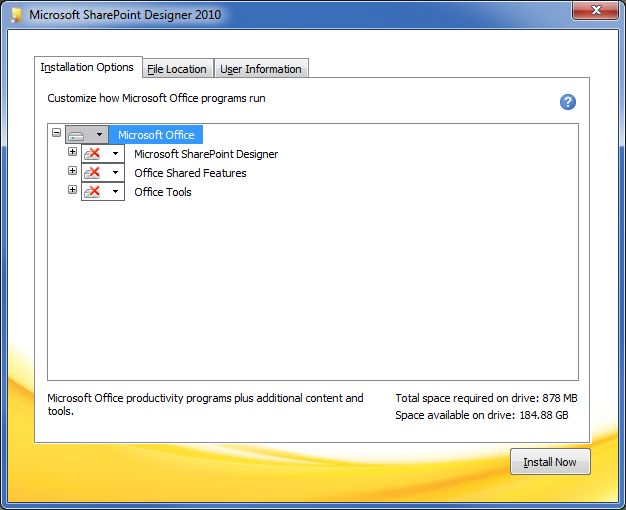
3. Run the downloaded SharePoint installer.
Using Windows/File Explorer (or whatever file manager you prefer), execute the downloaded installer and on the opening screen click the Customize button.
4. Mark all three program sections as Not Available.
Click the drop-down on Microsoft SharePoint Designer and select Not Available.
Click the drop-down on Office Shared Features and select Not Available.
Click the drop-down on Office Tools and select Not Available.
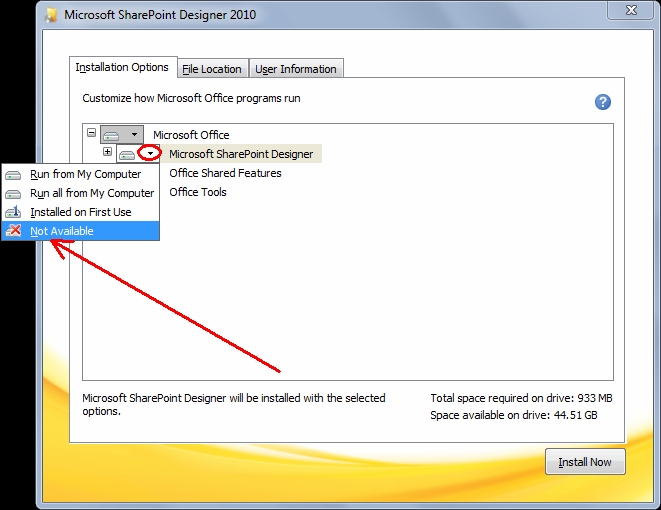
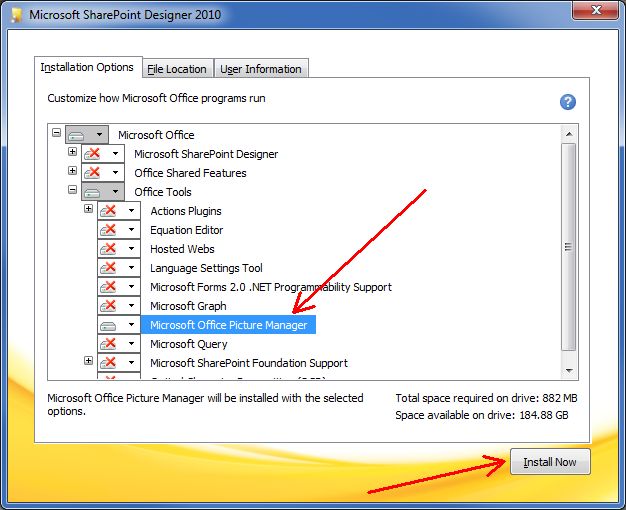
5. Select Picture Manager to install.
Click the plus sign for Office Tools to expand it.
Click the drop-down on Microsoft Office Picture Manager and select Run from My Computer.
Click Install Now.
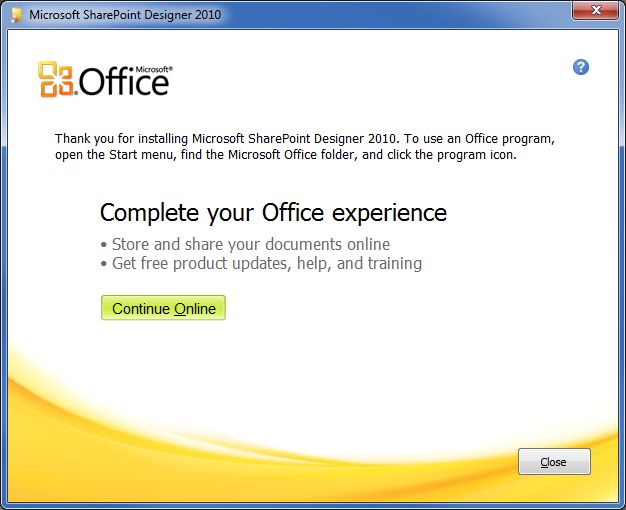
6. Close the dialog showing that the installation was completed.
Click the Close button.
7. View the Microsoft Office 2010 Tools program group.
Look in your program groups and you will find a new one called Microsoft Office 2010 Tools.
Open it up and you will see a shortcut to Microsoft Office Picture Manager.

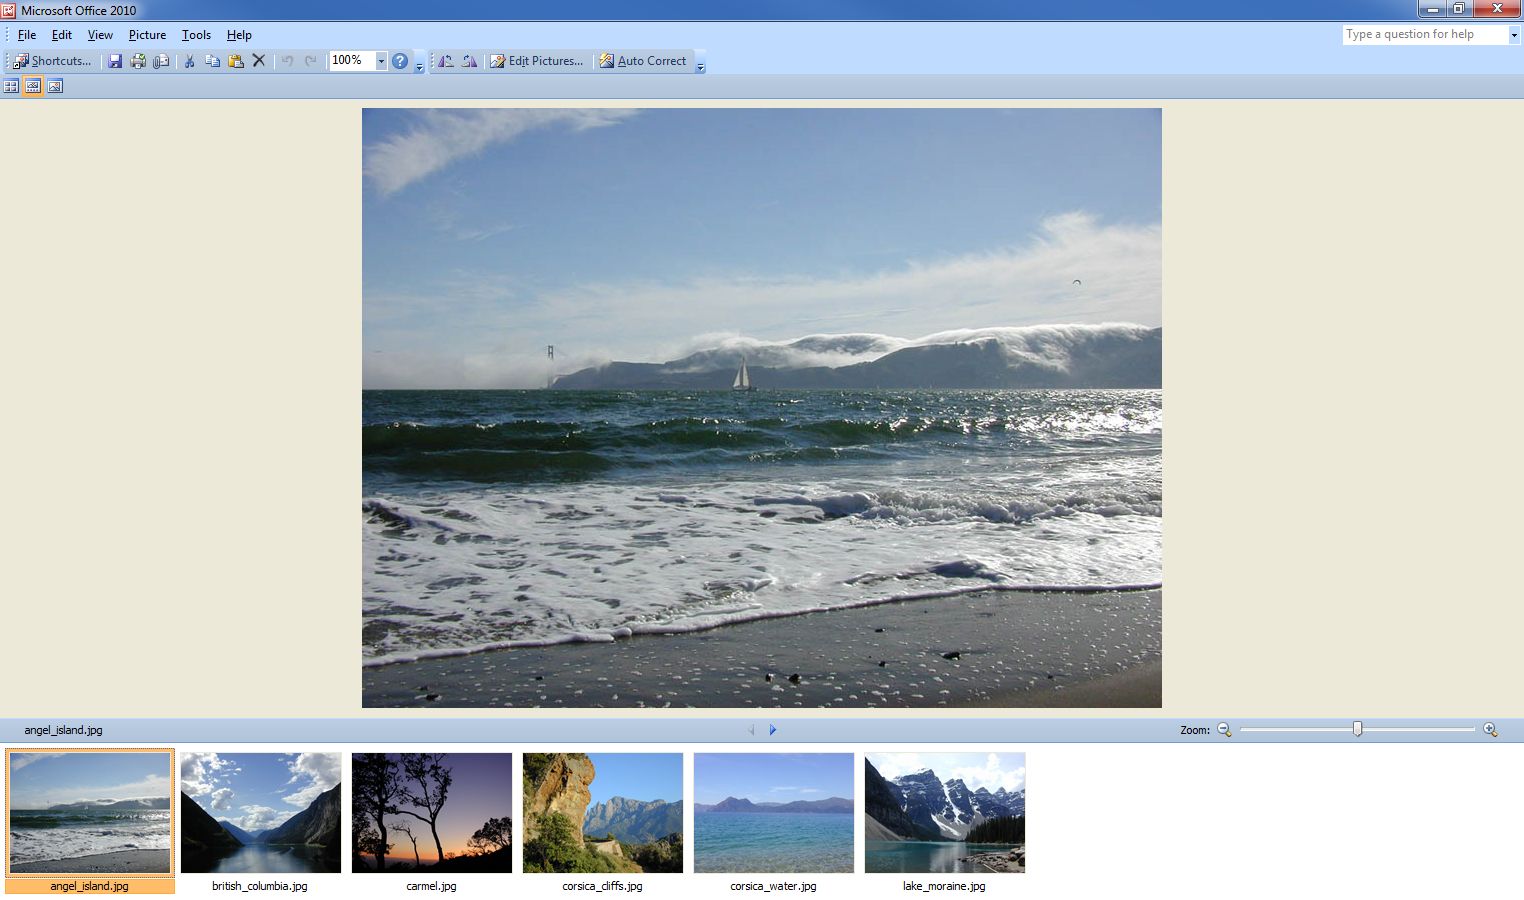
8. Run Picture Manager.
Click the Microsoft Office Picture Manager shortcut to run it!
That's it! If you find this video to be helpful, please click the thumbs-up icon below. Thank you for watching!
2 Comments
Thank you! The changes to Office 2013 are not the best. I appreciate you putting this together.
Have a good day
Have a good day
Suggested Videos

This article examine how we can use SPFx web part that would facilitate the administrator to sync the profile photos from Azure AD or the FileShares to SharePoint User Profile store.

Depending on the things you do with Microsoft Office, you can sometimes inadvertently lose your recent document lists in apps such as Microsoft Word and Excel. This article shows you how to back up and restore those lists when necessary. Enjoy...
- Microsoft
- Windows 10
- Microsoft Office
- Storage Software
- Windows OS
- Microsoft Excel, Microsoft Word