Drawing with .NET and GDI+ [Part 1: The Basics]


Software Architect in .Net C#, VB & ASP. Lover of Star Wars, MCU and Rock music. My greatest achievement in life: my 2 daughters.
Published:
Browse All Articles > Drawing with .NET and GDI+ [Part 1: The Basics]
With this one you're reading, I'm starting a series of articles focused on creating and manipulating graphics in .Net using GDI+ library starting at the most basic level of knowledge in this area. I'll post all the source code in Visual Basic.net, as it is my preferred language, although the code would look much similar and is really easy to translate from VB.net to C# using one of the many excellent online translators (for example, this one).
As said, Windows XP replaced the old GDI libraries with GDI+, which improved GDI by adding new features and optimizing existing features. MSDN defines GDI+ as "the portion of the Windows XP operating system or Windows Server 2003 operating system that provides two-dimensional vector graphics, imaging, and typography". The .Net Framework graphics system uses GDI+ through the System.Drawing namespace.
All of these operations involved the use of several Windows API functions, and many times the work was painful. Now, the .Net Framework has simplified it all and gives to us the Graphics object that is very close to a DC, but lets us deal with it as a managed class with simple methods and properties.
You can think of the Graphics object as a canvas on which you are about to paint a picture. But in this picture, besides painting straight lines, curves, colors, dots, shapes, etc, you will be able to perform complex transformations anytime. You can rotate, scale, shake, paint again and transform again the times you want. Finally, you can show your picture to the world (usually on a screen, but it could be on a printer) or save it to a bitmap for posterity.
But, how can you obtain a Graphics object to start drawing? The Graphics class has no public constructors, so you cannot create a new Graphics object from scratch. This is for a good reason: a Graphics object is closely related to a drawing surface, so you need to access first the drawing surface (for example, a form, a control or a printer) and then obtain a Graphics object that the drawing surface will provide to you.
Let's see some examples.
Getting a Graphics object to a Form or a Control
The class System.Windows.Forms.Control implements the CreateGraphics function, that is just what you need to get a Graphics object to draw on the control. The class System.Windows.Forms.Form, as it inherits from System.Windows.Forms.Control, has this function too. So, if you want to draw on a Form or a Control, all you need is to call this function, that returns a Graphics object just ready to start drawing.
But using this method can have a disadvantage: your drawings on the Graphics object will not be persistent, which means that they will disappear as soon as your form or control is beign repainted.
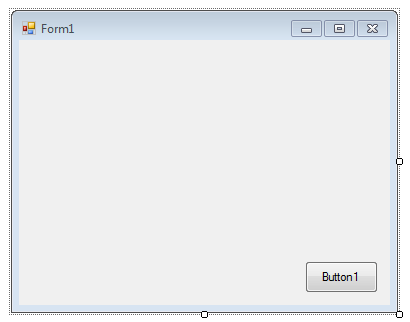
To test it, let's make a very simple example of what I'm saying. In Visual Studio, create a new VB.net Windows Forms application. Form1 is created by default. Now put a standard Button into the form and move the button to the bottom-right corner. You should have something like this:
![The form just created.]()
Now, let's put some code into the Button1.Click event handler. Double-click on the button to open the Code Window. Button1_Click is created by default. Put this code inside the Button1_Click method:
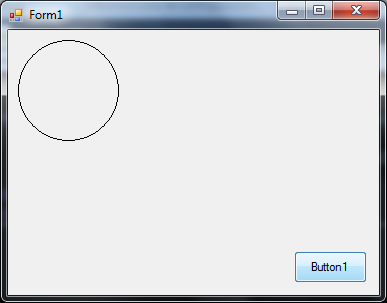
Even if you've never worked with System.Drawing classes, this code is very easy to understand. First, we called the Form's CreateGraphics function to get a ready-to-use Graphics object. Then, we called the DrawEllipse method of the Graphics object to draw a black circle on the Form starting at (10,10) coordinates and with a width and height of 100 pixels.
If you run your project and click on the button, you should have something like this:
![A circle is drawn on the Form.]()
Now, minimize the Form and then restore it. What happened? The circle has disappeared. But, why? Well, each time that your form (or any part of it) needs to be repainted, it is responding to the WM_PAINT system message by calling BeginPaint to obtain a device context, wrapping this device context with a managed Graphics class and passing this class to your drawing code in the PaintEventArgs which are provided first to the OnPaint protected method and then, in turn, to the Paint event. So the graphics on your form are overriden by the graphics of the Graphics object provided in the Paint event.
Fortunately, the solution here is very simple. If you want to draw persistent graphics on a form or control, then use the Graphics object provided in the Paint event. Let's try! Edit your form's code and write this code in the form's Paint event:
Now, run the project. The circle is there from the beginning, because it is drawn every time that the form paints itself. Minimize the form and restore it: the circle is still there.
Well, now you know how to get a valid Graphics object to draw on a form or control and you have the ability to make your graphics persistent.
Getting a Graphics object to a printer
Although is not a very common task to draw directly on a printer using a Graphics object, in fact it can be done and is as easy as doing it on a Form. You can do it, for example, with a PrintDocument component, which provides a Graphics object in the parameters of its PrintPage event.
If you want to test it, continue with the previous Visual Studio project and simply put a PrintDocument component from the Toolbox into your Form. Switch to code view and edit the PrintPage event of the PrintDocument object. Write this code:
Now, modify your Button1_Click event to print the document:
As you can see, the "e" parameter has a .Graphics property that is a valid Graphics object to the printer. What we are doing here is change the page unit of the Graphics object to millimeters, and then draw a circle at 3 cm from the left and top borders of the page, and with a width and height of 5 cm. If you run your project and click the button, then you should obtain that circle in your default printer.
Getting a Graphics object to an in-memory bitmap
Earlier I said that is not a common task to draw directly on the Graphics object of a printer. This is because is much common to edit a in-memory bitmap and then print the bitmap. Create images from scratch (or edit existing images) is a very easy task with System.Drawing. Let's see it modifying your Button1_Click event:
Now let's explain this code. First we create a new in-memory bitmap with a width and height of 50 pixels. Then we get a valid Graphics object to the bitmap using the FromImage static function of the System.Drawing.Graphics class. After, we set the background of the bitmap to a solid white color, and finally we draw a circle starting at (10,10) pixels and with a width and height of 30 pixels. Finally, we save the bitmap to disk in .png format.
If you run your project and click the button, you should obtain a "c:\testbitmap.png" that should look exactly like this:
![The saved testbitmap.png file.]()
As you can see, in-memory creation and manipulation of bitmaps is very easy.
GDI+ on msdn
GDI on msdn
DirectX Development Site
The System.Drawing.Graphics class on msdn
Bob Powell's GDI+ FAQ
Introduction
GDI+ was introduced by Microsoft in Windows XP as an improvement and a replacement of GDI. GDI (Graphics Device Interface) was present in all prior versions of Windows and was a core OS component responsible for representing graphical objects, as well as transmitting them to output devices, such as monitors and printers. Note that GDI was not responsible for drawing windows, menus, and other Windows OS core graphical objects (those features are in the user subsystem).As said, Windows XP replaced the old GDI libraries with GDI+, which improved GDI by adding new features and optimizing existing features. MSDN defines GDI+ as "the portion of the Windows XP operating system or Windows Server 2003 operating system that provides two-dimensional vector graphics, imaging, and typography". The .Net Framework graphics system uses GDI+ through the System.Drawing namespace.
Legacy graphics?
MSDN describes GDI+ as a legacy graphics system. Is it true? Well, in a strict terminology, Microsoft has introduced several new graphics libraries and rendering engines, such as DirectX (probably the most powerful graphics engine existing for Windows). But the fact is that the object model of DirectX is very complex and, in real scenarios, using GDI+ is more than sufficient to draw 2D graphics that involves pens, brushes, backgrounds, gradients, paths, text rendering, etc. Of course, GDI+ is supported in all versions of Windows since Windows XP, and even today with Windows 8 just launched, it's still an important piece of the Redmond's OS.Device-independient
The main feature of GDI and GDI+ is that both are device-independient. This means that if you want to draw something (let's say a red circle with blue border and white text inside it), you will use the same set of instructions for drawing it on a monitor and to print it on a printer. The graphics system is responsible for communicate with the appropiate system driver to "translate" your instructions into something that the driver understands. Obviously, this is a great advantage for the programmer.The Device Context and the Graphics object
In the past, when we were programming with GDI and we wanted to draw something, the first thing that we needed to do was to get a Device Context to the device in which we wanted to draw. A Device Context (commonly called DC) is a structure that defines a set of graphics objects and their associated attributes, as well as the graphic modes that affect output. So, if we wanted, for example, to draw something into a windows form, we needed to get a DC to that form, via its Handle (or hWnd). For painting purposes, we could open DCs for video displays, for printers and for memory (to draw into a memory-bitmap).All of these operations involved the use of several Windows API functions, and many times the work was painful. Now, the .Net Framework has simplified it all and gives to us the Graphics object that is very close to a DC, but lets us deal with it as a managed class with simple methods and properties.
Parts of GDI+
As MSDN says, GDI+ services fall into these 3 broad categories:
2-D vector graphics. These are primitive graphics such as lines, curves and figures, that can be specified by sets of points in a coordinate system. For example, a straight line is specified by its two endpoints, while a rectangle is specified by a point defining its upper-left corner and 2 numbers defining its width and height.
Imaging. There are certain kinds of pictures which are difficult (or impossible) to display using only 2-D vector graphics. For example, think of a high resolution picture of a leaping lion to hunt antelope in full African savannah. This is not possible to represent (or at least it is extremely difficult) with vector graphics. So these images are treated as bitmaps, which are arrays of numbers representing individual colored dots.
Typography. Typography is the display of text in a variety of fonts, sizes, and styles. GDI+ provides extensive support for this complex task. One of the new features in GDI+ (not present in GDI) is subpixel antialiasing, which gives text rendered on an LCD screen a smoother appearance.
The Graphics class
As this article is being eminently theoretical, and because I would like the following one to be much more practical, it is essential to enter deeper into the heart of the whole system of graphical manipulation in GDI+ with .Net: the System.Drawing.Graphics class.You can think of the Graphics object as a canvas on which you are about to paint a picture. But in this picture, besides painting straight lines, curves, colors, dots, shapes, etc, you will be able to perform complex transformations anytime. You can rotate, scale, shake, paint again and transform again the times you want. Finally, you can show your picture to the world (usually on a screen, but it could be on a printer) or save it to a bitmap for posterity.
But, how can you obtain a Graphics object to start drawing? The Graphics class has no public constructors, so you cannot create a new Graphics object from scratch. This is for a good reason: a Graphics object is closely related to a drawing surface, so you need to access first the drawing surface (for example, a form, a control or a printer) and then obtain a Graphics object that the drawing surface will provide to you.
Let's see some examples.
Getting a Graphics object to a Form or a Control
The class System.Windows.Forms.Contr
But using this method can have a disadvantage: your drawings on the Graphics object will not be persistent, which means that they will disappear as soon as your form or control is beign repainted.
To test it, let's make a very simple example of what I'm saying. In Visual Studio, create a new VB.net Windows Forms application. Form1 is created by default. Now put a standard Button into the form and move the button to the bottom-right corner. You should have something like this:
Now, let's put some code into the Button1.Click event handler. Double-click on the button to open the Code Window. Button1_Click is created by default. Put this code inside the Button1_Click method:
Private Sub Button1_Click(sender As System.Object, e As System.EventArgs) Handles Button1.Click
                          Using g As Graphics = Me.CreateGraphics
                              g.DrawEllipse(Pens.Black, New Rectangle(10, 10, 100, 100))
                          End Using
End SubEven if you've never worked with System.Drawing classes, this code is very easy to understand. First, we called the Form's CreateGraphics function to get a ready-to-use Graphics object. Then, we called the DrawEllipse method of the Graphics object to draw a black circle on the Form starting at (10,10) coordinates and with a width and height of 100 pixels.
If you run your project and click on the button, you should have something like this:
Now, minimize the Form and then restore it. What happened? The circle has disappeared. But, why? Well, each time that your form (or any part of it) needs to be repainted, it is responding to the WM_PAINT system message by calling BeginPaint to obtain a device context, wrapping this device context with a managed Graphics class and passing this class to your drawing code in the PaintEventArgs which are provided first to the OnPaint protected method and then, in turn, to the Paint event. So the graphics on your form are overriden by the graphics of the Graphics object provided in the Paint event.
Fortunately, the solution here is very simple. If you want to draw persistent graphics on a form or control, then use the Graphics object provided in the Paint event. Let's try! Edit your form's code and write this code in the form's Paint event:
Private Sub Form1_Paint(sender As Object, e As System.Windows.Forms.PaintEventArgs) Handles Me.Paint
                          e.Graphics.DrawEllipse(Pens.Black, New Rectangle(10, 10, 100, 100))
End SubNow, run the project. The circle is there from the beginning, because it is drawn every time that the form paints itself. Minimize the form and restore it: the circle is still there.
Well, now you know how to get a valid Graphics object to draw on a form or control and you have the ability to make your graphics persistent.
Getting a Graphics object to a printer
Although is not a very common task to draw directly on a printer using a Graphics object, in fact it can be done and is as easy as doing it on a Form. You can do it, for example, with a PrintDocument component, which provides a Graphics object in the parameters of its PrintPage event.
If you want to test it, continue with the previous Visual Studio project and simply put a PrintDocument component from the Toolbox into your Form. Switch to code view and edit the PrintPage event of the PrintDocument object. Write this code:
Private Sub PrintDocument1_PrintPage(sender As System.Object, e As System.Drawing.Printing.PrintPageEventArgs) Handles PrintDocument1.PrintPage
                          With e.Graphics
                              .PageUnit = GraphicsUnit.Millimeter
                              .DrawEllipse(Pens.Black, New Rectangle(30, 30, 50, 50))
                          End With
                          e.HasMorePages = False
End SubNow, modify your Button1_Click event to print the document:
Private Sub Button1_Click(sender As System.Object, e As System.EventArgs) Handles Button1.Click
                          Me.PrintDocument1.Print()
End SubAs you can see, the "e" parameter has a .Graphics property that is a valid Graphics object to the printer. What we are doing here is change the page unit of the Graphics object to millimeters, and then draw a circle at 3 cm from the left and top borders of the page, and with a width and height of 5 cm. If you run your project and click the button, then you should obtain that circle in your default printer.
Getting a Graphics object to an in-memory bitmap
Earlier I said that is not a common task to draw directly on the Graphics object of a printer. This is because is much common to edit a in-memory bitmap and then print the bitmap. Create images from scratch (or edit existing images) is a very easy task with System.Drawing. Let's see it modifying your Button1_Click event:
Private Sub Button1_Click(sender As System.Object, e As System.EventArgs) Handles Button1.Click
                          Using bmp As Bitmap = New Bitmap(50, 50)
                              Using g As Graphics = Graphics.FromImage(bmp)
                                  g.Clear(Color.White)
                                  g.DrawEllipse(Pens.Black, New Rectangle(10, 10, 30, 30))
                              End Using
                              bmp.Save("c:\testbitmap.png", Imaging.ImageFormat.Png)
                          End Using
End SubNow let's explain this code. First we create a new in-memory bitmap with a width and height of 50 pixels. Then we get a valid Graphics object to the bitmap using the FromImage static function of the System.Drawing.Graphics class. After, we set the background of the bitmap to a solid white color, and finally we draw a circle starting at (10,10) pixels and with a width and height of 30 pixels. Finally, we save the bitmap to disk in .png format.
If you run your project and click the button, you should obtain a "c:\testbitmap.png" that should look exactly like this:

As you can see, in-memory creation and manipulation of bitmaps is very easy.
Conclusion
In this article, I've explained the origins of both GDI and GDI+ and I've talked about some of its characteristics. I've also introduced the Graphics class, which is the basis for all drawing operations in .Net with System.Drawing, the namespace that uses GDI+. In the next article, I'll explain in detail the coordinate systems. This is a necessary step to, once we start to draw, to know precisely how and where we're drawing.References
GDI on WikipediaGDI+ on msdn
GDI on msdn
DirectX Development Site
The System.Drawing.Graphics class on msdn
Bob Powell's GDI+ FAQ
Software Architect in .Net C#, VB & ASP. Lover of Star Wars, MCU and Rock music. My greatest achievement in life: my 2 daughters.
Have a question about something in this article? You can receive help directly from the article author. Sign up for a free trial to get started.
Comments (0)