Image with Transparent Background with The GIMP Software


My areas of expertise include:
- system and database architecture
- IT auditing
- ITS (or Intelligent Transport Systems) for the highway
- system and database architecture
- IT auditing
- ITS (or Intelligent Transport Systems) for the highway
Published:
Browse All Articles > Image with Transparent Background with The GIMP Software
This article is in response to an Experts Exchange question Trouble cleaning a signature. Although the question concerns a scanned signature, this technique can be easily applied to any graphics file that requires a transparent background.
This technique is illustrated using the Gimp, a free, open source image editor (http://www.gimp.org/).
Here are the steps to clean up a scanned image of a signature to create a transparent background.
Step 1 - Scan image of signature and open the file in the GIMP
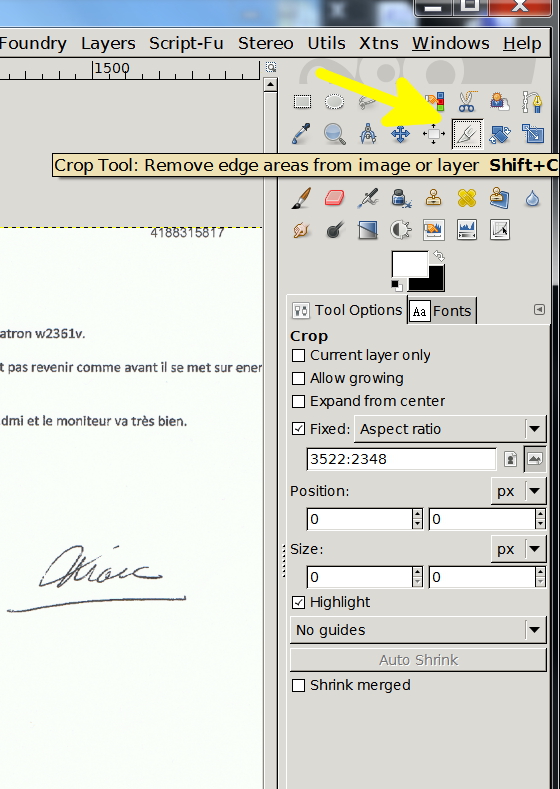
Step 2 - Crop the signature AND duplicate this layer (just in case you mess up)![Crop tool]()
![Crop-2]() I find it is a good idea to duplicate the working layer after each step
I find it is a good idea to duplicate the working layer after each step![Duplicate Layer]() I always make the lower layers invisible to see only the layer I'm working on...
I always make the lower layers invisible to see only the layer I'm working on...![Hide-show layer]() Step 3 - Add alpha channel (if there is none, the layer name will be in BOLD characters)
Step 3 - Add alpha channel (if there is none, the layer name will be in BOLD characters)![Tranparency]() NOTE: If there is NO alpha channel, you cannot create a transparent background
NOTE: If there is NO alpha channel, you cannot create a transparent background
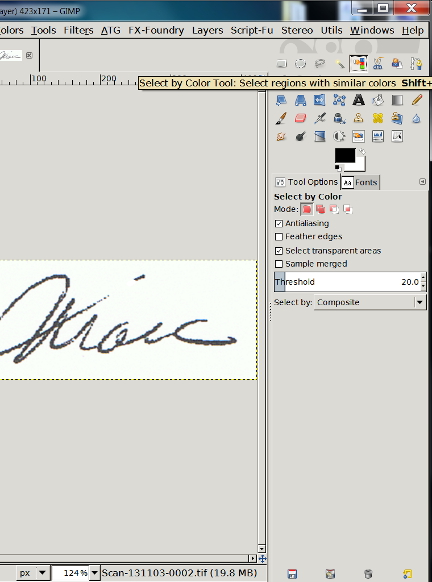
Step 4 - Use the Select by Color Tool to select the background and erase with the Delete key![Select by color]() The Select by Color Tool will select all the areas of the same color, even if they are isolated from the area you click in (this does NOT happen with the Fuzzy Select Tool)
The Select by Color Tool will select all the areas of the same color, even if they are isolated from the area you click in (this does NOT happen with the Fuzzy Select Tool)
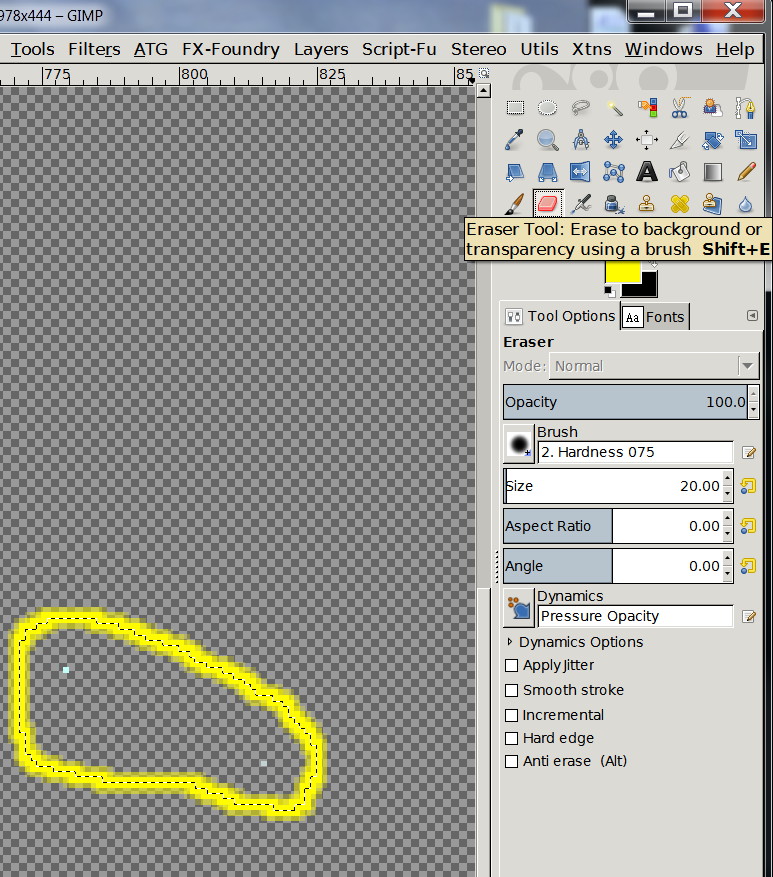
Step 5 - Clean up the extraneous spots with the Eraser Tool![Eraser Tool]() A dirty scanner glass can sometimes leave 'dirt marks' on a scanned image that should be removed with the eraser
A dirty scanner glass can sometimes leave 'dirt marks' on a scanned image that should be removed with the eraser
Step 6 - Use the Select by Color Tool to select the background
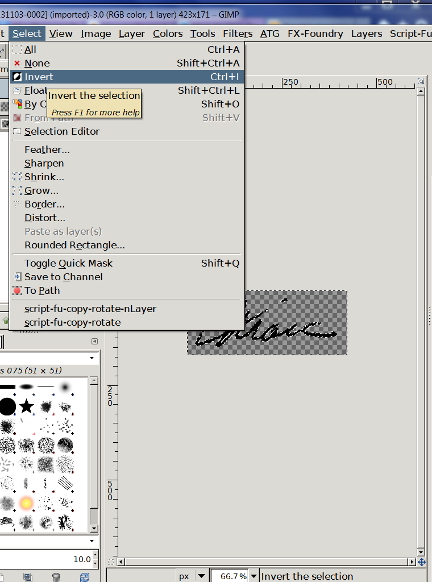
Step 7 - Invert this selection (Select tab -> Invert (or ctrl-I)![Invert Selestion]() Step 8 - Use Bucket Fill Tool (with Black foreground) to fill selection - make sure to select the option Fill whole selection
Step 8 - Use Bucket Fill Tool (with Black foreground) to fill selection - make sure to select the option Fill whole selection![Bucket fill]() Step 9 - You should now have an image of your signature with a transparent background
Step 9 - You should now have an image of your signature with a transparent background![Final Image]() Use the File -> Export option to save as a .gif or .tif format file to preserve the transparent file!
Use the File -> Export option to save as a .gif or .tif format file to preserve the transparent file!
BEFORE![Before]() AFTER
AFTER![After]()
This technique is illustrated using the Gimp, a free, open source image editor (http://www.gimp.org/).
Here are the steps to clean up a scanned image of a signature to create a transparent background.
Step 1 - Scan image of signature and open the file in the GIMP
Step 2 - Crop the signature AND duplicate this layer (just in case you mess up)
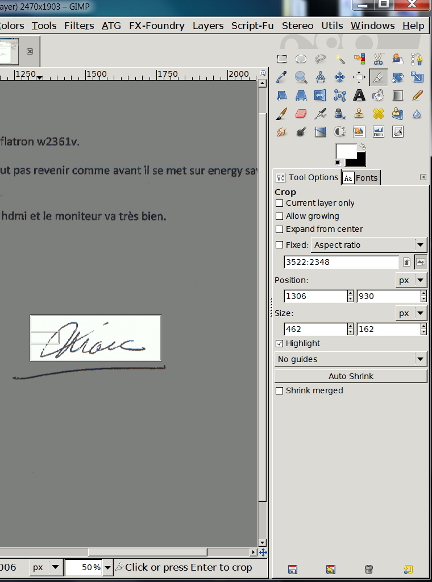 I find it is a good idea to duplicate the working layer after each step
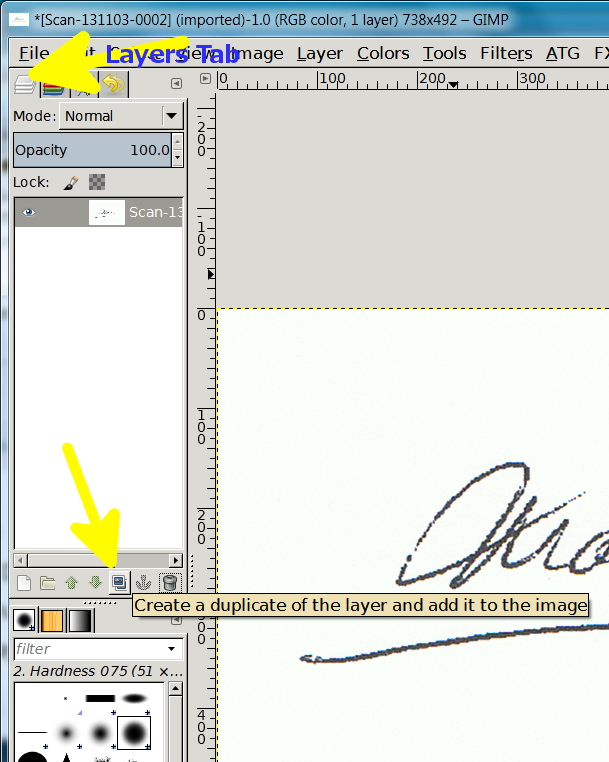 I always make the lower layers invisible to see only the layer I'm working on...
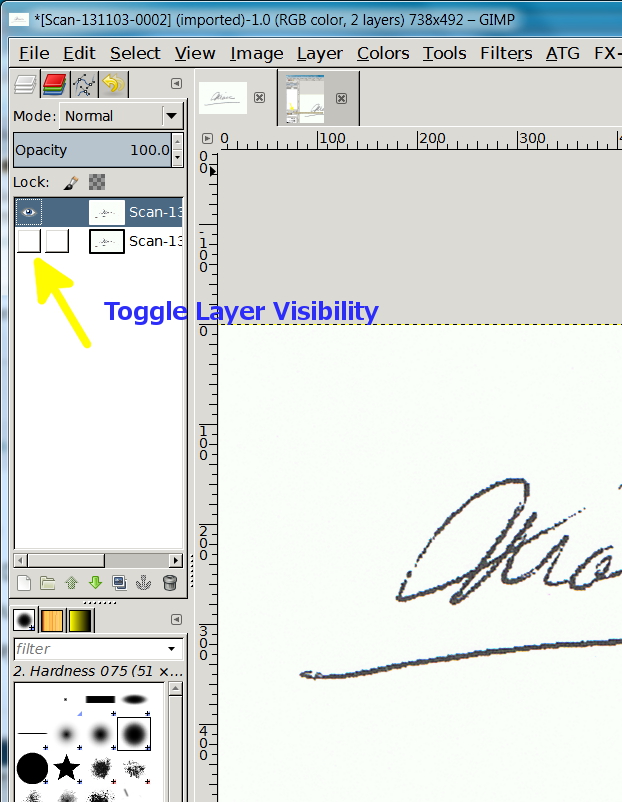 Step 3 - Add alpha channel (if there is none, the layer name will be in BOLD characters)
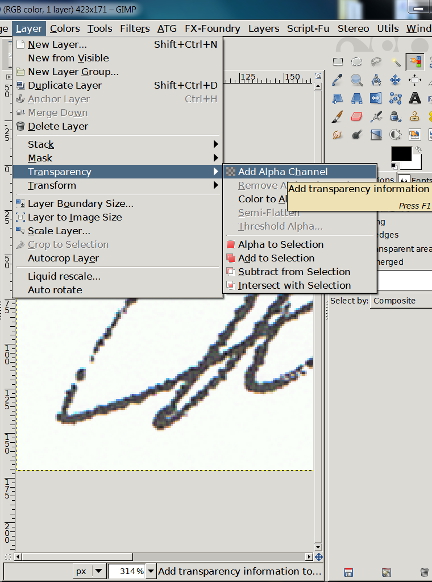 NOTE: If there is NO alpha channel, you cannot create a transparent background
Step 4 - Use the Select by Color Tool to select the background and erase with the Delete key
 The Select by Color Tool will select all the areas of the same color, even if they are isolated from the area you click in (this does NOT happen with the Fuzzy Select Tool)
Step 5 - Clean up the extraneous spots with the Eraser Tool
 A dirty scanner glass can sometimes leave 'dirt marks' on a scanned image that should be removed with the eraser
Step 6 - Use the Select by Color Tool to select the background
Step 7 - Invert this selection (Select tab -> Invert (or ctrl-I)
 Step 8 - Use Bucket Fill Tool (with Black foreground) to fill selection - make sure to select the option Fill whole selection
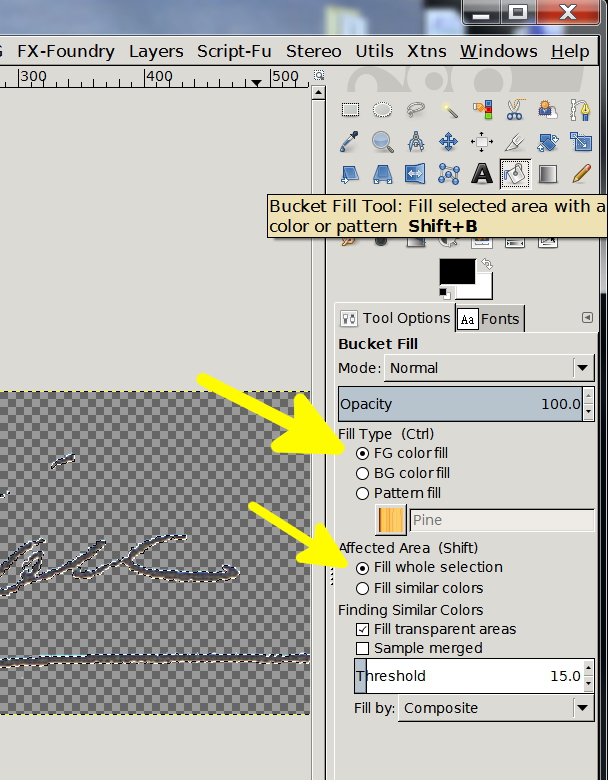 Step 9 - You should now have an image of your signature with a transparent background
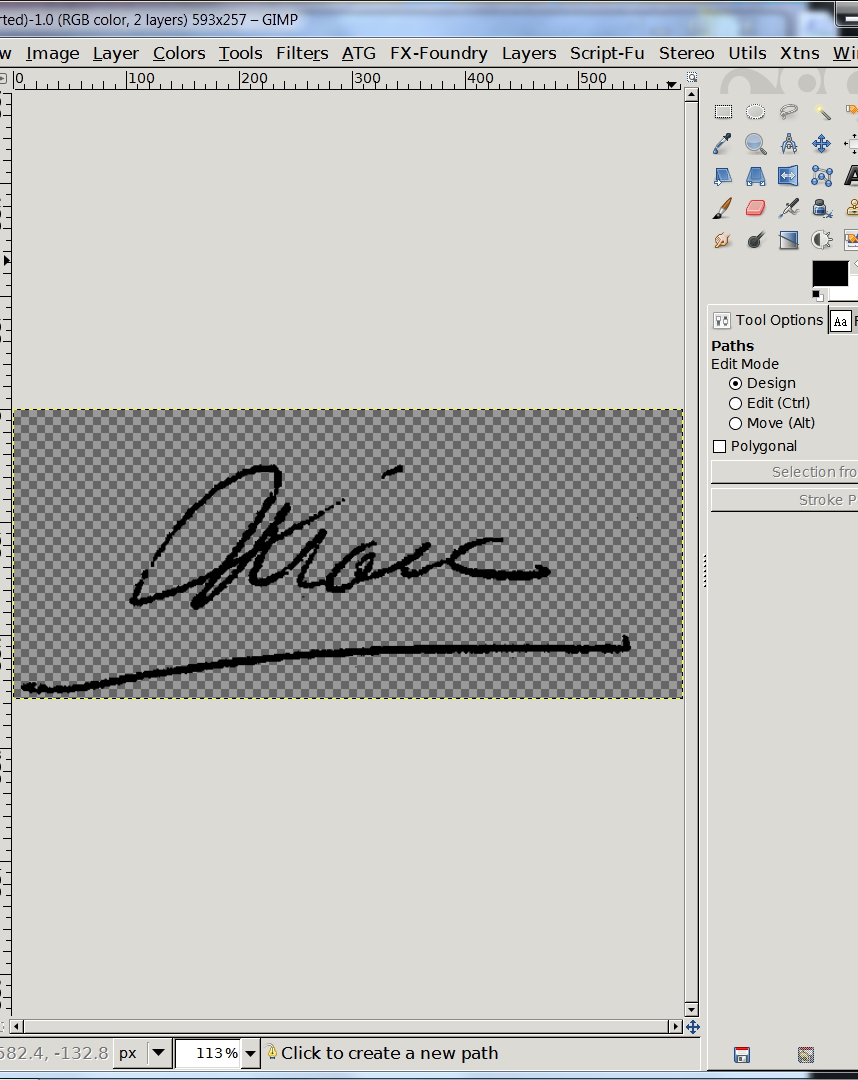 Use the File -> Export option to save as a .gif or .tif format file to preserve the transparent file!
BEFORE
 AFTER
AFTER
My areas of expertise include:
- system and database architecture
- IT auditing
- ITS (or Intelligent Transport Systems) for the highway
- system and database architecture
- IT auditing
- ITS (or Intelligent Transport Systems) for the highway
Have a question about something in this article? You can receive help directly from the article author. Sign up for a free trial to get started.
Comments (0)