

Browse All Articles > HOW TO: Create a new Outlook Profile (Exchange / POP / IMAP)
As creating a new Outlook profile is a process that comes in very handy when you are confronted with various Outlook issues I came up with this detailed tutorial (quite lengthy with many screenshots, so I hope it covers most of the common questions).
It's purpose is to give a detailed explanation on every single step and I also tried to provide some useful links on special topics.
I hope my article can help solving the one or other Outlook issue.
By the way:
Screenshots are showing an Office 2013 installation on a Windows 7 (64bit) client.
Some of the settings may slightly vary in older versions of Outlook.
------------------------------------------------------------------------------------------------
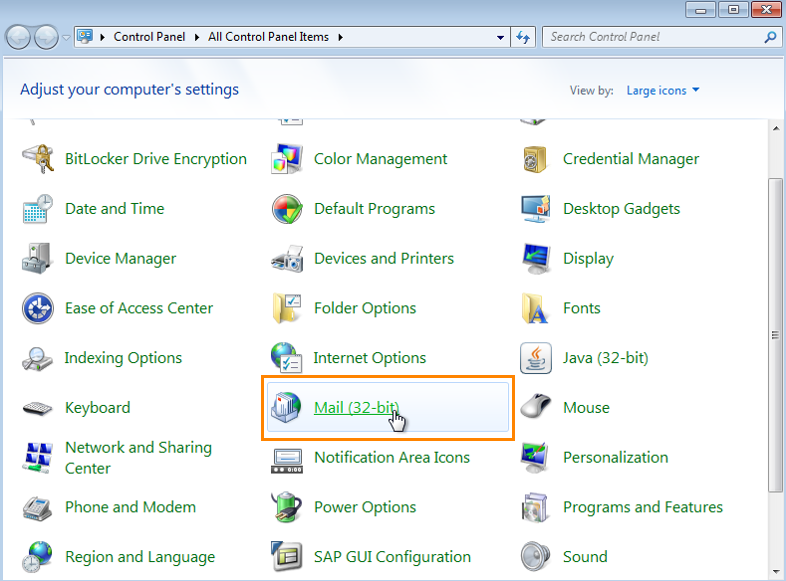
To start off, open up the control panel and click on the “Mail” button (it is called “Mail (32-bit)” because I am running a 64bit machine.)
![control panel]() Then click the “Show Profiles…” button:
Then click the “Show Profiles…” button:
![show profiles]() What you see now is a list of already created profiles. In case it is a fresh Outlook installation, the list will be empty. Simply click on “Add…”:
What you see now is a list of already created profiles. In case it is a fresh Outlook installation, the list will be empty. Simply click on “Add…”:
![add new profile]()
Now it’s time to give your new profile a name (this can be any name you wish and does not have anything to do with your mail address or the account type you choose). e.g. if you are creating a POP account profile for gmail you may call the profile “gmail – pop”.
![profile name]() In the next window you can choose to either automatically connect (if you are connected to an Exchange Server), or to manually set up the profile.
In the next window you can choose to either automatically connect (if you are connected to an Exchange Server), or to manually set up the profile.
![manual profile setup]()
Now let's see how the separate account types are set up:
------------------------------------------------------------------------------------------------
In order to manually set up an Exchange profile choose “Microsoft Exchange…” and hit “Next”:
Insert the name of your company’s Exchange Server and your Windows username and click on “Check Name” to make sure it is correctly resolved. (In case the server- and username are entered correctly they will be underlined as soon as you click on “Check Name”). If the names are resolved correctly, click on “More Settings…”
You can find detailed information on cached exchange mode here: http://office.microsoft.com/en-001/outlook-help/turn-on-or-off-cached-exchange-mode-HP001232935.aspx
and here:
http://hosting.intermedia.net/support/kb/?id=1057
In the “General” tab we have the option to give our Exchange Account a reference name:
![exchange general settings]() On the “Advanced” tab you can connect additional mailboxes and configure some more cached mode settings:
On the “Advanced” tab you can connect additional mailboxes and configure some more cached mode settings:
![exchange advanced settings]()
![add mailbox]()
![public folder favorites]()
a\Local\Microsoft\Outlook\outlook.ost on a Windows 7 client)![data file settings]()
On the “Security” tab you can change a few security settings:
![security tab]()
Further information can be found here:
http://office.microsoft.com/en-001/outlook-help/specify-exchange-network-security-HP001003058.aspx
Under “Connection” you can setup “Outlook Anywhere” (greyed out in my screenshot as we set it via policy in our environment):
![outlook anywhere]() When you click on “Exchange Proxy Settings…” you can specify all necessary settings for “Outlook Anywhere”:
When you click on “Exchange Proxy Settings…” you can specify all necessary settings for “Outlook Anywhere”:
![exchange proxy settings]() Detailed information on “Outlook Anywhere” can be found here:
Detailed information on “Outlook Anywhere” can be found here:
http://office.microsoft.com/en-001/outlook-help/use-outlook-anywhere-to-connect-to-your-exchange-server-without-vpn-HP010102444.aspx
As all available settings are set now, click “Next”:
![add account next steps]() On the last screen of the profile setup click “Finish”:
On the last screen of the profile setup click “Finish”:
![account finish]() Basically your Outlook profile is set up and should be running fine. But there are still no pst files etc. connected to it. In order to finalize your Outlook profile highlight the profile you’ve just set up and click “Properties”:
Basically your Outlook profile is set up and should be running fine. But there are still no pst files etc. connected to it. In order to finalize your Outlook profile highlight the profile you’ve just set up and click “Properties”:
![account properties]() On the „E-Mail“ tab you can configure the following options:
On the „E-Mail“ tab you can configure the following options:
![email tab]()
Further information can be found here:
http://www.itechtalk.com/thread9989.html
![data files]()
![data file general settings]()
![delivery location]()
![rss settings]()
![new rss feed]()
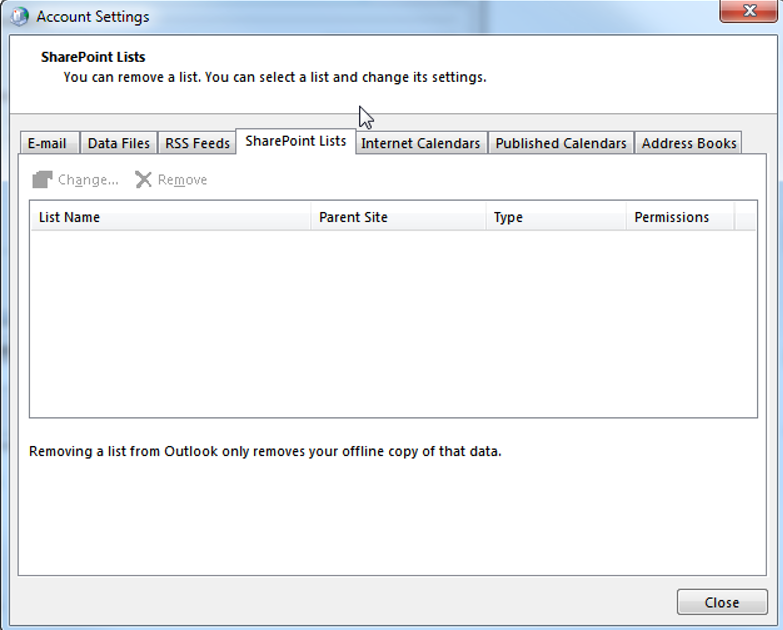
![rss delivery location]() On the “SharePoint Lists” tab you can see, change and remove all your connected SharePoint lists. (In order to Add a new SharePoint List to Outlook you’ll have to click on “Connect to Outlook” from within the SharePoint Site):
On the “SharePoint Lists” tab you can see, change and remove all your connected SharePoint lists. (In order to Add a new SharePoint List to Outlook you’ll have to click on “Connect to Outlook” from within the SharePoint Site):
![sharepoint lists]() On the “Internet Calendars” tab you can add, change or remove your Internet Calendar subscriptions:
On the “Internet Calendars” tab you can add, change or remove your Internet Calendar subscriptions:
![internet calendars]()
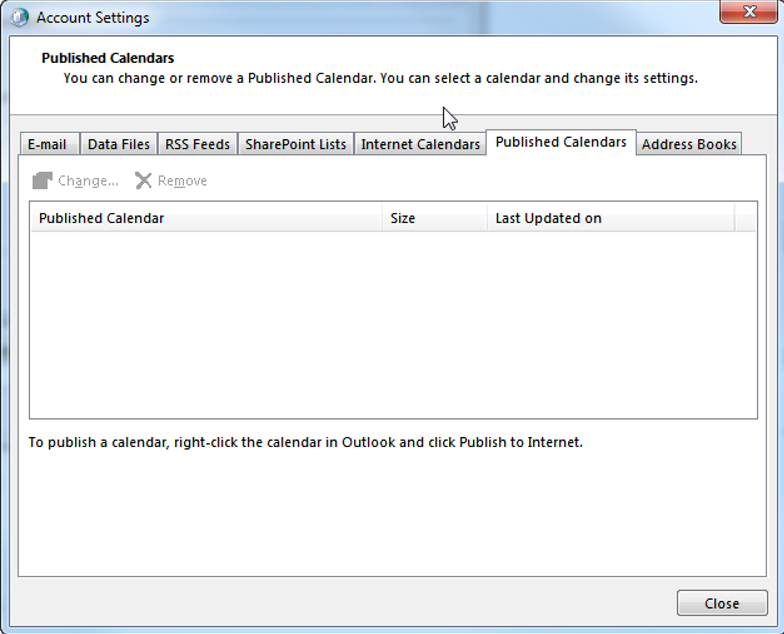
![add new internet calendar]() On the “Published Calendars” tab you can see, change and remove all your calendars that you have previously published to the Internet. (In order to publish a calendar, right-click the calendar in Outlook and click “Publish to Internet”):
On the “Published Calendars” tab you can see, change and remove all your calendars that you have previously published to the Internet. (In order to publish a calendar, right-click the calendar in Outlook and click “Publish to Internet”):
![published calendars]() On the “Address Books” tab you can add, change and remove different types of address books:
On the “Address Books” tab you can add, change and remove different types of address books:
![address books]()
![add address book]()
![ldap]()
![ldap more settings - connection]()
![ldap more settings - search]()
![other address book types]() Further information on adding various types of address books in Outlook can be found here:
Further information on adding various types of address books in Outlook can be found here:
http://office.microsoft.com/en-001/outlook-help/add-or-remove-an-address-book-HA010164208.aspx
and here:
http://office.microsoft.com/en-us/outlook-help/use-the-mobile-address-book-HA010126747.aspx
![outlook address book - change]() CONGRATULATIONS!!! You have now successfully set up your Exchange profile!
CONGRATULATIONS!!! You have now successfully set up your Exchange profile!
------------------------------------------------------------------------------------------------
![pop or imap]() In the next window, the following information has to be provided:
In the next window, the following information has to be provided:
![add pop / imap account]()
Further information on the difference between POP3 and IMAP can be found here:
http://mail2web.com/blog/2010/02/pop-imap-difference/
and here:
http://www.guidingtech.com/2207/difference-between-pop-and-imap/
Activating the “Remember password” option means that you do not have to re-enter your password every time you start outlook. If you uncheck it, Outlook will prompt for your account password each time it is started.
http://en.wikipedia.org/wiki/Secure_Password_Authentication
and here:
http://www.kuro5hin.org/?op=displaystory;sid=2002/4/28/1436/66154
![test account settings]()
![pop - general]() On the “Outgoing Server” tab you can configure if the SMTP server requires authentication or not. If it does you can either set it up to use the same settings as your incoming mail server or you can provide a separate account (your email provider has to inform you about the settings you’ll have to provide here):
On the “Outgoing Server” tab you can configure if the SMTP server requires authentication or not. If it does you can either set it up to use the same settings as your incoming mail server or you can provide a separate account (your email provider has to inform you about the settings you’ll have to provide here):
![pop - outgoing server]() On the “Advanced” tab you can specify the following settings (again, your email provider has to provide you with the necessary settings here):
On the “Advanced” tab you can specify the following settings (again, your email provider has to provide you with the necessary settings here):
Example for a POP3 account:
![pop3 - advanced]() Example for an IMAP account:
Example for an IMAP account:
![imap - advanced]() CONGRATULATIONS!!! You have now successfully set up your POP / IMAP profile!
CONGRATULATIONS!!! You have now successfully set up your POP / IMAP profile!
A list of common POP3 servers and the necessary port settings can be found here:
http://www.arclab.com/products/amlc/list-of-smtp-and-pop3-servers-mailserver-list.html
A list of common IMAP servers and the necessary port settings can be found here:
http://www.arclab.com/products/amlc/list-of-smtp-and-imap-servers-mailserver-list.html
It's purpose is to give a detailed explanation on every single step and I also tried to provide some useful links on special topics.
I hope my article can help solving the one or other Outlook issue.
By the way:
Screenshots are showing an Office 2013 installation on a Windows 7 (64bit) client.
Some of the settings may slightly vary in older versions of Outlook.
--------------------------
To start off, open up the control panel and click on the “Mail” button (it is called “Mail (32-bit)” because I am running a 64bit machine.)
 Then click the “Show Profiles…” button:
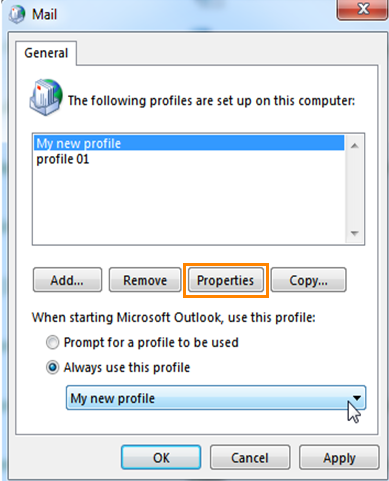
 What you see now is a list of already created profiles. In case it is a fresh Outlook installation, the list will be empty. Simply click on “Add…”:
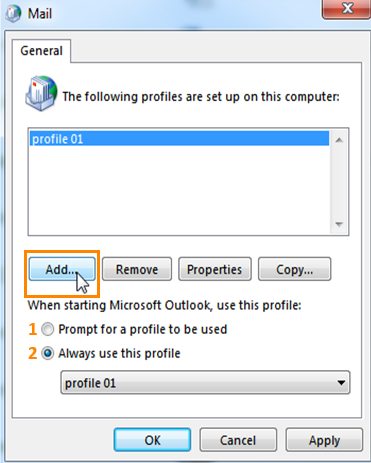
1. Prompt for a profile to be used
if more than 1 outlook profile is set up (for example your private one and another one for a resource mailbox) outlook will prompt for a profile to connect to2. Always use this profile
Outlook will always connect to the specified profile without prompting on startupNow it’s time to give your new profile a name (this can be any name you wish and does not have anything to do with your mail address or the account type you choose). e.g. if you are creating a POP account profile for gmail you may call the profile “gmail – pop”.
 In the next window you can choose to either automatically connect (if you are connected to an Exchange Server), or to manually set up the profile.
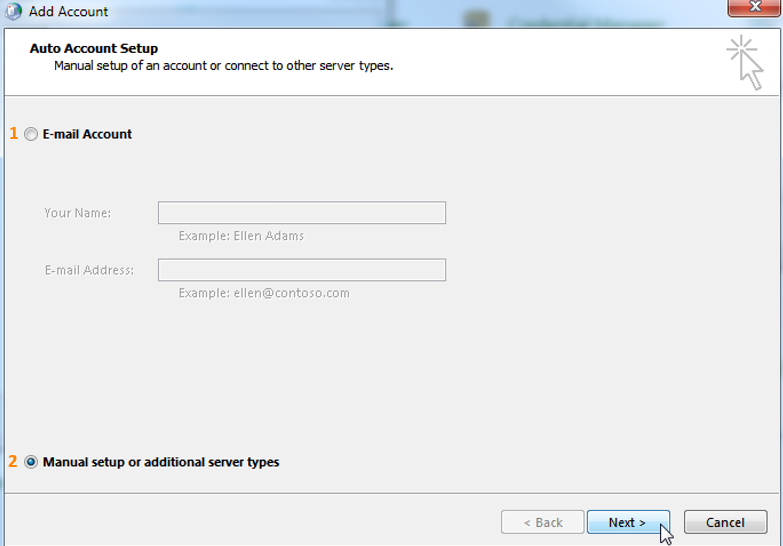
1. E-mail Account
In case you are connected to an Exchange Server this is the fastest and easiest way to create a new outlook profile. Choose this option and hit “Next”. This way, a “default” Outlook profile will be created.2. Manual setup or additional server types
manually setting up an outlook profile allows you to instantly configure various other settings right away (I am using this option for this tutorial)Up to here the steps are exactly the same for Exchange, POP and IMAP accounts.Now let's see how the separate account types are set up:
--------------------------
Exchange Account
(connected to Exchange 2007)In order to manually set up an Exchange profile choose “Microsoft Exchange…” and hit “Next”:
Insert the name of your company’s Exchange Server and your Windows username and click on “Check Name” to make sure it is correctly resolved. (In case the server- and username are entered correctly they will be underlined as soon as you click on “Check Name”). If the names are resolved correctly, click on “More Settings…”
1. Server Settings
Insert the name of the exchange server and your windows username and click on “check name”. In case the server- and username are entered correctly they will be underlined as soon as you click on “Check Name”.2. Offline Settings
Here you can enable or disable Cached Exchange Mode.You can find detailed information on cached exchange mode here: http://office.microsoft.com/en-001/outlook-help/turn-on-or-off-cached-exchange-mode-HP001232935.aspx
and here:
http://hosting.intermedia.net/support/kb/?id=1057
In the “General” tab we have the option to give our Exchange Account a reference name:
 On the “Advanced” tab you can connect additional mailboxes and configure some more cached mode settings:
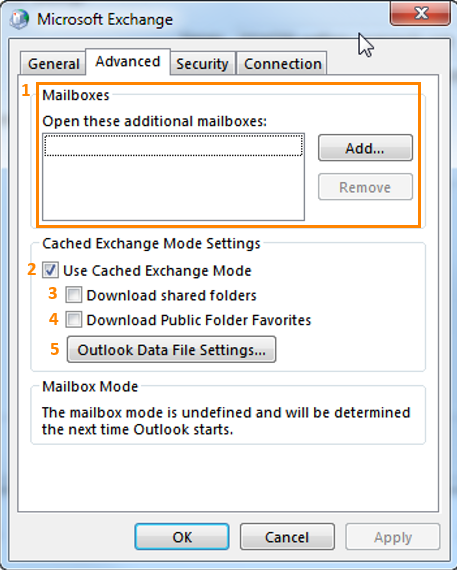
1. Mailboxes
In order to add an additional mailbox to your outlook profile (it will be shown underneath your default profile in the outlook folder list) click the “Add…” button. Then insert the name of the additional mailbox and click OK.
2. Use Cached Exchange Mode
here you can enable or disable cached exchange mode in general (this is the same option as mentioned previously in the “add Acount” screenshot in the “Offline Settings” section)3. Download shared folders
When you enable this option, shared folders (like the shared calendar or inbox from your colleagues) will also be made available offline (this will have more or less effect on the size of your *.ost file where all the offline items are stored)4. Download Public Folder Favorites
When you enable this option, all items that are located in your public folder favorites will be made available offline (this will have more or less effect on the size of your *.ost file where all the offline items are stored)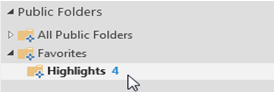
5. Outlook Data File Settings…
In this dialogue you can specify the location for the *.ost file (by default outlook will create the file C:\Users\%username%\AppDat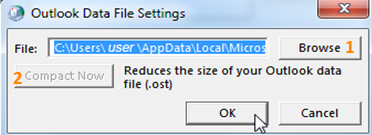
1. Browse
In order to change the location and name of the *.ost file click on „Browse“ and specify location and name for the file.2. Compact Now
Through clicking on „Compact Now“ you can reduce the file size of the *.ost file (in my case it is greyed out because I am still setting up my profile and the ost file referenced above has not been created yet)On the “Security” tab you can change a few security settings:
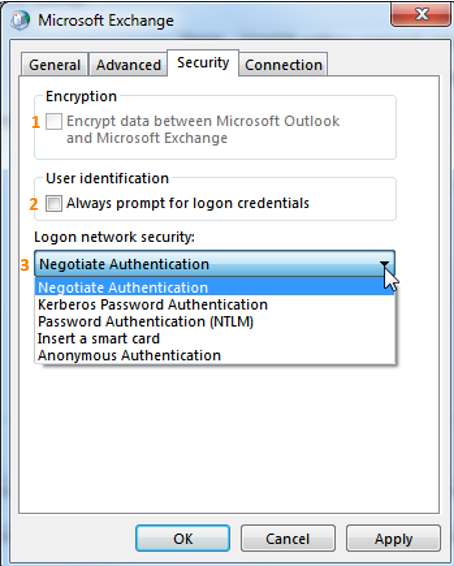
1. Encryption
Activate this option in order to encrypt data between Outlook and your Exchange server.2. User identification
If you enable this option you are prompted for a username and password each time you connect to the exchange server.Further information can be found here:
http://office.microsoft.com/en-001/outlook-help/specify-exchange-network-security-HP001003058.aspx
3. Logon network security
You can choose between various authentication options (select the corresponding option depending on your environment).Under “Connection” you can setup “Outlook Anywhere” (greyed out in my screenshot as we set it via policy in our environment):
 When you click on “Exchange Proxy Settings…” you can specify all necessary settings for “Outlook Anywhere”:
 Detailed information on “Outlook Anywhere” can be found here:
http://office.microsoft.com/en-001/outlook-help/use-outlook-anywhere-to-connect-to-your-exchange-server-without-vpn-HP010102444.aspx
As all available settings are set now, click “Next”:
 On the last screen of the profile setup click “Finish”:
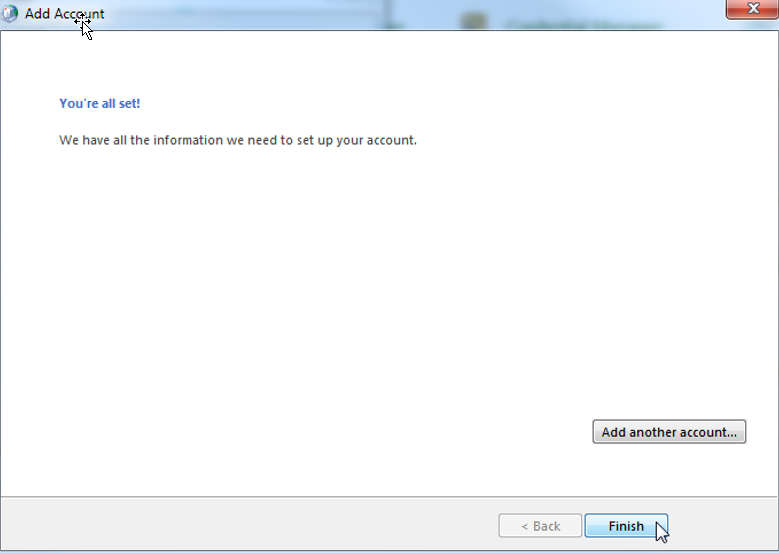 Basically your Outlook profile is set up and should be running fine. But there are still no pst files etc. connected to it. In order to finalize your Outlook profile highlight the profile you’ve just set up and click “Properties”:
 On the „E-Mail“ tab you can configure the following options:
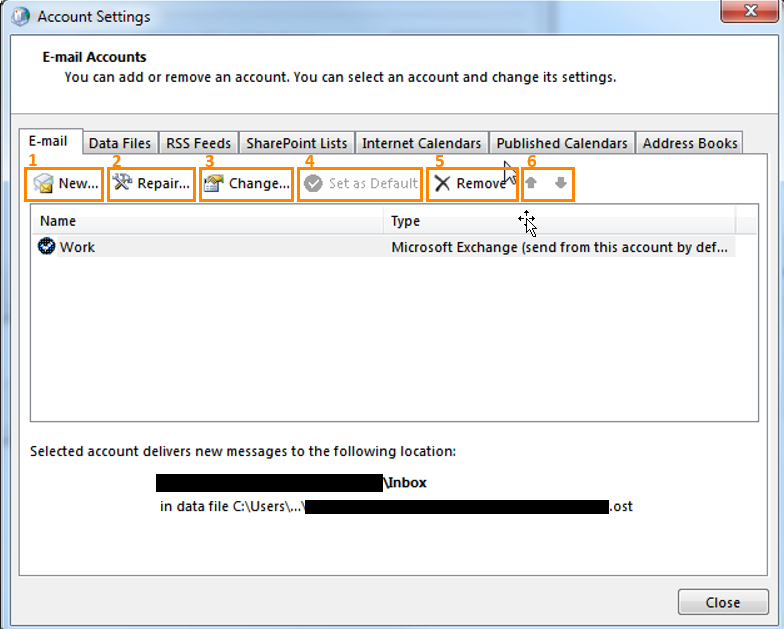
1. New...
Allows you to create an additional (new) account2. Repair...
Allows you to repair the selected account.Further information can be found here:
http://www.itechtalk.com/thread9989.html
3. Change...
Allows you to make changes to the selected account. (It will bring you back to all the settings previously explained in this article.)4. Set as Default
In case multiple accounts are set up in Outlook, you can set one as default here. (New messages are delivered to the default account.)5. Remove
Allows you to completely remove an account.6. Up- and Down Arrows
Allow you to re-arrange the accounts in the accounts- list.On the “Data Files” tab you can change the following settings:
1. Add...
Allows you to add data files (e.g. Personal Folders aka PST files).2. Settings...
Allows you to change the settings for the selected data file.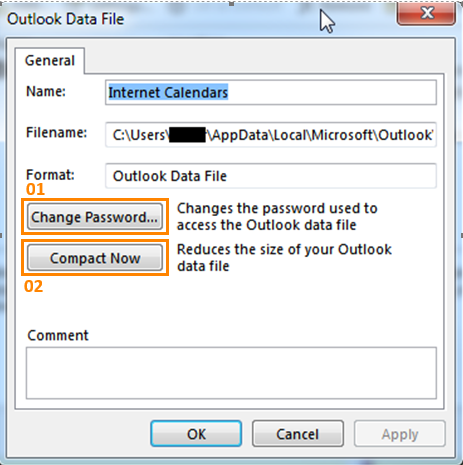
01. Change Password...
Allows you to specify (or change) a password for the selected data file.02. Compact Now
Reduces file size of the selected data file.3. Set as Default
Allows you to specify a data file as default. In case you specify a data file as default, be aware of those changes: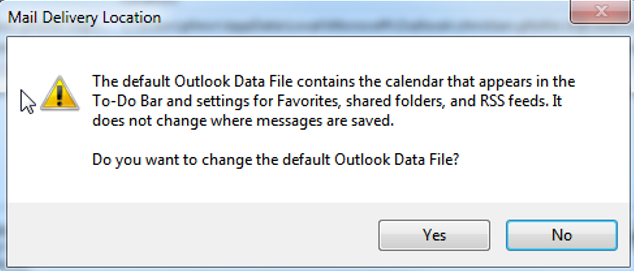
4. Remove
Allows you to remove a data file. (It is NOT deleted, but only removed from within Outlook)5. Open File Location
Opens the Windows Explorer pointing to the location where the selected data file is located.On the “RSS Feeds” tab you can add, change or remove your RSS Feed subscriptions:
1.
In order to add a new RSS Feed Subscription, simply click “New…” and insert the URL to the RSS Feed.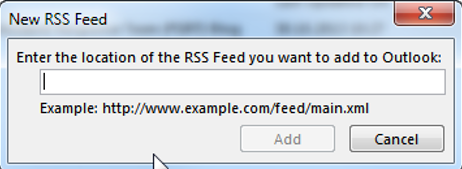
2.
You are also able to change the folder location where RSS Feeds are delivered to: On the “SharePoint Lists” tab you can see, change and remove all your connected SharePoint lists. (In order to Add a new SharePoint List to Outlook you’ll have to click on “Connect to Outlook” from within the SharePoint Site):
 On the “Internet Calendars” tab you can add, change or remove your Internet Calendar subscriptions:

1.
In order to add a new Internet Calendar Subscription, simply click “New…” and insert the URL to the Internet Calendar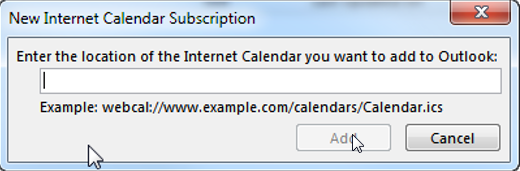 On the “Published Calendars” tab you can see, change and remove all your calendars that you have previously published to the Internet. (In order to publish a calendar, right-click the calendar in Outlook and click “Publish to Internet”):
 On the “Address Books” tab you can add, change and remove different types of address books:
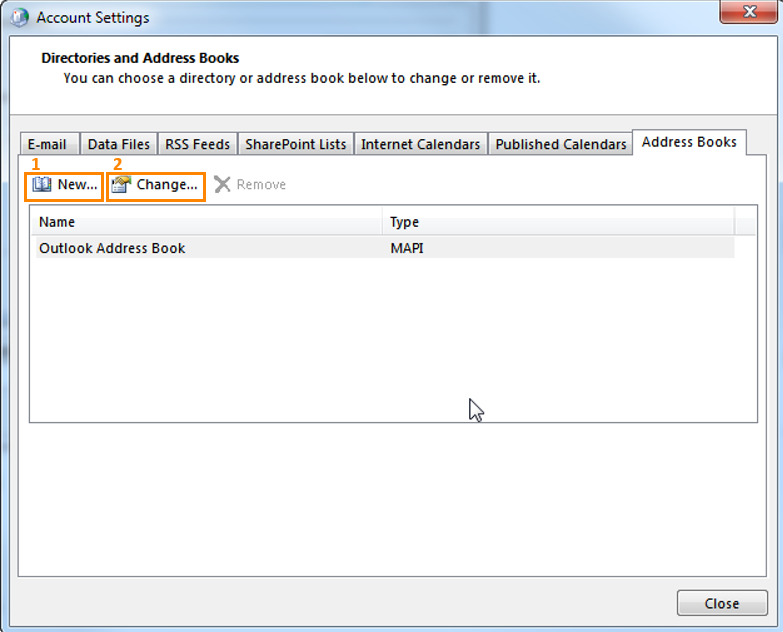
1. New...
Allows you to set up a new directory or Address Book: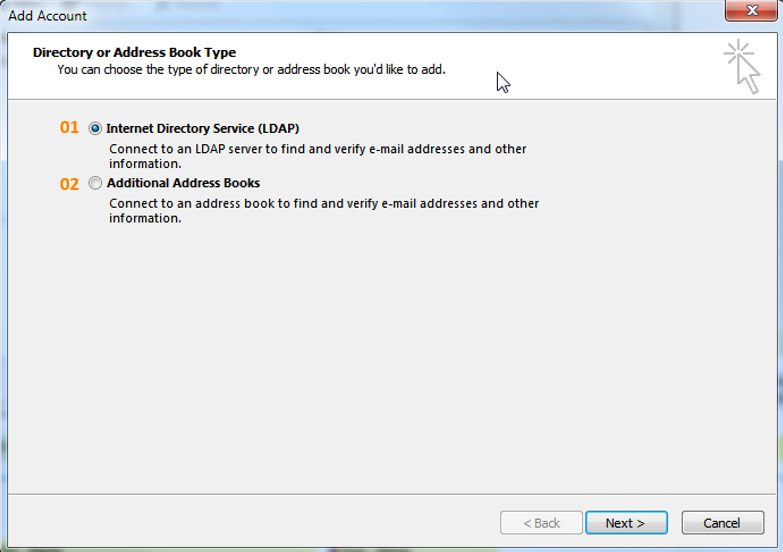
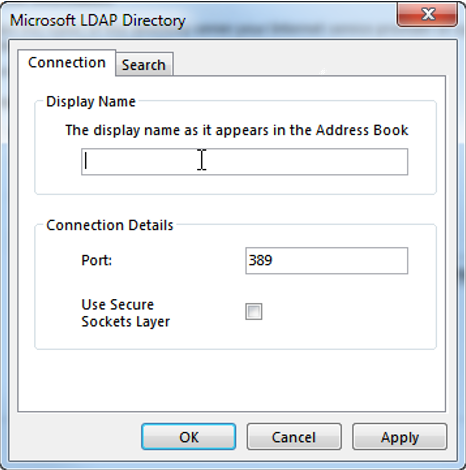
01. Internet Directory Service (LDAP)
Allows you to connect to an LDAP Server

02. Additional Address Books
Allows you to either add a “Mobile Address Book” or an “Outlook Address Book”.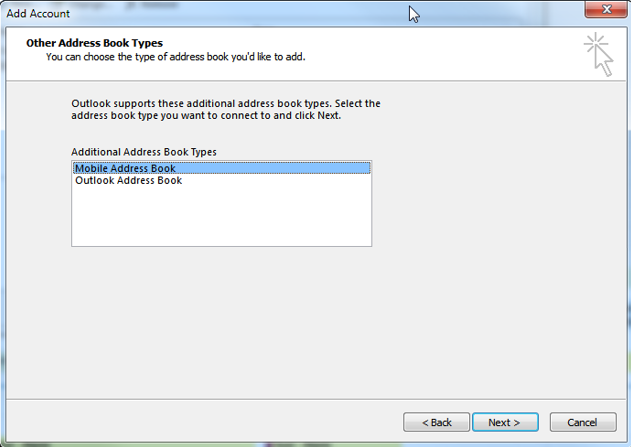 Further information on adding various types of address books in Outlook can be found here:
http://office.microsoft.com/en-001/outlook-help/add-or-remove-an-address-book-HA010164208.aspx
and here:
http://office.microsoft.com/en-us/outlook-help/use-the-mobile-address-book-HA010126747.aspx
2. Change...
Allows you to change further settings for the selected address book like “Show names by” etc: CONGRATULATIONS!!! You have now successfully set up your Exchange profile!
--------------------------
POP / IMAP Account
In order to manually set up a POP or IMAP profile choose “POP or IMAP” and hit “Next”: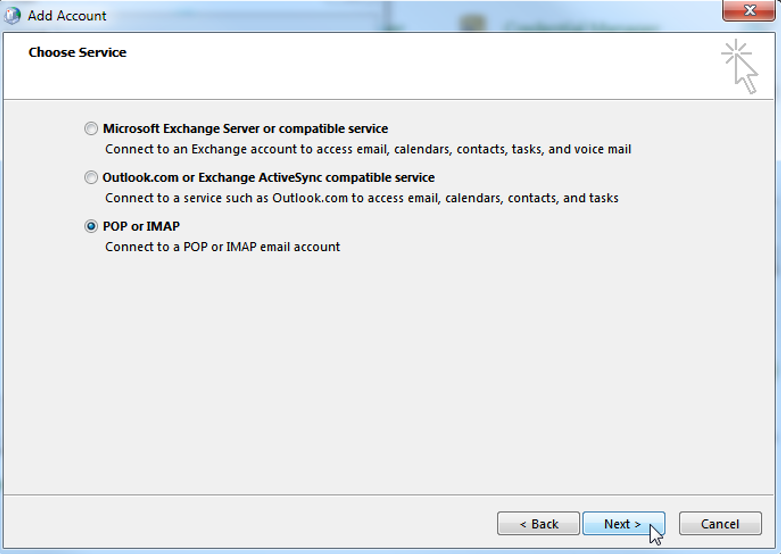 In the next window, the following information has to be provided:

1. User Information
Provide your full name and email address here.2. Server Information
Here you can choose between POP3 and IMAP account types.Further information on the difference between POP3 and IMAP can be found here:
http://mail2web.com/blog/2010/02/pop-imap-difference/
and here:
http://www.guidingtech.com/2207/difference-between-pop-and-imap/
3. Logon Information
Provide your username and account password here (e.g. your gmail username and password)Activating the “Remember password” option means that you do not have to re-enter your password every time you start outlook. If you uncheck it, Outlook will prompt for your account password each time it is started.
4. Require logon using Secure Password Authentication (SPA)
Further information on SPA can be found here:http://en.wikipedia.org/wiki/Secure_Password_Authentication
and here:
http://www.kuro5hin.org/?op=displaystory;sid=2002/4/28/1436/66154
5. Test Account Settings
Once you’ve entered all the necessary information (you also have to insert all necessary information in the "More Settings..." section in order to pass this test), click on “Test Account Settings”. You should see the following window appear – and, assuming you’ve entered all necessary information correctly – complete the test without any errors:
6. Deliver new messages to
Here you can either specify that a new *.ost file should be created for this account or you can simply configure an existing *ost file to be used for storing your emails.7. More Settings...
Once you’ve provided all necessary information, click the “More Settings…” button.On the “General” tab you can enter a name for your account and some information on your organization: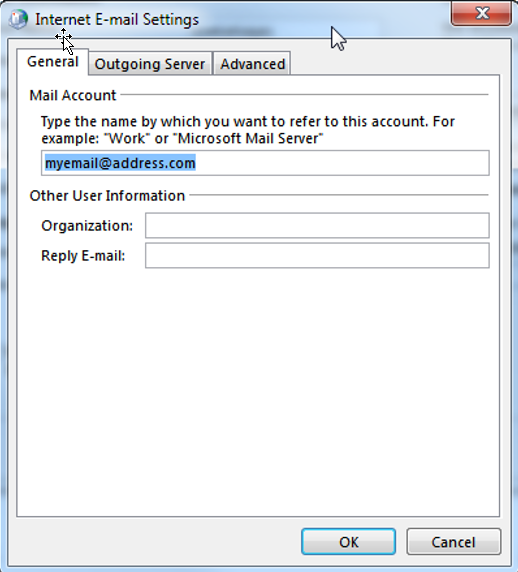 On the “Outgoing Server” tab you can configure if the SMTP server requires authentication or not. If it does you can either set it up to use the same settings as your incoming mail server or you can provide a separate account (your email provider has to inform you about the settings you’ll have to provide here):
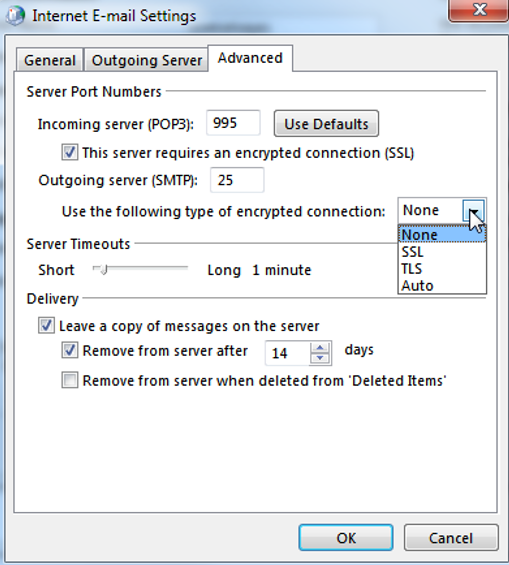
 On the “Advanced” tab you can specify the following settings (again, your email provider has to provide you with the necessary settings here):
Example for a POP3 account:
 Example for an IMAP account:
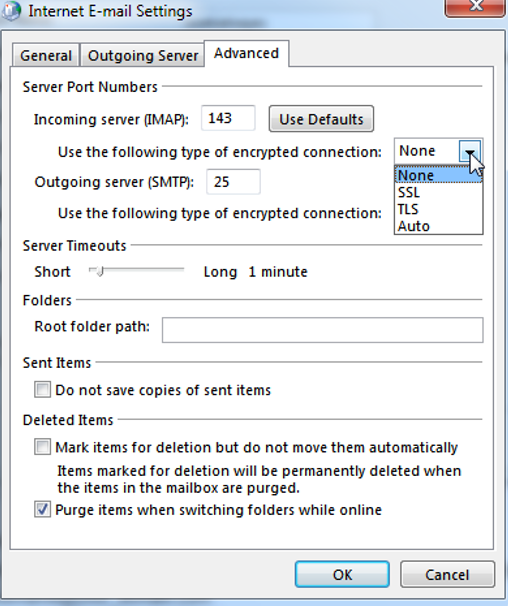 CONGRATULATIONS!!! You have now successfully set up your POP / IMAP profile!
A list of common POP3 servers and the necessary port settings can be found here:
http://www.arclab.com/products/amlc/list-of-smtp-and-pop3-servers-mailserver-list.html
A list of common IMAP servers and the necessary port settings can be found here:
http://www.arclab.com/products/amlc/list-of-smtp-and-imap-servers-mailserver-list.html
Have a question about something in this article? You can receive help directly from the article author. Sign up for a free trial to get started.
Comments (0)