

Browse All Articles > How to Make System Image Backup in Windows 8 / 8.1
There is a hidden way to make an image of Windows 8 / 8.1 that I would like to share that I found after doing some research into this, in order to answer a question posted. I decided to write an Article on how to accomplish this in the least amount of effort. First some factual reference to why this seems to be hidden.
"Microsoft is deprecating (discontinuing) the Windows Imaging functionality because Microsoft has decided that data and Operating System should be separate (like a mobile device) for Windows 8. Thus, they have a restoration parition that can re-set you back to factory defaults and / or reinstall the OS for you if it is broken, but your data will be in tact as long as you're using the File History function of Windows 8." -- DrDamnit
Now that you know why it is hidden. I will show you the steps on how to accomplish the image backup which is always my favorite way of backing up. But remember it's always best to do it on a clean system so look to other Articles to help you clean up your system first.
First go to the Start Screen and just type File Recovery
Next Click on Settings on the right (if you have Windows 8.1 you can skip this step)
Then Click on Windows 7 File Recovery on the left
![Windows 7 File Recovery]()
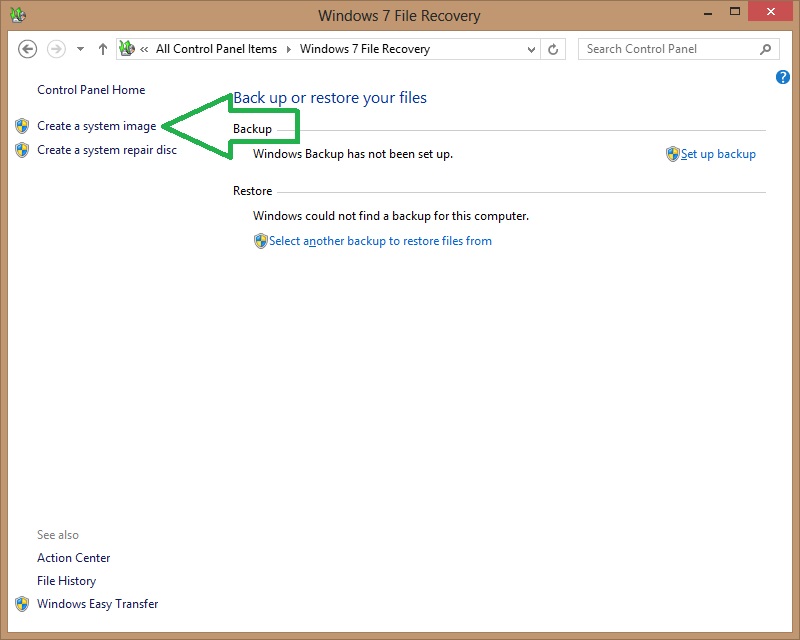
You will now be in Windows 7 File Recovery.
Click on "Create a system image" on the left
![Win8 Create System Image]()
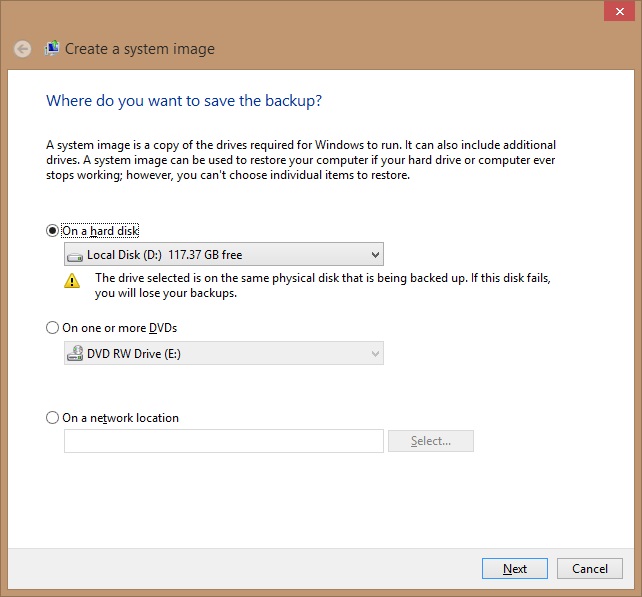
Windows will now scan for a backup Device on your computer. You have a choice here of whether to backup locally to a connected backup Hard Drive either internally or externally connected via USB/eSATA/Firewire etc. On DVDs or on a network location.
![Choose Location]()
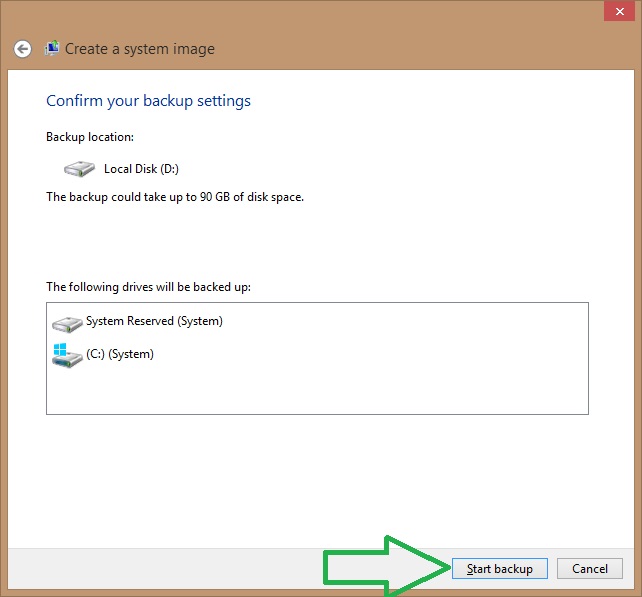
If you choose a local Drive just select your Destination from the drop down menu and at the next screen click the Start Backup button at the bottom
![Start Backup Local]()
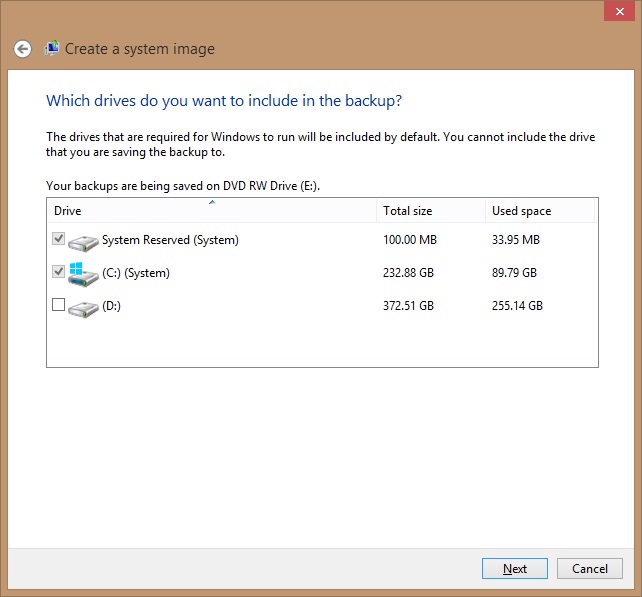
If you choose One or more DVDs option then you will be presented a screen in which to choose the Hard Drives / Partitions you want backed up. Select the ones that you want and click Next. Then click Start Backup button at the bottom.
![Choose drives]()
If you choose On a network location option you will need to click select on the right after clicking the radio button. Then you will see the next screen in which you will browse to your network location or type it in and input the credentials required for accessing the network location and then click OK.
![Network Location]()
Then you will proceed by clicking next and following the same steps as above on DVDs selection.
Hopefully this Article will be worthwhile to those who seek a way to backup Windows 8 / 8.1 easily with the built in tools provided by Windows. Good luck, I hope this helps.
"Microsoft is deprecating (discontinuing) the Windows Imaging functionality because Microsoft has decided that data and Operating System should be separate (like a mobile device) for Windows 8. Thus, they have a restoration parition that can re-set you back to factory defaults and / or reinstall the OS for you if it is broken, but your data will be in tact as long as you're using the File History function of Windows 8." -- DrDamnit
Now that you know why it is hidden. I will show you the steps on how to accomplish the image backup which is always my favorite way of backing up. But remember it's always best to do it on a clean system so look to other Articles to help you clean up your system first.
First go to the Start Screen and just type File Recovery
Next Click on Settings on the right (if you have Windows 8.1 you can skip this step)
Then Click on Windows 7 File Recovery on the left

You will now be in Windows 7 File Recovery.
Click on "Create a system image" on the left
Windows will now scan for a backup Device on your computer. You have a choice here of whether to backup locally to a connected backup Hard Drive either internally or externally connected via USB/eSATA/Firewire etc. On DVDs or on a network location.
If you choose a local Drive just select your Destination from the drop down menu and at the next screen click the Start Backup button at the bottom
If you choose One or more DVDs option then you will be presented a screen in which to choose the Hard Drives / Partitions you want backed up. Select the ones that you want and click Next. Then click Start Backup button at the bottom.
If you choose On a network location option you will need to click select on the right after clicking the radio button. Then you will see the next screen in which you will browse to your network location or type it in and input the credentials required for accessing the network location and then click OK.

Then you will proceed by clicking next and following the same steps as above on DVDs selection.
Hopefully this Article will be worthwhile to those who seek a way to backup Windows 8 / 8.1 easily with the built in tools provided by Windows. Good luck, I hope this helps.
Have a question about something in this article? You can receive help directly from the article author. Sign up for a free trial to get started.
Comments (0)