Windows 2012 Backup to a Virtual Hard Drive (VHD)


Published:
Browse All Articles > Windows 2012 Backup to a Virtual Hard Drive (VHD)
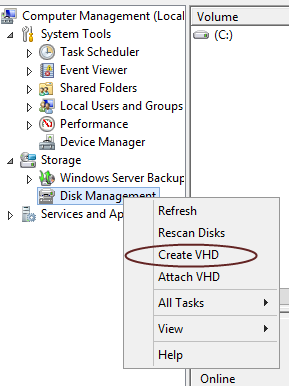
Every now and then, Microsoft does something that totally impresses me. It doesn't happen often, but in this case I must say I am thoroughly impressed with Windows Server Backup. One of the long time issues with Windows Backup has been the ability to send your backups to a location not on the local machine. In fact the limitation is still there. Many of us have gotten around this by setting up a NAS or SAN device and then connecting to the server via iSCSI. But what if I simply want to use a network share? Here's how I did it. Simply create a VHD in Disk Manager! Ok maybe not that simple, there are some issues with this method, like VHD's that do not reconnect after the system is rebooted (Really Microsoft?), so you need to create a scheduled task to reconnect the VHD, otherwise it's pretty straight forward. The first step is to create the VHD, this easy to do in Disk Management. Open Disk Management by going to the Control Panel > Administrative Tools and open Computer Management, then drill down to Disk Management:
![CreateVHD]()
Right Click on Create VHD, then fill in the blanks. I recommend using a VHDx because you can create drives larger that 2TB on up to 64TB, the only caveat is that only Windows Server 2012 and Windows 8 can read VHDx. I also recommend using Dynamically Expanding so that the file space is not used unless it is needed. The location can be a mapped drive as shown below or a UNC path like \\SERVER\FOLDER\FILE.VHDX.
![CreateVHD_Dialog]()
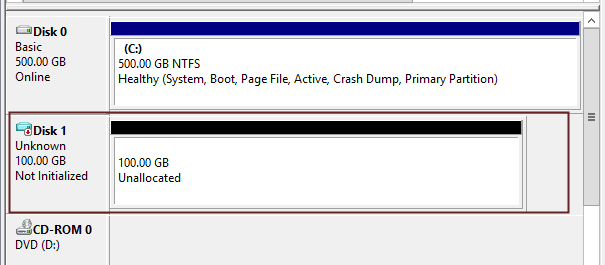
Now you will see an new disk in Disk Management. Leave it alone! We do not want to initialize this disk because Windows Server Backup is going to do it for us. we are also not going to assign a drive letter because it's not necessary and there's nothing you will be able to with it outside of Windows Server Backup anyway.
![VHD_NotInitialized]()
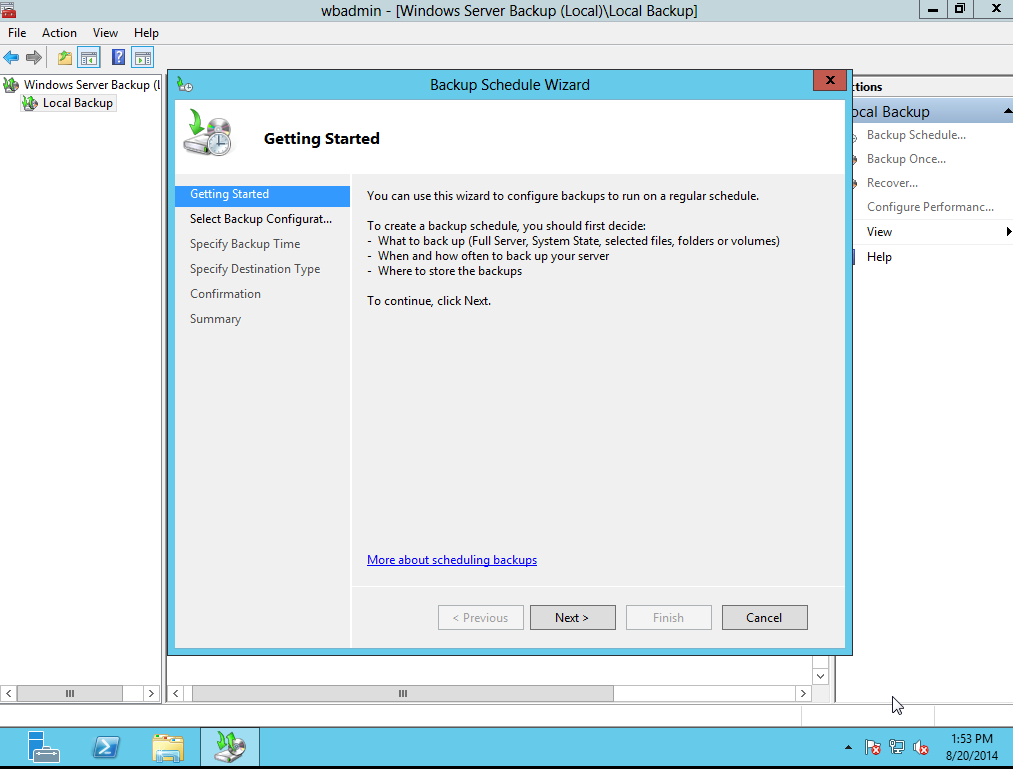
Now, lets configure our backups! - Open Windows Server Backup (You did install the feature right?). Now click on Local Backup and find Backup Schedule in the Actions Pane. You will be greeted with the Backup Schedule Wizard. Here is where the fun begins:
![WindowsServerBackupSchedule1]()
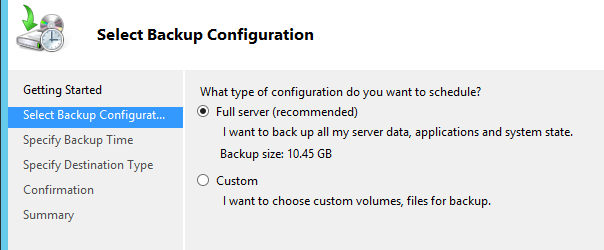
On the next screen we will choose Full server , feel free to go custom if you want.![FullServerSelect]()
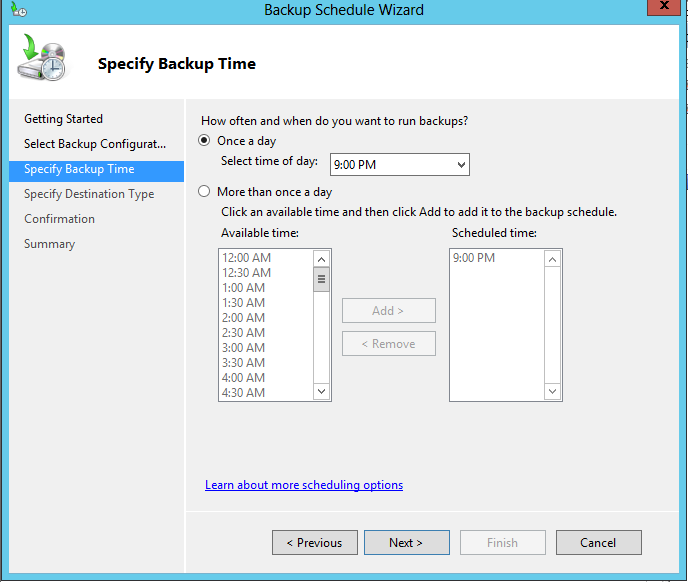
On the next screen setup your backup time:![SetBackupTime]()
This next two screens are critical. Pay attention!
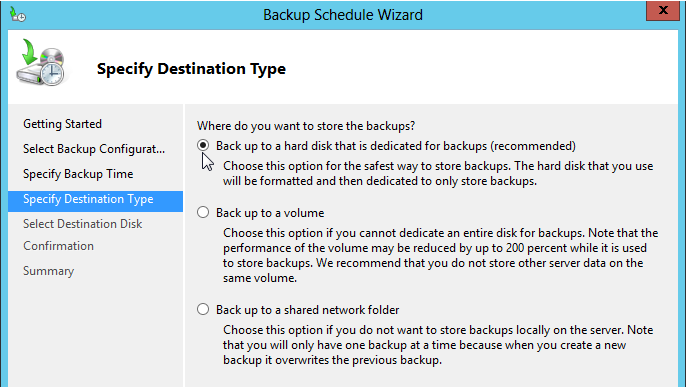
Now we select Backup to a hard disk that is dedicated for backups.![SelectBackupDestinationType]()
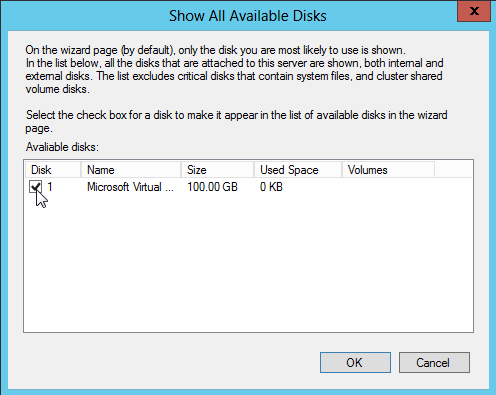
Next we need to find our VHDx file, which will appear as a disk to the wizard. Click on the Show All Available Disks... button.
![DestinationDisk1]()
Now select the VHD we created earlier.
![SelectVHD]()
Confirm your choices and finish up. The VHD will be formatted and your backups will be scheduled. Now for the GOTCHA! Microsoft must not have been thinking clearly when it came to connecting VHD's. Believe it or not the VHD will not reconnect after a reboot and requires a scheduled task with a short script to reconnect the VHD when the system starts up. You can find the article on reconnecting the VHD on startup here:Reconnect VHD on Windows Startup – Windows Server 2008/2012
this is reprint of my original article: http://xpertnotes.net/blog/2014/08/20/windows-2012-backup-to-a-virtual-hard-drive-vhd/
Right Click on Create VHD, then fill in the blanks. I recommend using a VHDx because you can create drives larger that 2TB on up to 64TB, the only caveat is that only Windows Server 2012 and Windows 8 can read VHDx. I also recommend using Dynamically Expanding so that the file space is not used unless it is needed. The location can be a mapped drive as shown below or a UNC path like \\SERVER\FOLDER\FILE.VHDX.

Now you will see an new disk in Disk Management. Leave it alone! We do not want to initialize this disk because Windows Server Backup is going to do it for us. we are also not going to assign a drive letter because it's not necessary and there's nothing you will be able to with it outside of Windows Server Backup anyway.
Now, lets configure our backups! - Open Windows Server Backup (You did install the feature right?). Now click on Local Backup and find Backup Schedule in the Actions Pane. You will be greeted with the Backup Schedule Wizard. Here is where the fun begins:
On the next screen we will choose Full server , feel free to go custom if you want.
On the next screen setup your backup time:
This next two screens are critical. Pay attention!
Now we select Backup to a hard disk that is dedicated for backups.
Next we need to find our VHDx file, which will appear as a disk to the wizard. Click on the Show All Available Disks... button.

Now select the VHD we created earlier.
Confirm your choices and finish up. The VHD will be formatted and your backups will be scheduled. Now for the GOTCHA! Microsoft must not have been thinking clearly when it came to connecting VHD's. Believe it or not the VHD will not reconnect after a reboot and requires a scheduled task with a short script to reconnect the VHD when the system starts up. You can find the article on reconnecting the VHD on startup here:Reconnect VHD on Windows Startup – Windows Server 2008/2012
this is reprint of my original article: http://xpertnotes.net/blog
Have a question about something in this article? You can receive help directly from the article author. Sign up for a free trial to get started.
Comments (1)
Author
Commented: