Creating Next/Previous Post Links in WordPress

Published:
Browse All Articles > Creating Next/Previous Post Links in WordPress
An earlier version of this article was originally posted on my personal blog at: http://www.brianjmatis.com/2014/07/07/enabling-nextprevious-post-links-in-wordpress/
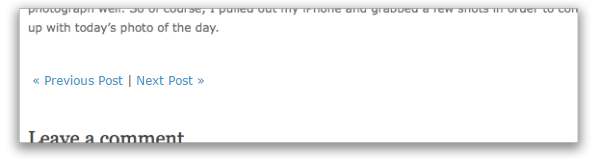
Example of Next/Previous post links at the bottom of a blog entry:
![nextAndPrevLinks.png]()
Fortunately, doing it is pretty easy. The key is to make use of the following two WordPress functions:
These functions do pretty much what they sound like: add a link to the next post and a link to the previous post. The default behavior for these is actually pretty good and might work just fine for you. Each function would display the following (without the bullets):
Where each one was a link to the relevant post and the text was its title. If you wanted to display these next to each other, with a "|" character as a divider between them, the code would be like so:
Warning: messing up this file can totally break the functionality of your blog. Ideally, you've got some experience or knowledge already about WordPress and PHP before you begin editing the code for your blog. If in doubt, make sure you've got a backup! (Actually, that's not a bad idea even if you know what you're doing ;-)
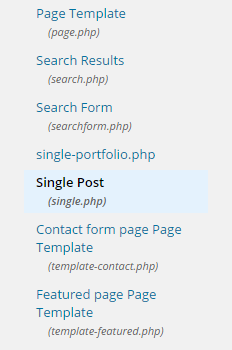
Editing this php file can be done from within your WordPress admin controls. In the WordPress menu on the left, Navigate to Appearance -> Editor. Then on the right side, choose the Single Post template (single.php).
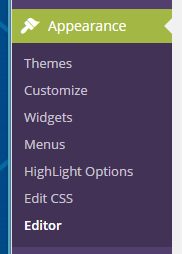
Getting to the WordPress Appearance Editor:
![wp-appearanceEditorMenu.PNG]()
Selecting the Single Post file from the Templates menu:
![wp-singlePostTemplate.PNG]()
In my case, the code was going within an existing PHP code block, but if yours isn't, make sure to wrap it in the PHP code tags:
“« Title of Previous Post | ”.
To fix this, you'll need to put in logic around the display of the ‘|’ character to only show up if there is both a previous post and a next post. Here, you'll make use of the following WordPress functions:
You'll use these two functions to test for the existence of the previous post and the next post. Only if both are true do you want to display the '|', so the code will be as follows:
http://codex.wordpress.org/Template_Tags/previous_post_link
http://codex.wordpress.org/Template_Tags/next_post_link
Introduction
In most blogs, a fairly common navigational element is to have links at the bottom of article pages for going to the next and/or previous entry in the blog. This gives readers an easy way to navigate between individual posts, without needing to jump back up to the main blog page each time. If you're using WordPress, as I am, most themes will likely already include this feature for you. However, it's still up to the individual theme, and as I discovered with the one I chose, it might not be there! This meant it was time to roll up my sleeves, and create it myself.Example of Next/Previous post links at the bottom of a blog entry:
Generating the Links
Fortunately, doing it is pretty easy. The key is to make use of the following two WordPress functions:
- previous_post_link()
- next_post_link()
These functions do pretty much what they sound like: add a link to the next post and a link to the previous post. The default behavior for these is actually pretty good and might work just fine for you. Each function would display the following (without the bullets):
- « Title of Previous Post
- Title of Next Post »
Where each one was a link to the relevant post and the text was its title. If you wanted to display these next to each other, with a "|" character as a divider between them, the code would be like so:
//include next/prev post navigation
                      previous_post_link();
                      echo ' | ';
next_post_link():Adding the code to your "Single Post" template
This code goes within your Single Post (a.k.a. single.php) file, in the location where you want it to appear on the page -- but finding that spot will be highly dependent upon whatever theme you're using and exactly where you want it to appear on the page. For that, you'll just have to look through the code and do some amount of figuring out what it's generating on the page. For mine, I put it after the code that generated the post content and before the code that generated the comments. (Again, your mileage may vary based upon your theme and how clearly it's commented and labeled.)Warning: messing up this file can totally break the functionality of your blog. Ideally, you've got some experience or knowledge already about WordPress and PHP before you begin editing the code for your blog. If in doubt, make sure you've got a backup! (Actually, that's not a bad idea even if you know what you're doing ;-)
Editing this php file can be done from within your WordPress admin controls. In the WordPress menu on the left, Navigate to Appearance -> Editor. Then on the right side, choose the Single Post template (single.php).
Getting to the WordPress Appearance Editor:
Selecting the Single Post file from the Templates menu:
In my case, the code was going within an existing PHP code block, but if yours isn't, make sure to wrap it in the PHP code tags:
<?php ... ?><?php
//include next/prev post navigation
previous_post_link();
echo ' | ';
next_post_link():
?>Making the Divider Conditional
That’s nice and all, but it leaves you with a problem: for the very most recent post and the very last post, there’d be an unnecessary ‘|’ character within the navigation, since there would only be a “Next Post” or a “Previous Post” instead of having both. So if you were at the newest post, you’d end up with:“« Title of Previous Post | ”.
To fix this, you'll need to put in logic around the display of the ‘|’ character to only show up if there is both a previous post and a next post. Here, you'll make use of the following WordPress functions:
- get_previous_post()
- get_next_post()
You'll use these two functions to test for the existence of the previous post and the next post. Only if both are true do you want to display the '|', so the code will be as follows:
if( get_previous_post() && get_next_post() )
echo ' | ';//include next/prev post navigation
previous_post_link();
if( get_previous_post() && get_next_post() )
echo ' | ';
next_post_link();Conclusion
There you go! With that small bit of code, you should be able to get working Previous/Next Post navigational links at the bottom of your blog article pages. As for next steps, you may want to move beyond the default behavior to do things like: customize the text that appears, make them only navigate through a particular category, style the display of the links, or more. For that, I'd recommend checking out the WordPress reference pages for the previous_post_link() and next_post_link() functions, which I've provided links to below. Enjoy!
References
http://codex.wordpress.org/Template_Tags/previous_post_link
http://codex.wordpress.org/Template_Tags/next_post_link

Product Manager. Photographer. Runner. Gamer. Mostly human.
Have a question about something in this article? You can receive help directly from the article author. Sign up for a free trial to get started.
Comments (0)