Browse All Articles > How to create a custom audience from data for facebook advertising
In this article, you will learn how to create custom audiences using your own email lists. You can use this custom audience as your target audience for advertising on Facebook. This allows you to advertise to your existing audience. Once you've created a custom audience, you will also have the option to create audiences that have similar behaviors and demographics as your audiences, through lookalike audiences.
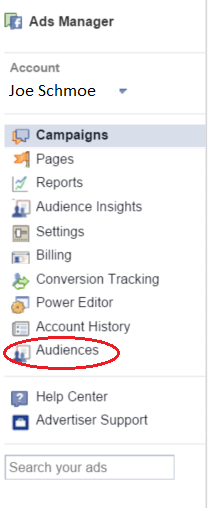
- When you log in to your Facebook account, navigate to your ads manager and click "Audiences", located in the left column. Note: You can also create custom audiences using power editor. In Power Editor, the selection for "Audiences" is in the dropdown at the top of the left rail.
![Audiences.png]()
- In Audiences, click the green "Create Audience" button in the upper right corner and select "Custom Audience" from the dropdown menu. Note: to create a similar audience, select "Lookalike Audience" here. You must already have a custom audience to choose from in order to do this.
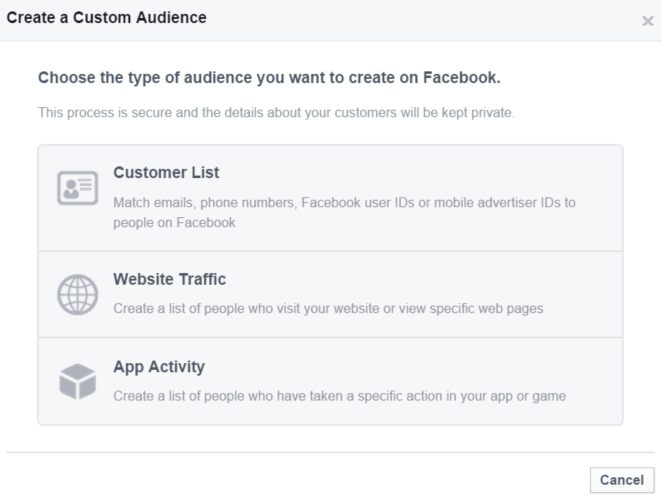
- Choose "Customer List" for the type of audience you want to create. Note: You may create custom audiences here from different sources, such as website traffic and activity from your app.
![Customer-List.png]()
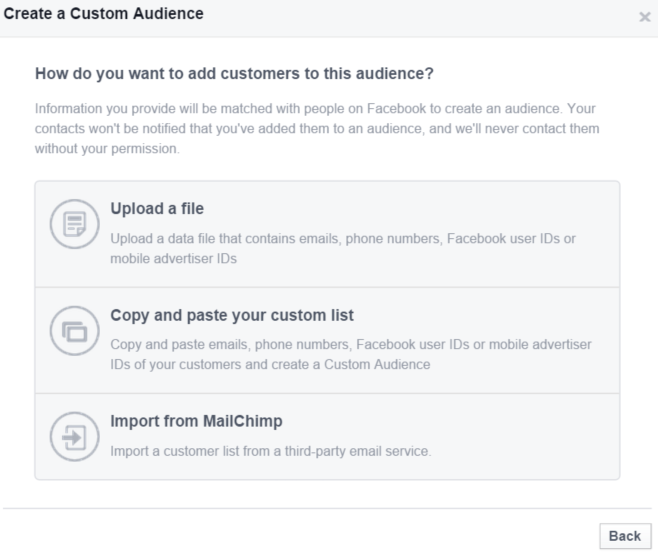
- Next you can choose to either upload an excel file, copy and paste your list, or import your list from Mail Chimp. Each contact must be separated by a new line or carriage return. Choose either email address or phone number as the type of identifier. You must have them formatted as follows:
Email addresses: name@domain.com
Phone number: country code + number (ex: 1-805-787-0603)
Note: Each list you upload must only contain one type of identifier (either phone number OR email). If you’d like to create a custom audience based on both identifiers, you will need to upload each list of identifiers separately.![Upload-a-file.png]()
- Click "Create Audience" and you’re done. Once Facebook processes your audience (this can take a couple hours) you will have the option to target this custom audience in the "Audience" tab when you are creating an ad.
Have a question about something in this article? You can receive help directly from the article author. Sign up for a free trial to get started.


Comments (0)