

Browse All Articles > A/B testing email subject lines in Marketo
Marketo is a marketing automation software that I use often in my position to create marketing email campaigns. After creating triggered email programs in Marketo, I perform A/B tests of different versions of the emails to find which emails are performing best among recipients.
Depending on the content of the email I will perform an A/B test on the subject line, or the main content of the email. This article will explain how to A/B test subject lines for a triggered Marketo email program. Note: the email program must be a triggered program or the A/B test will not function successfully.
Step 1: Locate the Email you want to A/B test
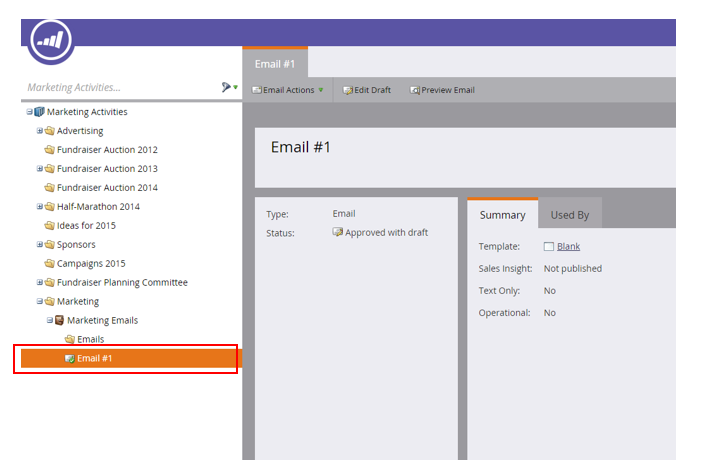
Locate the email that you would like to A/B Test. I'm going to A/B test an email titled "Email #1", so I locate that email in Marketo. Check that the email is approved, because it will not be able to be A/B tested if it is not in an approved state.
When an email has been approved, it will have a green check mark to the left of the email title. If the email you would like to A/B test is not approved. Right-click on the email title and select "Approve Draft" from the drop-down menu.
![AB-Subject-Lines-Step-1-1.png]()
Step 2: Open and review the email
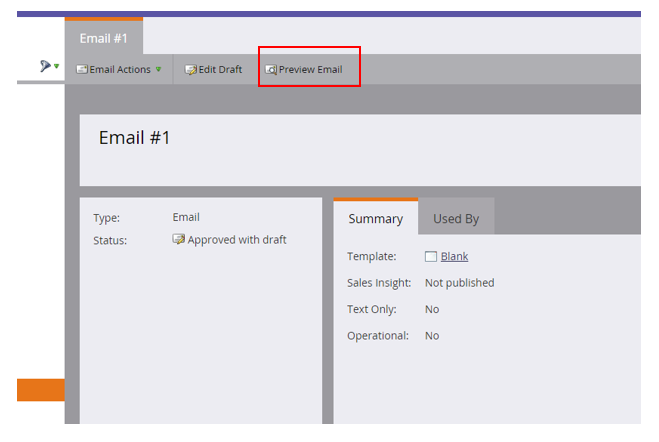
Open the email by clicking the "Preview Email" button.
![AB-Subject-Lines-Step-2-1.png]()
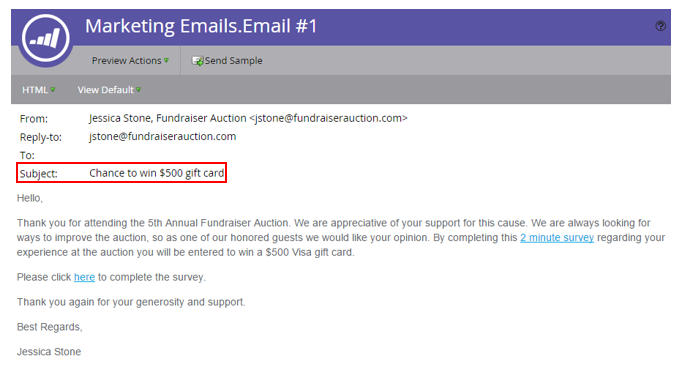
Once you have opened the email, you can review the subject line and decide how you like to change it for the A/B test.
![AB-Subject-Lines-Step-2-2.png]()
Note: If you edit the email before performing the A/B test it will need to be approved again. Approve the email by right-clicking on the email title in the right navigation bar and selecting "Approve Draft" from the drop-down menu.
Step 3: Create a New Test
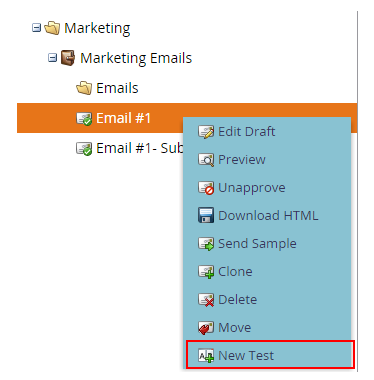
Return to the window that displays the right navigation bar that lists the email programs. Go to the right navigation bar and click on the email title that you will be A/B testing. Select "New Test" from the drop down menu.
![AB-Subject-Lines-Step-3-1.png]()
A new window will open that displays the test details.
![AB-Subject-Lines-Step-3-2.png]()
Step 4: Edit the Test Settings
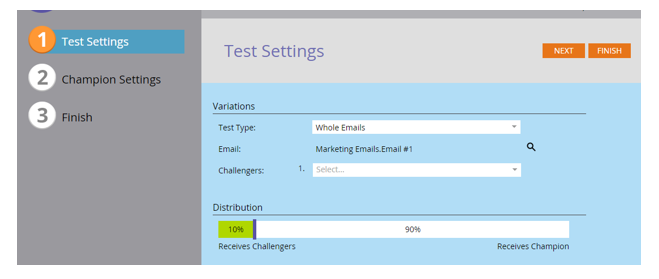
This new window displays a 3-step process. The first step is "Test Settings." We will complete the fields to determine the settings of this test.
![AB-Subject-Lines-Step-3-2.png]()
For Test Type, click the drop-down menu to display the choices.
![AB-Subject-Lines-Step-4-2.png]()
There are 3 choices: Whole Emails, Subject Line, and From Address. We will select "Subject Line" because we are A/B testing subject lines.
![AB-Subject-Lines-Step-4-3.png]()
The "Champion" field will be auto-filled with the subject line of the original email. In the "Challengers" field we will enter the subject line that we would like to test against the original email. In this article, the challenger subject line is: "Complete survey for chance to win $500."
![AB-Subject-Lines-Step-4-4.png]()
If you would like to test multiple subject lines you can press the plus symbol to add fields.
![AB-Subject-Lines-Step-4-5.png]()
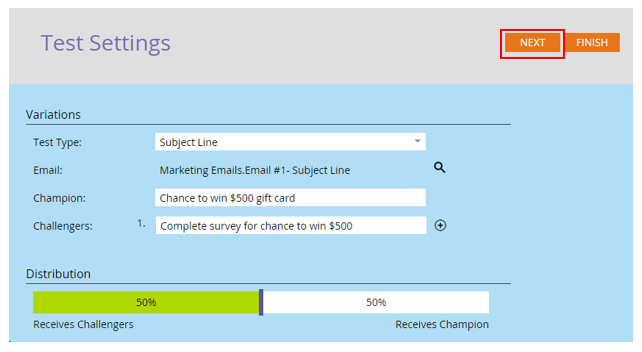
For the Distribution, you will use the slider to select how much traffic you want to send to each subject line. I'm going to give each subject line 50% of traffic. After selecting the distribution percentage, press "Next."
![AB-Subject-Lines-Step-4-6.png]()
Step 5: Edit the Champion Settings
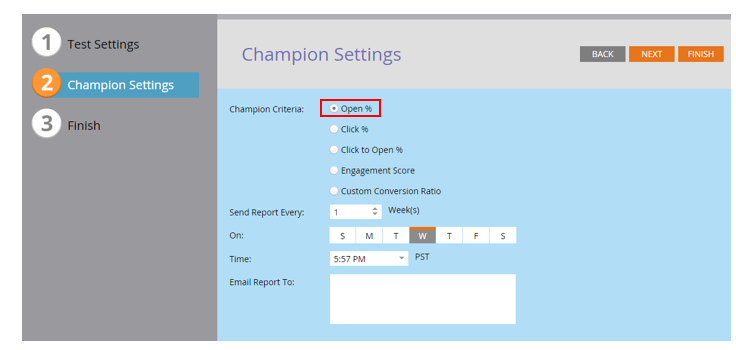
We will complete the first section of the Champion Settings, the "Champion Criteria."
For testing subject lines you will click the radio button for "Open %." We use the Open % option because we are evaluating the effectiveness of the subject line, therefore we want to find how many people will open the email after reading the subject line.
![AB-Subject-Lines-Step-5-1.png]()
The next sections of this page are used to set up the report that will be emailed with the test results. You will select the interval of weeks, the day(s) of the week, the time, and the email address the report will be sent to. This report will display the results of the tests and which email is winning.
After determining when you would like the report to be sent to you click "Next."
![AB-Subject-Lines-Step-5-2.png]()
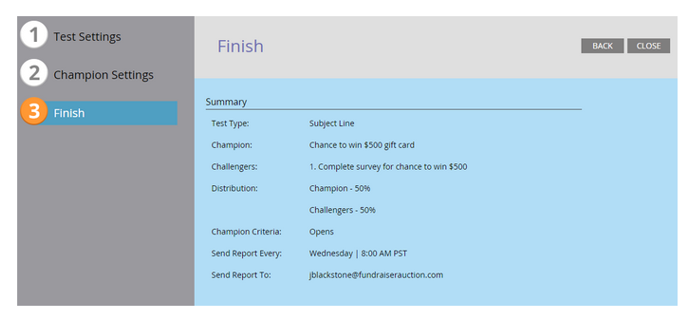
You have finished setting up your A/B test for an email subject line. Next, you will approve the test to activate it.
Step 6: Approve the A/B Test
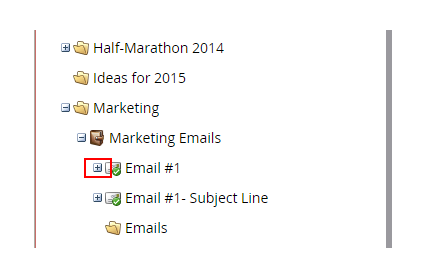
After setting up the A/B Test it will need to be approved to be activated. Approve the test by locating the email title and click the plus symbol to the left of the title to expand it.
![AB-Subject-Lines-Step-6-1.png]()
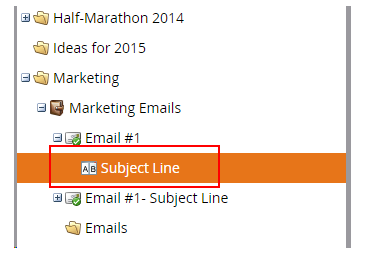
The test will now be displayed below the email title.
![AB-Subject-Lines-Step-6-2.png]()
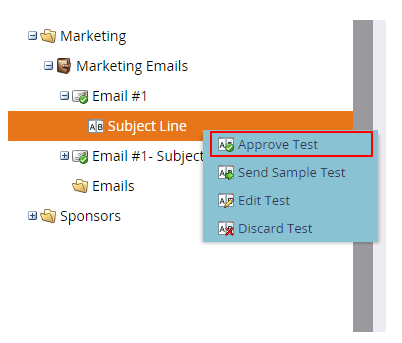
Approve the test by right-clicking the email test and selecting "Approve Test" from the drop-down menu.
![AB-Subject-Lines-Step-6-3.png]()
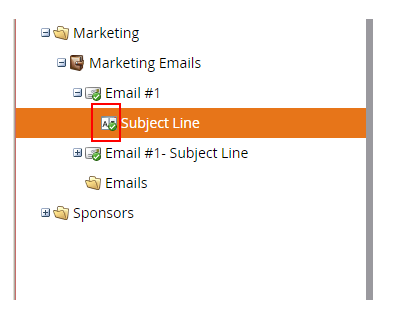
Once the test has been approved a green check mark will appear to the left of the test title.
![AB-Subject-Lines-Step-6-4.png]()
Your A/B test for the subject line is now complete and activated. To monitor the results of this A/B test, you will receive emails that display the A/B test results. These emails will be sent on the day, time, and to the email address you specified during Step 5 of this article "Edit the Champion Settings."
After monitoring the results of the A/B test you will declare a champion based on which email performs best. The emails that you will be sent with the A/B test results will show which email is winning and include a link to declare a champion. Follow that link to pick the winner and have 100% of traffic distributed to that winner.
Depending on the content of the email I will perform an A/B test on the subject line, or the main content of the email. This article will explain how to A/B test subject lines for a triggered Marketo email program. Note: the email program must be a triggered program or the A/B test will not function successfully.
Step 1: Locate the Email you want to A/B test
Locate the email that you would like to A/B Test. I'm going to A/B test an email titled "Email #1", so I locate that email in Marketo. Check that the email is approved, because it will not be able to be A/B tested if it is not in an approved state.
When an email has been approved, it will have a green check mark to the left of the email title. If the email you would like to A/B test is not approved. Right-click on the email title and select "Approve Draft" from the drop-down menu.
Step 2: Open and review the email
Open the email by clicking the "Preview Email" button.
Once you have opened the email, you can review the subject line and decide how you like to change it for the A/B test.
Note: If you edit the email before performing the A/B test it will need to be approved again. Approve the email by right-clicking on the email title in the right navigation bar and selecting "Approve Draft" from the drop-down menu.
Step 3: Create a New Test
Return to the window that displays the right navigation bar that lists the email programs. Go to the right navigation bar and click on the email title that you will be A/B testing. Select "New Test" from the drop down menu.
A new window will open that displays the test details.
Step 4: Edit the Test Settings
This new window displays a 3-step process. The first step is "Test Settings." We will complete the fields to determine the settings of this test.

For Test Type, click the drop-down menu to display the choices.
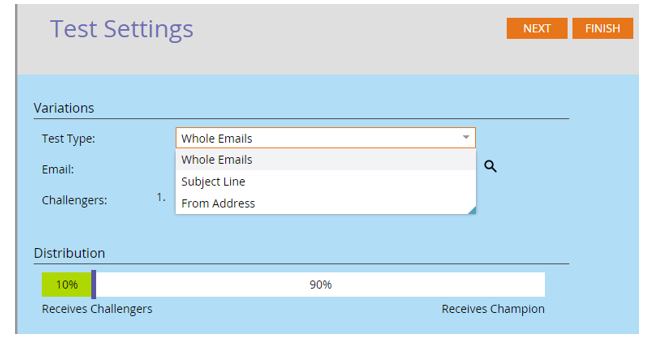
There are 3 choices: Whole Emails, Subject Line, and From Address. We will select "Subject Line" because we are A/B testing subject lines.
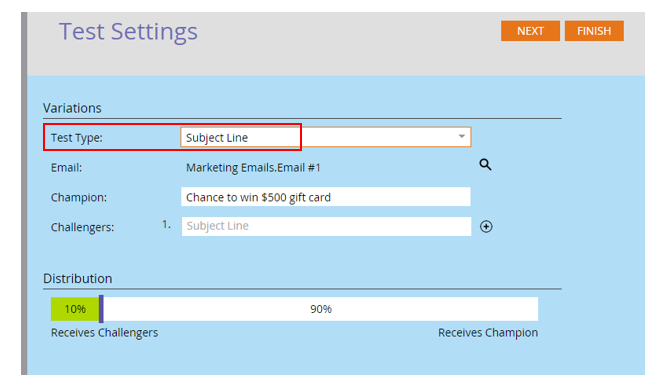
The "Champion" field will be auto-filled with the subject line of the original email. In the "Challengers" field we will enter the subject line that we would like to test against the original email. In this article, the challenger subject line is: "Complete survey for chance to win $500."

If you would like to test multiple subject lines you can press the plus symbol to add fields.

For the Distribution, you will use the slider to select how much traffic you want to send to each subject line. I'm going to give each subject line 50% of traffic. After selecting the distribution percentage, press "Next."
Step 5: Edit the Champion Settings
We will complete the first section of the Champion Settings, the "Champion Criteria."
For testing subject lines you will click the radio button for "Open %." We use the Open % option because we are evaluating the effectiveness of the subject line, therefore we want to find how many people will open the email after reading the subject line.
The next sections of this page are used to set up the report that will be emailed with the test results. You will select the interval of weeks, the day(s) of the week, the time, and the email address the report will be sent to. This report will display the results of the tests and which email is winning.
After determining when you would like the report to be sent to you click "Next."
You have finished setting up your A/B test for an email subject line. Next, you will approve the test to activate it.
Step 6: Approve the A/B Test
After setting up the A/B Test it will need to be approved to be activated. Approve the test by locating the email title and click the plus symbol to the left of the title to expand it.
The test will now be displayed below the email title.
Approve the test by right-clicking the email test and selecting "Approve Test" from the drop-down menu.
Once the test has been approved a green check mark will appear to the left of the test title.
Your A/B test for the subject line is now complete and activated. To monitor the results of this A/B test, you will receive emails that display the A/B test results. These emails will be sent on the day, time, and to the email address you specified during Step 5 of this article "Edit the Champion Settings."
After monitoring the results of the A/B test you will declare a champion based on which email performs best. The emails that you will be sent with the A/B test results will show which email is winning and include a link to declare a champion. Follow that link to pick the winner and have 100% of traffic distributed to that winner.
Have a question about something in this article? You can receive help directly from the article author. Sign up for a free trial to get started.
Comments (0)