How to create a vector texture from a digital image using Adobe Illustrator and Photoshop?


I use my years of visual communication and design thinking to understand the user and their pain points to deliver the best user experience.
Published:
Browse All Articles > How to create a vector texture from a digital image using Adobe Illustrator and Photoshop?
In this article I share how to make a vector texture from a digital image.
Vector textures are useful because they are scalable without losing in image quality. I'll be using Adobe Photoshop to adjust the highlights and contrast of a digital image, then I will use Adobe Illustrator to create the vector texture using the image trace feature. You should be able to use any version of Adobe Photoshop to adjust the brightness and contrast.
For the second part, we will be using the Image Trace functionality in Illustrator CS6. Image Trace used to be called Live Trace and was introduced in Illustrator CS2. With the release CS6 the people at Adobe changed the name to Image Trace. On inspection the tool looks different but the concept is the same. The trace option makes an attempt at tracing the different parts of an image. The images used in this article are provided by our good friend, Morgan Finley (morganfinley).
![FinalOutcome.png]() Step 1: Choose a photo
Step 1: Choose a photo
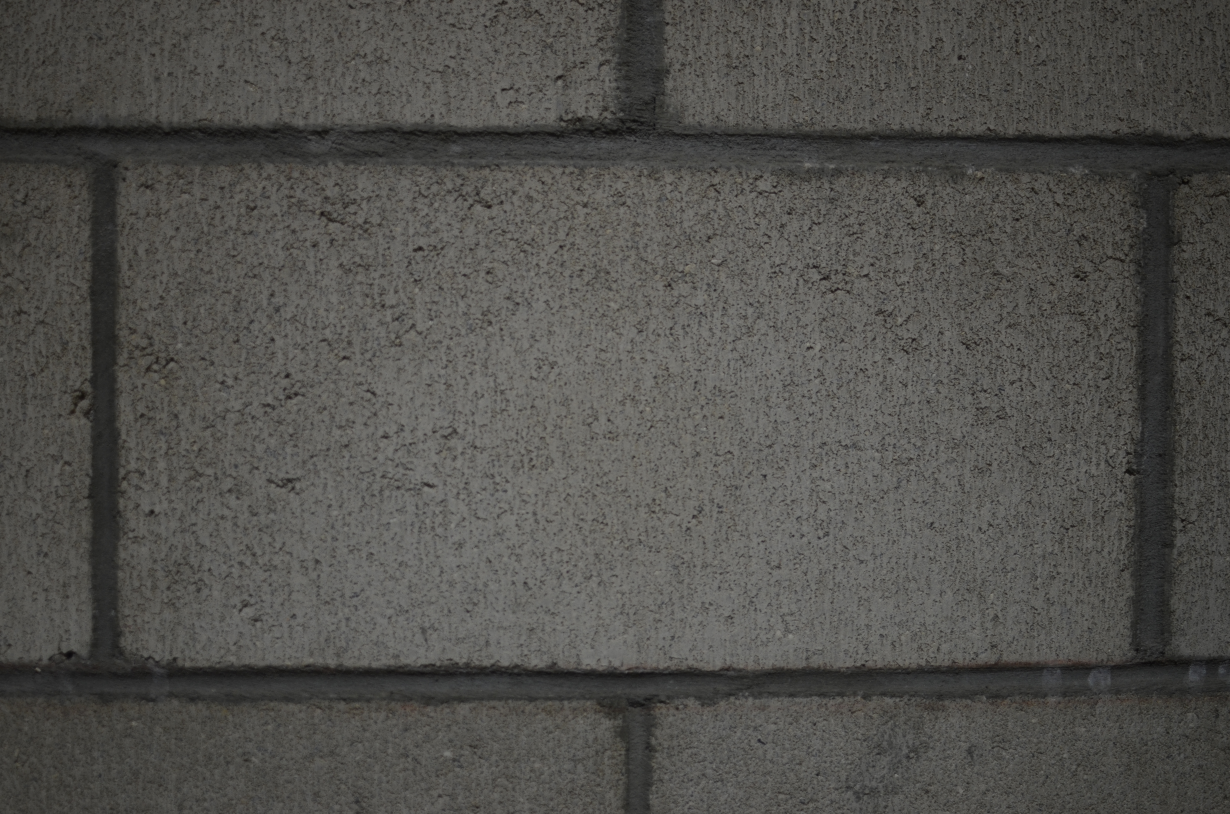
When choosing a photo look for something that has a lot of texture packed into a small area with a good amount of contrast. Images I've used before could be a close up shot of a stucco wall, tree bark or rusted piece of metal. In this case I'm using a picture that Morgan took of our cinderblock wall here at the office.
![Photo.png]() Step 2: Crop the image
Step 2: Crop the image
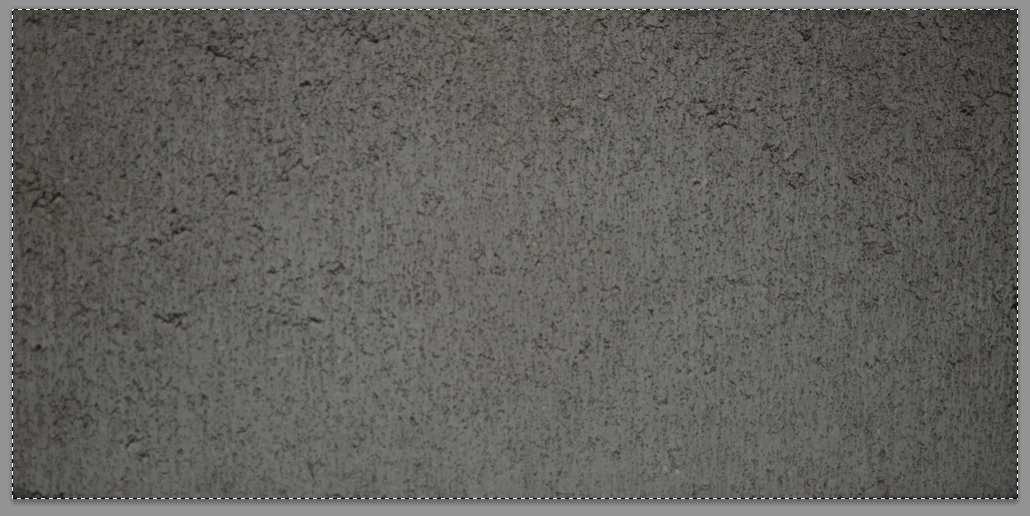
I decided to focus on the center of the bricks and cropped out the cement holding them together. To crop use the Rectangular Marquee Tool to drag a selection. Then select "Image" in the top of window > Select "Crop".
![Crop.png]() Step 3: Desaturate the image
Step 3: Desaturate the image
We desaturate the image to rid it of color and help simplify it for Image Tracing in Illustrator. To Desaturate select "Image" in the top of window > Select "Adjustments" > Select "Desaturate" near the bottom.
Step 4: Adjust brightness/contrast
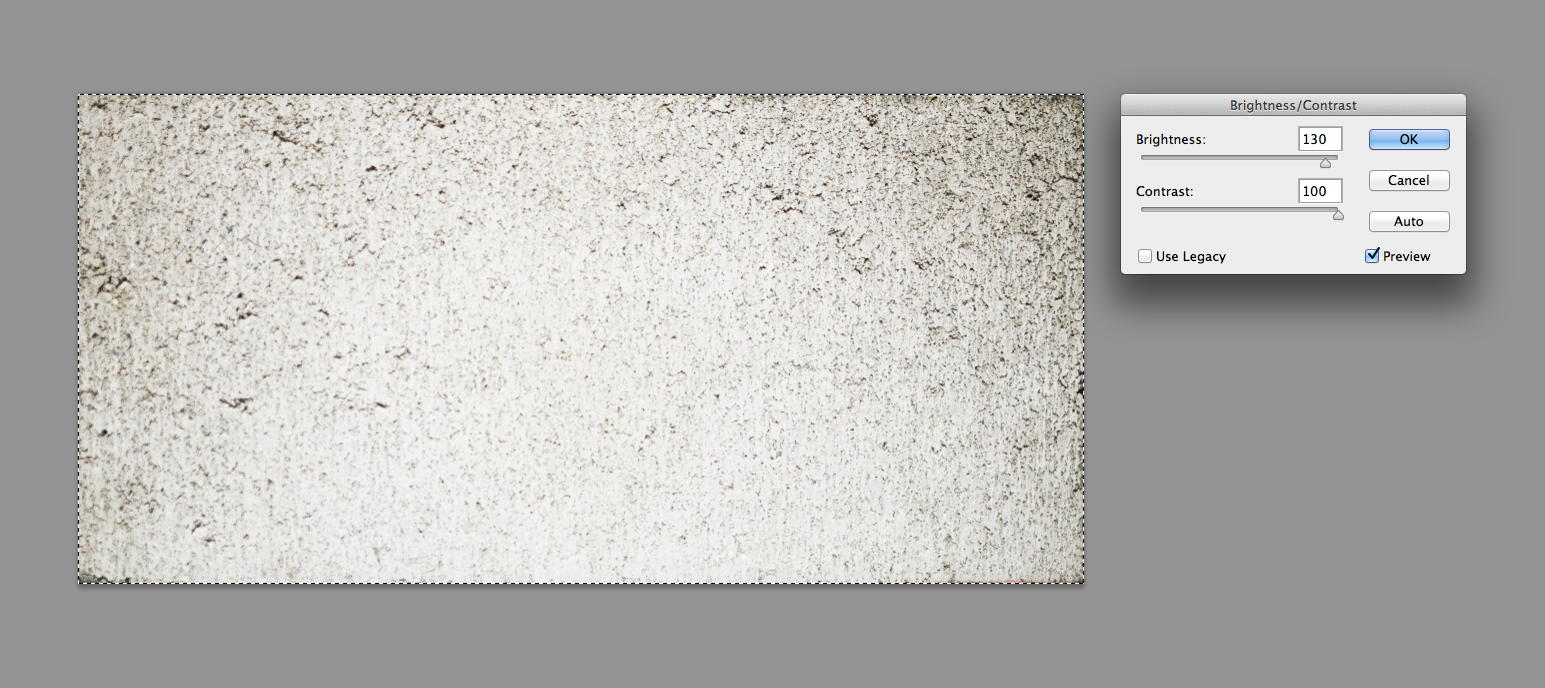
Because we are going to Live Trace the image in Illustrator it is important to highlight the texture by adjusting the Brightness and Contrast. I try to adjust so that the image appears to only be two colors, black and white. To adjust Brightness and Contrast > select "Image" in the top of window > Select "Adjustments" > Select "Brightness/Contrast" at the top of the list. I've chosen 130 for Brighness and 100 for Contrast.
![BrightnessContrast.png]() Step 5: Save and open in Illustrator
Step 5: Save and open in Illustrator
When saving give your file a different name so that you don't copy over your original file. I add "-edited" to the end of file name.
![Image-Trace.png]() Step 6: Image Trace
Step 6: Image Trace
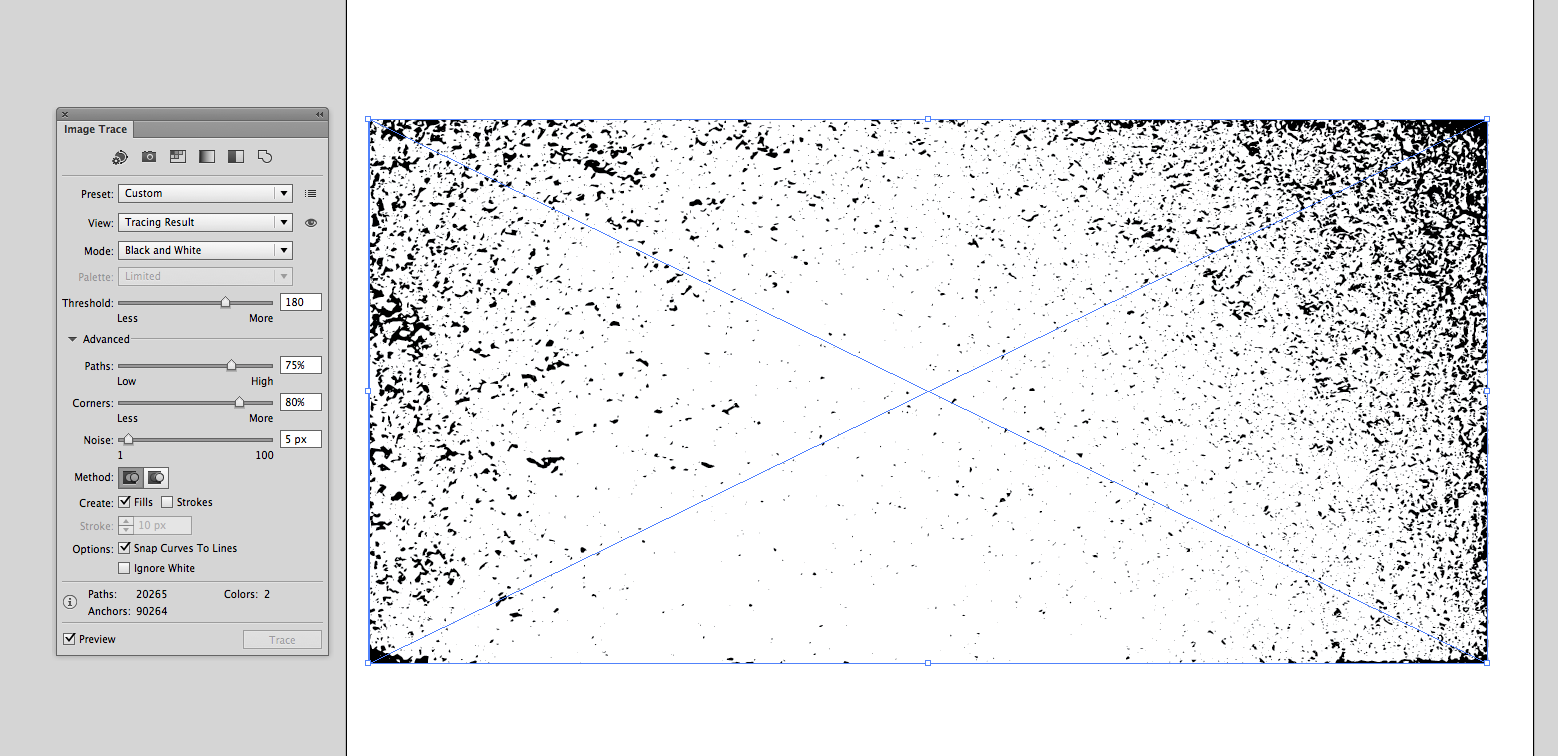
Select your image in Illustrator and next click Image Trace. In the default options I change the "Threshold" slider to 180. Open the advanced section of the options. There I changed the sliders for "Paths" to 75 per cent, "Corners" to 80 per cent and "Noise" to 5px. Each photo will require different settings and you will need to experiment with your own settings. Once you are happy select "Expand", to actually create the vector paths for the texture. Potentially this can lead to a large file because of the number of vector elements making up the texture. "Expand" will be found in the top bar of the Illustrator window.
Step 7: Delete white
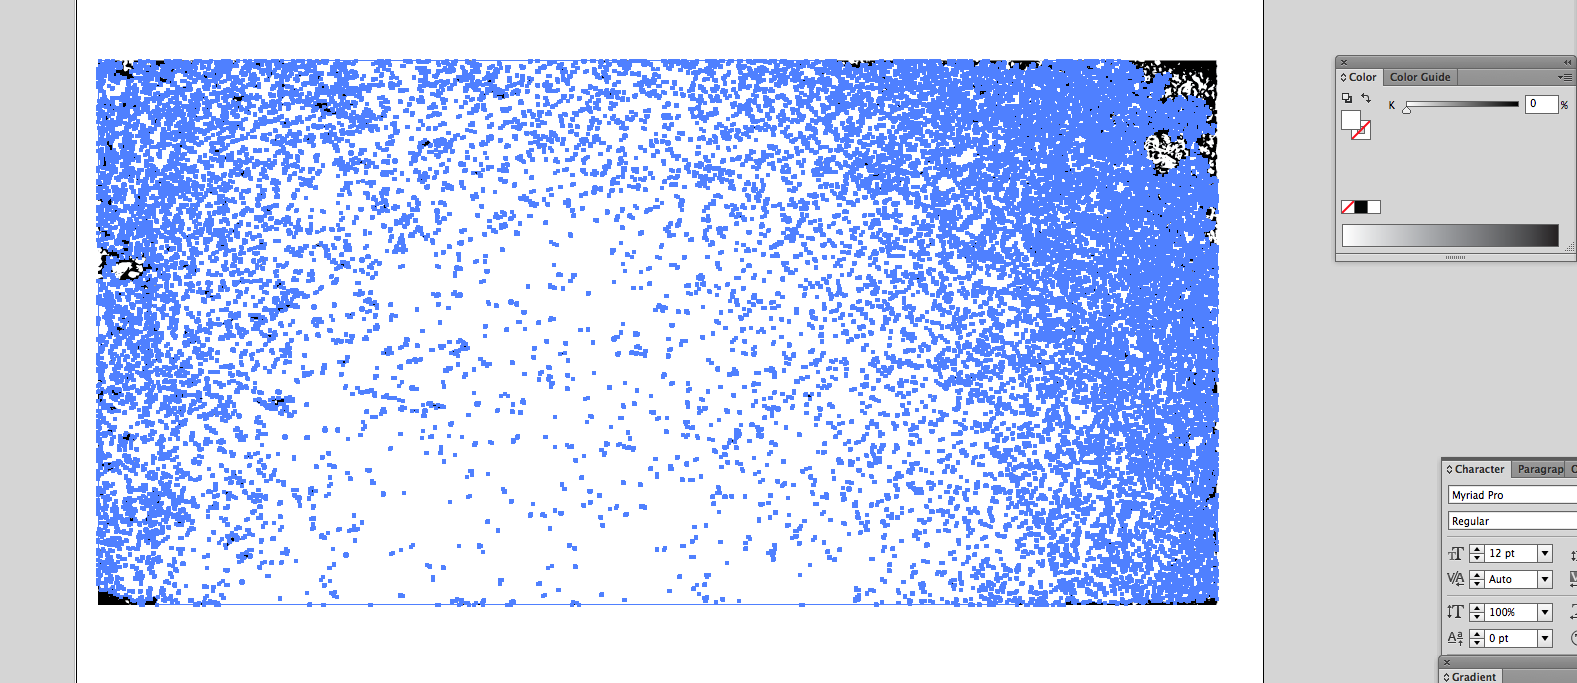
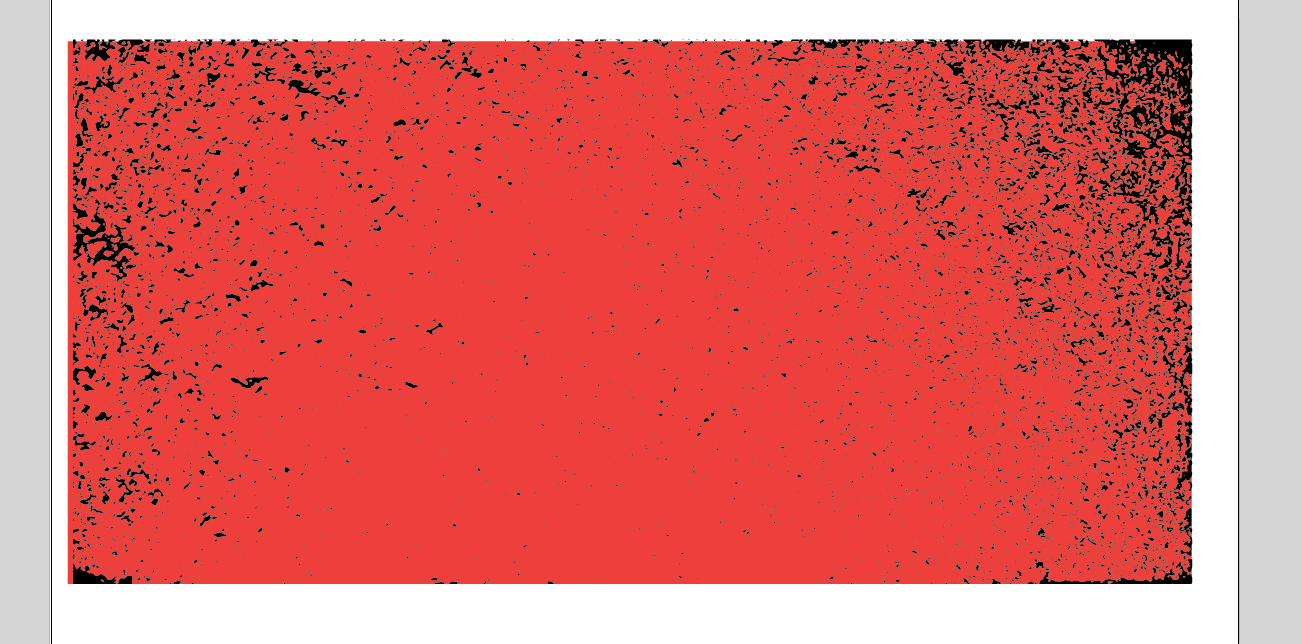
Now that you have your expanded your Live Trace you should see your pattern. Right now it has two colors. Black and white. You may not have noticed because it is sitting on a white art board. Using the "Direct Select Tool" (White arrow) select the white area of your new texture. Next select "Select" at the top of the window > "Same" > "Fill Color". We know have selected all the white. SImply hit delete to get rid of all the white. Now we can place the texture on top of other colors to see the Texture in effect. And Voila.. We are done!
![SelectWhite.png]()
![On-Red.png]()
Have fun and experiment with different textures to see what great effects you can create.
Vector textures are useful because they are scalable without losing in image quality. I'll be using Adobe Photoshop to adjust the highlights and contrast of a digital image, then I will use Adobe Illustrator to create the vector texture using the image trace feature. You should be able to use any version of Adobe Photoshop to adjust the brightness and contrast.
For the second part, we will be using the Image Trace functionality in Illustrator CS6. Image Trace used to be called Live Trace and was introduced in Illustrator CS2. With the release CS6 the people at Adobe changed the name to Image Trace. On inspection the tool looks different but the concept is the same. The trace option makes an attempt at tracing the different parts of an image. The images used in this article are provided by our good friend, Morgan Finley (morganfinley).
 Step 1: Choose a photo
When choosing a photo look for something that has a lot of texture packed into a small area with a good amount of contrast. Images I've used before could be a close up shot of a stucco wall, tree bark or rusted piece of metal. In this case I'm using a picture that Morgan took of our cinderblock wall here at the office.
 Step 2: Crop the image
I decided to focus on the center of the bricks and cropped out the cement holding them together. To crop use the Rectangular Marquee Tool to drag a selection. Then select "Image" in the top of window > Select "Crop".
 Step 3: Desaturate the image
We desaturate the image to rid it of color and help simplify it for Image Tracing in Illustrator. To Desaturate select "Image" in the top of window > Select "Adjustments" > Select "Desaturate" near the bottom.
Step 4: Adjust brightness/contrast
Because we are going to Live Trace the image in Illustrator it is important to highlight the texture by adjusting the Brightness and Contrast. I try to adjust so that the image appears to only be two colors, black and white. To adjust Brightness and Contrast > select "Image" in the top of window > Select "Adjustments" > Select "Brightness/Contrast" at the top of the list. I've chosen 130 for Brighness and 100 for Contrast.
 Step 5: Save and open in Illustrator
When saving give your file a different name so that you don't copy over your original file. I add "-edited" to the end of file name.
 Step 6: Image Trace
Select your image in Illustrator and next click Image Trace. In the default options I change the "Threshold" slider to 180. Open the advanced section of the options. There I changed the sliders for "Paths" to 75 per cent, "Corners" to 80 per cent and "Noise" to 5px. Each photo will require different settings and you will need to experiment with your own settings. Once you are happy select "Expand", to actually create the vector paths for the texture. Potentially this can lead to a large file because of the number of vector elements making up the texture. "Expand" will be found in the top bar of the Illustrator window.
Step 7: Delete white
Now that you have your expanded your Live Trace you should see your pattern. Right now it has two colors. Black and white. You may not have noticed because it is sitting on a white art board. Using the "Direct Select Tool" (White arrow) select the white area of your new texture. Next select "Select" at the top of the window > "Same" > "Fill Color". We know have selected all the white. SImply hit delete to get rid of all the white. Now we can place the texture on top of other colors to see the Texture in effect. And Voila.. We are done!
Have fun and experiment with different textures to see what great effects you can create.
I use my years of visual communication and design thinking to understand the user and their pain points to deliver the best user experience.
Have a question about something in this article? You can receive help directly from the article author. Sign up for a free trial to get started.
Comments (0)