

Browse All Articles > How to network together two sites using PFSense.
There are times where you would like to have access to information that is only available from a different network. This network could be down the hall, or across country. If each of the network sites have access to the internet, you can create a network bridge that can connect the two networks together.
If all you want to do is connect to you desktop remotely, then this is not for you. You would be better off using one of the commercial options like TeamViewer or SplashTop.
However, if you need to give access to many individuals, or you need systems to be able to access other systems in a different network like printers or fileservers, then this might be what you need.
This article will not cover routing which is required to take full advantage of this network bridge.
The things that you will need for each site;
A word of warning, PFSense is designed to take full control of the computer it is installed on. It will not be useable for any other purpose.
PFSense Installation
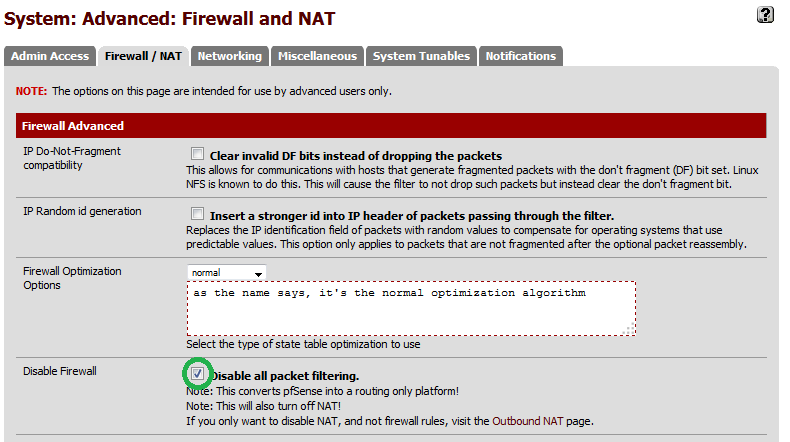
This article will not cover Installation instructions of PFSense. However I will say that I chose the default installation options and only configured one network card. I also made sure that the option "Disable all packet Filtering" was checked. This is found under System->Advanced->Firewall/NAT tab.
![Pic0.png]() This will need to be done on both client and server instances of PFSense.
This will need to be done on both client and server instances of PFSense.
Setup the VPN Server
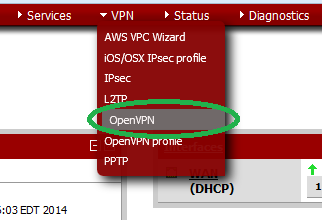
Begin by selecting the OpenVPN from the VPN dropdown.
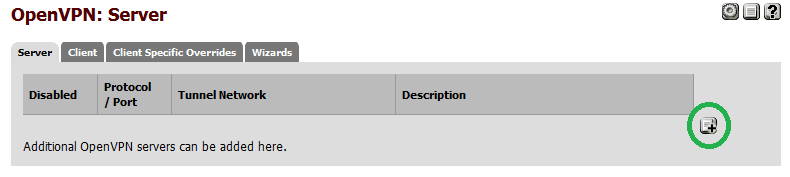
![Pic1.png]() Click the "Add" button to add a new VPN server.
Click the "Add" button to add a new VPN server.
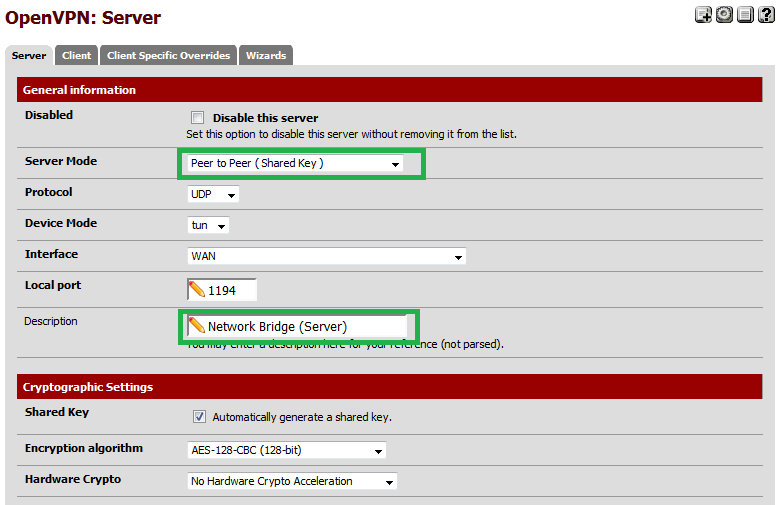
![Pic2.png]() Select "Peer to Peer (Shared Key)" for "Server Mode" and give your VPN server instance a description.
Select "Peer to Peer (Shared Key)" for "Server Mode" and give your VPN server instance a description.
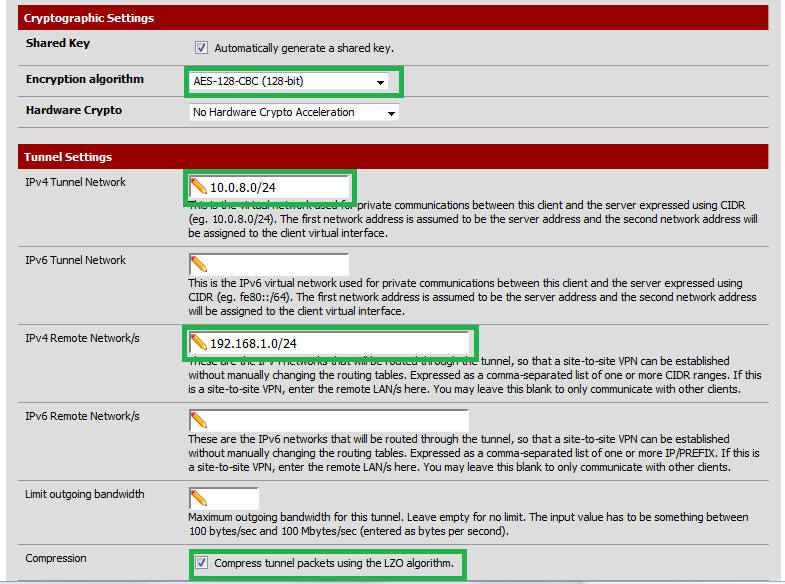
![Pic3.png]() Continue to fill out the following fields;
Continue to fill out the following fields;
![Pic4.png]() Optionally choose to compress the network traffic. Possible performance improvements will depend on the type of traffic that is being sent. Information being sent that is already compressed will in most cases increase the amount of time to transfer with this switch on. This option must match with the client side of the VPN.
Optionally choose to compress the network traffic. Possible performance improvements will depend on the type of traffic that is being sent. Information being sent that is already compressed will in most cases increase the amount of time to transfer with this switch on. This option must match with the client side of the VPN.
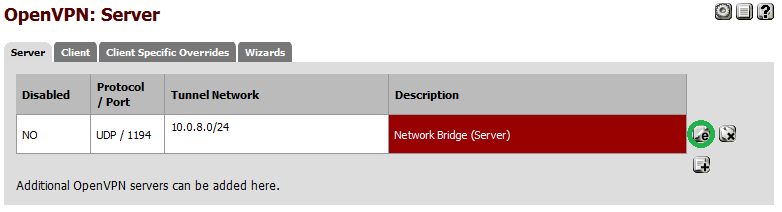
![Pic5.png]() Click save and you will return to the Server VPN configuration page.
Click save and you will return to the Server VPN configuration page.
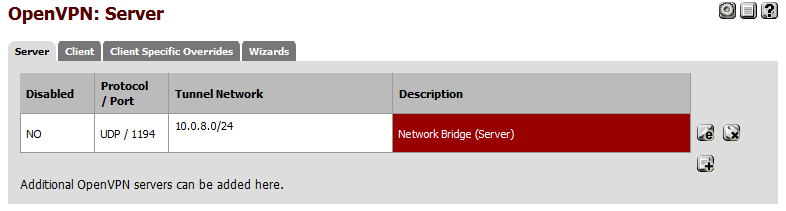
![Pic6.png]() This completes the configuration of the Server side of the VPN.
This completes the configuration of the Server side of the VPN.
Setup the VPN Client
Begin by selecting the OpenVPN from the VPN dropdown.
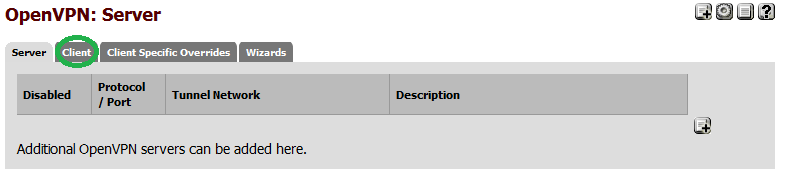
![Pic1.png]() Next, click the "Client" tab.
Next, click the "Client" tab.
![Pic7.png]() Click the "Add" button to add a new VPN client.
Click the "Add" button to add a new VPN client.
![Pic8.png]() Select "Peer to Peer (Shared Key)" for "Server Mode". Next enter the IP Address and the port number that was specified in the server. Also give your VPN client instance a description.
Select "Peer to Peer (Shared Key)" for "Server Mode". Next enter the IP Address and the port number that was specified in the server. Also give your VPN client instance a description.
![Pic9.png]()
Continue to fill out the following fields;
![Pic10.png]() Click save and you will return to the Server VPN configuration page.
Click save and you will return to the Server VPN configuration page.
Copy the Shared Key
One final piece of information must be passed from the server to the client and this is the "Shared Key".
Open the configuration on the VPN Server.
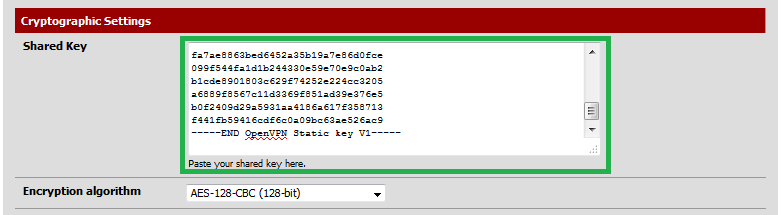
![Pic11.png]() Copy the contents of the "Shared Key" from the VPN server without changing it.
Copy the contents of the "Shared Key" from the VPN server without changing it.
![Pic12.png]() Paste it into the "Shared Key" field of the VPN client and save your change.
Paste it into the "Shared Key" field of the VPN client and save your change.
![Pic13.png]() This completes the configuration of the Client side of the VPN.
This completes the configuration of the Client side of the VPN.
Testing the VPN Tunnel
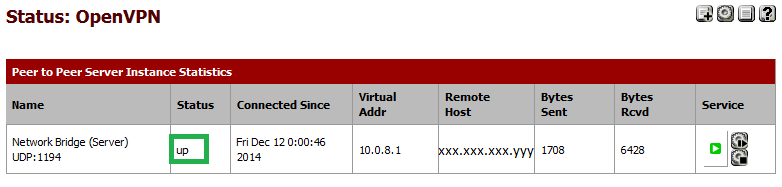
Within a few moments the VPN client will contact the VPN Server and establish a connection. You can verify that the connection has been made by checking the status of the OpenVPN.
![Pic14.png]()
The status should be stated as "UP".
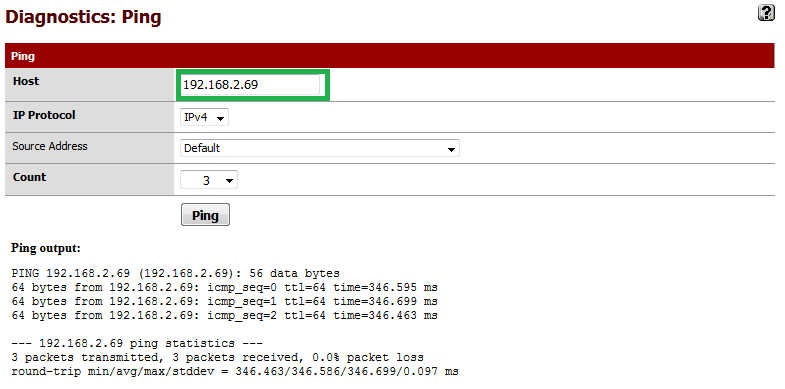
![Pic15.png]() Optionally you can try to ping the address of the VPN client from the Server by using the Diagnostics->Ping utility.
Optionally you can try to ping the address of the VPN client from the Server by using the Diagnostics->Ping utility.
![Pic16.png]()
If all you want to do is connect to you desktop remotely, then this is not for you. You would be better off using one of the commercial options like TeamViewer or SplashTop.
However, if you need to give access to many individuals, or you need systems to be able to access other systems in a different network like printers or fileservers, then this might be what you need.
This article will not cover routing which is required to take full advantage of this network bridge.
The things that you will need for each site;
- A spare computer system.
- A copy of PFsense (I used version 2.1.5)
A word of warning, PFSense is designed to take full control of the computer it is installed on. It will not be useable for any other purpose.
PFSense Installation
This article will not cover Installation instructions of PFSense. However I will say that I chose the default installation options and only configured one network card. I also made sure that the option "Disable all packet Filtering" was checked. This is found under System->Advanced->Firewall
 This will need to be done on both client and server instances of PFSense.
Setup the VPN Server
Begin by selecting the OpenVPN from the VPN dropdown.
 Click the "Add" button to add a new VPN server.
 Select "Peer to Peer (Shared Key)" for "Server Mode" and give your VPN server instance a description.
 Continue to fill out the following fields;
- IPv4 Tunnel Network - This is a private network that should only be known by both client and server VPN end points. It must not overlap with either of the networks that it is bridging.
- IPv4 Local Network - This is the network that is connected to the server. It will be advertized to by the client when the VPN connection is made.
- IPv4 Remote Network - This is the network that is connected to the client. Any traffic that is sent to the Server that belongs to this network will be sent to the client using the Tunnel Network.
 Optionally choose to compress the network traffic. Possible performance improvements will depend on the type of traffic that is being sent. Information being sent that is already compressed will in most cases increase the amount of time to transfer with this switch on. This option must match with the client side of the VPN.
 Click save and you will return to the Server VPN configuration page.
 This completes the configuration of the Server side of the VPN.
Setup the VPN Client
Begin by selecting the OpenVPN from the VPN dropdown.
 Next, click the "Client" tab.
 Click the "Add" button to add a new VPN client.
 Select "Peer to Peer (Shared Key)" for "Server Mode". Next enter the IP Address and the port number that was specified in the server. Also give your VPN client instance a description.

Continue to fill out the following fields;
- Encryption algorithm - This must match what the server is using. The default should be sufficient in most cases.
- IPv4 Tunnel Network - This must be the same as the Server.
- IPv4 Remote Network - This is the network that is connected to the server.
- Compression - This must be the same as the Server.
 Click save and you will return to the Server VPN configuration page.
Copy the Shared Key
One final piece of information must be passed from the server to the client and this is the "Shared Key".
Open the configuration on the VPN Server.
 Copy the contents of the "Shared Key" from the VPN server without changing it.
 Paste it into the "Shared Key" field of the VPN client and save your change.
 This completes the configuration of the Client side of the VPN.
Testing the VPN Tunnel
Within a few moments the VPN client will contact the VPN Server and establish a connection. You can verify that the connection has been made by checking the status of the OpenVPN.

The status should be stated as "UP".
 Optionally you can try to ping the address of the VPN client from the Server by using the Diagnostics->Ping utility.
Have a question about something in this article? You can receive help directly from the article author. Sign up for a free trial to get started.
Comments (0)