How To Add, Remove And Update Watermark To PDF Using Adobe Acrobat


PDF files have been in the limelight due to its unmatched features. Personal documents, emails, business reports and eBooks are all converted into PDF files owing to peerless features provided by it. Adding watermark to PDF file is a method to secure the PDF pages from plagiarism and any unlawful usage. But, at times it is needed to delete or modify the watermark. Therefore, in this blog post we will learn how to add, remove and update watermark to PDF files. But, before that know some benefits of PDF watermarking.
Advantages of Adding Watermark to PDF Files
Some of the advantages to add watermark on multiple PDF documents are given below:
- Watermarks are versatile.
- They can easily be customized.
- They can be used to distinguish between private and professional information.
Scenarios Demanding To Apply Watermark on PDF Files
Before knowing the process to insert watermark in PDF files, let’s first have a look on the situations that requires to add watermark to PDF file.
- Copyright protection of a page
- Broadcast monitoring
- Video authentication
- Source tracking
Once you understand the need for applying watermark to PDF files, the next stage is to understand how to add, remove and update watermark to PDF files.
Add Watermark to PDF Using Adobe Acrobat Pro
If you need to apply watermark to PDF file that is already opened on your local machine, you need to follow these steps:
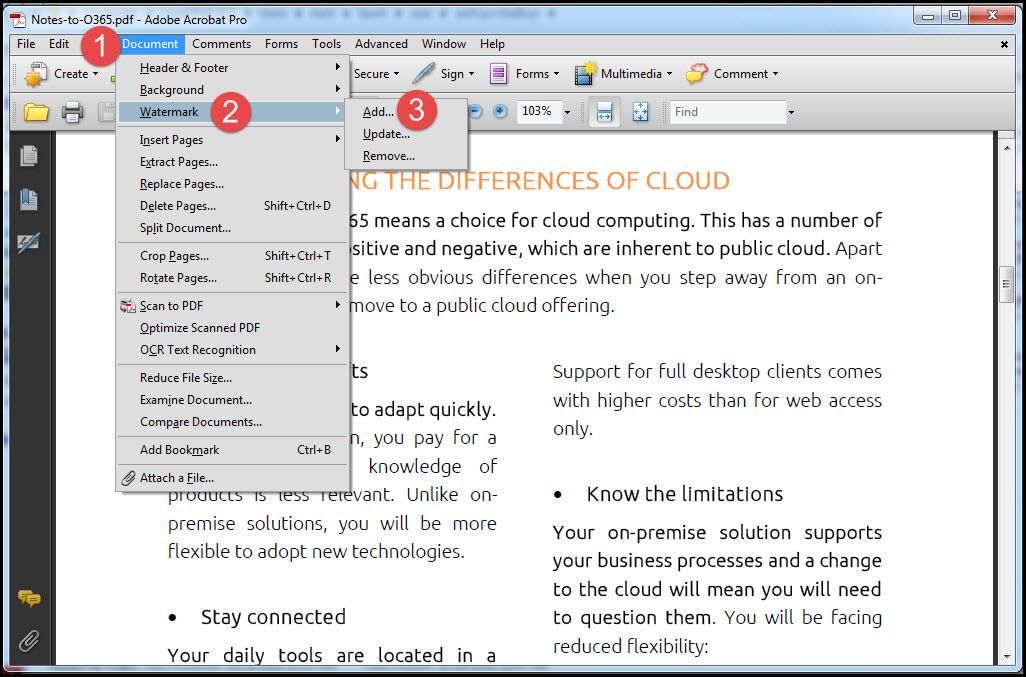
1- Open the PDF file using Adobe Acrobat Pro.
2- Click on Watermark from the Document menu.
3- Click on Add in order to add files to apply watermark to PDF.
4- Specify all the settings for the watermark print.
If you need to specify text as the watermark type the text in the provided box.
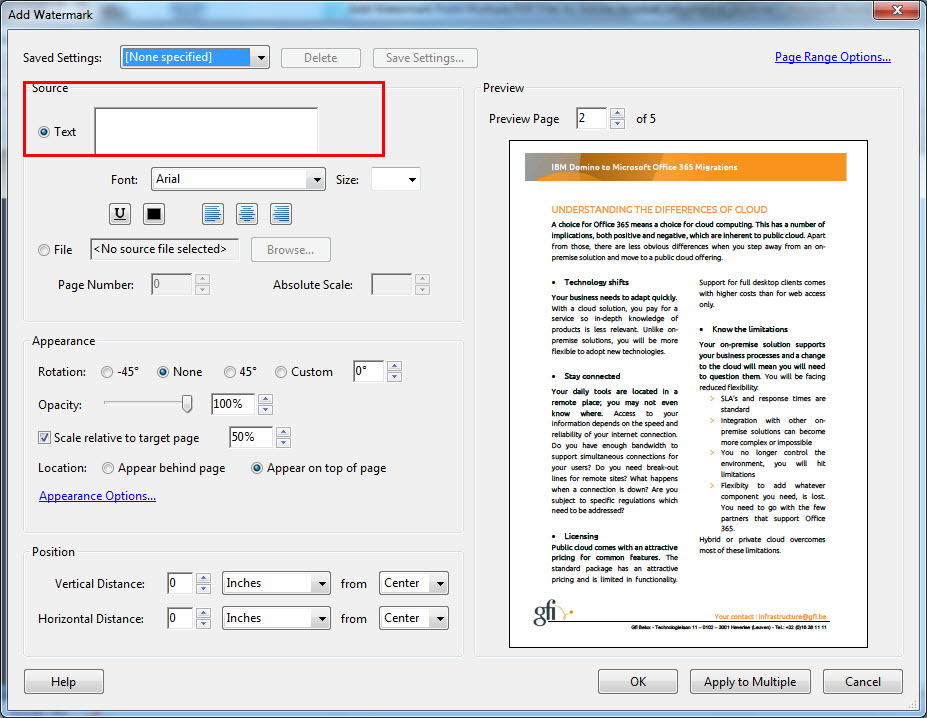
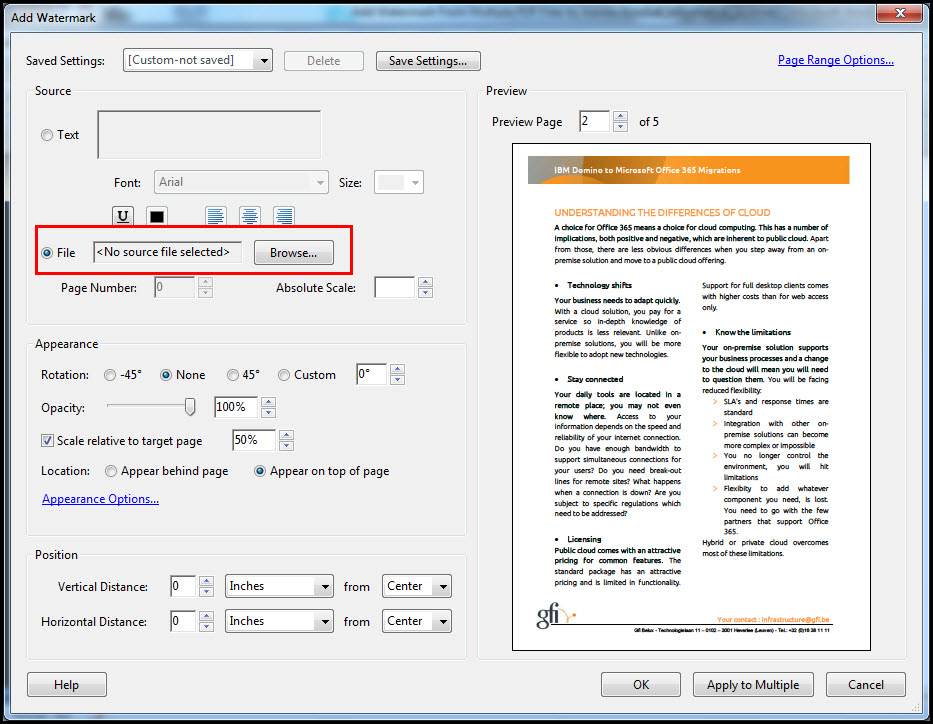
5- From the ‘File’ option, you can select an existing file to be printed as the watermark.
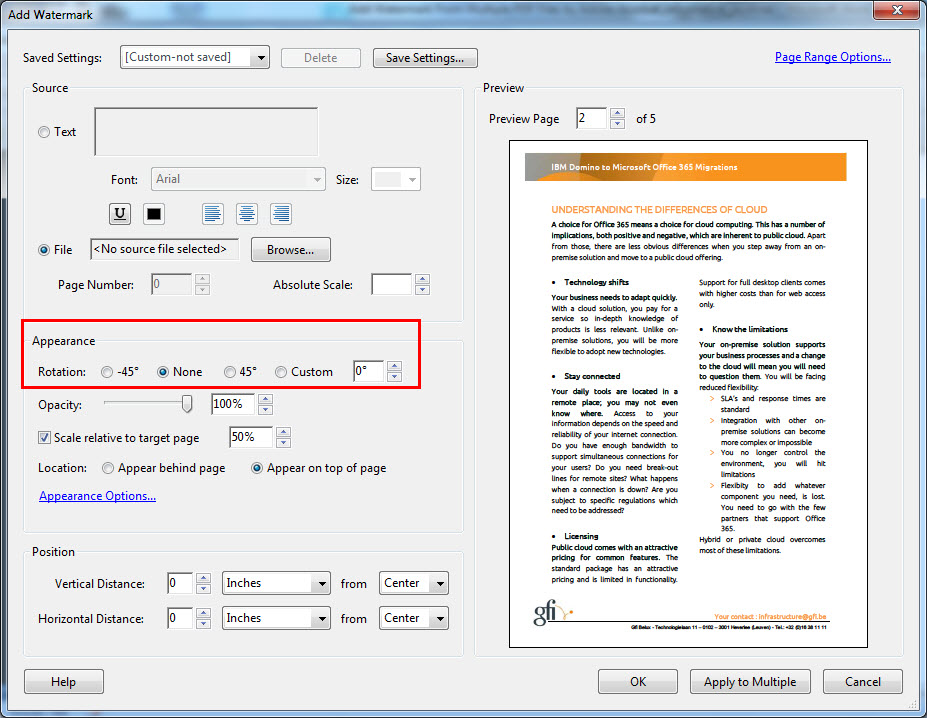
6- If you need to provide rotation to the watermark you can rotate it through -450 , 00 or 450 directly or can customize the angle.
7- Opacity option is used to manage the level of transparency of the watermark.
Note: High opacity applies less transparency to the watermark.
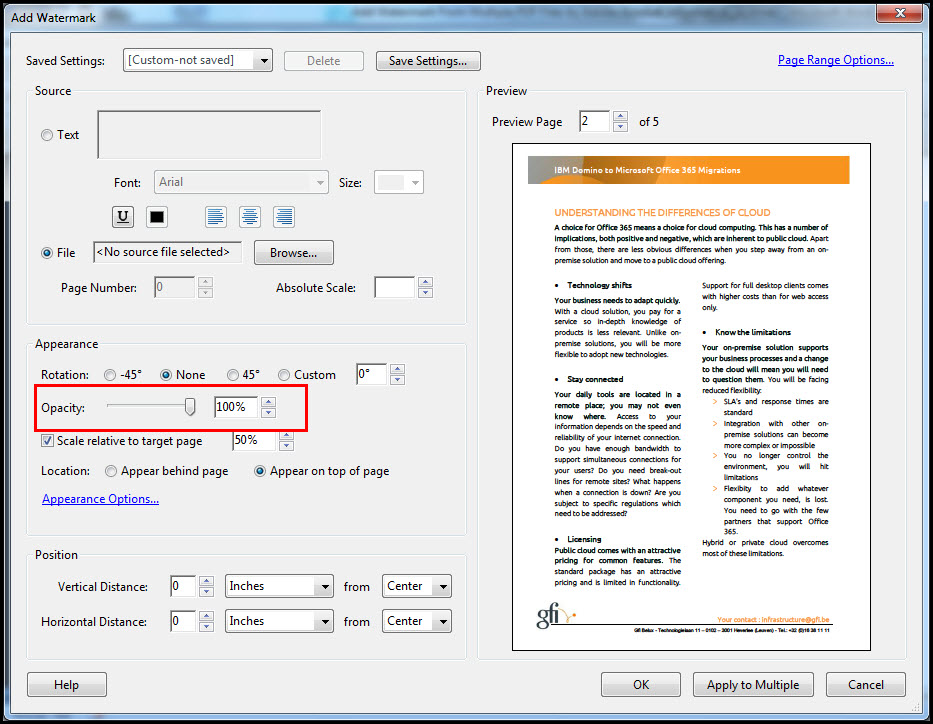
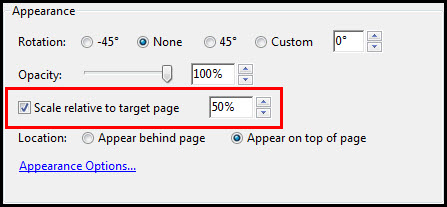
8- If you need to add scale corresponding to the target page, you can check the option “Scale relative to target page” and specify the relative percentage.
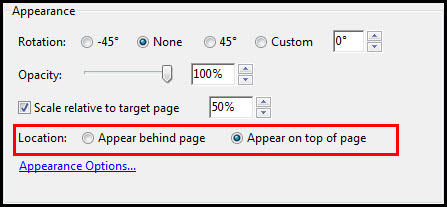
9- The ‘Location’ option determines whether you want the watermark to appear behind the page or on the top of the page.
10- The position of the watermark can be set using position option. You can provide vertical and horizontal distances of the watermark in various units.

11- The Appearance Option provides you three choices from where you can select your choice by clicking on the check box.
- “Show when printing” option allows the watermark to be visible at the time when you print the PDF file.
- “Show When Displaying On Screen” option helps you to view the watermark when you open the PDF file on the local machine.
- “Keep position and size of watermark text constant while printing on different page sizes” helps to keep the position and size of watermark constant.

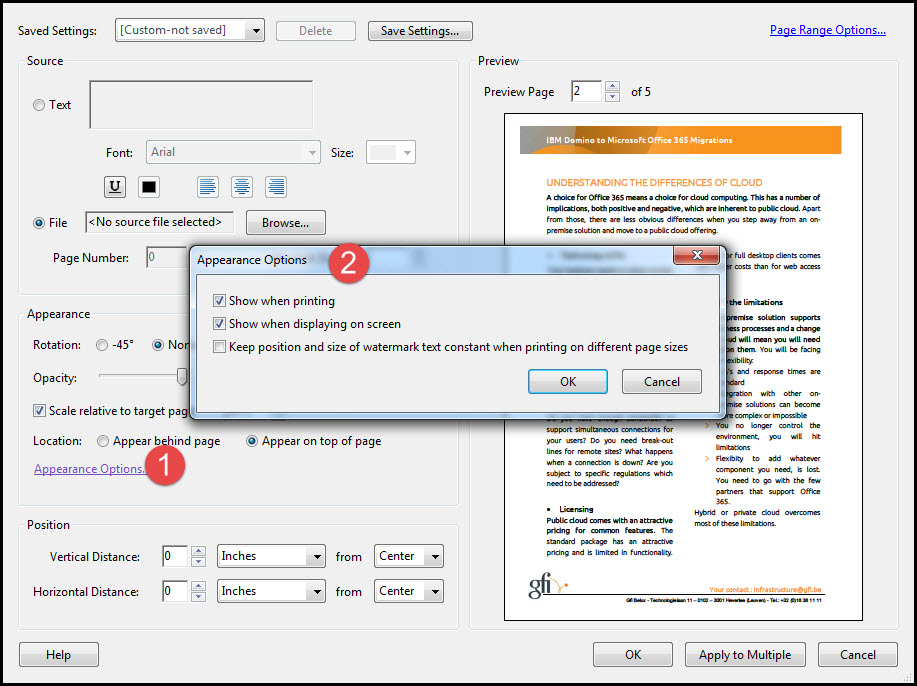
12- Click on OK after checking the desired Appearance Option.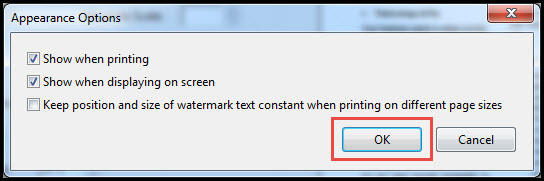
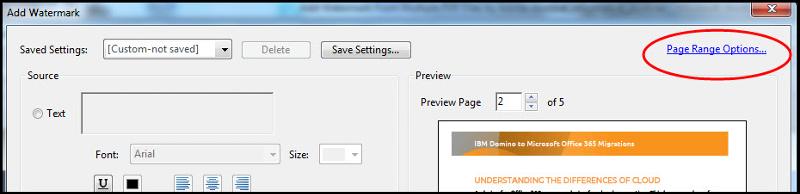
13- A ‘Page Range’ option is provided at the top right corner containing some options that can be applied to multiple PDF files.
- Selecting ‘All Pages’ option applies watermark in the entire PDF file.
- If you need to add watermark to a fixed number of pages, you can provide the range of pages to ‘Page From’ option.

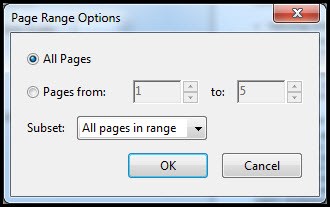
14- A subset option is also present containing three options:
- All Pages in Range: This option permits you to add watermark to the entire pages that lies in the limit of the specified range.
- Even Pages Only: As the name signifies, watermark would be applied only to the pages with even page numbers.
- Odd Pages Only: This option allows you to add watermark to the pages with odd page numbers.
15- Click on OK to save the preferences.
Note: You can apply multiple watermarks to a PDF file or files but you need to take care that each watermark has to be added separately.
Update Watermark to PDF Files Using Adobe Acrobat
In order change or update watermark in PDF files using Adobe Acrobat, you need to follow these steps:
1- In the Menu bar click on ‘Documents’.
2- Select watermark and then update.

3- Make all the necessary changes that you want to make in the watermark.
4- Once you are done with the changes, click on OK to save them.
Remove Watermark from PDF Files
To remove or delete watermark from PDF files, you can follow these steps:
1- From the ‘Document’ menu, select watermark.
2 Click on Remove.
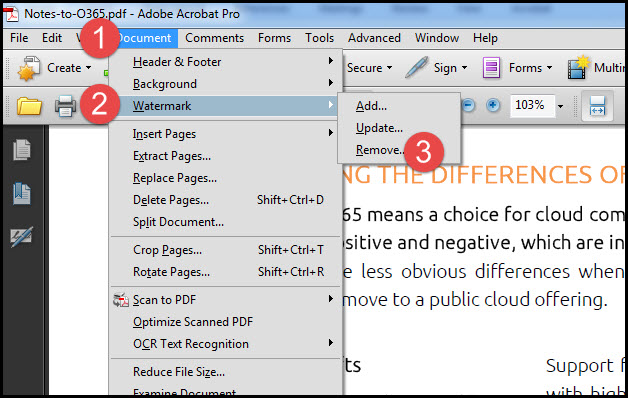
3- Confirm for the permanent removal of the watermark by simply clicking on Yes.
Using Adobe Acrobat one can easily perform any changes related to the watermark of a PDF file. With simple mouse clicks users can add, remove and update watermark on PDF files.
Have a question about something in this article? You can receive help directly from the article author. Sign up for a free trial to get started.
Comments (0)