Top 5 Best Practices for Conducting Surveys with Google Forms

Published:
Browse All Articles > Top 5 Best Practices for Conducting Surveys with Google Forms
Google Forms is one of the most simple and easy-to-use platforms for conducting large-scale surveys, polls and questionnaires. It is convenient for various uses -- from gathering huge amounts of information through surveys, to creating simple sign-up sheets for events.
In this article I will suggest the top 5 tools you can consider using in your Google Forms to enhance the user’s experience and to make Google Forms more effective for you as the owner.
Note: You can only use Data Validation for Text, Paragraph text, Checkboxes and Grid answers.
To make sure a valid Email address is submitted, follow these steps:
In this article I will suggest the top 5 tools you can consider using in your Google Forms to enhance the user’s experience and to make Google Forms more effective for you as the owner.
Organize your Form
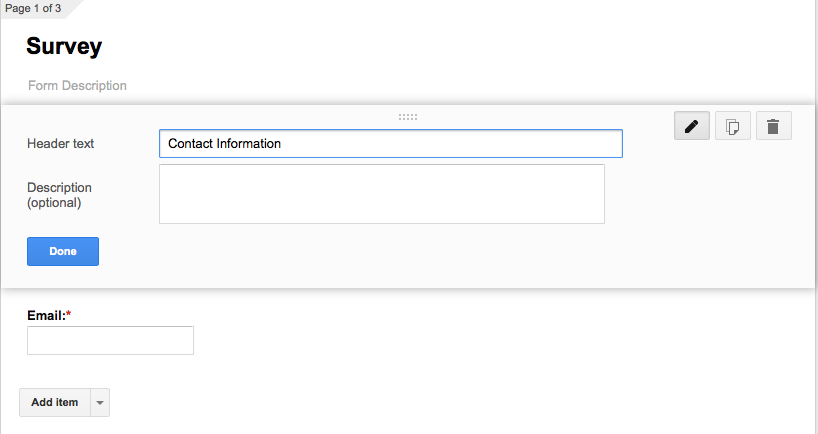
Especially for longer forms, organization is key to keeping your survey or poll user-friendly. Follow these steps to organize and categorize your form. Creating sections in your form can keep things neat and increase clarity for the user. If you want to create categories into your form, you can add Section headers.- Before you begin a new section, select the arrow key next to Add item. A drop-down menu will appear where you can choose Section header under Layout.
![sectionheader.png]()
- You can now add the title and description of your new section. Keep in mind that you can rearrange your sections and questions by dragging them up or down.
![Section-Title.png]()
- This is how your separate categories will look in the live form:
![SectionsLiveForm.png]()


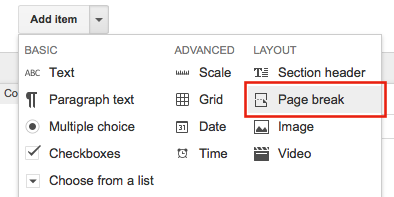
- Select the arrow key next to Add item where you want to start a new page.
- Select Page break under Layout once the drop-drown menu appears.
![pagebreaks.png]()
- You can also add a title and a description of your new page if you would like.
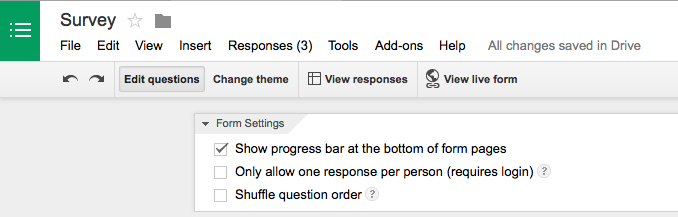
- When you begin your new form, there will be a section on top labeled Form Settings.
- Check the first option under this section that says “Show progress bar at the bottom of form pages.”
![ProgressBarCheck.png]()
- There will now be a progress bar at the bottom of every page on your live form such as the one shown below.
![ProgressBarLiveForm.png]()

Data Validation
To prevent incorrect information from being submitted, you should use Data Validation. There are many uses for this such as to make sure that correct email addresses are being used or to limit the number of options a user can choose in a checkbox question.Note: You can only use Data Validation for Text, Paragraph text, Checkboxes and Grid answers.
To make sure a valid Email address is submitted, follow these steps:
- To use Data Validation, make a question and then select Advanced settings at the bottom.
- You have a variety of things you can do now to create guidelines for their answer. To make sure users submit valid emails, create a Text question.
- Next to Text, select Email address in the drop-down menu.
- You can also personalize a Custom error text if an invalid email address is submitted.
![DataValidationEmailAddress.png]()
- Click Done once you are finished creating your question.

Form Notifications
There are many add-ons or third-party apps that you can use with all of Google Apps. For Google Forms, I like to use an add-on called Form Notifications. This will allow you to create email notifications to be sent to you and the user once he/she completes your form.- Download the add-on for free through the Add-on Store by clicking here.
- Select the +Free button on the top right corner to obtain the add-on.
- Select Accept when the pop-up appears.
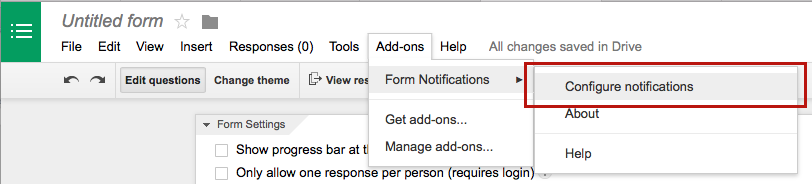
- Now you must activate the add-on. Select Add-ons on the toolbar on top of your survey that you are making.
- Under Form Notifications, choose Configure notifications.
![formnotifications-configure.png]()
- The form you are creating will now look like this with a panel on the right.
![Form-Notifications.png]()
- Select Notify me if you want to receive emails when people submit information to your survey. Select Notify respondents if you want to let the user receive an email after they have completed the form.
- You can now personalize the reply the user will get under Notify respondents. You could thank them for completing the survey or send them links for more information.
![FormNotificationMessages.png]()
- Click Save once you have finished filling out the panel.


Create a Summary of Responses
Google Forms conveniently creates graphs and charts for you once it collects data. Follow these steps to gather all your data in real-time:- Using the toolbar on top, select Responses.
- Choose Summary of responses in the drop-down menu.
![summaryofresponses.png]()
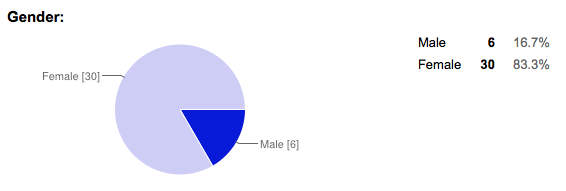
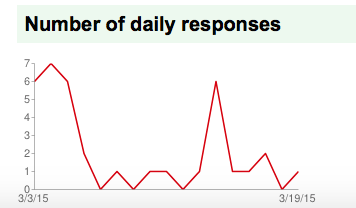
- You will now get all your data in one place with graphs and charts included such as the ones shown below.
![PieChart.png]()
![Graph.png]()

Personalize your Offline Form
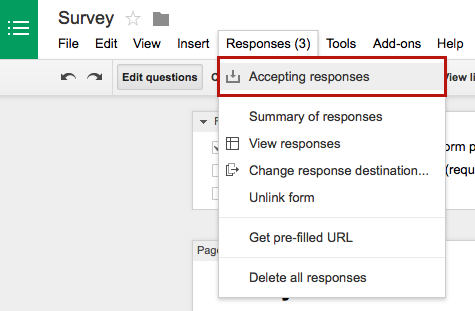
- Using the toolbar on the top of your screen, select Responses.
- Choose Accepting responses from the drop-down menu. This will now stop any incoming responses. You can always turn it back on by selecting Not accepting responses back at the drop-down menu.
![OfflineFormSetUp.png]()
- Now, you can personalize what message a user will receive if they click on your form. Let the user know that your form is inactive or you could insert a link to a different form as well.
![OfflineForm.png]()

Have a question about something in this article? You can receive help directly from the article author. Sign up for a free trial to get started.
Comments (1)
Commented: