Citrix XenDesktop 7.6 Citrix Studio - Configure VMware Connection


Holistic technology infrastructure strategy, design, engineering and implementation that is highly scalable, secure, optimized, automated
Published:
Browse All Articles > Citrix XenDesktop 7.6 Citrix Studio - Configure VMware Connection
#Citrix #XenDesktop #POC #Proof-of-concept
CONFIGURE VMWARE HOSTING IN CITRIX STUDIO
In Citrix XenDesktop 7.6 Citrix Studio Configure New Site, we examined the basic configuration of Citrix XenDesktop site using Citrix Studio. In this article, the focus is on connecting the Citrix platform to VMware Hypervisor by the way of vCenter and the SDK.
Assumptions:
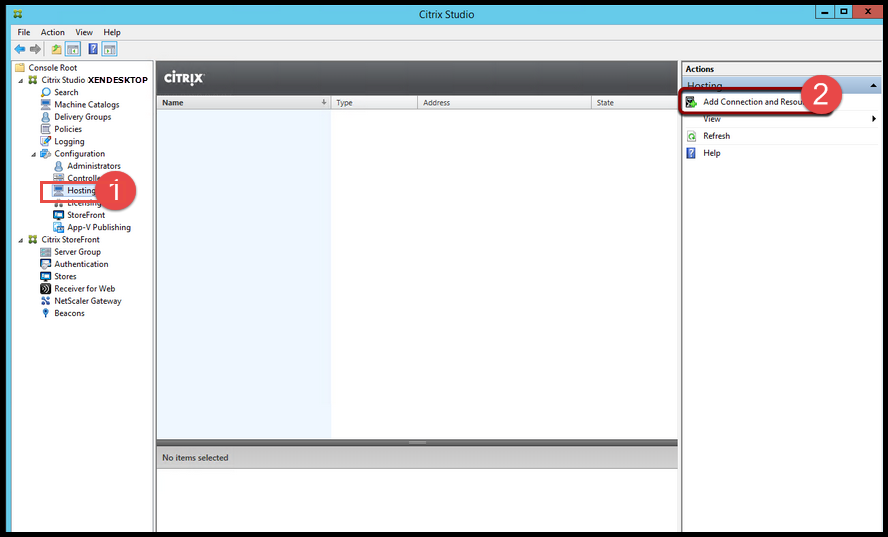
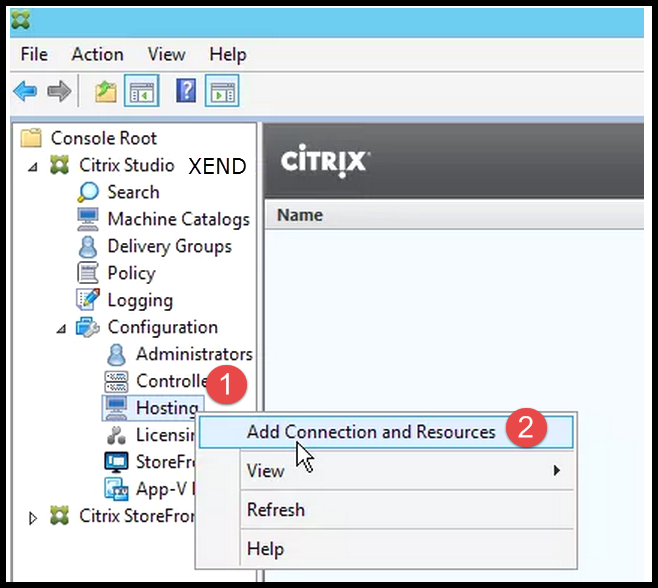
![IMAGE1.png]() Add Connection and Resources
Add Connection and Resources
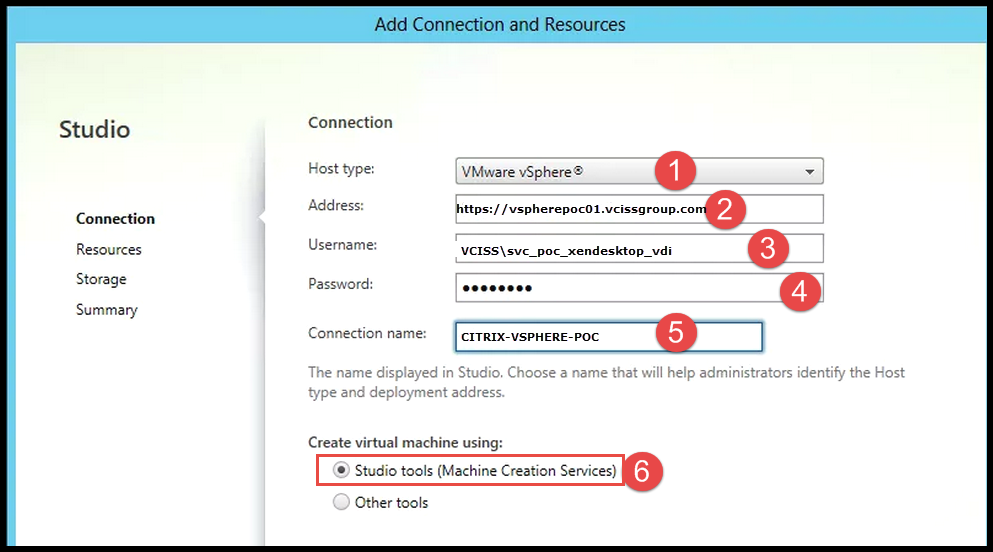
In the Connection page, select VMware vSphere as the Host type.
Enter https://vspherepoc01.vcissgroup.com/sdk as the vSphere URL. The URL must contain the FQDN of the vSphere server. This is where XenDesktop requires vSphere connectivity to SDK. Refer to Part Two for the HTTPS certificate steps.
![IMAGE2.png]() Note: This runs in the context of a logged-on user who must have vSphere permissions or an appropriate role.
Note: This runs in the context of a logged-on user who must have vSphere permissions or an appropriate role.
Enter the "Address", "Username", "Password" and "Connection Name" > Choose "Studio tools (Machine Creation Services)" > Click Next
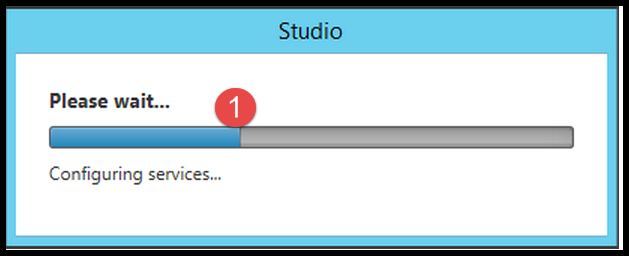
![IMAGE3.png]() Click Next > XenDesktop connects as the Active Directory service account or uses the ID of the user currently logged on and performing the installation.
Click Next > XenDesktop connects as the Active Directory service account or uses the ID of the user currently logged on and performing the installation.
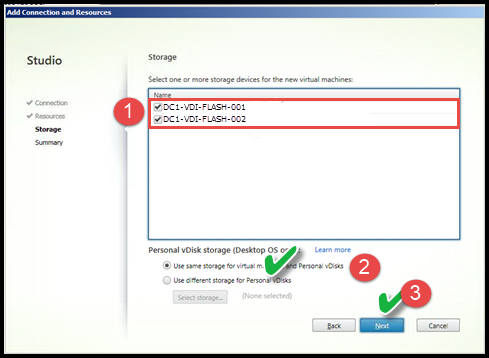
![IMAGE4.png]() On the Storage screen, one should see the storage logical unit numbers (LUNs) available to the Citrix XenDesktop Site Controller. This is the storage configured as a prerequisite step. We have allocated two datastores of 1 TB each. We are creating "Random Pooled Desktops" so select "Use same storage for virtual machines and vDisks" > Next.
On the Storage screen, one should see the storage logical unit numbers (LUNs) available to the Citrix XenDesktop Site Controller. This is the storage configured as a prerequisite step. We have allocated two datastores of 1 TB each. We are creating "Random Pooled Desktops" so select "Use same storage for virtual machines and vDisks" > Next.
![IMAGE5.png]() The summary screen provides a quick overview of the connection address, name, networks, and storage. Click Finish.
The summary screen provides a quick overview of the connection address, name, networks, and storage. Click Finish.
![IMAGE6.png]()
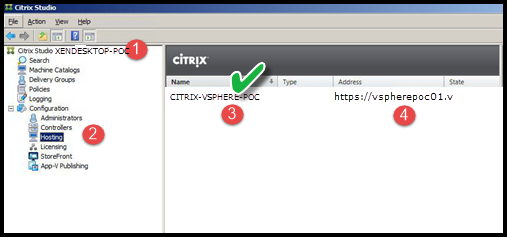
In Citrix Studio there exists a new "Hosting Connection".
![IMAGE7.png]() Now we want to run the built-in tests using the "Test Resources" option in Citrix Studio. Expand "Configuration" > Click "Hosting" > on the right-hand side click "Test Resources."
Now we want to run the built-in tests using the "Test Resources" option in Citrix Studio. Expand "Configuration" > Click "Hosting" > on the right-hand side click "Test Resources."
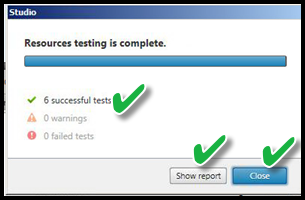
![IMAGE8.png]() Test resources executes a series of tests then produces a report.
Test resources executes a series of tests then produces a report.
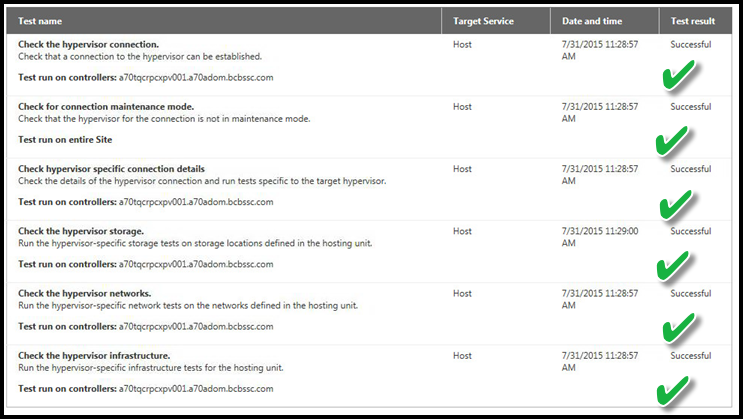
![IMAGE9.png]() Check the report and remediate any issues found.
Check the report and remediate any issues found.
![IMAGE10.png]() SUMMARY
SUMMARY
In this section, we configured the XenDesktop site and created a hosting connection to VMware vSphere using the SDK. This was done without error because we addressed the SSL certificate issue in prior steps. After configuring the hosting section we ran the "Test Resources" task and reviewed the report.
ADDITIONAL READING SUGGESTIONS
Free Tools and Citrix Training
Citrix XenDesktop 7.6 Citrix Policies Advanced Printing
Citrix XenDesktop 7.6 Windows 7 Gold Image Creation
ACKNOWLEDGEMENT
Does this shared knowledge provide value? If this article has value, please click on "Good Article" button to your right. Knowing this knowledge is valued by others is motivation to continue sharing. Your support is greatly appreciated.
![GOOD-ARTICLE.png]() .
.
In Citrix XenDesktop 7.6 Citrix Studio Configure New Site, we examined the basic configuration of Citrix XenDesktop site using Citrix Studio. In this article, the focus is on connecting the Citrix platform to VMware Hypervisor by the way of vCenter and the SDK.
Assumptions:
- The VMware vSphere server configured in a lab with storage
- The correct Active Directory permissions are assigned to a Role in vSphere or a specific service account
- Citrix XenDesktop is installed on separate server and the Site for POC configured
 Add Connection and Resources
In the Connection page, select VMware vSphere as the Host type.
Enter https://vspherepoc01.vciss
 Note: This runs in the context of a logged-on user who must have vSphere permissions or an appropriate role.
Enter the "Address", "Username", "Password" and "Connection Name" > Choose "Studio tools (Machine Creation Services)" > Click Next
 Click Next > XenDesktop connects as the Active Directory service account or uses the ID of the user currently logged on and performing the installation.
- Permissions must match those provided in Step One for vSphere permissions
 On the Storage screen, one should see the storage logical unit numbers (LUNs) available to the Citrix XenDesktop Site Controller. This is the storage configured as a prerequisite step. We have allocated two datastores of 1 TB each. We are creating "Random Pooled Desktops" so select "Use same storage for virtual machines and vDisks" > Next.
 The summary screen provides a quick overview of the connection address, name, networks, and storage. Click Finish.

In Citrix Studio there exists a new "Hosting Connection".
 Now we want to run the built-in tests using the "Test Resources" option in Citrix Studio. Expand "Configuration" > Click "Hosting" > on the right-hand side click "Test Resources."
 Test resources executes a series of tests then produces a report.
 Check the report and remediate any issues found.
 SUMMARY
In this section, we configured the XenDesktop site and created a hosting connection to VMware vSphere using the SDK. This was done without error because we addressed the SSL certificate issue in prior steps. After configuring the hosting section we ran the "Test Resources" task and reviewed the report.
ADDITIONAL READING SUGGESTIONS
Free Tools and Citrix Training
Citrix XenDesktop 7.6 Citrix Policies Advanced Printing
Citrix XenDesktop 7.6 Windows 7 Gold Image Creation
ACKNOWLEDGEMENT
Does this shared knowledge provide value? If this article has value, please click on "Good Article" button to your right. Knowing this knowledge is valued by others is motivation to continue sharing. Your support is greatly appreciated.
 .
.
Holistic technology infrastructure strategy, design, engineering and implementation that is highly scalable, secure, optimized, automated
Have a question about something in this article? You can receive help directly from the article author. Sign up for a free trial to get started.
Comments (0)