Connect, Configure App on Real Android device and Run Hello World program with Android Studio.

Published:
Browse All Articles > Connect, Configure App on Real Android device and Run Hello World program with Android Studio.
In this post we will learn how to connect and configure Android Device (Smartphone etc.) with Android Studio. After that we will run a simple Hello World Program.
In this post we will learn how to connect and configure Android Device (Smartphone etc.) with Android Studio. After that we will run a simple Hello World Program.
1) Android Studio installed on your PC (Unix or Windows). You can learn how to install it here .
2) A basic knowledge of Android lifecycle and different classes & functions used in Android Studio.
Follow following steps for connecting smartphone with Android Studio:
First we need to enable Developer options on Android device.
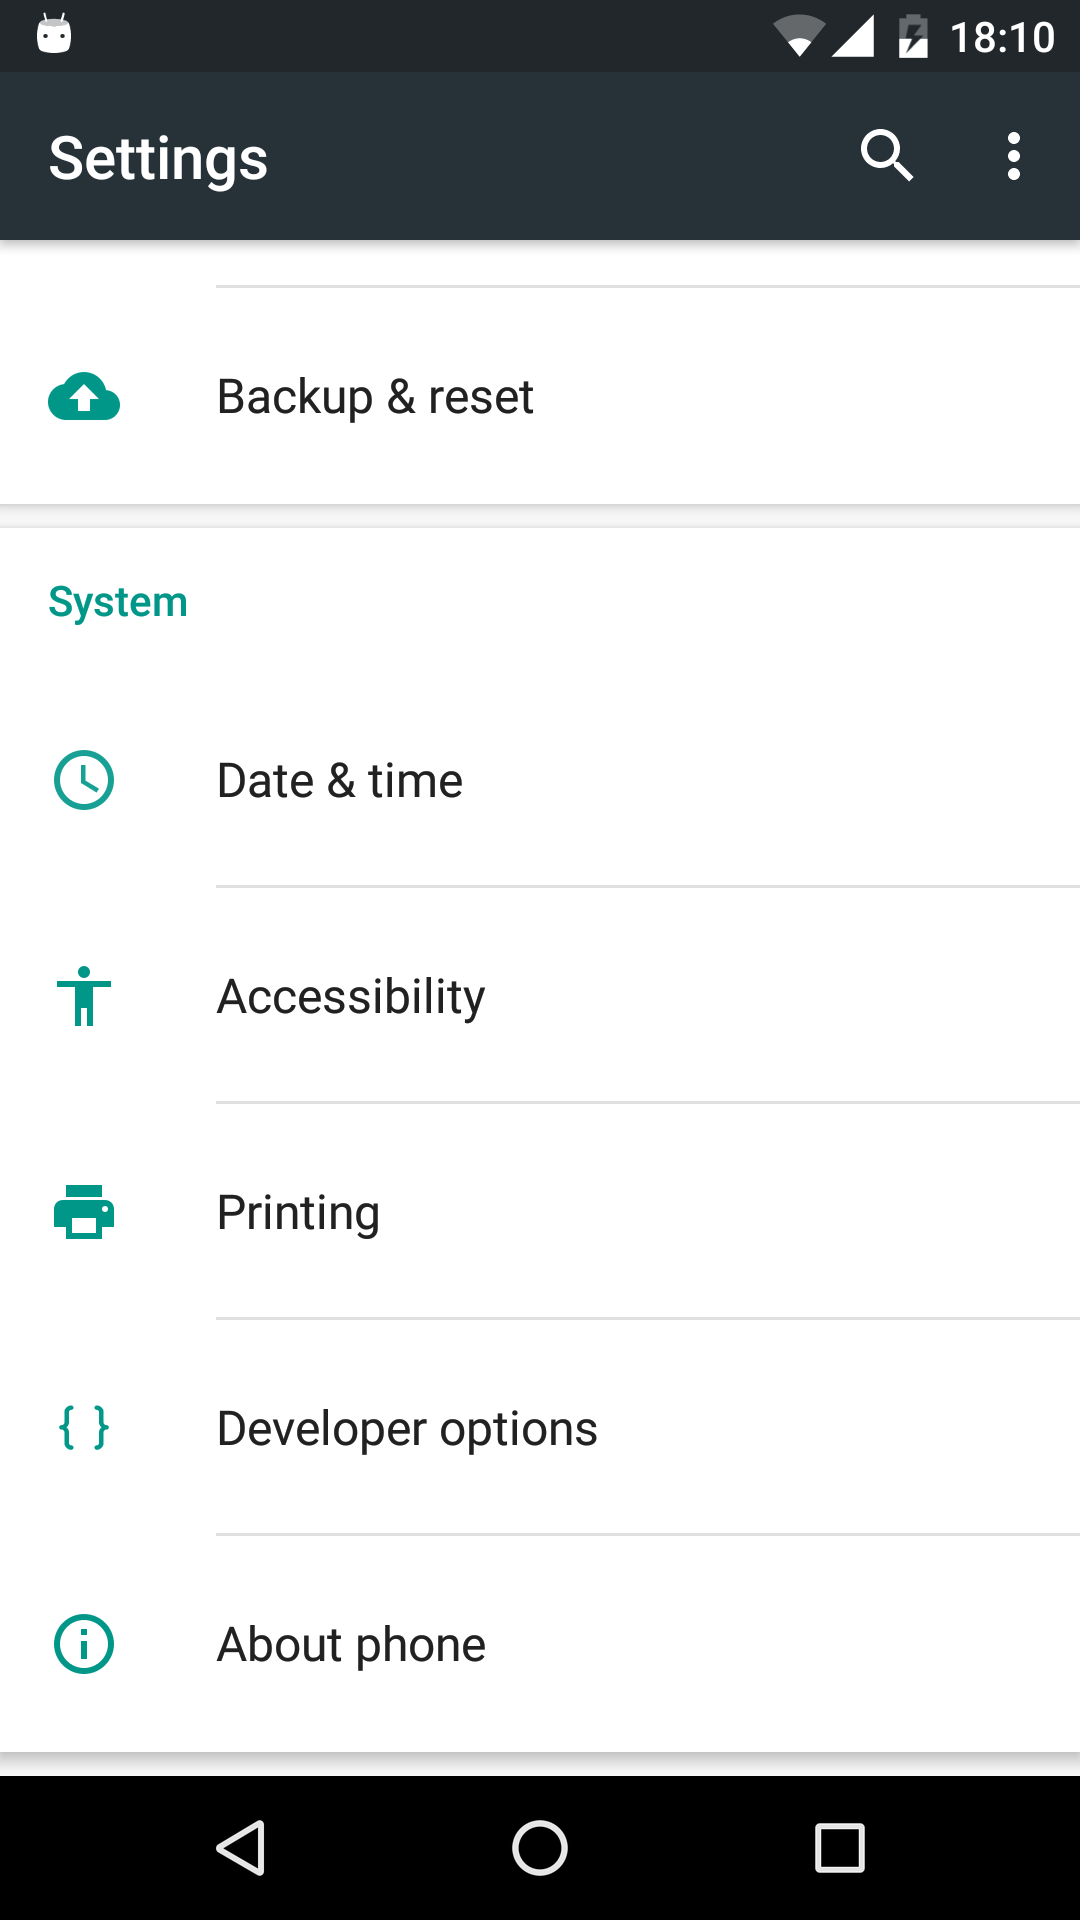
Go to Settings of the Android Device and then System Settings as shown below:
![device_system_setting.png]()
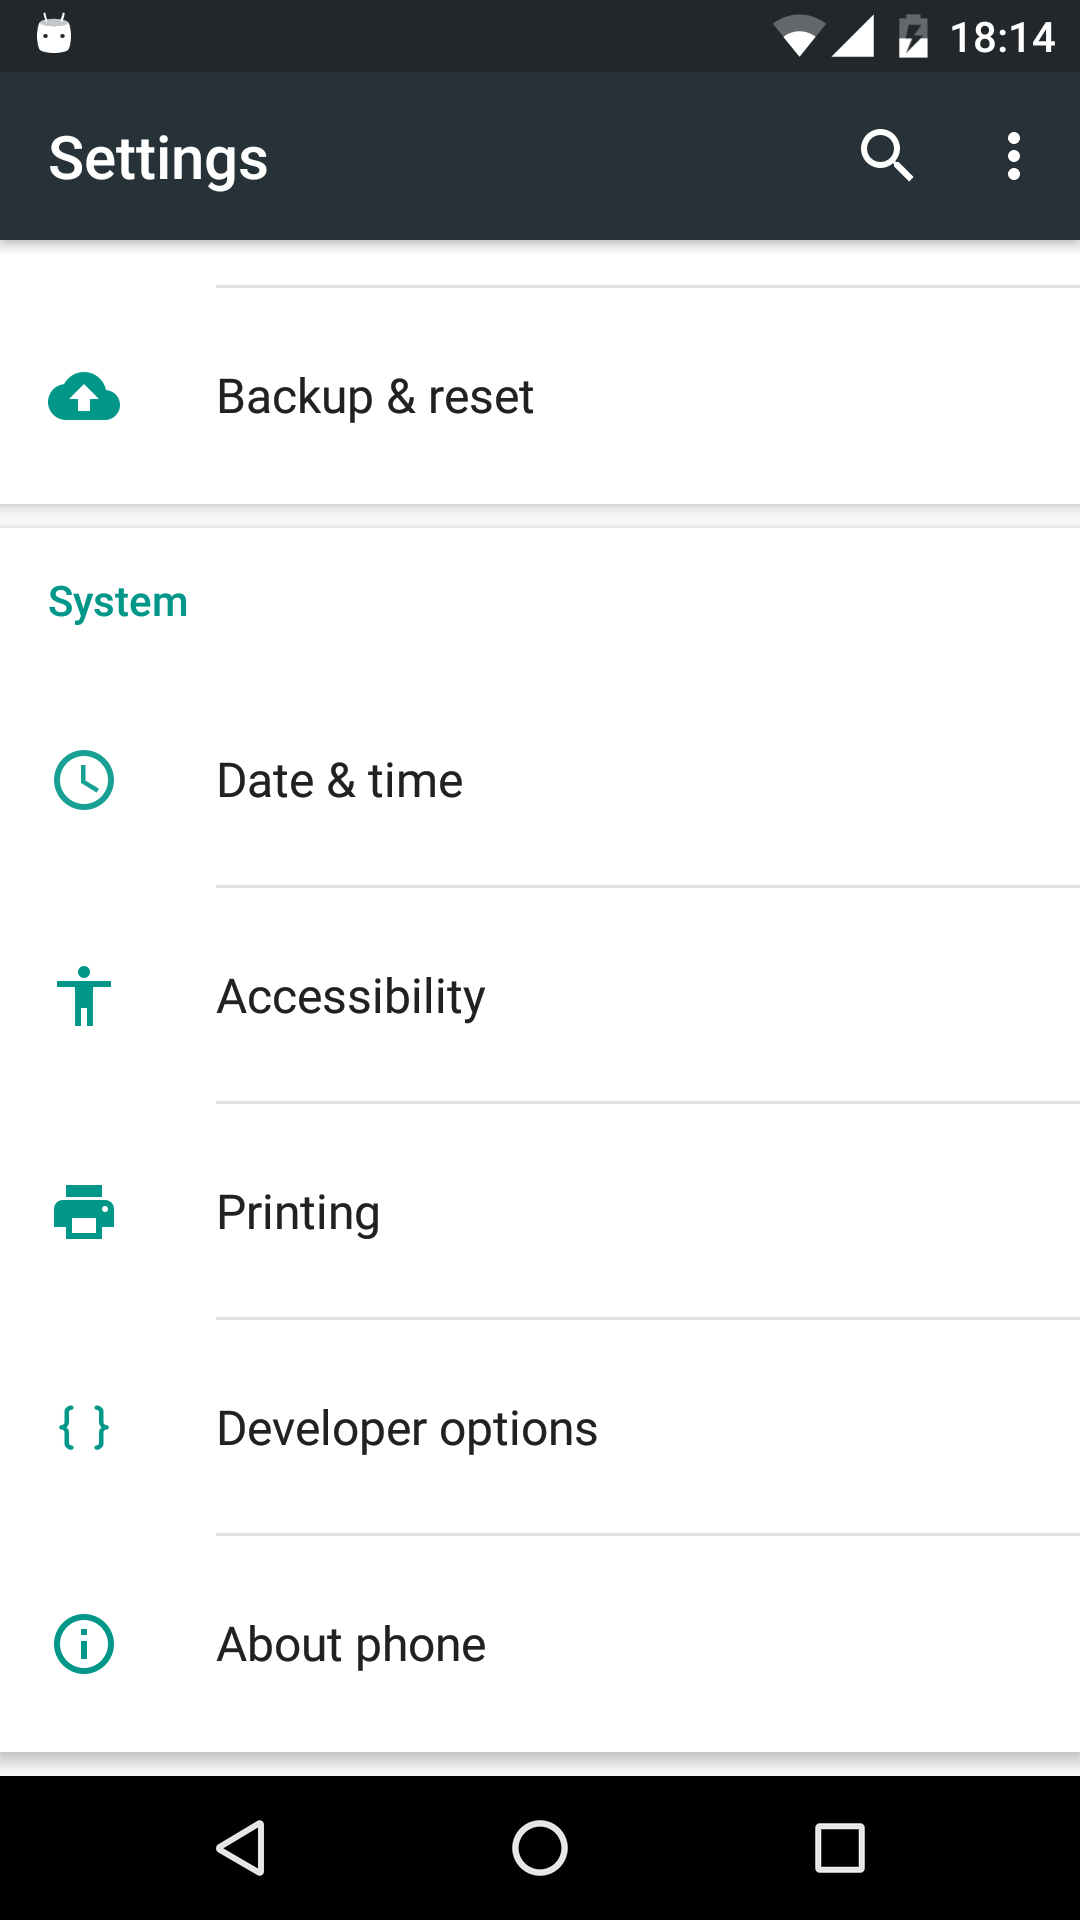
Click on About Phone (In some devices it is About Device). Following screen will be opened:
![settings_about_phone.png]()
For Android version higher than 4.4, developer option is hidden. In the above window there will be a Build number.
You need to hit this build number 7 times. It is common for all android devices. Now go back to settings again. You will see developer options as shown below:
![device_developer_option.png]()
Select developer options and then select USB debugging option. Connect your Android device with Android Studio through micro USB wire. Select photo transfer (PTP) option.
Now open Device Monitor in Android Studio and you will be able to see device connected.
So we have successfully connected and configured android device. Now let’s run a Hello World App on our configured device.
Please follow following steps:
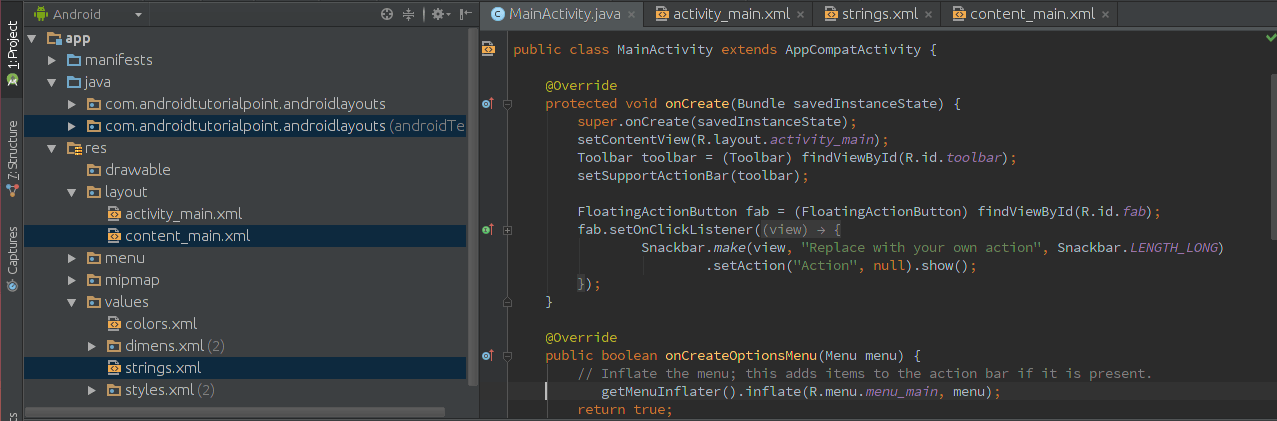
![java_xml_view.png]()
Run the code (Shift+F10) . Following window will pop up:
![device_emulator.png]()
Select the device and click Ok. Boom!! Our App is working and running fine. Hello World will be shown on Android Device.
You can see our next tutorial of How to make a basic App. Here You will be able to make an App from scratch without any external help.
Pre-requisites:
1) Android Studio installed on your PC (Unix or Windows). You can learn how to install it here .
2) A basic knowledge of Android lifecycle and different classes & functions used in Android Studio.
Follow following steps for connecting smartphone with Android Studio:
First we need to enable Developer options on Android device.
Go to Settings of the Android Device and then System Settings as shown below:
Click on About Phone (In some devices it is About Device). Following screen will be opened:

For Android version higher than 4.4, developer option is hidden. In the above window there will be a Build number.
You need to hit this build number 7 times. It is common for all android devices. Now go back to settings again. You will see developer options as shown below:
Select developer options and then select USB debugging option. Connect your Android device with Android Studio through micro USB wire. Select photo transfer (PTP) option.
Now open Device Monitor in Android Studio and you will be able to see device connected.
So we have successfully connected and configured android device. Now let’s run a Hello World App on our configured device.
Creating new project
Please follow following steps:
- Open Android Studio and make a new project with name “Android Device” and company domain application.example.com (I used my company domain i.e androidtutorialpoint.com. Similarly you can use yours).
- Click Next and choose android version Lollipop. Again Click Next and Choose Blank Activity.
- Leave all things remaining same and Click Finish.
Run the code (Shift+F10) . Following window will pop up:
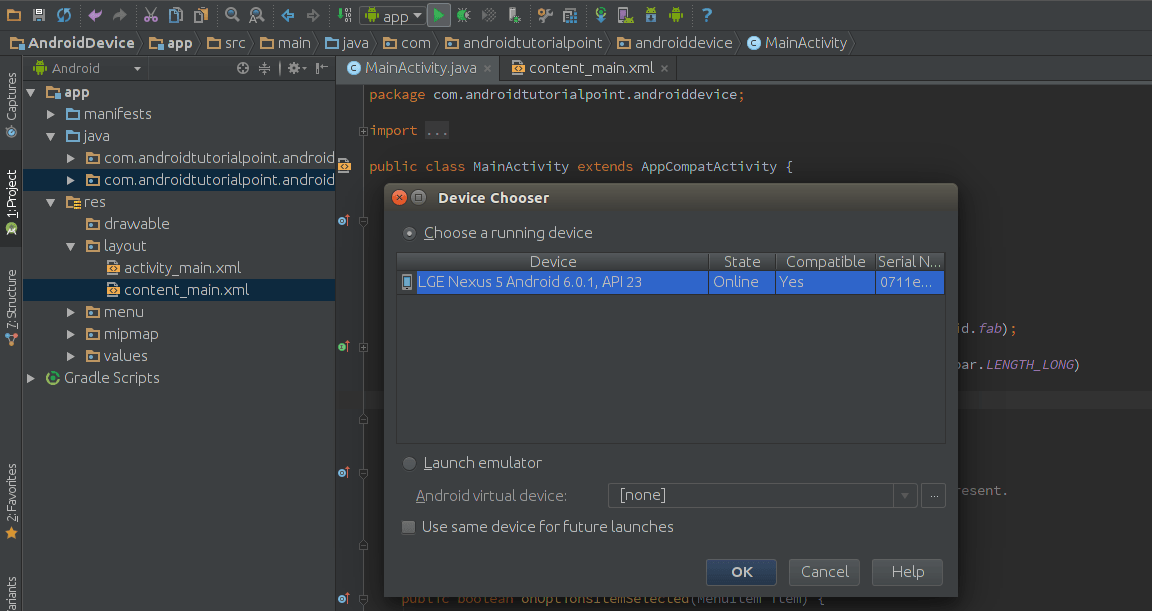
Select the device and click Ok. Boom!! Our App is working and running fine. Hello World will be shown on Android Device.
What’s Next
You can see our next tutorial of How to make a basic App. Here You will be able to make an App from scratch without any external help.
Have a question about something in this article? You can receive help directly from the article author. Sign up for a free trial to get started.
Comments (0)