Create "Bubble Text" in PowerPoint and learn some great tips and tricks along the way


Eating, sleeping, breathing PowerPoint and VBA at BrightCarbon
Published:
Browse All Articles > Create "Bubble Text" in PowerPoint and learn some great tips and tricks along the way
PowerPoint is the go-to presentation software for millions of users around the world. Many presentations use basic text features but you can really make special text jump out of your slide by applying this bubble text design process. This article has lots of tips and tricks to aid your creativity.
What you'll learn
Throughout this article, you'll discover lots of tips and tricks to make your PowerPoint sessions more productive, creative and dare I say, more enjoyable. You discover how to use some of the advanced features of the Format Task Pane, how to organise your content with the Selection Task Pane, how to use special keyboard shortcuts and hidden context sensitive menus. By the end, you'll be able to recreate the "Bubble Text" in the image at the top of this article but along the way, you'll have discovered many techniques that can be applied more generally to your presentation creation workflow. We're using PowerPoint 2016 for the PC but the same steps apply to 2010 and 2013. You can also achieve the same with PowerPoint:mac 2011 and 2016 although the references to the PowerPoint UI will be different.
So why is this creating this kind of text effect not straight forward?
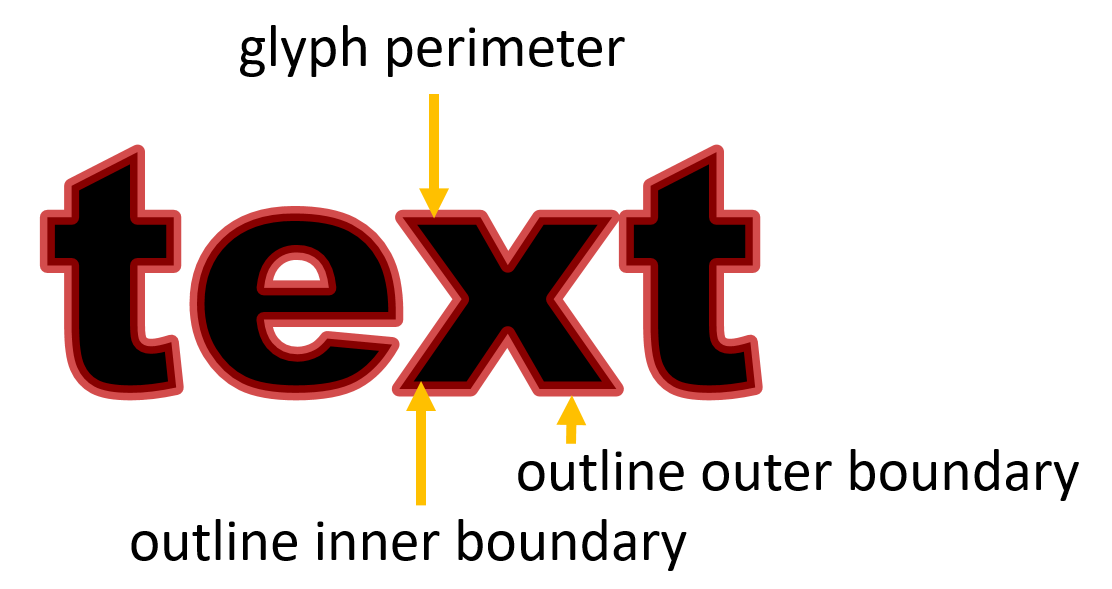
For frequent PowerPoint content authors, it may look like the affect in the article header should be really easy to implement by simply setting the the outline of the text to orange and the required width. But because Microsoft renders outlines on text equally inside and outside of the outer perimeter of the font outline, it doesn't work as required. To demonstrate the problem, here is some black text where a thick red outline has been applied and then this outline has had its transparency set to 30% so we can see the rendering challenge when zooming into the 'x' character (glyph):
 This isn't usually a problem when adding a basic thin outline to text but since we're creating "fat" bubble text, it doesn't yield the desired effect as seen here because the outline appears (somewhat unexpectedly) both inside and outside of the text:
 One might then consider using the glow effect instead since this renders from the perimeter of the glyph outwards, without encroaching the inner area of the text. But although the glow effect transparency can can be set, the feathered edges cannot:

OK. Got it. So what's the solution?
Well, we're going to go back to the first issue and make use of what we did to demonstrate it. Below is a step by step guide to the process. Note that actual colours will depend on the template/theme you are using. We're using the default Office theme in this article.
- Create a new blank slide
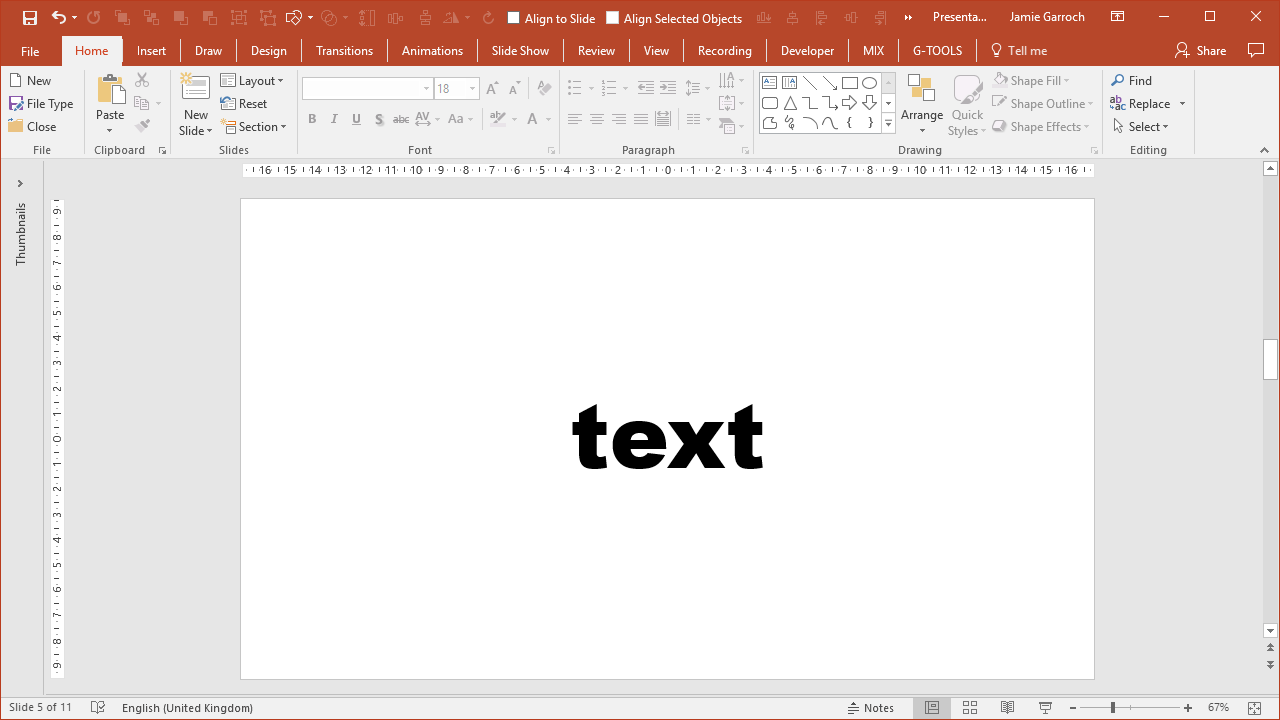
- Add a text box to the slide and write your desired "special" text within it:
![EE-bubble-text-plain-text.png]()
- Now select the text frame (the box around the text) and click the Format tab in the PowerPoint ribbon.
- We now need to show the Format Task Pane with the Text Fill and Line options and there are several ways to do this. You can either:
- Click the Text Outline button, move the mouse over Weight and then click More Lines in the sub menu that appears:
![EE-bubble-text-Format-tab.png]()
- Click any of the three Group expansion buttons that appear in the lower right corner of groups in the Format tab: (note that you'll then need to navigate to the Text Options / Text Fill & Outline section of the pane that appears)
![EE-bubble-text-group-expansion-contr.png]()
- Right click the text frame and select Format Shape from the context sensitive menu that appears noting again that you'll need to navigate to the Text Options / Text Fill & Outline section of the pane.
- Click the Text Outline button, move the mouse over Weight and then click More Lines in the sub menu that appears:
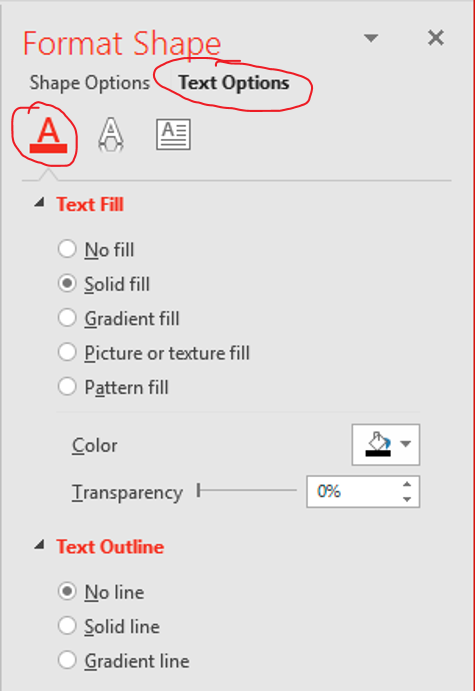
- Once you have the Format Task Pane open, make sure it's set to show the Text Options view and the the Text Fill & Outline properties (the first "A" icon):
![EE-bubble-text-Format-Task-Pane.png]()
- Before we do anything else, copy the selected text box to the clipboard by pressing Ctrl+C (you'll see why soon!)
- We can now set the Text Outline to a Solid Line and then increase the Width property in the box that appears. A rough rule of thumb is to set it to around 20% of the size of the font so in this example, I set the font size to 100pt and the line Width to 20pt:
![EE-bubble-text-Outline-20pt.png]()
- As explained in the introductory section, the text we want to see has now almost disappeared. But don't worry, here's the clever yet simple part. Press Ctrl+V to paste a copy of the original text box, without an outline on the text, onto a layer above the bubble text we just created:
![EE-bubble-text-two-shapes-misaligned.png]()
- Well that doesn't look quite what we want. That's because PowerPoint will automatically shift duplicates of objects right and down when pasted on top of each other. So let's correct that by selecting both of the text boxes using the lasso method. Left click your mouse well outside of one corner of the two text boxes (the mouse cursor should be the basic arrow one, not the 4-way cross or I bar) and then whilst keeping the left mouse button pressed, drag to beyond the opposite corner of the two text boxes. You should now have both text boxes selected:
![EE-bubble-text-selected.png]()
- With these two text boxes selected, click the Format tab in the ribbon again and from the Arrange group, click the Align button followed by Align Center. Repeat for Align Middle. Now we have what we wanted:
![EE-bubble-text-complete.png]()
- Depending on the text and font face you're using, you may find little gaps as seen between the x and the t characters above. You can disguise these by simply drawing a shape around them, filling it with the same colour used for the text outline property and then sending it to the back layer by right clicking on it and selecting Send to Back (you can also group the whole lot to ensure they all stay together) but we're going to do something else.
- We can now make the text really jump out of the page by applying a shadow to the text box that has the thick outline and setting that outline to have a gradient fill. Let's see how to do that next.
- Because the text box with the black text we can see is now exactly the same size and exactly on top of the text box with the fat outline, it's impossible to select the one with the outline just by clicking objects on the slide. Here's a couple of useful tricks to select the lower of the two text boxes:
- Click the top text box. Now press Shift+Tab. You won't see anything happen (unless the Selection Task Pane is open as in the third step below) but the text box immediately below it is now selected.
- Use the lasso method describe above to select both text boxes. Now keep the Shift key pressed whilst left clicking the top text box. Again, you won't see anything happen on the slide but only the lower text box is now selected.
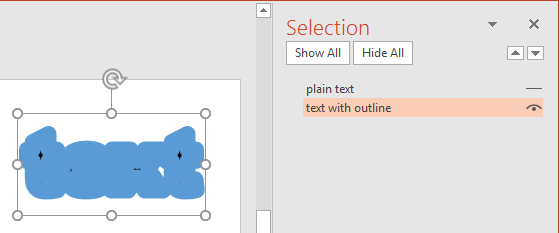
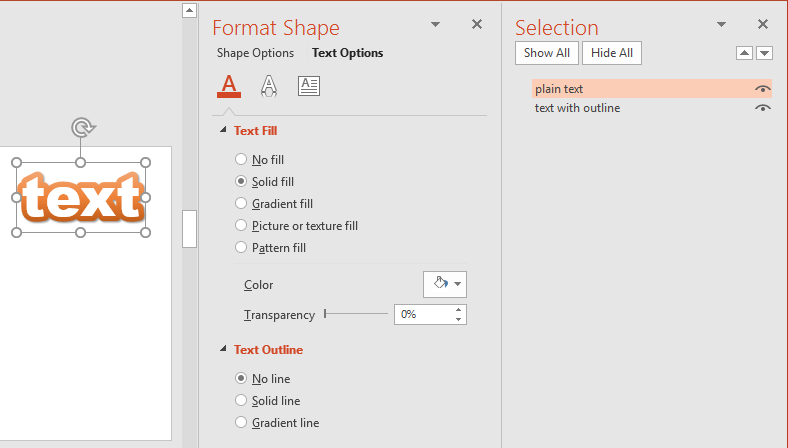
- If you prefer visual cues to see what you're doing more clearly, press Alt+F10 (PowerPoint 2010 onwards) to open the Selection Task Pane. From here you can select single/multiple objects on the slide (use the Ctrl key + left mouse button to select more than one) and also hide objects by clicking the eye icon on the right hand side to make it easier to work on others. In this example, we've renamed the two objects (click the name to edit it) to make them easier to identify, hidden the one on top and selected the one below:
![EE-bubble-text-Selection-Task-Pane.png]()
- Now we have the desired lower text box selected, we can go to the Format tab again and change the Outline to a Gradient. We've just used one of the preset gradients but you can the modify all of the stops (deleting them or adding more) as required:
![EE-bubble-text-outline-gradient.png]()
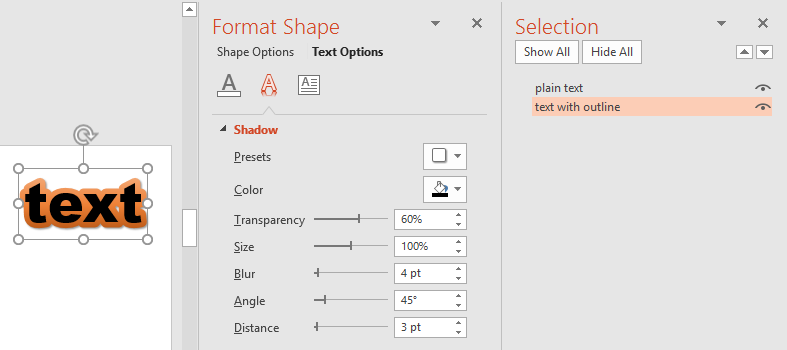
- We're also going to add a drop shadow to the lower text box by clicking the second 'A' icon in the Format Task Pane which is Text Effects. Again, we're using a preset, "Offset: Bottom Right":
![EE-bubble-text-Frop-Shadow.png]()
- The last step is turn the top text box visibility back on in the Selection Task Pane using the eye icon...
![EE-bubble-text-complete-with-gradien.png]() ...set the text fill of that top object to white...
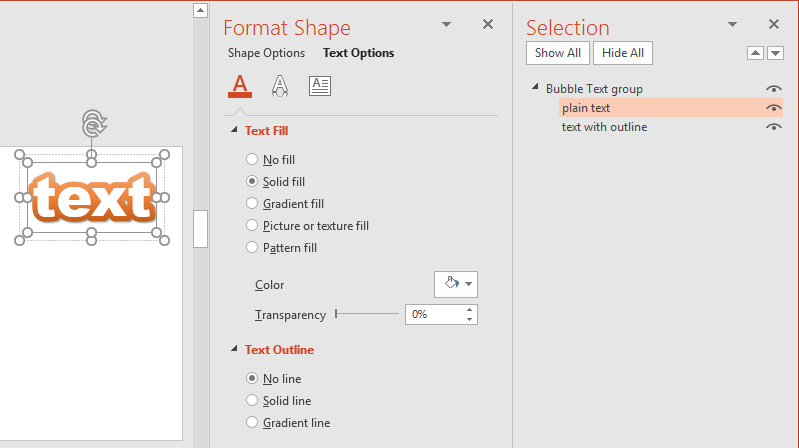
...set the text fill of that top object to white...![EE-bubble-text-complete-final.png]() ...group the two text boxes to make sure they don't get separated accidentally and hey presto, we're done:
...group the two text boxes to make sure they don't get separated accidentally and hey presto, we're done:![EE-bubble-text-complete-final-groupe.png]()
- If you want, you can also use your new creation as a non-editable image. This is useful to ensure that none of the following can upset the visual design of your new enhanced text:
- Use of restricted non-system fonts that can't be embedded (or displayed on a Mac) and hence won't appear as designed when the presentation is sent to other folks.
- Changes in theme as can happen when copying content from one presentation to another.
- The two text boxes getting separated or misaligned.
- People editing your creation!
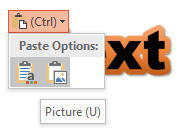
- To use it as a non-editable image, simple select both text boxes (or the group) again, press Ctrl+C followed by Ctrl+V and when the copy is pasted back to the slide, use the Paste drop down menu to change it to a fixed flattened image:
![EE-bubble-text-Copy-Paste.png]()
- You can even save the multi-selection as a transparent PNG image by right clicking on the selection (or group) and selecting Save as Picture


Conclusion
You've seen many useful techniques demonstrated in this tutorial in the creation of "Bubble Text" but much of what has been shown will help you become more proficient and creative in the authoring of your own PowerPoint content.
Eating, sleeping, breathing PowerPoint and VBA at BrightCarbon
Have a question about something in this article? You can receive help directly from the article author. Sign up for a free trial to get started.
Comments (0)