Create a new Microsoft Account User Profile in Windows 10


This is a follow up to my previous article about creating a new Local Administrator Profile account on Windows 10 for troubleshooting purposes when getting help from experts at Experts Exchange.
As mentioned in my previous article, troubleshooting a corrupted user profile in Windows 10 (or any recent version of windows for that matter) can be so tedious and time-consuming, that it's almost always easier to just create a new user profile and be done with it.
Ideally, you would have already determined that a new user profile solved a problem you were having and now want to create a new Microsoft Online Account user profile that you wish to keep. Here I'll show step by step instructions on how to do that, along with transferring your files and some settings from your corrupt user profile over to your new one, so that you don't lose any of your files.
If you follow the instructions given in this tutorial, you can rest assured that the process explained here is very safe, because we don't delete anything until we are certain that Windows is working the way we want again in our new profile.
Pre-Requisites:
1. You must know your Microsoft Account login details. If necessary, check to ensure you have your credentials correct by going to https://login.live.com/ and try logging in. I've found people can often forget their credentials if they make heavy use of the "Keep me logged in" feature in browsers.
2. Know the name of your corrupt user profile account.
If you're not sure what that is, open a command prompt window [Press Windows Key + R]
Type Command and press enter.
The profile name you are logged in with will be shown as C:\Users\ProfileName>_
Create a New Microsoft Account user profile
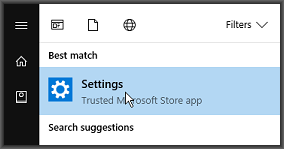
1. Press your Windows Key, Type Settings then click the Settings Trusted Windows store app search result
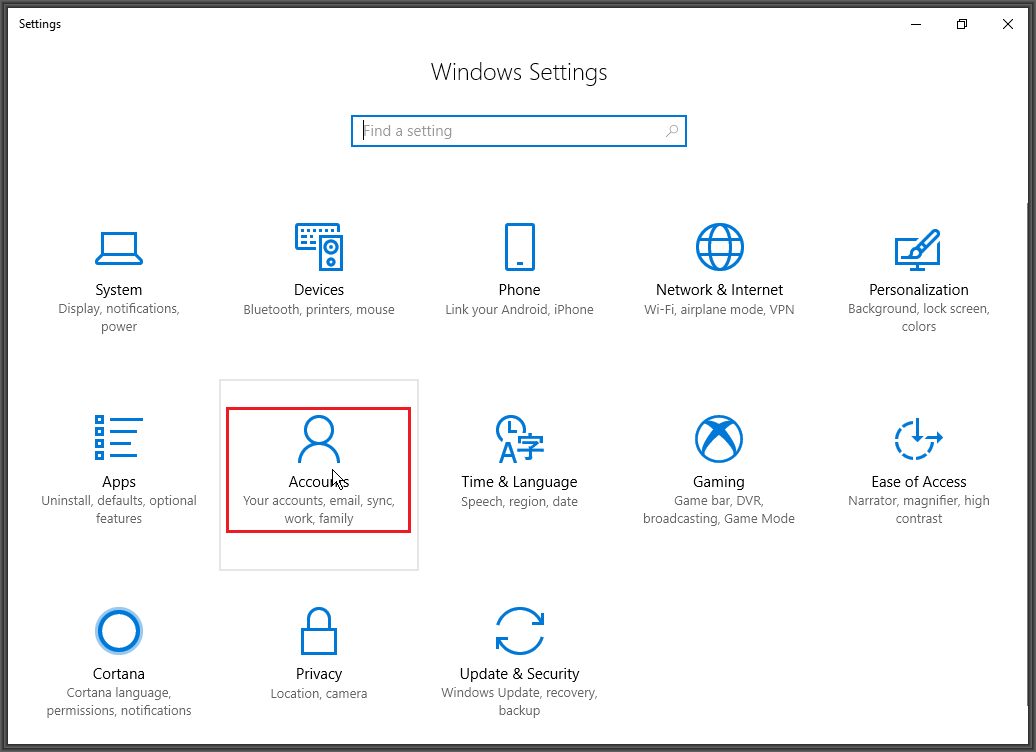
2. Click "Accounts"
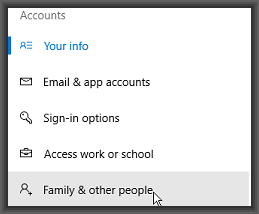
3. Click "Family & other people" on the left-hand side
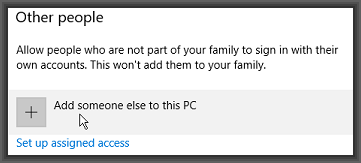
4. Click "+ Add someone else to this PC"
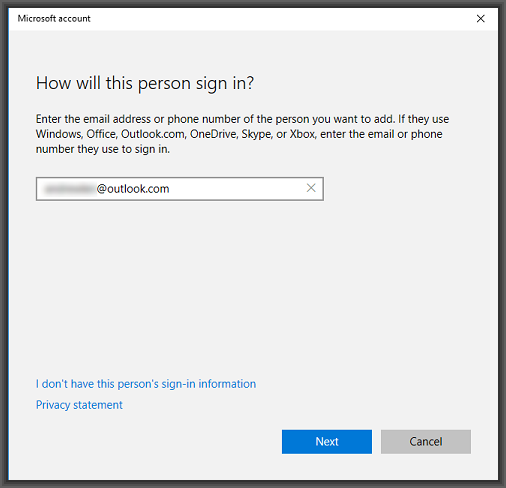
5. In the window that pops up, enter a valid Microsoft Account email address and click the Next button
Here you must do one of two things, depending on what happened after Step 4.
If you get the following Error - "Something went wrong. We can't add a user to the device right now. It's probably our fault. Please try again.", then just click the Close button and follow the prompts to "Create an account on this PC".
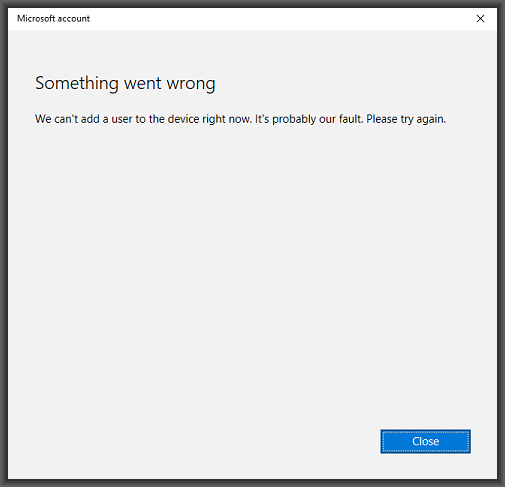
The above is a known and common Microsoft server error that often occurs and has not been fixed properly yet, (but we can take care of it later) so just move on to Step 6 below
If you did not get an error, you will get the following screen
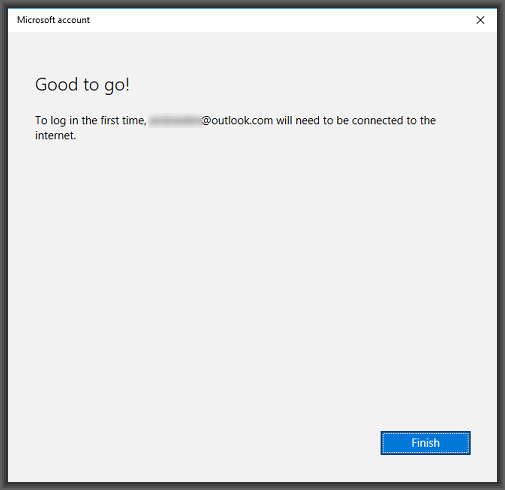
In this case, simply click the Finish button and move on to Step 9 below
After an Error at Step 4 - Create a ProfileName Local Account
I've found the "Something went wrong. We can't add a user to the device right now. It's probably our fault. Please try again." error is a common occurrence when you try to using the "same" Microsoft Account credentials to create a new profile account, as those that you are already logged into on your computer with.
In a case like this, no amount of "Try again's" will work in my experience, so continue with creating a local administrator account as explained below and then just keep following the steps. We'll attach the local account to your Microsoft Online Account details later.
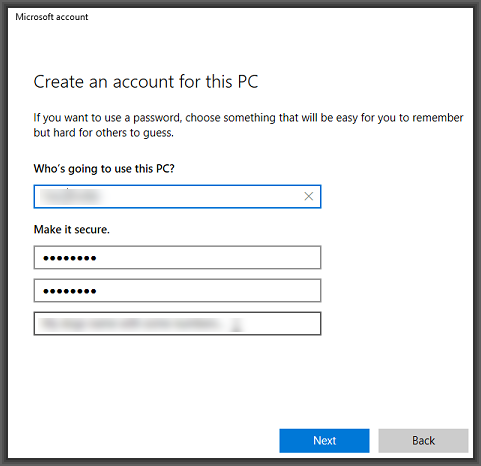
6. On the window, under "Who's going to use this PC" - type a descriptive new user account name that is different from the corrupt profile you are going to replace. This can be anything you like and it will end up being your new "ProfileName."
7. Under "Make it secure", enter your Microsoft Email Account Password - twice.
8. Type a "Password hint" that will help you remember the password in case you ever forget it, and then click the "Next" button
IF No Error in Step 4
9. Back on the "Family & other people" window, click the new "ProfileName" account just created (or the Microsoft Online Account if there was no error at Step 4), and select "Change account type".
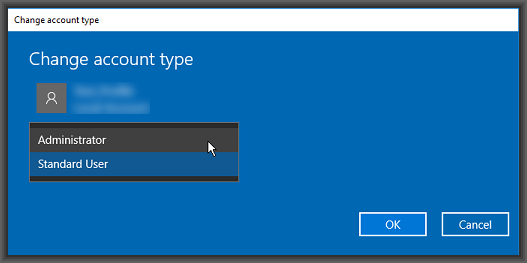
10. Change the "Account type" to "Administrator" and click the "OK" button
11. Close the "Settings" window and Restart Windows. Be patient. If you see "Getting Windows ready" and "Don't turn off your computer" before it restarts, then that's all good. Just wait until your computer restarts.
12. Now log in using either the new Microsoft Online Account if it created successfully, using your Microsoft account password, or into the new ProfileName account you just created if you got an error in Step 4.
Note 1: If you are prompted to "Use Windows Hello instead of your password" after logging in, just click "Skip this step" unless that's the way you're used to logging into Windows.
Note 2: If you are prompted to setup OneDrive after logging in, click "Save new files only to this PC by default."
Allow sufficient time for Windows to complete setting up your new profile and then continue on to the "Copy User Files to New Profile" section below.
Copy User Files to New Profile
Here we start to copy our user files from one profile to another. I say "Copy" instead of "Cut" or "Move" so as to avoid any file permissions issues in the new profile. You can remove the files from the old corrupt profile to free up space later, once you are satisfied that everything is correct in your new profile.
Remember - If at any point you get confused and end up not being sure what the current profile folder name you're logged in with is, just open a command prompt. The profile name is shown in the command window as:
C:\Users\ProfileName>_
Just make a note of what the ProfileName is, and then close the Command window.
! Info 1: Whenever I refer to ProfileName from here on, I'll be referring to the profile name you created and just confirmed by looking at a command prompt window as described above.
! Info 2: Everything should occur exactly as I describe below. If at any point you don't get an expected response from Windows, review the steps you've already completed to make sure everything was done correctly. If in doubt, return here and ask for clarification in the comments section.
If after logging in, you find you cannot open Windows File Explorer, restart your computer once more and log in a second time. That issue can sometimes occur, but a second restart will always cure the problem if it does happen.
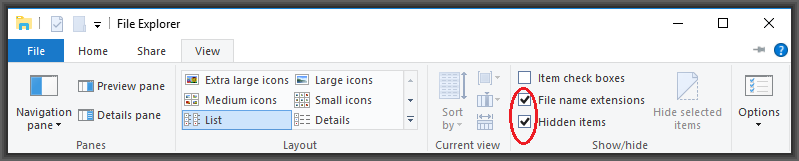
First: Configure Windows File Explorer to Show All Files and Extensions
a) Open Windows File Explorer
b) Click the view tab in Windows File Explorer and put a tick in "Hidden items"
c) Still on the view tab, put a tick in "File name extensions"
d) On the left-hand side of Windows File Explorer, click on "This PC"
Next: Start the File Copy process
1. Double click on "Local Disk (C:)" on the right side of Windows Explorer
2. Double click on "Users"
3. Double Click on the user profile name that matches your "Corrupt Profile" name that you made a note of in the Pre-Requisites section, at the start of this tutorial.
4. Click "Continue" on the "You don't currently have permission to access this folder" warning
5. Double click "Documents" - This is your old Documents folder. From the explorer window on the RIGHT, highlight all files and folders you had in your old Documents folder (You can just press CTRL-A) , then Right Click and select "Copy"
6. Navigate back to "C:\Users\ProfileName" and Double Click "Documents" there. Right-click and select "Paste" on the RIGHT side of Windows Explorer.
Repeat Steps 1 through 6 for the following folders, only paste them into their corresponding locations in your new C:\Users\ProfileName folder, as shown below.
If any of these folders are empty in the corrupt user profile you are copying from, then just skip any empty ones and move on to the next one.
- Desktop - Paste in C:\Users\ProfileName\Desktop
- Downloads - Paste in C:\Users\ProfileName\Downloads
- Favorites - Paste in C:\Users\ProfileName\Favorites
- Links - Paste in C:\Users\ProfileName\Links
- Music - Paste in C:\Users\ProfileName\Music
- Pictures - Paste in C:\Users\ProfileName\Pictures
- Saved Games - Paste in C:\Users\ProfileName\Saved Games
- Videos - Paste in C:\Users\ProfileName\Videos
If you created any folders in the root folder of your corrupt user profile yourself, copy and paste those to the same location in your new profile as well.
The following block of instructions are only valid and need to be followed if you had an error when trying to create an online account earlier in this tutorial and had to create a local administrator account. Ie: You didn't get a "Good to go!" response. If you didn't get this error, skip down to "Re-configure Microsoft Office" now.
Changing a Local Profile to an Online Microsoft Account Login Profile
- Press your Windows Key, Type Settings then click the Settings Trusted Windows store app search result
- Click "Accounts"
- Click "Sign in with a Microsoft account instead"
- The Microsoft account "Make it yours" window opens
- Enter your Microsoft Account email address and password, then click the "Sign in" button
- Enter your current Windows 10 password (this should be the same as your email password if you followed the above instructions correctly) to confirm it really is you that is making this change, and click the "Next" button
- Click "Skip this step" when prompted to set up a PIN - you can set it up later if you want to
- Close the Settings window and open it again by repeating Steps 1 and 2 above
- You must now verify your identity on this profile - click Verify under the words "You need to verify your identity on this PC" on the "Accounts > Settings > Your info" window
- Choose your preferred method of identity verification (phone or email) and follow the prompts given. If verifying by email, you will need to first login to your live.com email account using a browser to retrieve the verification code before you can complete this process, so if possible and it has been set up, use the "Text to your Mobile phone" option
- Complete the verification process and then close the Settings Window
- Restart Windows
- You will see "Getting windows ready" and "Don't turn off your computer" after restarting. This is normal and expected. Wait for the process to complete.
- Log in to Windows using your new account. **Remember you will need to use your Microsoft Account Password**
- Once you are logged in, you can verify that OneDrive is now available to you again, along with all other benefits of logging into Windows using an online Microsoft account
Re-configure Microsoft Office
The following assumes an up to date Office 2016 installation and the use of an online Microsoft Exchange Email account.
1. Press your Windows Key, Type Outlook, then press your Enter Key
2. A "First things first" window will open. Click the "Accept" button
3. The "Welcome to Outlook" window opens
4. Enter your Microsoft Account email address in the rectangular box and click the "Connect" button
5. When prompted, enter your email Password and Tick "Remember my credentials" - then click the "OK" button
6. On the next "Account setup is complete" window, remove the tick from "Set up Outlook Mobile on my phone, too" and then click the "OK" button
Outlook will now open and auto-populate itself with a local copy of your Microsoft email account content. Give it some time as depending on how much email data your account contains, it can take some time.
You can verify it has finished when you see the "All folders are up to date" message at the bottom of Outlook. See screenshot below.

If you find that you are missing emails after the above process, then you were either using a PST file with Outlook before, in which case we can import the missing data or re-connect the PST file, or you may need to change a setting in Outlook for your Microsoft account. Instructions for doing this are beyond the scope of this article. You are encouraged to use the Ask a Question feature at Experts Exchange for additional help.
Close Outlook
Open any remaining Microsoft Office applications that you use one by one, configure them to your liking as needed, then close them again.
That's it. You're done and are now using a new, fresh and not-corrupted User Profile!
Configure Windows Look & Feel
If you had personalized your Windows Theme in your old corrupt profile, then you will need to personalize it again in this new profile.
Same for third-party browsers like Chrome or Firefox, other Windows and possibly some program settings.
Bookmarks for any third party browsers will not be there for example, so they will need to be set up again. These can still be copied from the old profile, so just post a new question asking for help with that or anything else you may need help with to reinstate if required.
! Important: Ensure you configure any backup programs, routines, and schedules that you may have set up in the old corrupt profile once again so that they will run and backup correctly in this new profile.
Once you are satisfied that you have everything you need from the old corrupt profile, you can remove it if you want to, but I'd suggest leaving it there for now, just in case you discover something forgotten in the future.
Back it Up
Now that you are working in a non-corrupted user profile and have got Windows to look "just so" for yourself again, consider making a backup image of your computer to an external drive that you can restore to if things go belly up again in the future. Regularly update this image with incremental backups.
Think of image incremental backups as a type of invaluable Insurance for your Windows setup and data. My own worst case scenario is that I could lose the current days worth of work.
Every night, Acronis True Image backs up any changes I've made the day before to cloud storage. That includes settings, personalizations, files I've downloaded or created - read everything.
So, if I were hit with say... a bad Ransomware infection today, I could easily restore my entire computer to the state it was in yesterday. Consider doing something like that for your own setup. Or at least backing up to removable media if you don't want to use the cloud.
Removal of the Corrupt User Profile
Steps to remove a profile were covered in the first article which can be found here.
Need more support on this topic?
You are encouraged to use the "Ask a Question" feature of Experts Exchange to ask for more help. I monitor asked questions at EE in an expert capacity and will be glad to offer additional assistance, as will many other experts on this topic.
I hope the information here has helped you out.

Have a question about something in this article? You can receive help directly from the article author. Sign up for a free trial to get started.
Comments (0)