Four Simplistic Solutions to Convert an Offline File (.ost) to a Personal File (.pst)


Most Outlook users would have heard the terms "OST" and "PST" at one time or another. Though both of these formats are used to save Outlook data, there is a difference between the two.
OST or "Offline Storage Table" stores all of the works that were done while Outlook was online, with a local "offline storage table" created for when it is offline, thus saving having to download the data all over again when going back online. An example of when an OST file is used is when Outlook is connected to a Microsoft Exchange Server, or any other email server via IMAP (Internet Message Access Protocol).
Another way Outlook data is stored is in a PST file. In this case, everything is stored (and remains accessible) in the Personal Storage File when offline. Many Outlook users do not know how to convert an offline file (.ost) to a personal file (.pst). As a result, they face an awkward situation when they have to migrate their OST files to PST format. In this write-up, we will focus on various ways to export OST files to PST.
Continue reading to learn more about Outlook OST to PST conversions.
Situations When OST to PST Conversion become Imperative
Some users may wonder about the reasons for an offline file (.ost) to a personal file (.pst) migration. This section will cover their curiosity by sketching the reasons.
- Outlook OST file Corruption: If OST file becomes corrupted, its data can be accessed only by being transferred to PST. Virus/malware attacks, hardware issues, etc can damage OST files.
- No Access to Exchange Server: When you do not have access to Exchange Server, you need to convert OST files into PST to fully access their contents. The inaccessibility to Exchange may be caused by a maintenance break or the crashing of Exchange server.
- Migrating Outlook Data Files: In case you are changing your old organization and want to port your OST file into the new, you need to migrate its data into PST format so as not to lose it.
Techniques to Convert an Offline File (.ost) to a Personal File (.pst)
Due to the reasons discussed in the earlier section, you may need to export OST files in PST file format. We will share several solutions to this problem for the readers.
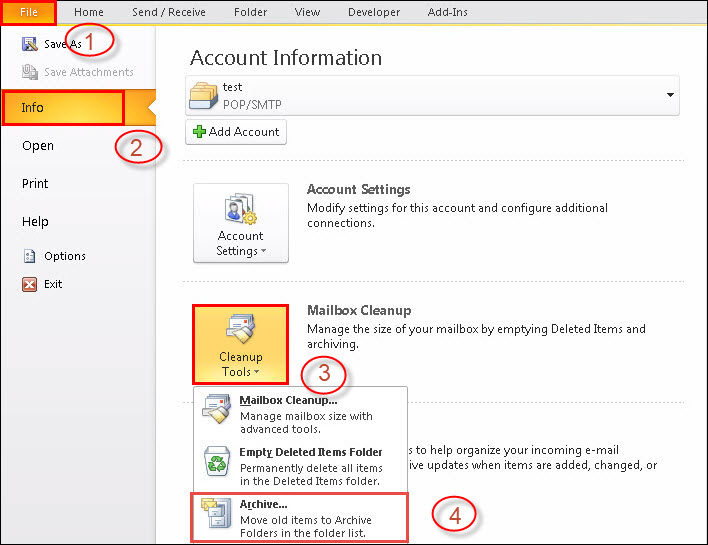
Solution 1: Archive Option
Like almost every other email client, MS Outlook also contains an Archiving feature. Luckily, we can use this feature to transfer OST data to PST.
a) Open MS Outlook.
b) Click on File>> Info>> Cleanup Tools>> Archive.
c) Select the OST file you want to archive.
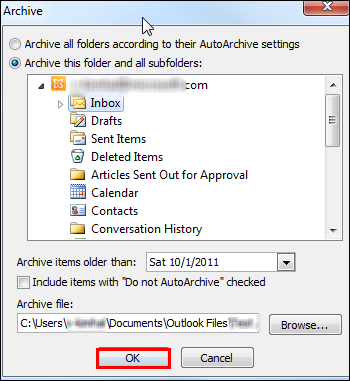
d) Select a suitable location for your new PST file.
e) Click OK and your OST file to be migrated into PST format.
Solution 2: Drag and Drop Technique
The items of OST file can be moved into a new PST file.
a) Create a New PST file inside your Outlook profile.
b) Simply drag and drop all mailbox items to the PST file. As Outlook does not allow Drag and Drop feature for Inbox, Calendar, Contacts, you have to copy them.
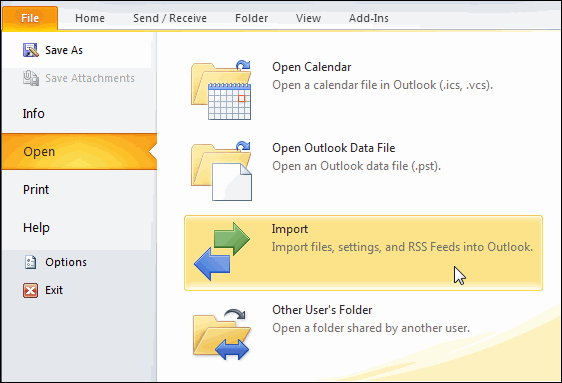
Solution 3: Transfer OST to PST using Export Option
Another quick way to transfer data from OST to PST is to use Export option.
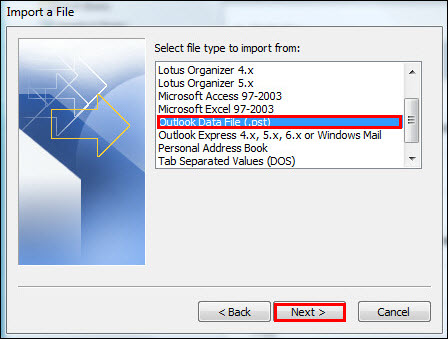
a) Open Outlook and click on File>> Open>> Import.
b) Import and Export Wizard will open. Select Export to a file>> Next.
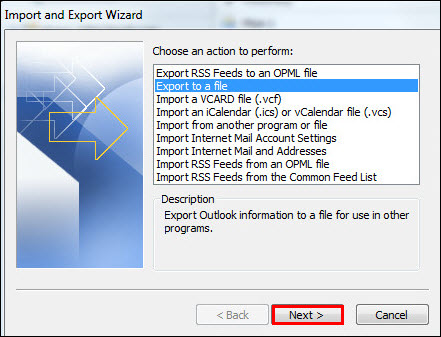
c) Select Personal File Folder (.pst)>> Next.
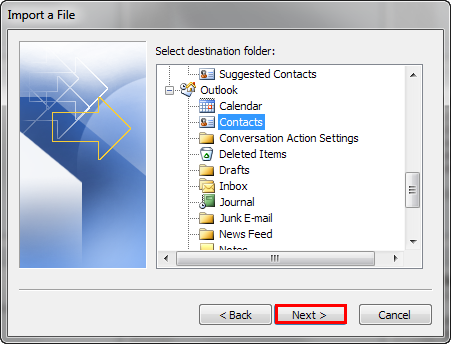
d) Choose your preferred file. Remember to select Include sub-folders option and click Finish.
Limitations of Above Method
Till now, we have discussed only the manual methods of exporting OST files to PST. These manual methods allow you to convert without using any third-party programs. However, there are also some drawbacks to these solutions. Users need to use the same system for migration where the OST files have been created. Connection to Exchange server is also necessary. These cannot be performed while Outlook is offline. Moreover, corrupt or damaged Outlook OST files cannot be migrated to PST.
Solution 4: Using Third Party Application
If you want to skip these limitations of manual procedures, you might want to choose SysTools OST to PST Converter. This application can migrate all OST file items into PST file format. Emails, contacts, journals, etc. can be exported into a PST file using this program. This tool is capable of even restoring the deleted PST file data. It can transfer multiple OST files in a batch and thus saves your time. The application supports OST files made in all versions of MS Outlook. If necessary, users can also choose to export selective OST file items into Outlook PST. Some of the main features of this software are:
- Converts an Offline file(.ost) to a Personal file(.pst) & preview of OST files before moving to PST.

- The software offers four export option like; PST, EML, MSG, and Office 365 migration as well as maintains Folder hierarchy.
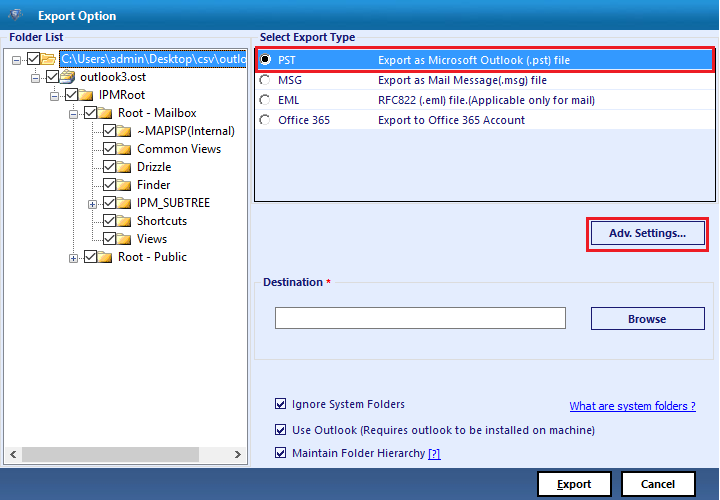
- Option to filter date-wise for selective conversion and maintains the data integrity of OST intact in PST file

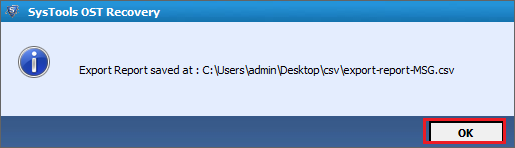
- Generates a report of migration process in CSV format.
Conclusion
We have mentioned two different solutions to convert an Offline File (.ost) to a Personal File (.pst). Users can choose between these to migrate their OST file in Outlook PST. As the manual method is full of drawbacks, users may choose the application for a swift and trouble-free migration. This tool easily exports OST data to PST and spares users from all the troubles of using manual methods.
Have a question about something in this article? You can receive help directly from the article author. Sign up for a free trial to get started.
Comments (1)
Commented: