Guide on how to install Ubiquiti Network Management System

Ubiquiti is relatively new in the USA, but the high quality and competitive prices with other router manufacturers of their products mean that they are now on the rise, growing very fast.
If you have any of their products you may want to look at their Network Management System [UNMS] from where you can manage all your Ubiquiti devices from one central place via a web page, and even from a phone. It is still in beta mode but already has considerable management. The only downside with Ubiquiti is support.
As you can see on their website, you need to have 64-bit (x64) CPU along with
- 2 GB RAM (Minimal)
- 16 GB storage (Minimal)
To follow this guide, you should also own a domain and have a static IP. You can make it work without these, but this guide is dependent upon the above requirements.
1-Download and install Ubuntu 16.04.1 LTS (Xenial Xerus) 64-bit from the list choose the one it says in the description Ubuntu 16.04.4 LTS (Xenial Xerus)
2- Once you’re done with the installation and you have the Linux machine up and running, open the terminal and Run the following script
curl -fsSL https://unms.com/install > /tmp/unms_inst.sh && sudo bash /tmp/unms_inst.sh3- Login to your domain host (like GoDaddy for example) and add a DNS A record at your domain host to point to your public IP. You can name it whatever you want [acb.initializebiz.com]
4- Get your local IP address of the Linux machine (UNMS) from your router or server, make it static in your router or reserve it in the domain controller.
5- Open a web browser on your windows machine that is on the same network, and enter the local IP address of the UNMS machine. You will get a setup screen that is easy to follow.
6- By default, it uses port 443. I recommend changing it for security reasons. This is done by running the following comment in the terminal on the Linux machine (UNMS)
curl -fsSL https://unms.com/install > /tmp/unms_inst.sh && sudo bash /tmp/unms_inst.sh --http-port xxxx--https-port xxxx --ssl-cert-dir /etc/certificates --ssl-cert fullchain.pem --ssl-cert-key privkey.pem [replace the xxxx on the http and https with the port you want to use]
7- If you change the port, you need to open the port on the UNMS machine firewall and run the following script,
sudo ufw allow xxxx [change the xxxx to the port you changed it to in the previous step] then run the following script to verify that the port is open,
sudo ufw status verbose8- You need to open this port on the host in Windows incoming firewall rules, you don’t need to open it for all, just for this IP.
9- In your router create a port forwarding with the port you chose, to the IP of the UNMS machine.
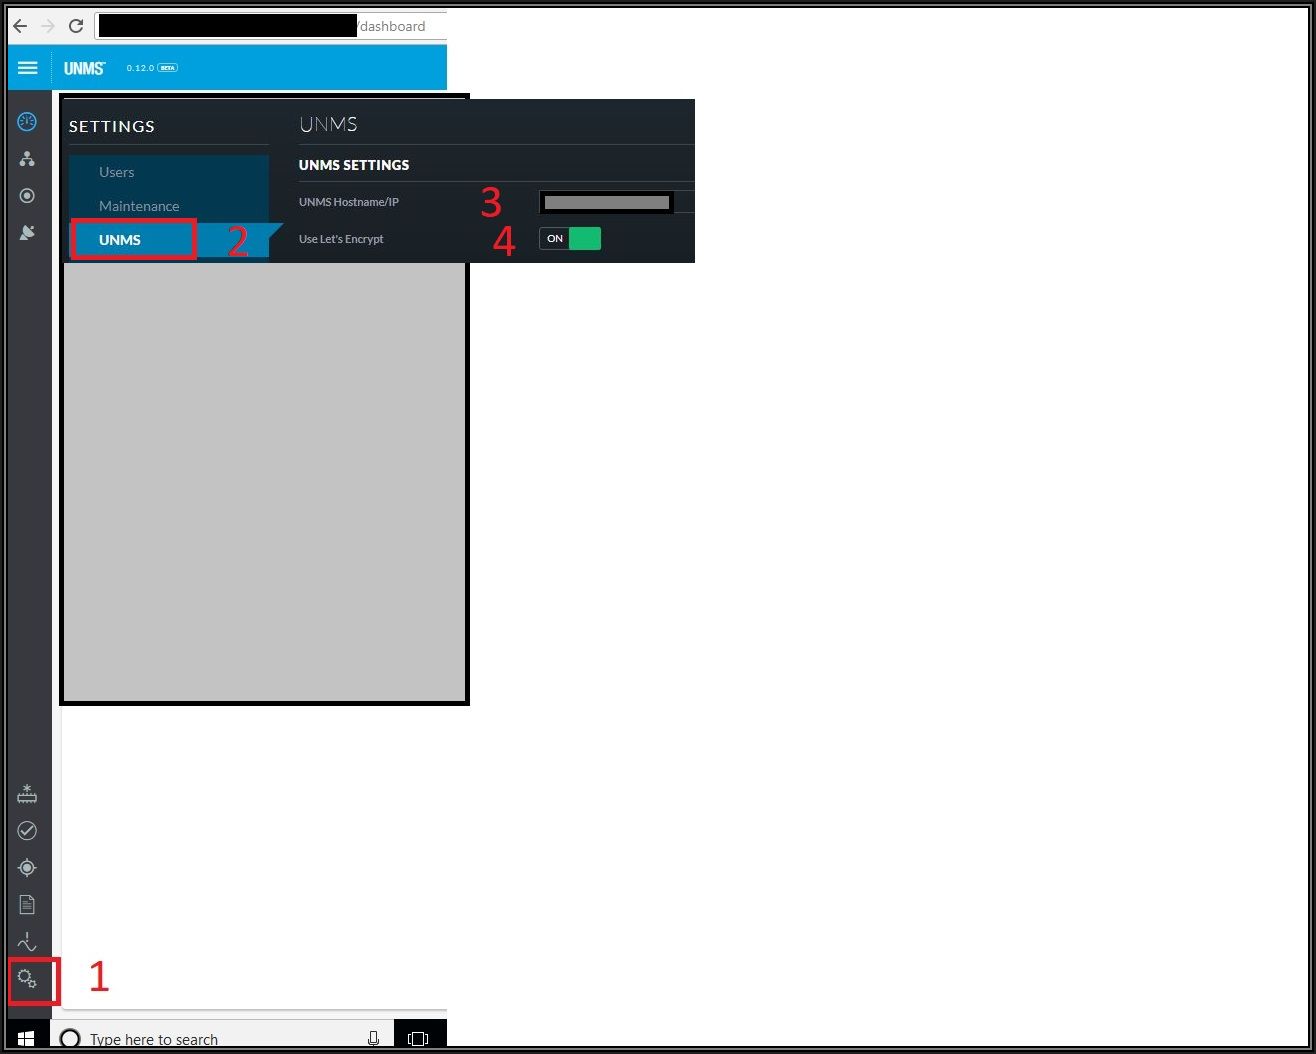
10- Back to the panel in the interface go to settings (on the right side at the bottom) then click on UNMS and where it says UNMS hostname/IP enter your new record [acb.initializebiz.com] and turn on use Let’s Encrypt.
Tip! Click on any image to get a full-size view...
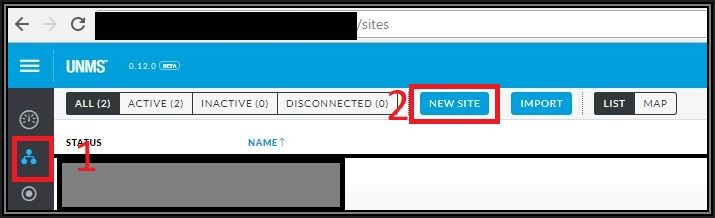
11- Go to the icon where it says sites, new site, and create a site. Only basic information is required, the rest is optional.
12- Go back to settings then click on Connection and copy the UNMS key.

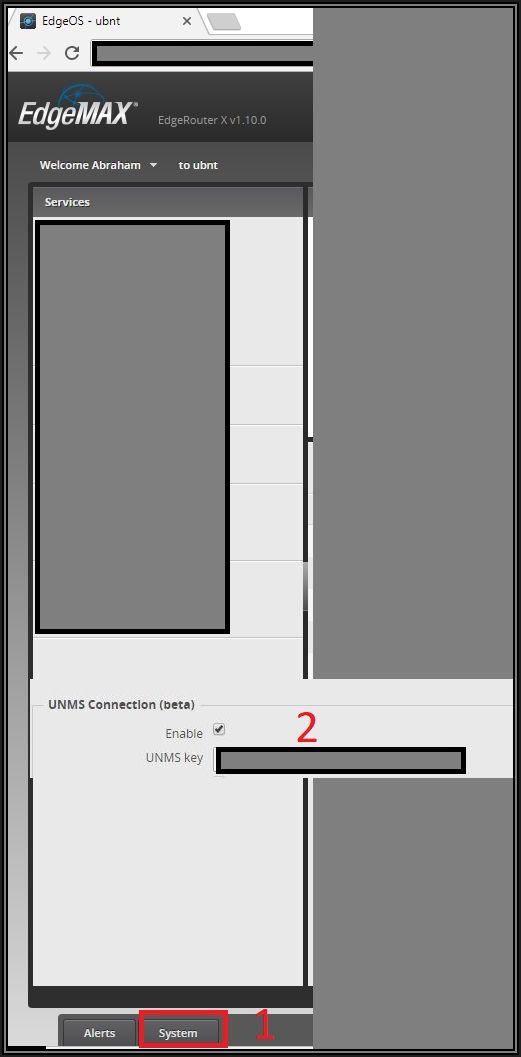
13- Login to your Ubiquiti device, for example, the edge router, on the system tab (at the bottom of the page) at UNMS Connection (you need to have the latest firmware to use this). Paste the text you just copied and click enable and save.
14- Back to your panel you should see the router show up. Click Authorize.
Done!
Hope you find this helpful.
Have a question about something in this article? You can receive help directly from the article author. Sign up for a free trial to get started.
Comments (0)