Learn to use the POWER of Mailwasher Pro - Part 1


I've been using Mailwasher (both free and paid) for 15+ years and recent questions I've seen asked at Experts Exchange and other forums I frequent have led me to write this series of articles. Mailwasher is a powerful anti-spam utility that is installed locally on your computer and unlike online managed anti-spam services, provides you with full control. Further, Mailwasher Professional is in this authors opinion, the BEST anti-spam utility on the market. Since using it, I have almost ZERO spam enter my Email application.
Introduction
By going through this series of articles, you will learn how to install and configure Mailwasher for the first time, and then how to utilize its powerful features.
This Part-1 of the series will cover the initial installation of Mailwasher and how to configure it with your POP and IMAP email accounts. Part-2 of the series (coming soon) will cover configuration of Mailwasher's Powerful anti-spam features.
So on with the show...
Downloading Mailwasher
1. First, go to the Mailwasher Pro homepage and click the Download Button or click the Download Button below

Download and save (at time of writing) the Mailwasher_Pro_Setup_7_11_05.exe file (approximately 22.0 MB) to get a fully functional 30 days free installation. Note: If you wish to keep using MailWasher Pro Trial after 30 days, you must purchase a license, or it will revert to the Free version. No settings will be lost if you opt to only use the Free version after the trial expires.
2. Once downloaded, double-click (execute) the Mailwasher Pro setup file and follow the prompts. Here are the steps for installing (with step by step pictures) for you on a Windows 10 Professional Machine. Other Windows versions will be very similar and just as easy to follow.
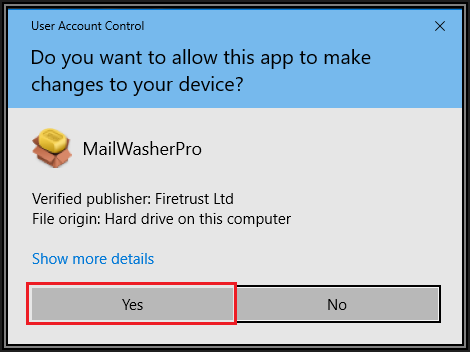
Answer Yes to the User Account Control box that will pop up
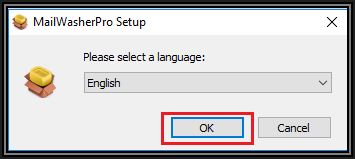
3. Setup launches. Click OK to select "English" language or click the drop arrow to select another language and then click the OK button
4. The "Welcome to the MailWasher Pro Setup Wizard appears. Click the Next button to continue

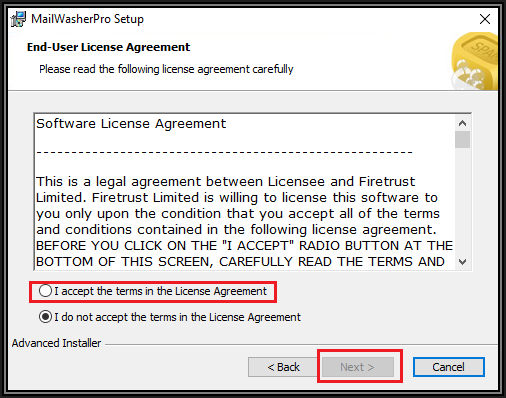
5. Read and Accept the Terms of the License Agreement and then click the Next Button
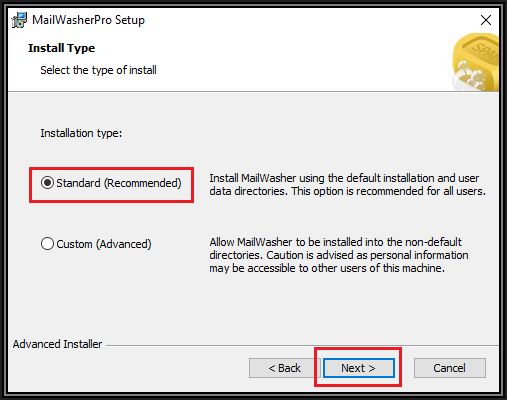
6. Select "Standard (Recommended)" and then click the Next button
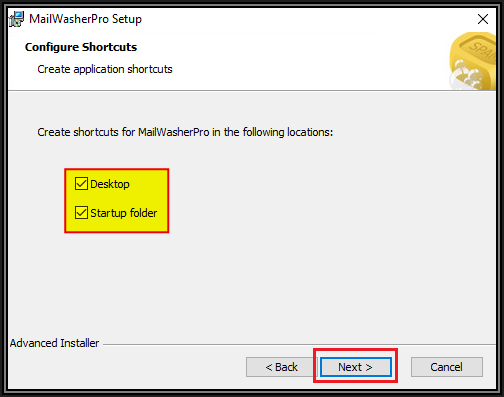
7. Select if you wish to have a Shortcut on the Desktop and the Startup folder and then click the Next button
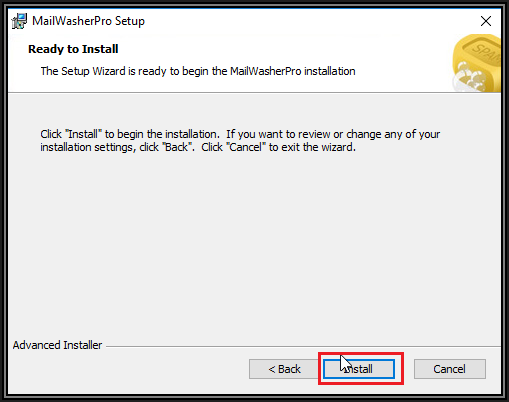
8. You're now ready to install. Click the "Install" button
9. Mailwasher proceeds with the install. Once done, click the Finish button to Launch MailwasherPro for the first time. Mailwasher will attempt to detect existing Email accounts and Contacts that you already have installed in your Email program.
Note: If you do not have any email accounts set up in an email client as yet, or if Mailwasher is unsuccessful in locating existing email accounts, then skip down to Step 14. now, otherwise, skip down to Step 19 now!
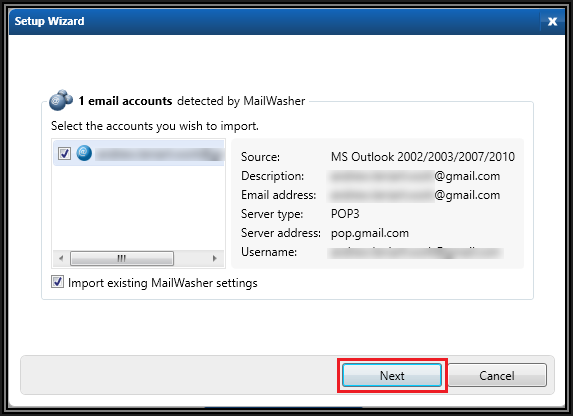
10. You will get a list of Email accounts that were automatically detected by Mailwasher Setup. Tick the ones you want to be automatically configured and then click the Next button
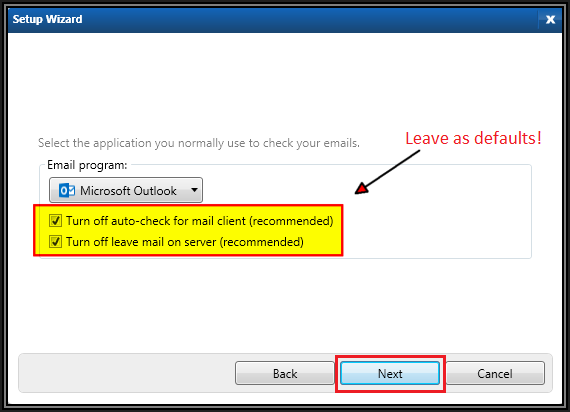
11. Select your Email client using the drop-down arrow. I suggest leaving the options given as default as shown below, then click the Next button
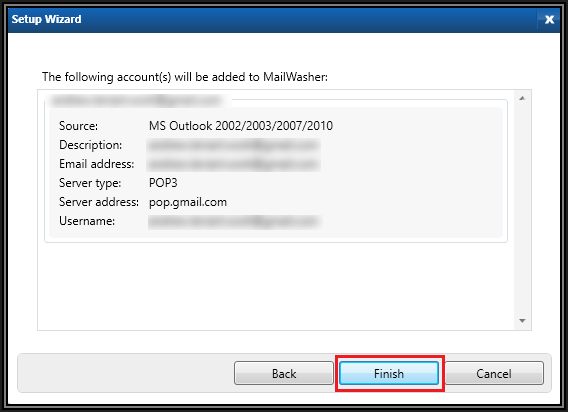
12. A summary of the accounts that will be automatically added is shown. If you're happy with the result, click the Finish button
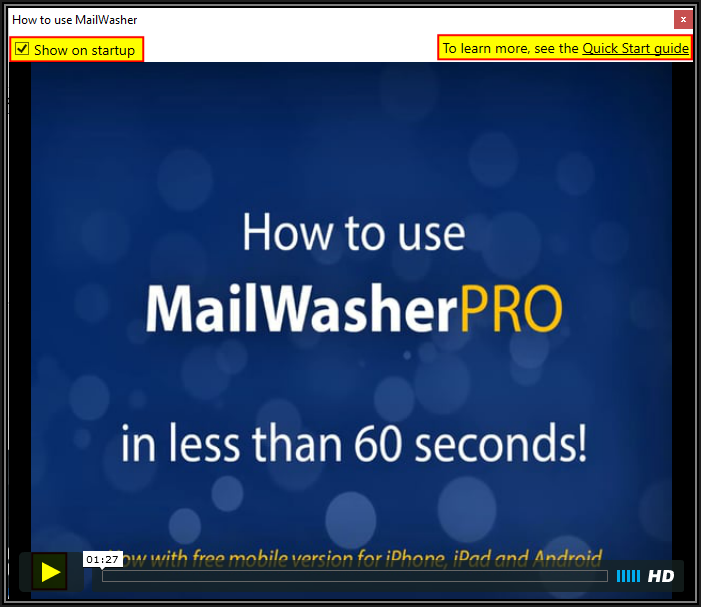
13. Watch the excellent short Video tutorial on how to use Mailwasher. This is great for first time users. Un-Tick "Show on startup" unless you want the next screen to open again the next time you run Mailwasher and I'd also recommend that you read the "Quick Start guide" for more tips on use. Note: You can opt to skip this and watch it later if you like
Note: If you DID have email accounts automatically imported into Mailwasher as per the instructions above, skip down to Step 19 Now!
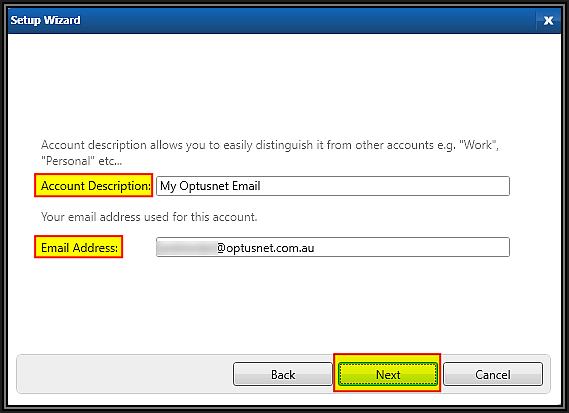
14. No email accounts detected? No problem.
The Setup Wizard presents you with the following screen. Enter an Account Description and the Email Address for the account you want to set up.
15. Now select your Server Type and enter your Password for the account you're setting up and then click the Next button

16. Select your Email client using the drop-down arrow. I suggest leaving the options given as default as shown below, then click the Next button

17. A summary of the accounts that will be automatically added is shown. If you're happy with the result, click the Finish button

18. Watch the excellent short Video tutorial on how to use Mailwasher. This is great for first-time users. Un-Tick "Show on startup" unless you want the next screen to open again the next time you run Mailwasher and I'd also recommend that you read the "Quick Start guide" for more tips on use. Note: You can opt to skip this and watch it later if you like

19. You're now ready to begin using Mailwasher for the first time.

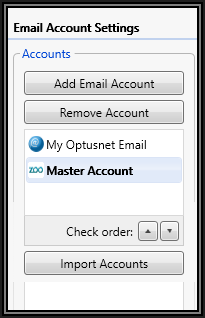
Manually Setting up additional Email Accounts in MailwasherPro
To set up additional mail accounts in MailwasherPro, click the Settings Tab (as shown above) and perform the following steps.
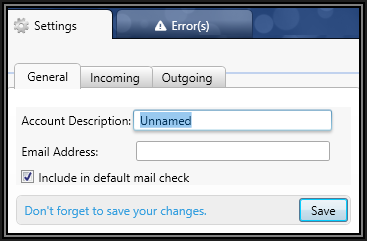
- Click the Accounts button in the left-hand pane
- Just as before, enter an Account Description, Email Address and don't forget to Save your changes!
- Leave the "Include in default mail check" option ticked
Enter your Password for the account and leave the "Remember password" option ticked. In the Advanced options below, you have the opportunity to change the Server Port Number and select the appropriate Authentication options. Leave Pipelining enabled for better performance when Mailwasher is checking mail. Finally, don't forget to click the Save button!
Note: The advanced options can be left as defaults in most cases
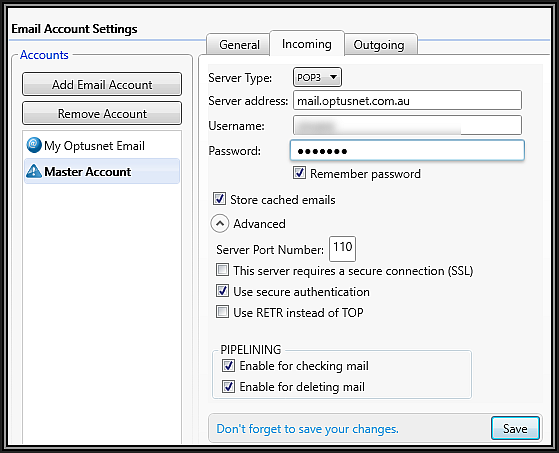
Once you've clicked Save, Mailwasher will test the connection to the server. If all is well, then you're done with setting up that account.
At this point, you can now begin using and enjoying the 'basic' anti-spam features MailwasherPro. To make it more powerful, however, there are a number of things to configure so that Mailwasher can learn what "you" consider to be spam. There are a ton of features and options to explore and configure that will make this tool eliminate spam for you forever.
Part-2 of this series, explaining some useful configurations tips is now available at the following link;
Need Support?
I encourage you to use the free Ask a Question feature at Experts Exchange. I monitor questions frequently and I (along with other experts) will be happy to provide additional assistance via that medium.
Author: Andrew Leniart
© Copyright 2018 All Rights Reserved

Have a question about something in this article? You can receive help directly from the article author. Sign up for a free trial to get started.
Comments (3)
Commented:
Author
Commented:Hi Nick and welcome to Experts Exchange! Thank you for your kind comment and also for endorsing the article with a thumbs up. That means a lot to me so much appreciated.
Commented:
Excellent article. That's what the doctor ordered. I been having a huge struggle with spam and safe senders that are going to spam and the ones that I block and and set the filter to have it go to trash still making it again to spam. I am so frustrated and above all wasting so much time on this problem that seems never ends. I hope this will be the answer to my prayers if it is not too expensive to buy.
Thank you Andrew,
Basem Khawaja