

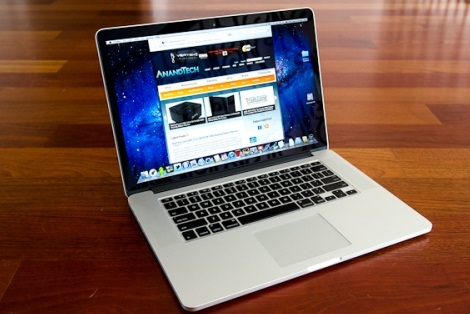
General rules for the care of MAC
It's a shame if the failure occurred due to ignoring simple rules for care or because of improper use of the device. For the MacBook, there are hygiene rules, as well as for users - if you do not follow these simple rules, neglect, or do not know them, then the device does not last long. You will definitely need to seek the assistance of a professional master or give the device for a number of works to clean the device in the service center.
Unlike the laptops of many companies, Apple's laptops are cleaned a bit harder, and the user without special skills is better not to take it for themselves. Just wipe the dust you will get without a doubt, but at the same time make a replacement for the dried thermal paste will not work. Such complications are due to the location of the radiator under the motherboard, and in order to make a replacement for thermal grease, a fee should be charged. The good news is that if you have MacBook Air and MacBook previous releases, where access to the MacBook is under the cover, and in the MacBook under the keyboard, then you can do the work yourself.
So, what is required of us as responsible for the device? Just a couple of minutes a week and only!
1. Turn off the device, turn it off from power.
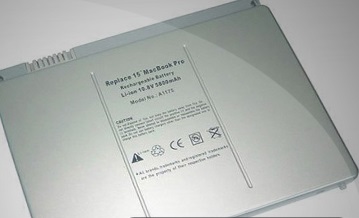
2. We take out the battery (in case it is removable).
3. Clean with a soft cloth (microfiber for office equipment) ports and air vents to remove dust.
4. We eliminate vacuum from the hard-to-reach areas, for example, slots.
But, it is not advisable to use a vacuum cleaner to clean the internal parts of the MacBook, as it has not yet brought any positive results to anyone. If there are pieces of dirt and dust left in the holes, you can use a toothbrush to moisten it with alcohol or an alcohol-based agent. The device is ready to work in half an hour, everything is simple and easy!
Read more: https://www.apple.com/support/macbookpro/care/index.html
Сare of MacBook battery
The check of the condition in which the battery is located should be made in a month 2 or more times, if this is not done, do not hesitate to apply for a repair of the MacBook. For verification, it is necessary to take the following actions:
1. Charge battery fully.
2. Enter the pmset -g rawlog command in the Terminal to check the current status of the battery.
The input of this command for its correct and correct execution should be done from the keyboard, and not through copying, after which the launch is performed by pressing the "Enter" key. The utility will display an image showing the current status of the battery. The codes and commands for the battery will have the following meanings:
- The presence of a connected power adapter - yes for external connected;
- Battery charge status is activated - yes for battery present;
- No battery charging at the moment - no for battery charging;
- Display of the factory or current capacity of the battery - cap = 5435/5380;
- The permissible quantity and at this time for the charge-discharge cycles, as well as at the present time - cycle count = 1000/72.
3. Special attention should be paid to the cap 5435/5380 indicator. If the value of the second number is greater than the first when the battery is fully charged, it is worthwhile to subject the battery to recalibration. To this end, the laptop itself is connected to the external power supply network, and its battery is fully charged, i.e. on 100%. The next 2 hours of work on the laptop should be done directly when powered from the network. At the end of this time, the battery should be discharged to the full 0% and leave the laptop itself for half a day. Before switching on after such operation of the laptop it is necessary to conduct a full charging of its battery.
4. You must restart the Terminal and re-enter the pmset -g rawlog command. In the output, there must be a new value for the cap parameter. In the case where this procedure for the laptop is the first, then the restoration of a value equal to or approximate to the factory one, for the battery may not occur. A similar repeat procedure will help to correct the condition. The optimum frequency for it is from 2 times per month of time.
P.S: Access to the "Terminal" utility is made through the Utilities folder located in the Program directory.
How to properly clean the MacBook keyboard
Food + drinks + keyboard - an explosive mixture that entails clogging of contacts, sticking keys and other unpleasant consequences for the user. In general, the picture is not pleasant. Despite the fact that the Apple Keyboard distance between the keys and the body is minimal to avoid getting under the body of dust, fibers and microparticles will not succeed. Consequently, sooner or later, there is a need to carry out cleaning work inside the keyboard. I will try to tell you how to do it correctly and without extra financial costs.
1. The preparatory stage includes the collection of necessary materials and the disconnection of the keyboard from the computer. So, we will need cotton buds, toothpicks, credit / discount card, water, cloth-microfiber, alcohol / specialized liquid for gadget care. Turn off the keyboard or use the special program KeyboardCleanTool, which automatically blocks the keyboard. And better do both
2. External cleaning of the keyboard consists of the mechanical cleaning of the keyboard body from dust and dirt, using a microfiber and a small amount of special equipment or water.
3. Internal cleaning of the keyboard is the most responsible and time-consuming process. Have enough patience and free time, friends.
- Pry the upper left corner of the small button with your fingernail / toothpick / credit card and lift it evenly enough to understand how the internal fasteners are located. This is very important because brute force can lead to the breakdown of the built-in mechanisms. After evaluating the location of the fasteners, press the key in the desired direction until it clicks.
- We shoot big keys. In addition to standard fasteners, they also have metal fasteners and clamps.
- This is how our keyboard looks without the keys. Please note that we remove the movable aluminum fasteners as well.
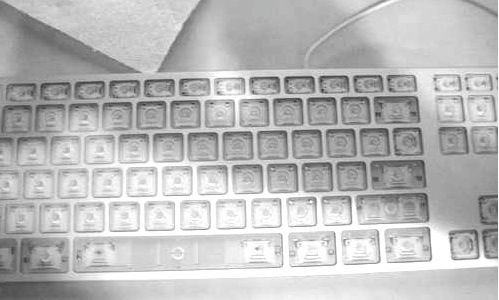
- Armed with wet napkins to disinfect monitors or paper towels with a small impregnation of alcohol. But it is better to give preference to specials. means. And we wash each key, throwing out napkins as they become soiled. If the keys are "gray" and the napkins do not take them, then users of the global network recommend using an eraser.
- The inner elements are wiped with a lint-free (!) Cloth moistened with a small (!) Amount of water. Crumbs are blown into the hand - at the same time and light, we will train.
4. It's time to set the keys in place. The small keys will come back up after a slight click on the body - until it clicks. Large (those with metal fittings) should coincide with the built-in grooves, but the principle is the same.
P.S.: For the more effective protection of your keyboard, you can use a MacBook keyboard cover, but this is only if it's convenient for you
Read more:https://support.apple.com/en-us/ht205662
Conclusion
I would like to say that in the first place everything depends on you and on your attitude towards your gadgets. After all, if you do not remember in time what and when to do good, nothing will turn out. Treat your technique as well as your pets and then you do not have to change your "pets" every 2-3 years!
Thank you all for attention! :)
Have a question about something in this article? You can receive help directly from the article author. Sign up for a free trial to get started.
Comments (0)