Methodologies to Upload PST to Office 365 Online Archive Folder


According to the current analysis, most Outlook users want to upload PST to Office 365 online archive. Because Outlook is a desktop-based email client that stores their data in the local machine, it can be difficult to access Outlook data files without a laptop.
On the other hand, Office 365 services provide a great opportunity for business users and make PST files accessible anywhere and anytime. Hence, Outlook to Office 365 conversion becomes a very common requirement these days. To resolve such problems for users, here we will tell you the solution to import PST file to Office 365 online archive.
How to Upload PST File to Office 365 Online Archive Folder?
In order to migrate Outlook PST file to Office 365 archive folder, you need to perform the following steps. First, the PST file is required to import into a normal folder of the Office 365 account. After that, you can move these data files to the archive folder of Office 365. But, to migrate PST data to Office 365, Outlook should be configured into Microsoft Office 365.
Steps to Import PST File to Office 365 Account
- First of all, open the Microsoft Outlook account.
- Then, click on the File tab that is located on the top left corner of Outlook.
- After that, click on the Open & Export option.
- Now, from the Open screen, click on the Import/Export button.
- Under the Import and Export wizard, select Import from another program or file & then click on the Next button.
- In this step, you need to select the Outlook Data File (.pst) and click on the Next button.
- Then, select the Browse option to find your Outlook data file(s) that you want to import. Click on the Next button to proceed further.
The default location of Outlook data files, unless altered, is C:\users\abc\documents\Outlook files - Now, select Import items into the same folder in & select your Office 365 Archive as the destination.
- Finally, click on the Finish to import the Outlook PST file to Office 365 account.
User’s Problem
“Hello friends!! I am using Outlook 2013 for mailing purpose. Because of my job, usually, I have to travel from one place to another. So, it creates a problem for me to carry my laptop everywhere. That is why now I am searching for a solution to import PST files to Office 365. I have tried many manual solutions but it seems quite difficult for me and I am not able to execute it. Please suggest me the best and easy commercial solution for this!!”
Office 365 PST Import Tool is ideal Software for Resolving the User’s Problem
There are many situations where a user needs to use this application. In this section, you will learn how this Office 365 PST Import tool is perfect to solve such issues faced by users. The process to migrating PST files to Office 365 by using SysTools Office 365 Import tool is quite simple and user-friendly. Also, it does not need any external help from experts.
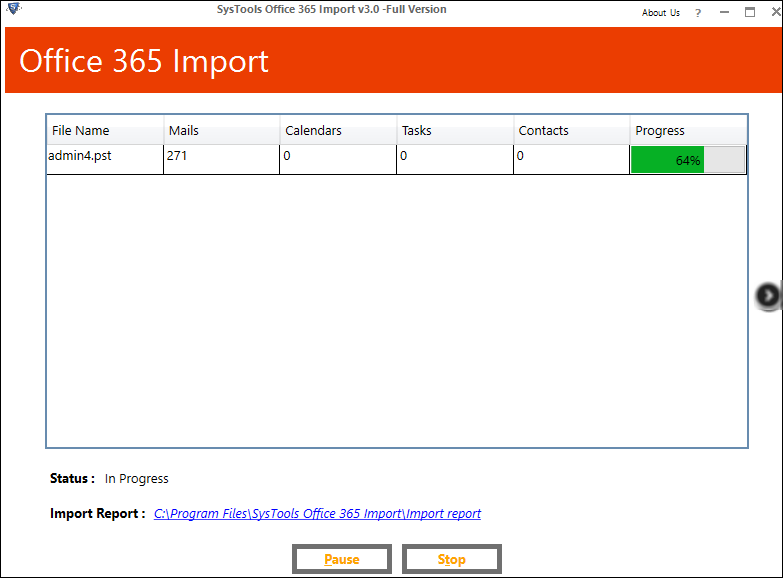
1. First of all, Install and Run the SysTools Office 365 PST Import tool.
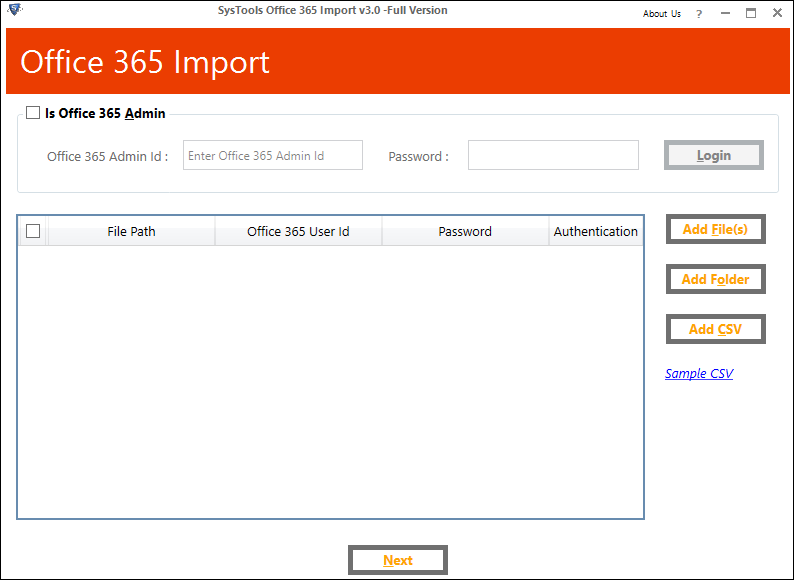
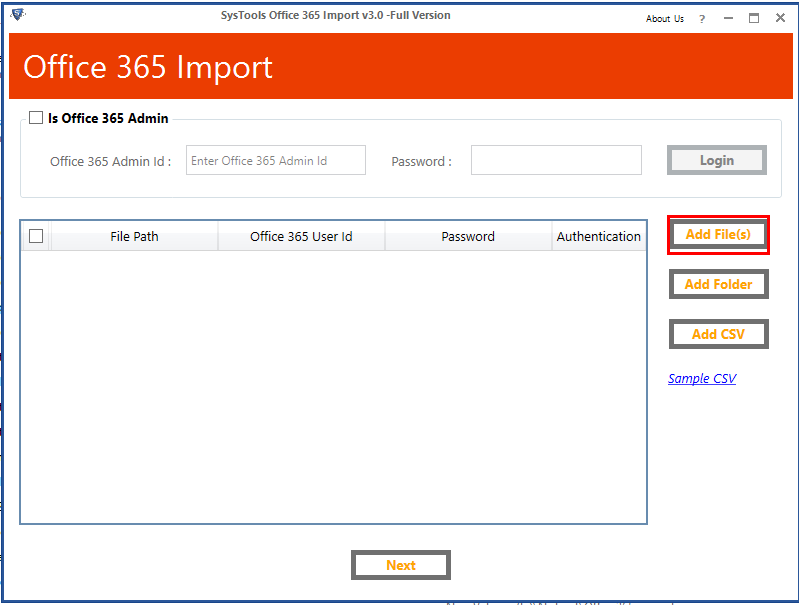
2. Then, choose Add File or Add Folder option within the application
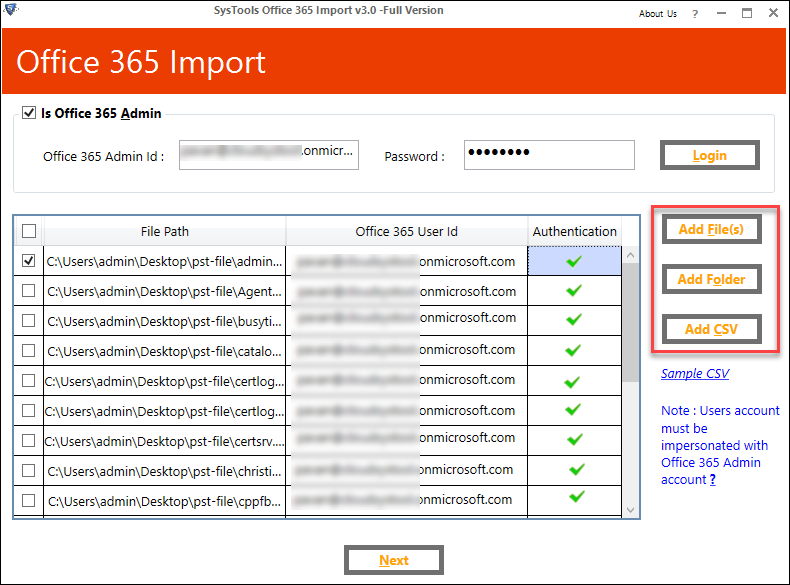
3. Now, Login as User Account or Admin Account to import PST to Office 365 & click Next button.
4. After that, select Category and apply Date Filter if you need.
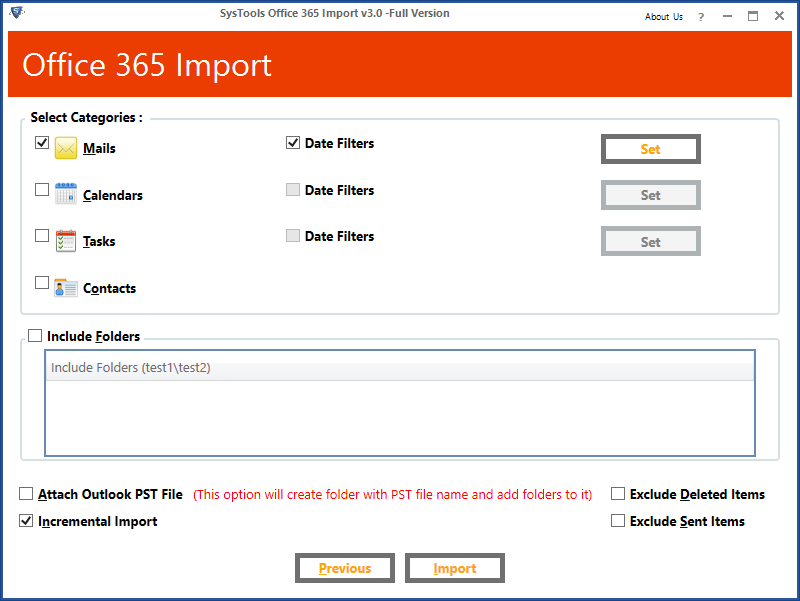
5. Finally, this software successfully imports PST file into Office 365 mailbox.
You can either perform the manual method or alternative approach to convert PST file to any folder of Office 365 account. Now, you need to transfer the data into the in-place archive folder of Office 365. For this purpose, you need to enable the archive mailboxes in Office 365. Once the option is enabled, you can directly click on the migrated PST folder and move into the Office 365 online archive.
A Process to Enable Archive Mailboxes in Office 365
- First of all, sign in to your Office 365 account.
- Then, go to the left pane of the Security & Compliance Center, click on the Data governance>> Archive.
- Now, the list of mailboxes displayed in front of you, select the user for which you need to enable the archive mailbox.
- After selecting the user, click on the Enable option from the right pane of the screen.
- Finally, click on the Yes button to enable the online archive mailbox of Office 365.
Instant Solution: Download Office 365 Import Tool for a reliable solution.

Wrapping Up
There are plenty of reasons to upload PST to Office 365 online archive. After understanding the need of users, we have come up with a solution to export PST files to the archive folder of Office 365. We have discussed both manual and automatic solution to execute this task. But, by using SysTools Office 365 PST Import tool, the process becomes quite easier. Because it is designed in such a way that it does not need any external help or technical knowledge to perform the conversion of PST to Office 365.
Have a question about something in this article? You can receive help directly from the article author. Sign up for a free trial to get started.
Comments (0)