Step By Step Guide to Migrate Mailboxes from Exchange 2003 to Office 365


Do you want to migrate Exchange 2003 to Office 365 without any trouble? Are you looking for a reliable technique to move Exchange 2003 to Office 365? Do not worry, as this post will share several techniques to perform this data transfer.
There are a number of Exchange Server users who may want to transfer their data into Office 365 due to various reasons. Since Exchange 2003 does not receive any extended support from Microsoft anymore, many of its users feel the urge to move their data. For most Exchange Server users, Office 365 is the most immediate and effective platform to transfer their Exchange 2003 data. Since many users want to know how to migrate Exchange Server 2003 to Office 365, we have decided to share some methods with our readers. This data transfer process can be done using manual technique or Exchange to Office 365 Migrator Tool. Continue reading to learn about both the techniques.
Ways to Perform Exchange 2003 to Office 365 Migration
As we have mentioned earlier, both the manual method and the alternative tool are proven solutions to transfer Exchange 2003 mailboxes to Office 365. To begin with, let’s know how to perform the data transfer using the manual technique.
Manual Method to Migrate Exchange Server 2003 to Office 365
The manual technique can be divided into four major steps. All the steps are described in detail in this section.
Step 1:
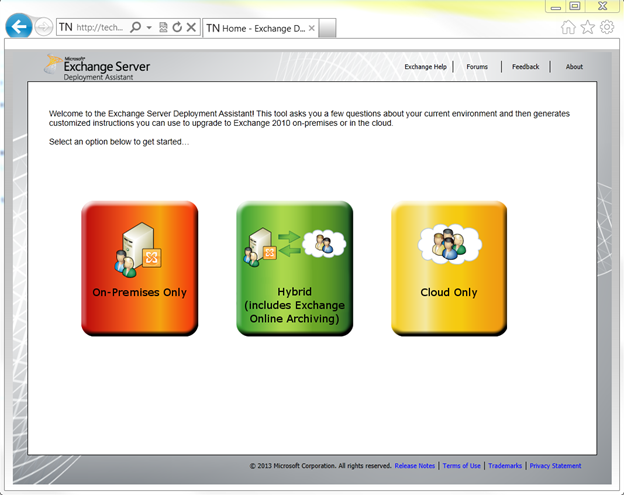
1. Start the migration process by going to Exchange server deployment page. Choose ‘Cloud Only’ option for Exchange 2003 to Office 365 migration
2. Select Yes option and click Next.
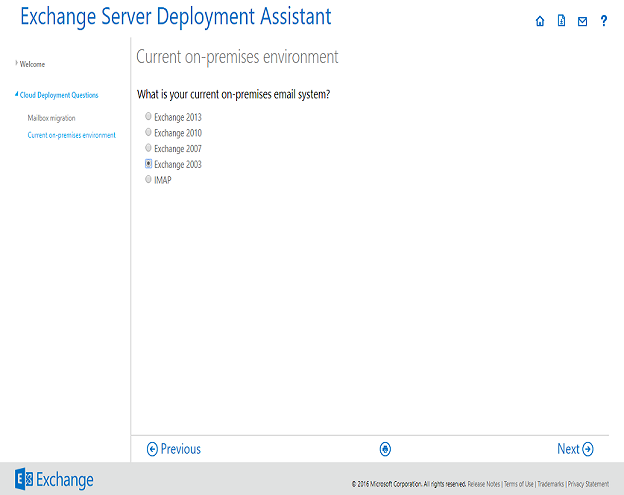
3. Choose the version of your Exchange Server and click on Next.
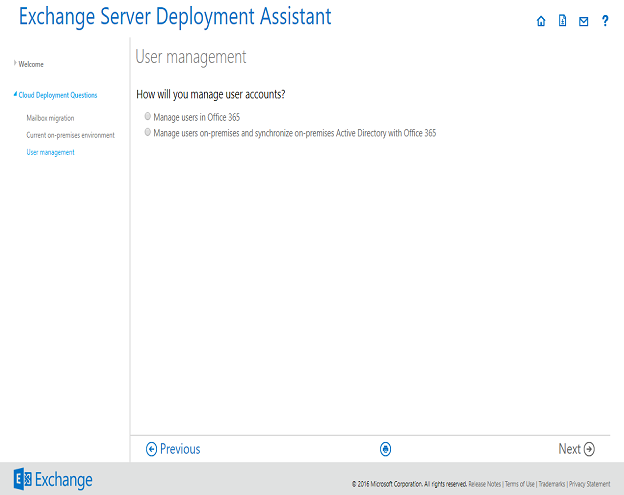
4. Select your preferred option for ‘how you will manage user accounts’ and go to the next page.
5. Provide an answer to the question regarding the mailbox count of Exchange Server 2003. Click on Next button
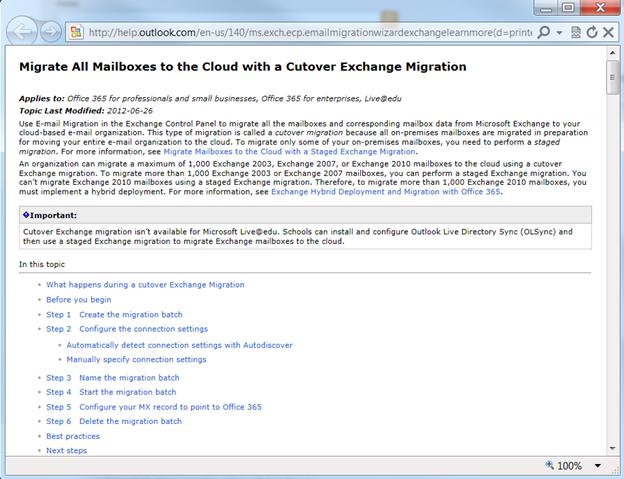
6. You will be redirected to a page that contains the complete guide from Microsoft to perform the migration. Go through the instructions for a successful data export.
Step 2:
1. At this stage, users have to verify several things, like the compatibility of Exchange 2003 infrastructure with RPC over HTTP and Outlook Connectivity using Remote Connectivity Analyzer. For the latter, go to https://testconnectivity.microsoft.com/. Select Microsoft Exchange Server tab and then choose Outlook Connectivity under Microsoft Office Outlook Connectivity Tests. Since Autodiscover is not supported by Exchange 2003, remember not to choose Outlook Autodiscover in place of Outlook Connectivity.
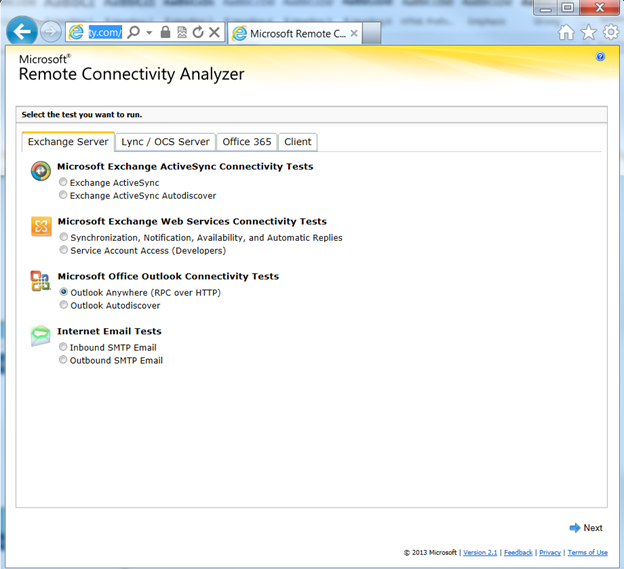
2. Click on Next and type the necessary information on the relevant fields.
3. Now choose Perform Test option. Once the testing is done, move to step 3.
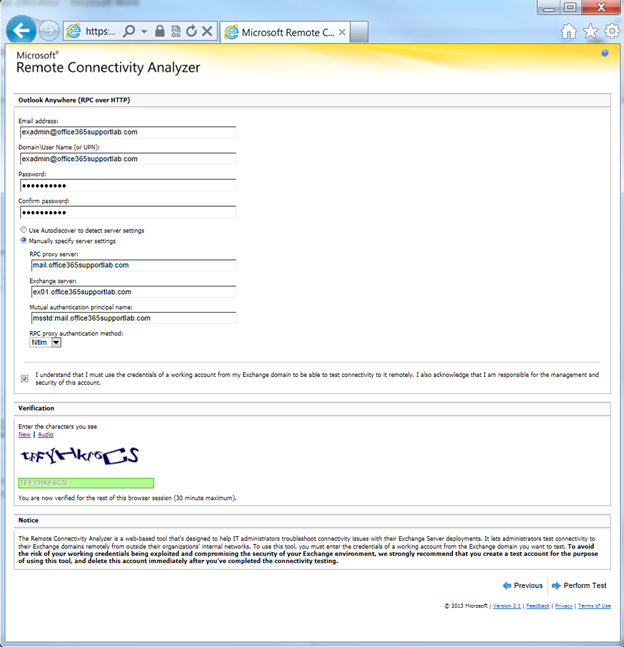
Note: If the testing process fails, users need to generate a report and follow accordingly to fix the problem.
Step 3
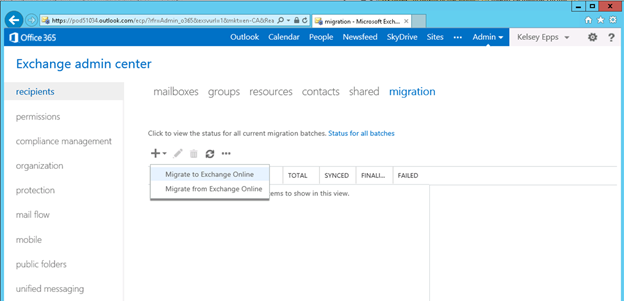
1. At this stage, navigate to this link: https://login.microsoftonline.com/ and log in with your account. Open Exchange server admin>> Migration tab.
2. Click on + icon and select Migrate to Exchange Online.
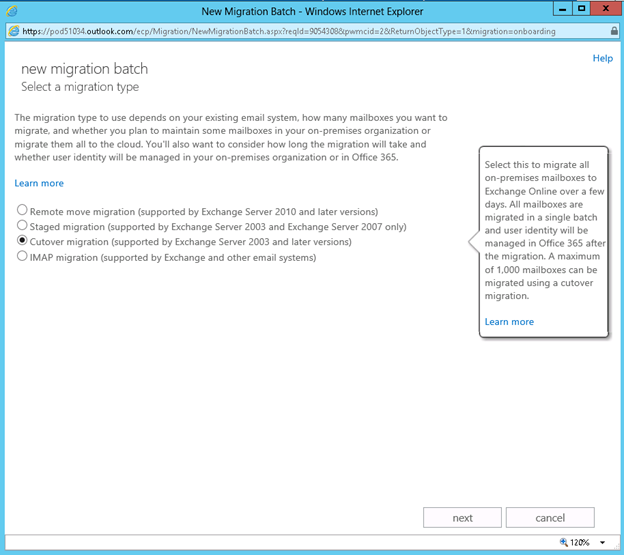
3. Select Cutover migration>> click Next.
4. Enter the credentials of the on-premise Exchange and click on Next.
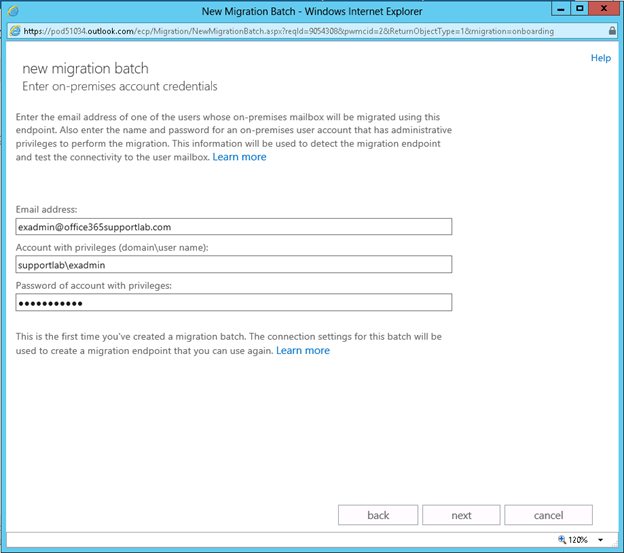
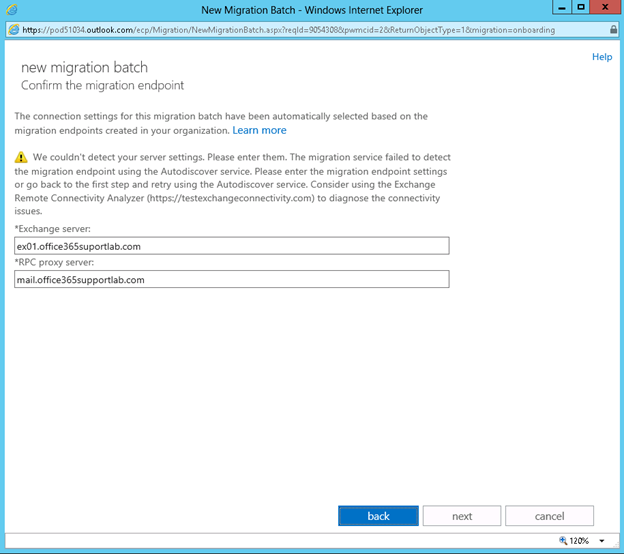
5. Type the RPC Proxy Server address and click Next.
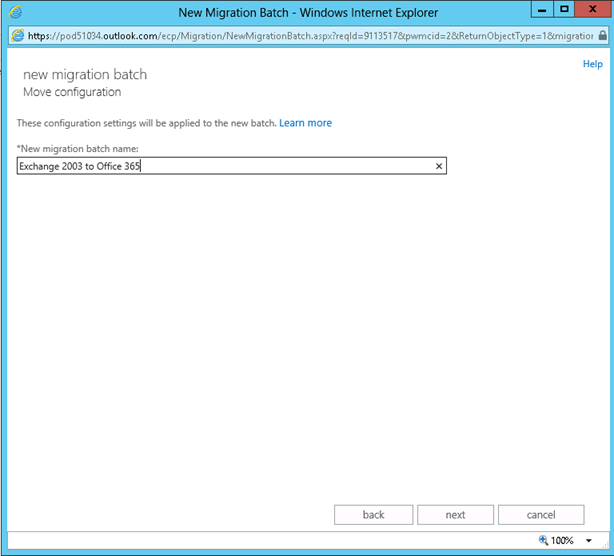
6. Give a name to the New Migration Batch. Click Next.
7. Choose the option Automatically start the batch and click Next.

8. At this stage, the created batch and Syncing status will be visible.
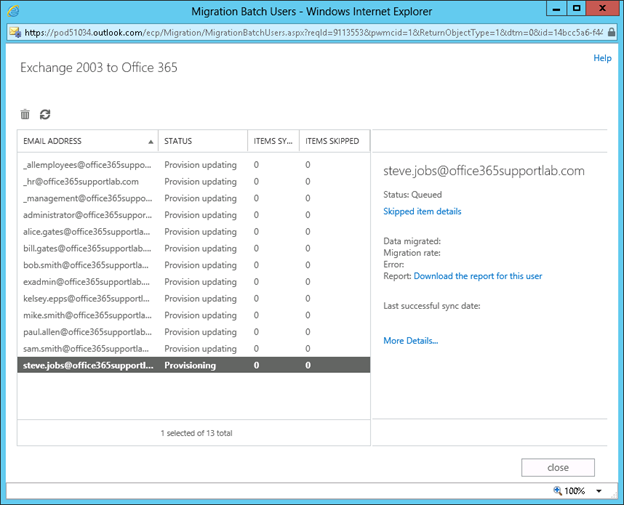
Depending on the mailbox size and the number of accounts you are migrating, the synchronization will take time. The details about this process can be seen by selecting Mailbox Status>> View Details
Step 4
After the completion of the synchronization process, the user will receive a report email containing all the details. Then the user has to perform the following tasks:
1. Export Public Folders to Office 365
2. Verify DNS Record
3. Designate Office 365 licenses
4. Configure desktop for Office 365
When the data transfer, as well as MX record DNS replication, is done, close migration batch and
Exchange 2003.
Evidently, this process is a complex one and requires a lot of time and patience. That is why many users opt for Exchange to Office 365 Migrator for an easy Exchange 2003 to Office 365 migration.
A Simple Method to Migrate Exchange 2003 Mailboxes to office 365
If you are looking for a solution that is not as complex as the above-mentioned manual method, you can go for Exchange to Office 365 Migration Software. This tool is capable of exporting multiple mailboxes of Exchange 2003 to Office 365. File size is not an issue for this robust application.
This utility also provides features like selective migration, data filtering, mailbox mapping, etc. Using this software, users can also delete the data from Exchange Server 2003 after the migration is done. This tool is a perfect choice for a hassle-free Exchange to Office 365 mailbox transfer. For the demo version, click below on the download link.

Conclusion
Here, we have discussed two different methods that can be used to migrate Exchange 2003 to Office 365. Users can opt for the technique they wish to and perform Exchange Server 2003 data transfer into Office 365 without any risk of data loss.
Have a question about something in this article? You can receive help directly from the article author. Sign up for a free trial to get started.
Comments (0)