Deleting mail of a certain age from Exchange mailboxes


Published:
Browse All Articles > Deleting mail of a certain age from Exchange mailboxes
Introduction
Exchange 2010 brings many new features around management of user content. One of these is Managed Content Settings. Although available in earlier versions of Exchange it was not as easy as it is now.Managed Content Settings gives us the ability to define retention periods on mailboxes or specific folders within the mailbox, and also allows us to perform actions against this content.
Creating the Managed Default Folders Policy
To create our Managed Content Policy we can either use the Exchange Management Shell or the Exchange Management Console. In this guide we will be using the Exchange Management Console.Navigate to Organisation Configuration > Managed Default Folders.
This section allows us to define policies against the default folders that are created in all Exchange Mailboxes.
Once you have selected the Managed Default Folders tab you will see the list of folders as displayed in the image below.
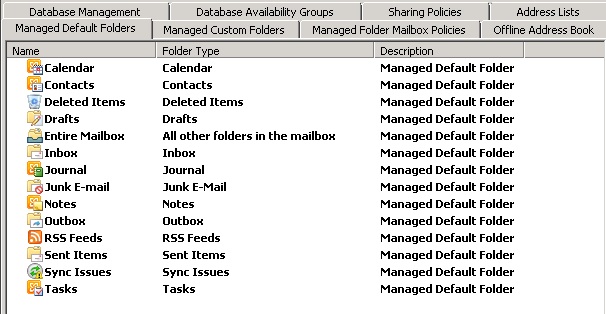 As you can see each folder can be controlled individually, or we can select the Entire Mailbox option.
For this article we will use the Entire Mailbox. Right click on this folder and select New Managed Content Settings
On the screen shown below, give your policy a name and then select the content type. We can choose to apply the policy to all content or just a specific type of content (mail, tasks, calendar items for example). We are going to leave it as All Mailbox Content
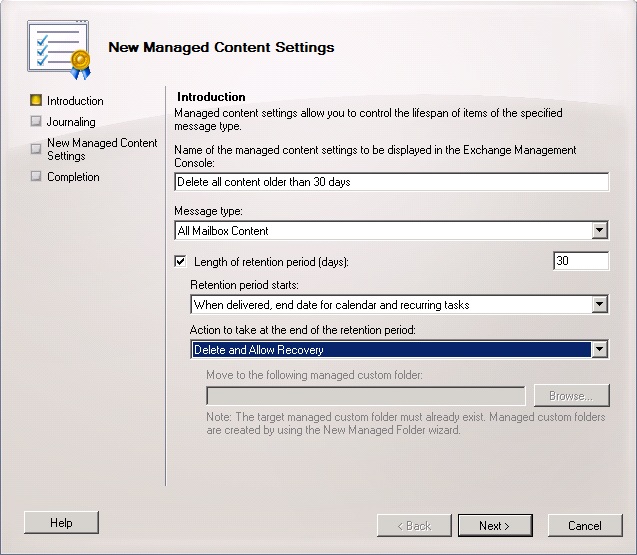 Check the box for Length of retention period and enter a retention period in days. If you enter 30 then anything over 30 days old will have the chosen action performed on it.
Exchange marks items with a number of dates, so when you have chosen the retention period time you will also need to specify when the retention period starts from. By default this will be when an item is delivered or when an appointment or a task has ended. However you can also select to start the retention period from the date on which an item was moved to another folder.
The when item was moved to folder option is mainly used in combination with the Managed Custom Folders option (article coming soon)
Once you have made your selections click Next.
The next screen allows you to specify a mailbox to send the user content that will have the actions performed against them to another mailbox. This would normally be used if you are required by law to keep the content of the mailbox for a certain time but want to remove it from mainstream storage.
Click Next and then New.
Creating the Managed Folder Mailbox Policy
What the Managed Folder Mailbox Policy does is allows us to assign our policies to mailboxes. It also allows us to specify more than one folder to be applied to a single mailbox.To do this using the Exchange Management Console navigate to Organisation Configuration > Managed Folder Mailbox Policies and click on New Managed Folder Mailbox policy.
This will present you with the following wizard.
 Give the policy a name and then click the Add button, select the folder you created a policy on earlier. Click New and then finish.
Assigning the policy
To apply the policy to a mailbox we need to use the Exchange Management Console to navigate to Recipient Configuration > Mailbox. Locate the user you want to apply the policy to select properties.Under Mailbox Settings, highlight Messaging Records Management and click properties.
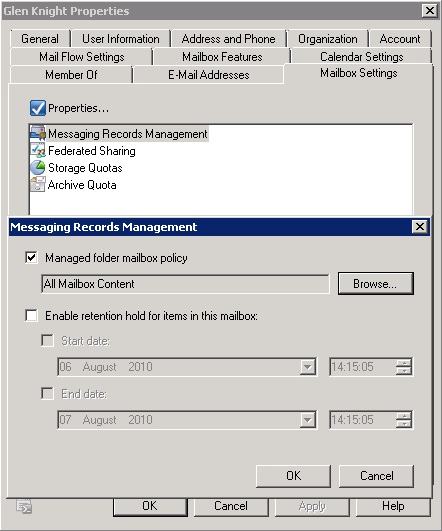 You will then need to check the box for Managed folder mailbox policy, select the policy you created in step 2 and click OK. Then apply the changes to the mailbox.
Further Reading
http://technet.microsoft.com/en-us/library/bb851502(EXCHG.80).aspxhttp://technet.microsoft.com/en-us/library/bb123548(EXCHG.80).aspx
http://technet.microsoft.com/en-us/library/bb310793(EXCHG.80).aspx
Have a question about something in this article? You can receive help directly from the article author. Sign up for a free trial to get started.
Comments (0)