Power Automate - Request Manager Approval for a Selected File Part I


Microsoft MVP Office Dev focussed on Azure services, M365, SharePoint On-Premise & SharePoint Online, Power Automate, Power Apps, LiveTiles
Published:
Edited by: Andrew Leniart
Browse All Articles > Power Automate - Request Manager Approval for a Selected File Part I
In this article let us see the default Power Automate template 'Request manager approval for a selected file' in deep and also let us see how we can add some additional features.
Introduction
Hi friends, in this post, let's examine the default Power Automate template 'Request manager approval for a selected file' in deep and see how we can add some additional features. Its gonna be a big post so it's split into two.
About the template
'Request manager approval for a selected file' is the predefined template that users can leverage to get the manager's approval for the files in a document library. This flow is used to get approval from the user's manager who triggered the approval process for the selected file. The approval must be triggered by the user by selecting the file and then selecting the Power Automate approval template from the menu bar.
How to set up the flow using the template
Setting up the flow using the template is a very simple process, please follow the steps mentioned below:


Note: The flow has to be shared with the users who want to use the same flow. Without shared with the users, the other users won't be able to trigger the flow from the library menu or from anywhere.
In the next post, we will see each flow action in detail and also see how we can enhance the default template.
Happy flowing...
Hi friends, in this post, let's examine the default Power Automate template 'Request manager approval for a selected file' in deep and see how we can add some additional features. Its gonna be a big post so it's split into two.
About the template
'Request manager approval for a selected file' is the predefined template that users can leverage to get the manager's approval for the files in a document library. This flow is used to get approval from the user's manager who triggered the approval process for the selected file. The approval must be triggered by the user by selecting the file and then selecting the Power Automate approval template from the menu bar.
How to set up the flow using the template
Setting up the flow using the template is a very simple process, please follow the steps mentioned below:
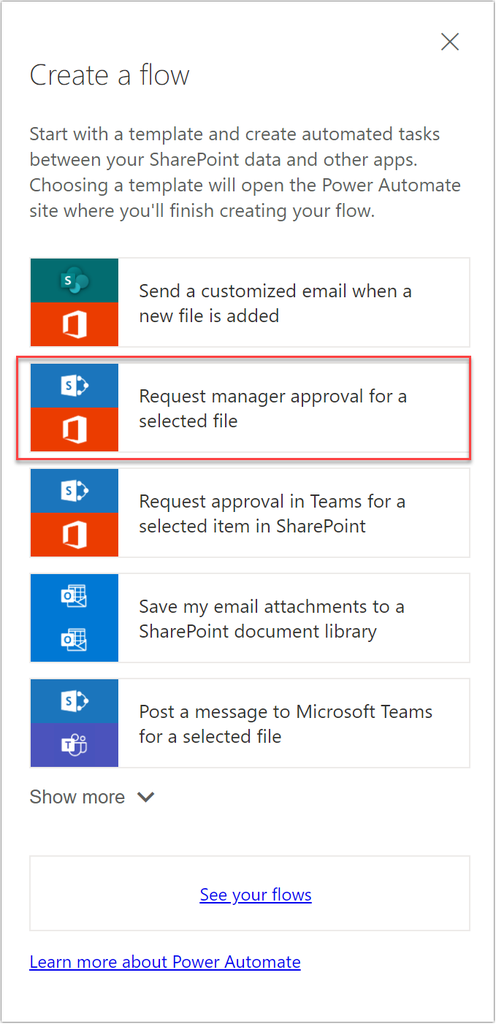
- Navigate to the document library where you need to set up the approval process
- Choose Automate --> Power Automate --> Create a flow from the library menu.
- A panel will be opened with the set of flow templates, select 'Request manager approval for a selected file'
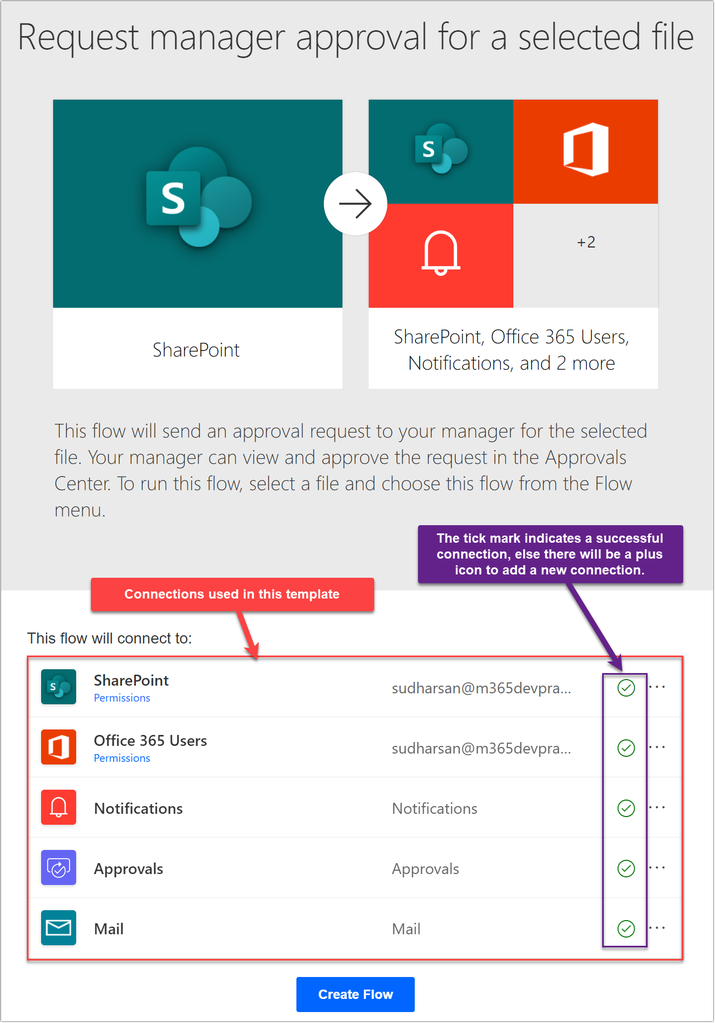
- Once you click on the template, it will redirect you to the Power Automate site with the template selected and will list down all the connections that will be used in the template.
- Click on the Create Flow button to create the flow.
- The flow is up and running, you can start to test the flow. Upload a file to the library, select the file, and choose the flow from the Automate menu item from the library menu.
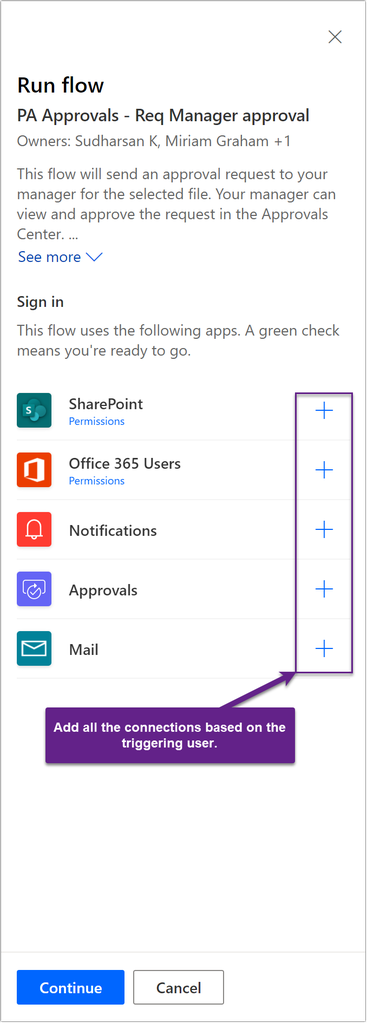
- If the user is triggering for the first time, a panel will be opened to add the connection based on the logged-in user. You can also check the permissions requested for each connection.
- Once all the connections are added, click on the Continue button to the next panel.
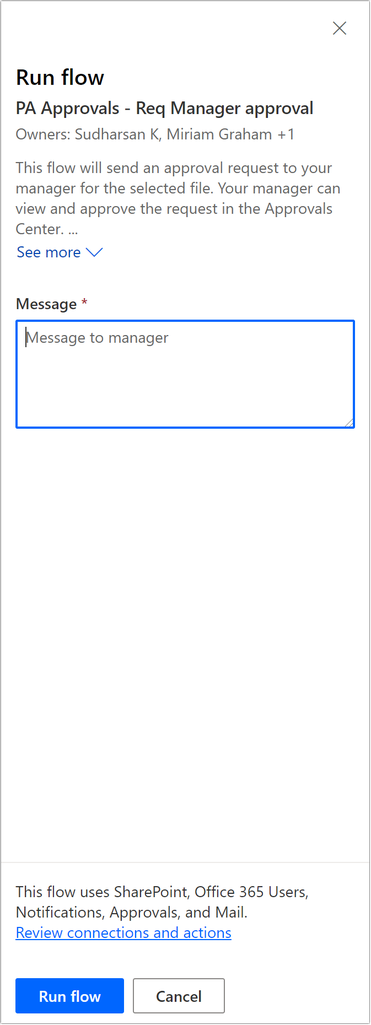
- Enter a message to the approver to start the flow. Click on the Run flow button to start the flow.
- The flow will start and will trigger the email notification to the manager for approval, based on the approval chosen, the file is approved or rejected, and the final outcome is sent to the user who sent for approval.
Note: The flow has to be shared with the users who want to use the same flow. Without shared with the users, the other users won't be able to trigger the flow from the library menu or from anywhere.
In the next post, we will see each flow action in detail and also see how we can enhance the default template.
Happy flowing...
Microsoft MVP Office Dev focussed on Azure services, M365, SharePoint On-Premise & SharePoint Online, Power Automate, Power Apps, LiveTiles
Have a question about something in this article? You can receive help directly from the article author. Sign up for a free trial to get started.
Comments (0)