Complete a CSR request from Exchange Admin Center


Most Valuable Expert2017 and 2020.
O365, Exchange Server,Windows Server, Active Directory, Virtualization, Teams and Email Migration Expert.
O365, Exchange Server,Windows Server, Active Directory, Virtualization, Teams and Email Migration Expert.
Published:
Browse All Articles > Complete a CSR request from Exchange Admin Center
This article helps you complete a CSR (Certificate Signing Request) from Exchange from EAC (Exchange Admin Center). Applies to Exchange 2013/2016/2019.
Experts Exchange by
Open the EAC and navigate to Servers > Certificates. and click on Pending request and click on complete.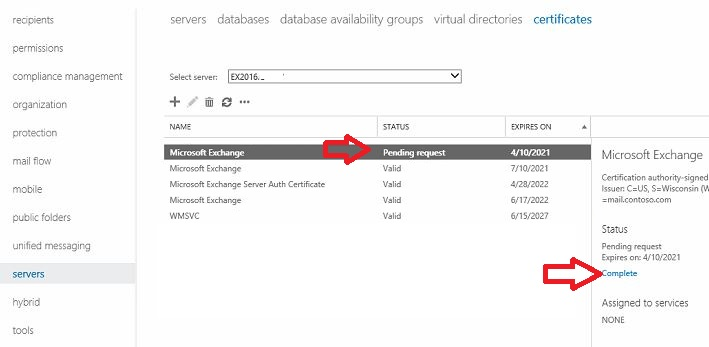
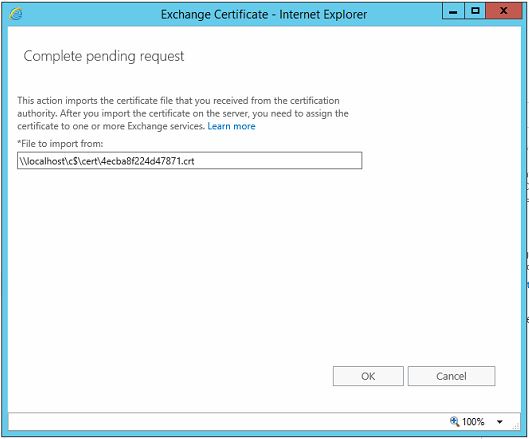
When you click on complete you get a popup to enter the certificate path. Please enter the certificate path. I saved the certificate in server in server, so I used localhost.
 Click on OK. Your certificate is imported.
By default POP,IMAP will be enabled in certificate.
You can assign and enable service certificates in Exchange 2016/2019 from the EAC. Below are the steps with screenshots showing how to enable and assign services:
Run the following command to check what services have been enabled.

Use the following command to enable other services. You can change the services according to your requirement. but IIS is mandatory.
After services enabled

You can read this TechNet article for more information on how to assign services to certificates in Exchange 2016/2019.
Open your OWA and make sure there are no errors. Also make sure certificate shows the expiry date as expected.
Now you are done. :))
When you click on complete you get a popup to enter the certificate path. Please enter the certificate path. I saved the certificate in server in server, so I used localhost.
Click on OK. Your certificate is imported.
By default POP,IMAP will be enabled in certificate.
You can assign and enable service certificates in Exchange 2016/2019 from the EAC. Below are the steps with screenshots showing how to enable and assign services:
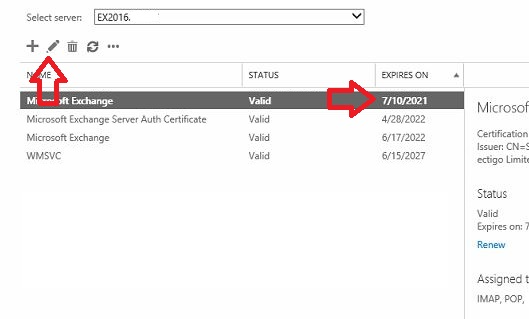
- Click on the new certificate and click the "Edit"
 button.
 - Check the expiry date of certificate.
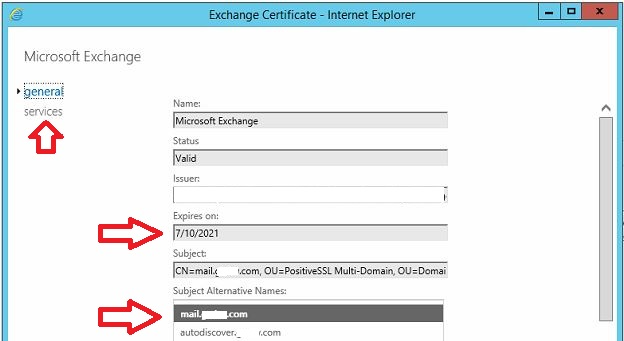
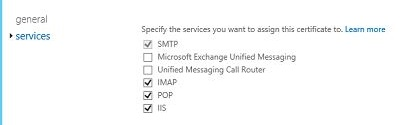
- Make sure domain names and expiry date is correct. Click on Services
- Select SMTP and IIS. If you're also using POP and IMAP, select them as well.
The same can be done from EMS.
Run the following command to check what services have been enabled.
Get-ExchangeCertificate | fl Issuer,CertificateDomains,notafter,thumbprint,servicesUse the following command to enable other services. You can change the services according to your requirement. but IIS is mandatory.
Enable-ExchangeCertificate -Services POP,IMAP, IIS, SMTP -thumbprint FACE6A655A03CD482AEC4AA019DC920485DC166After services enabled
You can read this TechNet article for more information on how to assign services to certificates in Exchange 2016/2019.
Open your OWA and make sure there are no errors. Also make sure certificate shows the expiry date as expected.
Now you are done. :))
Have a question about something in this article? You can receive help directly from the article author. Sign up for a free trial to get started.
Comments (0)