Part 1 - Build an immutable backup repository for Veeam Backup & Replication.


Published:
Browse All Articles > Part 1 - Build an immutable backup repository for Veeam Backup & Replication.
For Veeam Backup & Replication, this guide will show you, step by step, how to create and implement a disk-based immutable backup repository from scratch.
In this part: Prepare the install of Linux.
In this part: Prepare the install of Linux.
Veeam immutable repository by under a Public Domain Work license
Introduction
Purpose of these articles
You are a Windows Administrator running Veeam Backup & Replication and wish to raise protection against malware attacks and hackers without reverting to shuffle or rotate physical media.This you can accomplish by immutable backups stored on a physical server running Linux. However, you have no Linux servers running and don't want to.
But, like it or not, that is your only option, as the XFS file system is the only one capable of immutability, and XFS only runs under Linux.
Thus, a Linux server is a must. When you have accepted this fact, then what? Where to start?
Like me, you have about zero experience with Linux and, therefore, hesitate to set up a Linux server, indeed in a production environment.
If so, this guide is for you. Here, nothing about Linux is taken for granted.
Sections
The guide has been split in nine parts. This allows you to skip parts you are either familiar with or wish to implement later if at all.- Part 1 - Prepare the install of Linux
- Part 2 - Install Linux on the server
- Part 3 - Prepare the Linux server for Veeam
- Part 4 - Create the immutable Veeam backup repository
- Part 5 - Prepare for backup of the Linux server itself
- Part 6 - Backup of the Linux server itself
- Part 7 - Bare Metal Recovery of the Linux server
- Part 8 - Tighten security on the Linux server (MFA/2FA)
- Part 9 - Maintenance and deactivation/reactivation of MFA/2FA
Requirements
You are familiar with:- the usual tasks administering at least a small network with one Windows Server
- Veeam Backup & Replication and have it installed and running
- the command line - from PowerShell, Command Prompt, or even DOS
Veeam Backup & Replication is assumed to be of version 11 or later. It can be a licensed trial or paid version or even the free Community Edition.
XFS and the virtual air gap
The XFS file system was introduced by SGI in 1993 for its IRIX 5.0 operation system which was based on UNIX System V Release 4.XFS was ported to Linux in 2001. As SGI ceased operations in 2009, Linux is today the only operating system supporting XFS.
Why is this important? Because XFS offers immutability:
Once the file is set immutable, this file is impervious to change for any user. Even the root cannot modify, remove, overwrite, move or rename the file. You will need to unset the immutable attribute before you can tamper with the file again.For the details about handling this, study Dan Nanni's blog on Xmodulo:
How to make a file immutable on Linux.
Other Linux file systems offer immutability, but only XFS also supports *reflink*, a technology that allows for very fast cloning of files. Veeam has assigned *reflink* its own label, Fast Clone, and have specified this as a requirement for an immutable repository.
The ReFS file system of Windows also supports reflink, but not immutability. This is why Windows Server cannot host a hardened repository.Applying immutability to your backup files hosted on a physical server introduces a virtual air gap in your backup chain, protecting the backup files from anything else than direct physical access. This way, the backup files will be protected from any attack caused by advanced malware or possible hackers.
The effect is the same as if you back up to tape or DVD and, when done, remove the media from its drive.
Part 1. Prepare the install of Linux
In this section we will make all the preparations necessary to install the Linux server, which will be described in Part 2.Linux version
Linux comes in very many varieties, in the Linux world called distributions, and each of these are often offered in several versions. Some are intended for general usage, some for very specific purposes. Veeam may run on many of these, but these are the recommended and supported:- Ubuntu 20.04 LTS or later
- RHEL/CentOS 8.2
- SLES 15 SP2
- Debian 10
I had no preference, so I consulted a few friends having broad experience with Linux. Their recommendation was Ubuntu for the simple reason, that it is the most widely used. Also, it has good online documentation, thus easy to get help for. This also counts for professional assistance, should you at some point need it; any Linux-Pro will be familiar with Ubuntu.
It comes in two major editions: Desktop and Server. The difference is, that the Server edition lacks the graphic user interface which you won't need anyway (much like Windows Server Core).
That settled it, and Ubuntu Server will be used here.
Obtain the Ubuntu Server ISO file
Ubuntu Server comes in two flavours, a “short-lived” version with fast updates, and a long-term version guaranteed to be supported for many years. The latter, LTS for long-Term Support, is exactly what we need for a long-term low-feature server installation, so that's the version we will use.Go to the page Get Ubuntu Server:
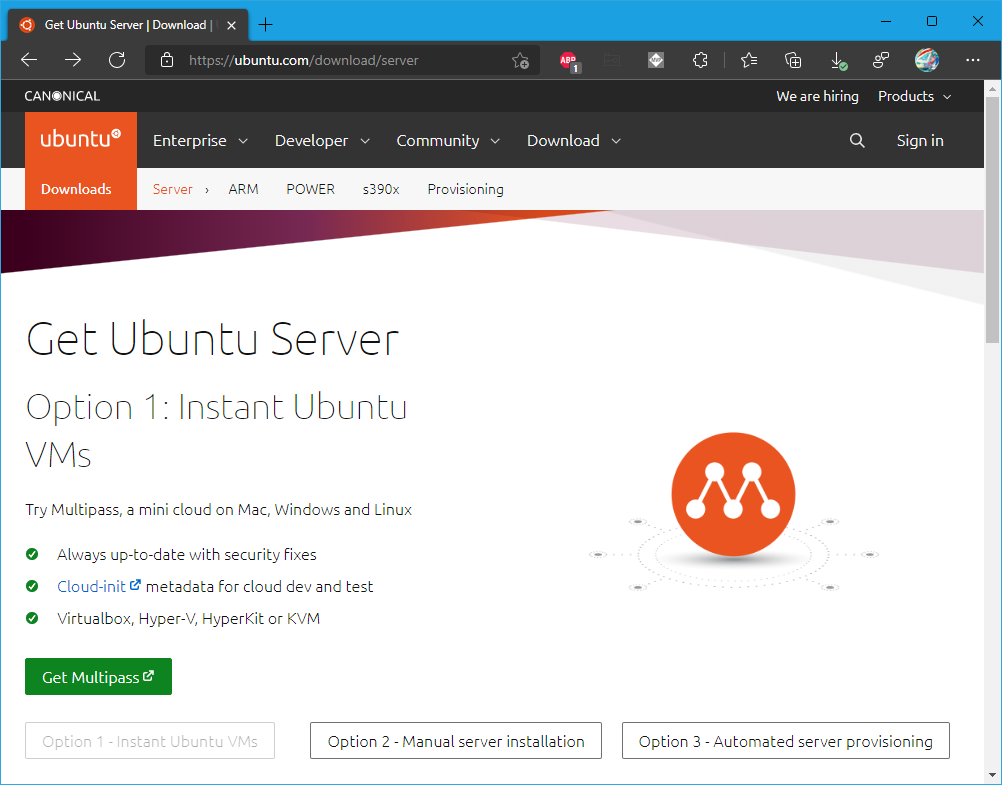
Click Option 2 - Manual server installation to open the server page:
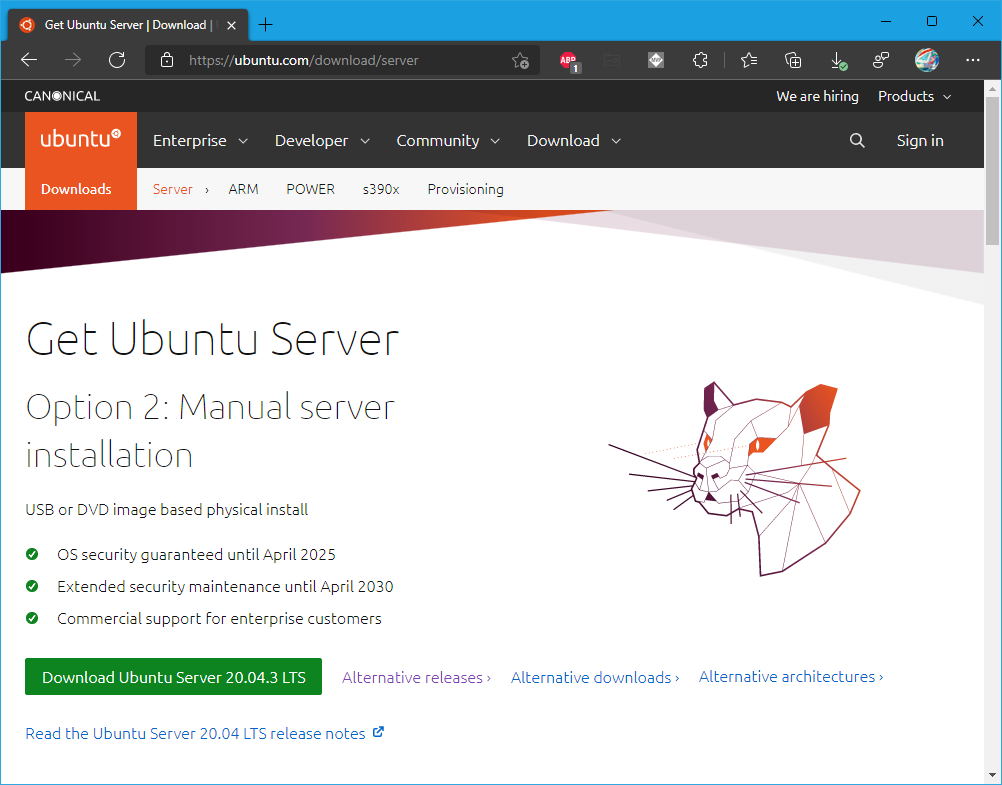
Click the download button for the current LTS version of Ubuntu Server, here Download Ubuntu Server 20.04.3 LTS, and the download will start at once in Edge:

Leave the ISO file in your Downloads folder or move it to a folder where you easily can locate it later.
Create install media
You have two basic options:- If the server has a DVD drive and no USB 3 port, and you have a drive that can write a DVD, burning a DVD may be the simplest method
- If the server has a USB 3 port, creating a bootable USB drive is the simplest and fastest method
The first method is trivial, but the second takes a few steps. You will need:
- a USB drive of 2 GB or more. USB 3 is best, but USB 2 will work fine, only slower
- a third-party tool to create the bootable USB drive from the ISO file
The third-party tool to use is Rufus.
It is free to use and can be downloaded from the Rufus homepage:
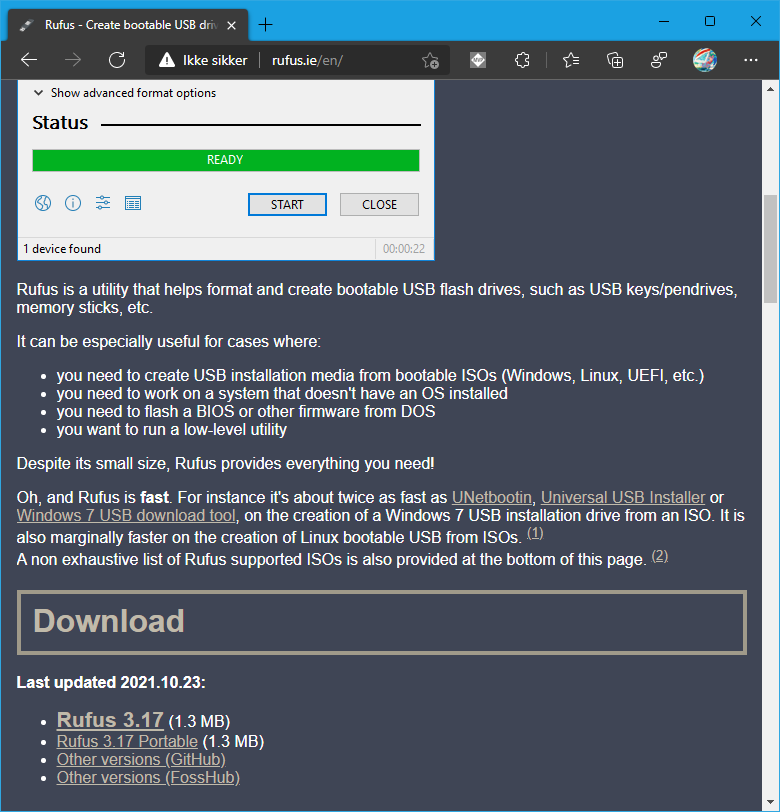
Download the current version:

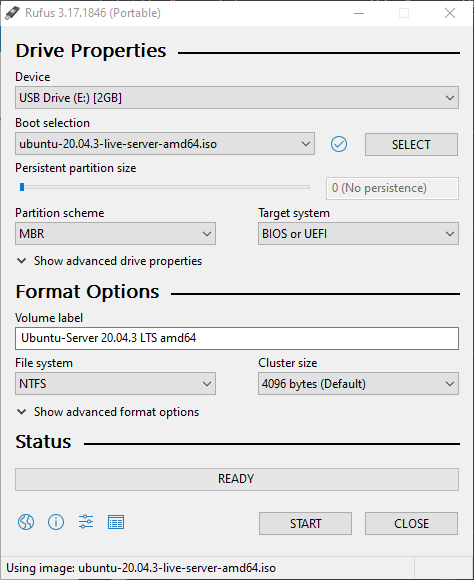
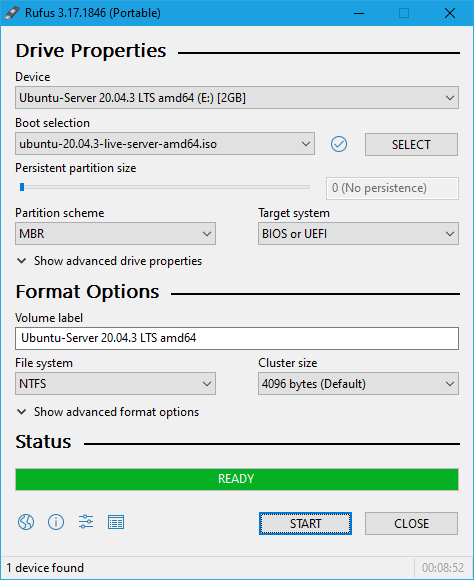
It is just a file - no installation is required - so just open it when ready and set the Drive Properties:
Device: Your USB drive
Boot selection: The Ubuntu Server ISO file (from the download above)
Partition scheme: MBR
Target system: BIOS or UEFI
Next, set the Format Options:
Volume label: It will be read from the ISO file, so leave it as is
File system: Use NTFS, as this will preserve the volume label
Cluster size: 4096 (Default)
The Rufus form should now appear like this:
When Status reports READY, click START. That will pop this message:
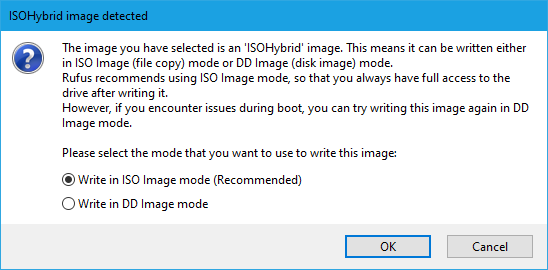
Select the recommended ISO image mode and Click OK, and this message box will show:
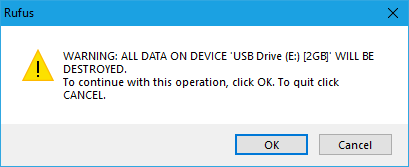
If the drive to be written to is correct, click OK.
The ISO file will now be written to the USB drive, and Rufus will show the progress in the Status bar:
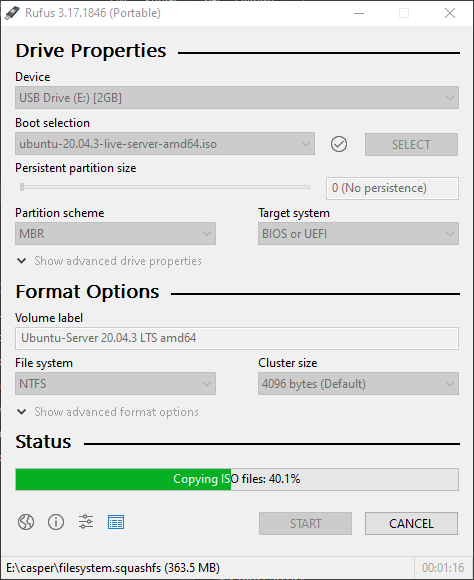
When done, the Status bar will be fully green and display READY:
Click CLOSE and remove the USB drive from the machine.
Conclusion
You now have the install media ready, a DVD or a USB drive, with Ubuntu Server from the downloaded ISO file.Next step is to use the media to install the Linux server. This is explained in Part 2 of this series:
Part 2 - Build an immutable backup repository for Veeam Backup & Replication.
I hope you found this article useful. You are encouraged to ask questions, report any bugs or make any other comments about it below.
Note: If you need further "Support" about this topic, please consider using the Ask a Question feature of Experts Exchange. I monitor questions asked and would be pleased to provide any additional support required in questions asked in this manner, along with other EE experts.
Please do not forget to press the "Thumbs Up" button if you think this article was helpful and valuable for EE members.

Have a question about something in this article? You can receive help directly from the article author. Sign up for a free trial to get started.
Comments (0)