Part 6 - Build an immutable backup repository for Veeam Backup & Replication.


Published:
Browse All Articles > Part 6 - Build an immutable backup repository for Veeam Backup & Replication.
For Veeam Backup & Replication, this guide will show you, step by step, how to create and implement a disk-based immutable backup repository from scratch..
In this part: Backup of the Linux server itself.
In this part: Backup of the Linux server itself.
Veeam immutable repository by under a Public Domain Work license
Introduction
Purpose of these articles
You are a Windows administrator running Veeam Backup & Replication and wish to raise protection against malware attacks and hackers without reverting to shuffle or rotating physical media.This you can accomplish by immutable backups stored on a physical server running Linux. However, you have no Linux servers running and don't want to.
But, like it or not, that is your only option, as the XFS file system is the only one capable of immutability, and XFS only runs under Linux.
Thus, a Linux server is a must. When you have accepted this fact, then what? Where to start?
Like me, you have about zero experience with Linux and, therefore, hesitate to set up a Linux server, indeed in a production environment.
If so, this guide is for you. Here, nothing about Linux is taken for granted.
Sections
The guide has been split in nine parts. This allows you to skip parts you are either familiar with or wish to implement later if at all.- Part 1 - Prepare the install of Linux
- Part 2 - Install Linux on the server
- Part 3 - Prepare the Linux server for Veeam
- Part 4 - Create the immutable Veeam backup repository
- Part 5 - Prepare for backup of the Linux server itself
- Part 6 - Backup of the Linux server itself
- Part 7 - Bare Metal Recovery of the Linux server
- Part 8 - Tighten security on the Linux server (MFA/2FA)
- Part 9 - Maintenance and deactivation/reactivation of MFA/2FA
Requirements
You are familiar with:- the usual tasks administering at least a small network with one Windows Server
- Veeam Backup & Replication and have it installed and running
- the command line - from PowerShell, Command Prompt, or even DOS
Veeam Backup & Replication is assumed to be of version 11 or later. It can be a licensed trial or paid version or even the free Community Edition.
Part 6: Backup of the Linux server itself
In the previous section, Part 5, we installed the Veeam Agent for Linux and created recovery media.In this section, we will, using the Veeam Agent, configure a backup job for the Linux server itself which can be used to perform a bare-metal recovery of the server in case its system drive should cease to function.
Concept
As you already have Veeam Backup & Replication running, thus having at least one backup repository at your disposal, all we need is to use the installed Veeam Agent for Linux on the Linux server and create a backup job that will back up the Linux server's system drive.Configure the backup job
Having a recovery media to boot from to restore the Linux system, we only miss the backup itself to be able to perform a recovery of the system.You may feel tempted to set that up in the Veeam Backup & Replication console as you do for any other backup job. However, to control the Veeam Agent on the Linux Server, that would require that the server stores a set of credentials to log in to the Linux server - and, even as the credentials will be stored encrypted, this is exactly what we don't want.
Thus, we will set up the agent to control the backup of the Linux system.
So, if not already logged in, log in to the Linux server and start the Veeam Agent with this command:
sudo veeamAs no backup jobs have been created, you will meet the Welcome screen:
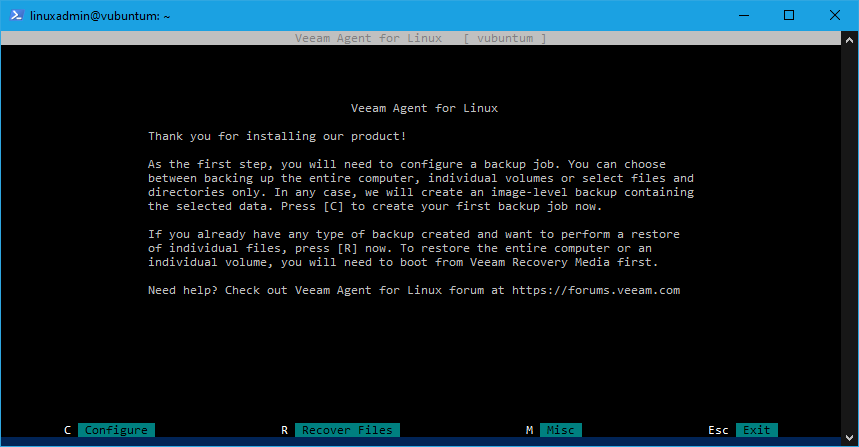
Press C to configure the backup job, and you will be prompted for the name of the job.
Name the job as you prefer, but be aware, that Veeam in the logs will prefix it with the hostname of the machine. For example - if you use the default job name, BackupJob1- the job will be listed as:mylinuxhost BackupJob1
A good name is simply system, which we will use:
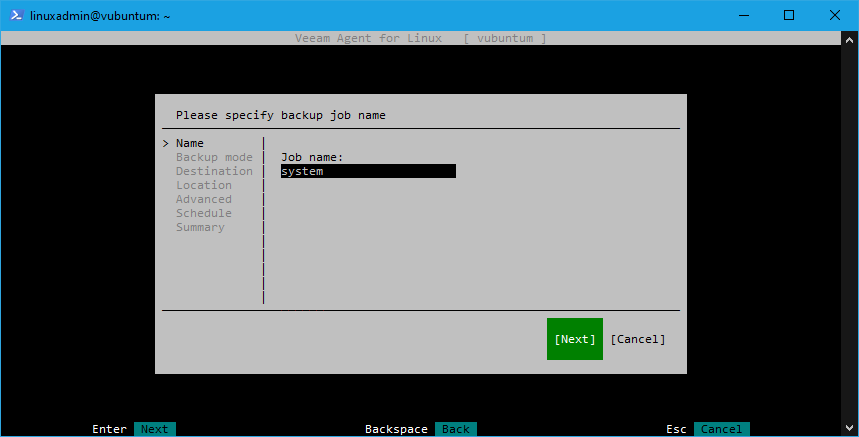
Press Next for the next window to select what to backup.
Do NOT select the recommended option - to backup the entire machine.
Select the option (as shown): Volume level backup:
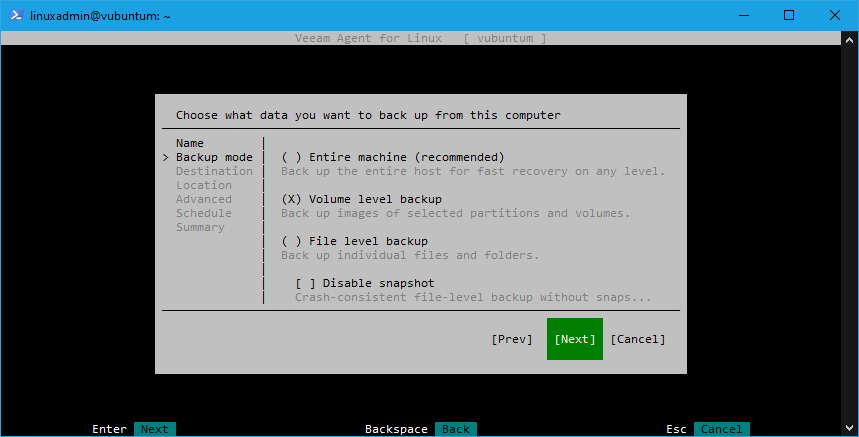
Press Next to select the device (disk) to backup:
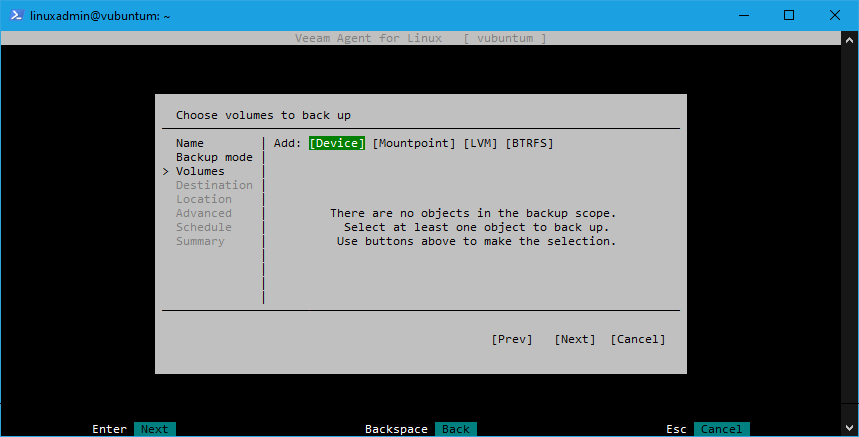
Navigate to Device and press Enter to have devices listed:
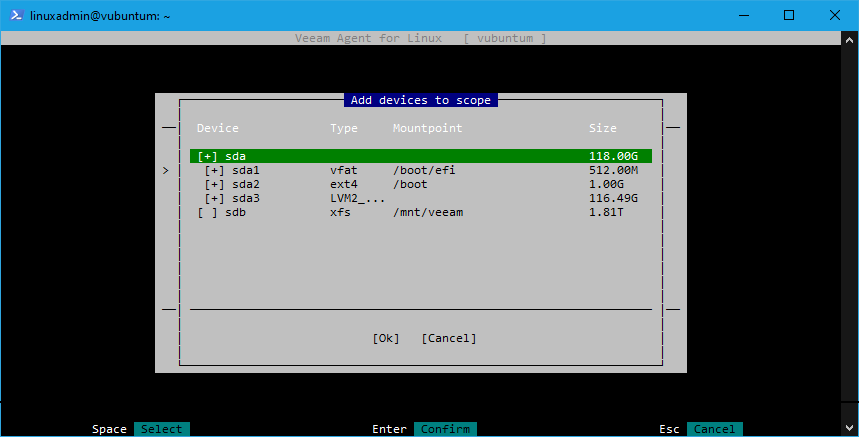
Mark the sda device, as this is the system drive, navigate to Ok, and press Enter to have the list of volumes to backup up. Only the sda device should be listed:
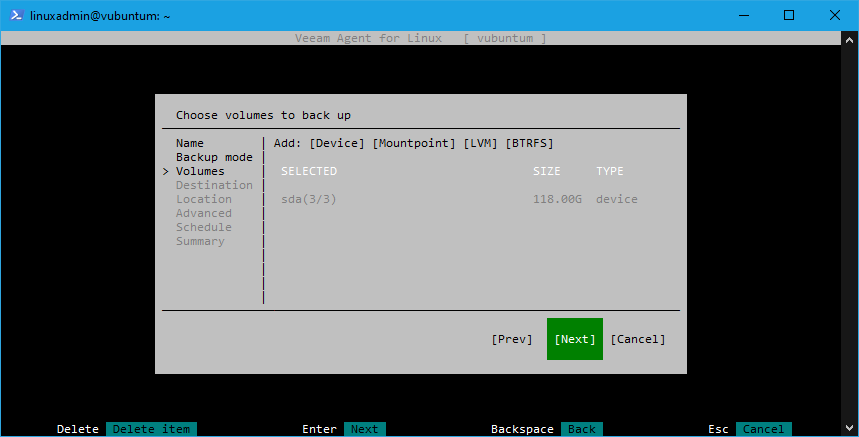
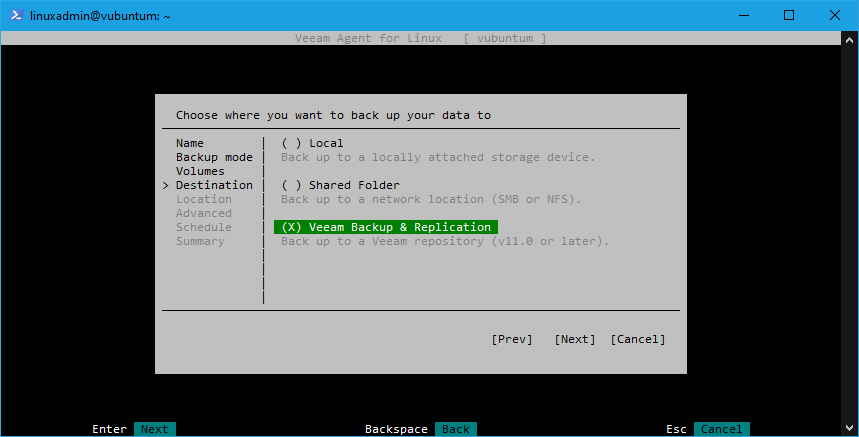
Press Next to choose the destination for the backup.
What to choose is up to you and your preferences. Each option has its advantages:
- Local. Could be a USB drive. Protected from malware attacks, as the machine effectively is off-line. To confirm backups, log in to the machine and open the Veeam Agent.
- Shared folder. Allows you to collect backups from several machines in one place. Not protected from malware attacks. To confirm backups, log in to the machine and open the Veeam Agent.
- Veeam Backup & Replication. Will log and list the backup history as for any other backup job. Protected from malware attacks if the repository used is immutable. Backup jobs can be confirmed by e-mail or another method as for any other backup job stored in the repository.
Here, we select the last option:
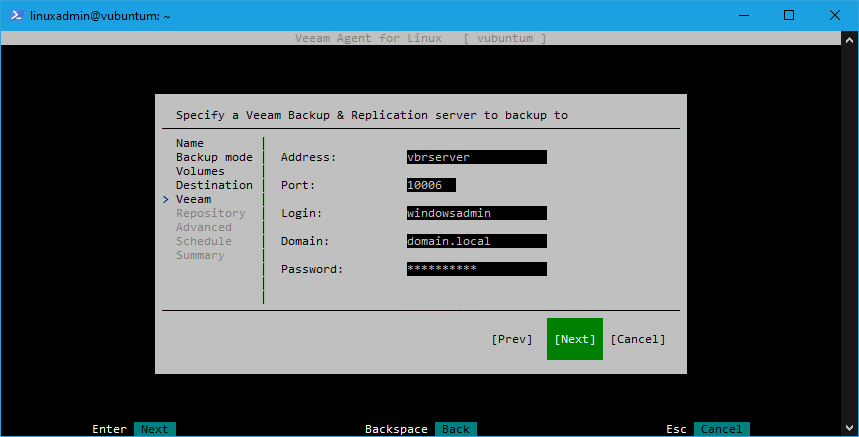
Press Next and input:
- the address and port of the VBR server
- credentials to log in to that server
as shown:
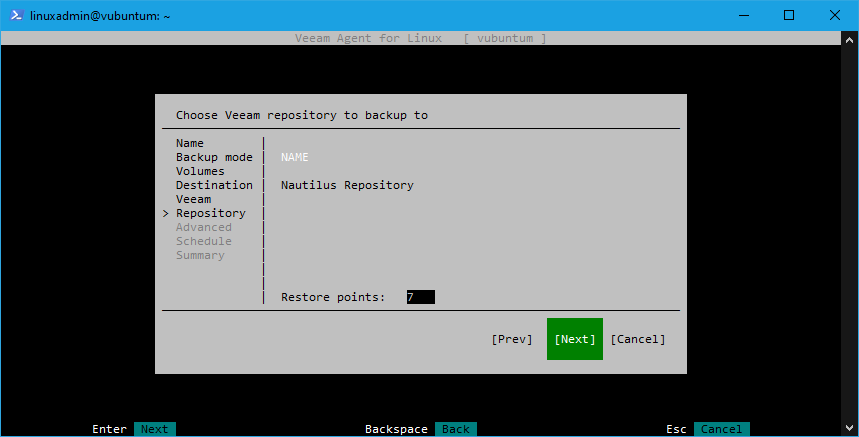
Press Next and select how many restore points to keep, here 7:
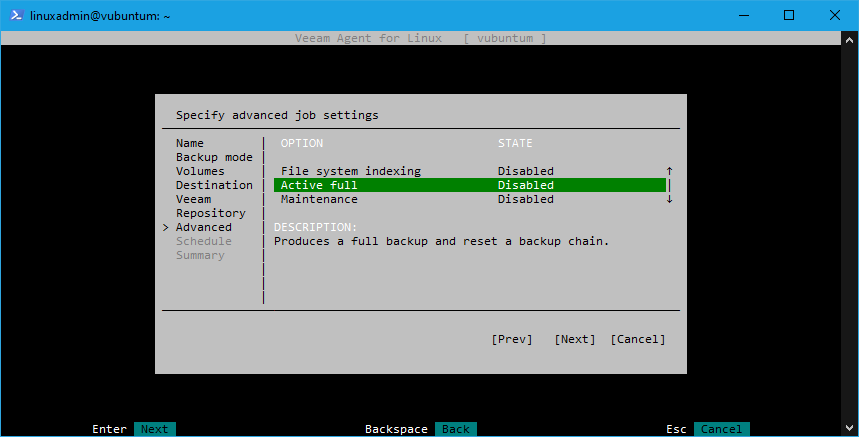
Press Next to specify advanced job settings. For a start, the default settings will work well:
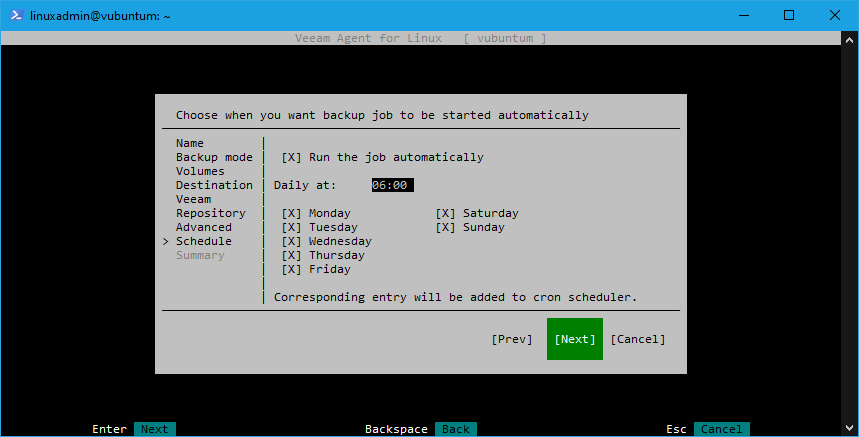
Navigate to Next and press Enter to specify the schedule for the job.
Mark, at top: Run the job automatically, and set the time to launch the backup job.
Then set the weekly schedule as to your preferences.
As the machine, apart from this job and serving the repository, has about zero activity, you hardly need a daily backup.
On the other hand, running a daily backup with success will list the machine as alive and well in your Veeam log.
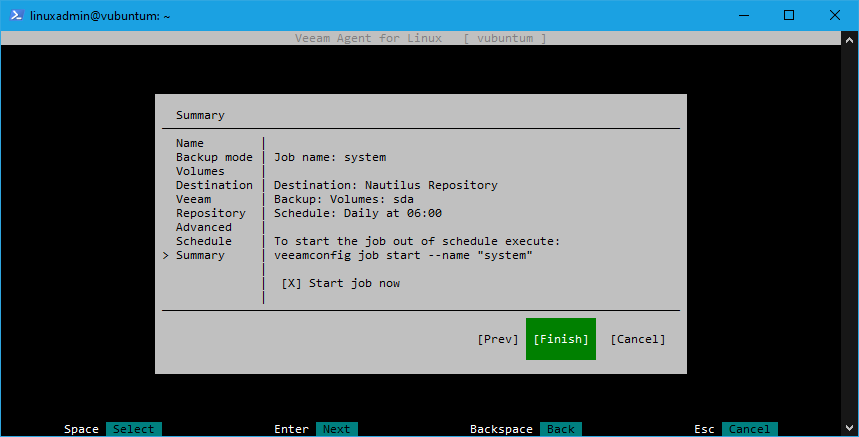
Press Next to view the summary.
Notice the displayed command line that can be used, should you wish to run the job out of schedule. However, it must be called elevated, so sudo must be prefixed:
sudo veeamconfig job start --name "system"For now, mark the option to: Start job now:
Press Next to continue, and the job will start:
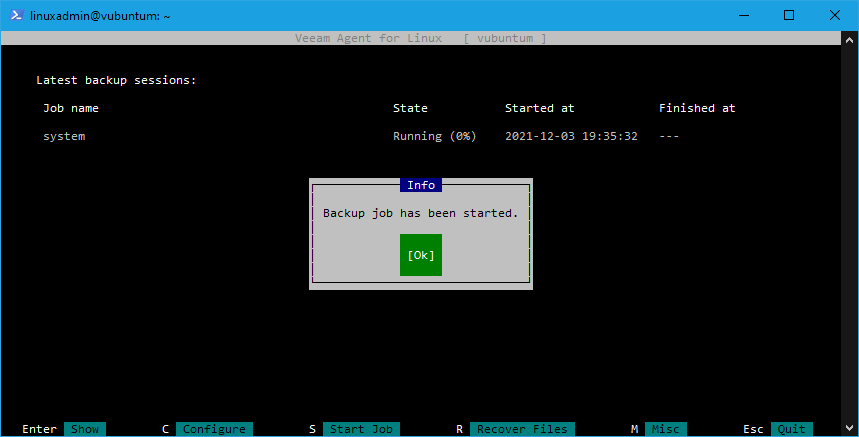
Press OK to watch the status:
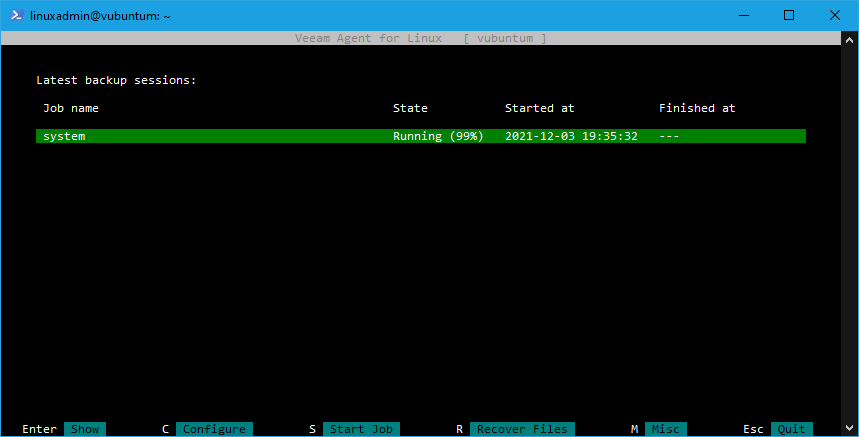
After a few minutes, the job should finish with success:
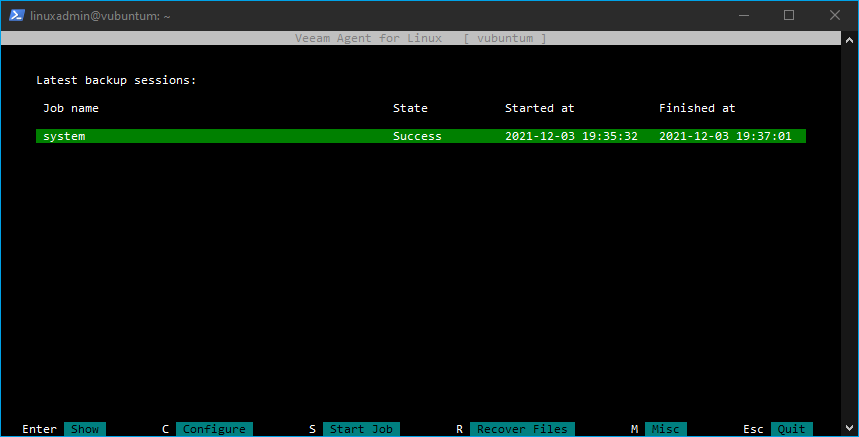
You can mark the log entry and press Enter to view the details.
Also, if you have set up e-mail notifications in Veeam Backup & Replication, you will have received one of the well-known green e-mails confirming the successful backup.
Press Esc to quit the Veeam Agent.
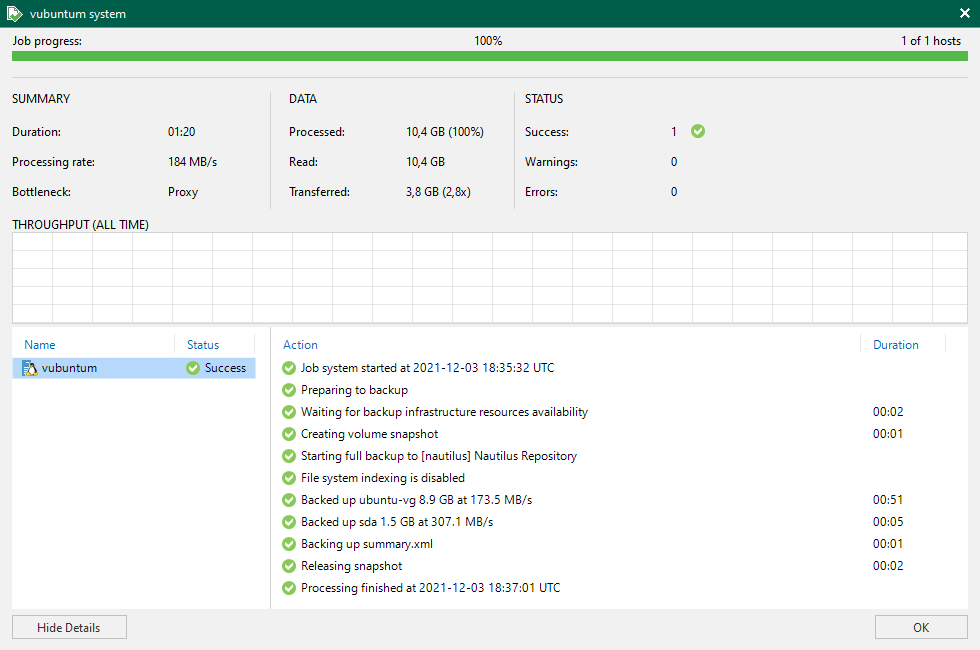
More importantly, for a regular check of the backup, you wouldn't connect to the Linux server and fire up the Veeam Agent. It is much easier to use the VBR console, locate the log entry for the backup job, and press Enter. That will bring up the details of the backup job:
Conclusion
The server has now been equipped with a top-class fully configured system backup making it possible to perform a bare-metal recovery of the Linux system in case the system drive should cease to function.How to do this is explained in detail in Part 7 of this series:
Part 7 - Build an immutable backup repository for Veeam Backup & Replication.
I hope you found this article useful. You are encouraged to ask questions, report any bugs or make any other comments about it below.
Note: If you need further "Support" about this topic, please consider using the Ask a Question feature of Experts Exchange. I monitor questions asked and would be pleased to provide any additional support required in questions asked in this manner, along with other EE experts.
Please do not forget to press the "Thumbs Up" button if you think this article was helpful and valuable for EE members.

Have a question about something in this article? You can receive help directly from the article author. Sign up for a free trial to get started.
Comments (0)