Part 7 - Build an immutable backup repository for Veeam Backup & Replication.


Published:
Browse All Articles > Part 7 - Build an immutable backup repository for Veeam Backup & Replication.
For Veeam Backup & Replication, this guide will show you, step by step, how to create and implement a disk-based immutable backup repository from scratch.
In this part: Bare Metal Recovery of the Linux server.
In this part: Bare Metal Recovery of the Linux server.
Veeam immutable repository by under a Public Domain Work license
Introduction
Purpose of these articles
You are a Windows administrator running Veeam Backup & Replication and wish to raise protection against malware attacks and hackers without reverting to shuffle or rotating physical media.This you can accomplish by immutable backups stored on a physical server running Linux. However, you have no Linux servers running and don't want to.
But, like it or not, that is your only option, as the XFS file system is the only one capable of immutability, and XFS only runs under Linux.
Thus, a Linux server is a must. When you have accepted this fact, then what? Where to start?
Like me, you have about zero experience with Linux and, therefore, hesitate to set up a Linux server, indeed in a production environment.
If so, this guide is for you. Here, nothing about Linux is taken for granted.
Sections
The guide has been split in nine parts. This allows you to skip parts you are either familiar with or wish to implement later if at all.- Part 1 - Prepare the install of Linux
- Part 2 - Install Linux on the server
- Part 3 - Prepare the Linux server for Veeam
- Part 4 - Create the immutable Veeam backup repository
- Part 5 - Prepare for backup of the Linux server itself
- Part 6 - Backup of the Linux server itself
- Part 7 - Bare Metal Recovery of the Linux server
- Part 8 - Tighten security on the Linux server (MFA/2FA)
- Part 9 - Maintenance and deactivation/reactivation of MFA/2FA
Requirements
You are familiar with:- the usual tasks administering at least a small network with one Windows Server
- Veeam Backup & Replication and have it installed and running
- the command line - from PowerShell, Command Prompt, or even DOS
Veeam Backup & Replication is assumed to be of version 11 or later. It can be a licensed trial or paid version or even the free Community Edition.
Part 7. Bare Metal Recovery of the Linux server
In the previous sections, Part 6, we installed the Veeam Agent for Linux, created recovery media, and configured regular backup of the Linux system.In this section we will, using the Veeam Agent, show how to restore the Linux system from scratch - to perform a bare-metal recovery of the server - in case its system drive should cease to function.
Concept
As you already have Veeam Backup & Replication running, we have used a repository of this to store the backup of the server.As mentioned in the previous section, the backup files could have been stored elsewhere - on a network share or a USB drive. To use either of these options is trivial, thus will not be covered here.The created recovery media will be used to boot the server and then restore the server from the backup.
Restoring the Linux server's system drive
The steps to take in case of a system drive failure are these:- replace the system drive
- boot the server from the recovery media
- locate and select the backup to restore from
- restore the system drive from the backup
So, first, replace the system drive. You know how to do this, and the only requirement is, that its capacity must be equal to or larger than the faulty drive.
Next, insert the recovery media and boot the machine from this:
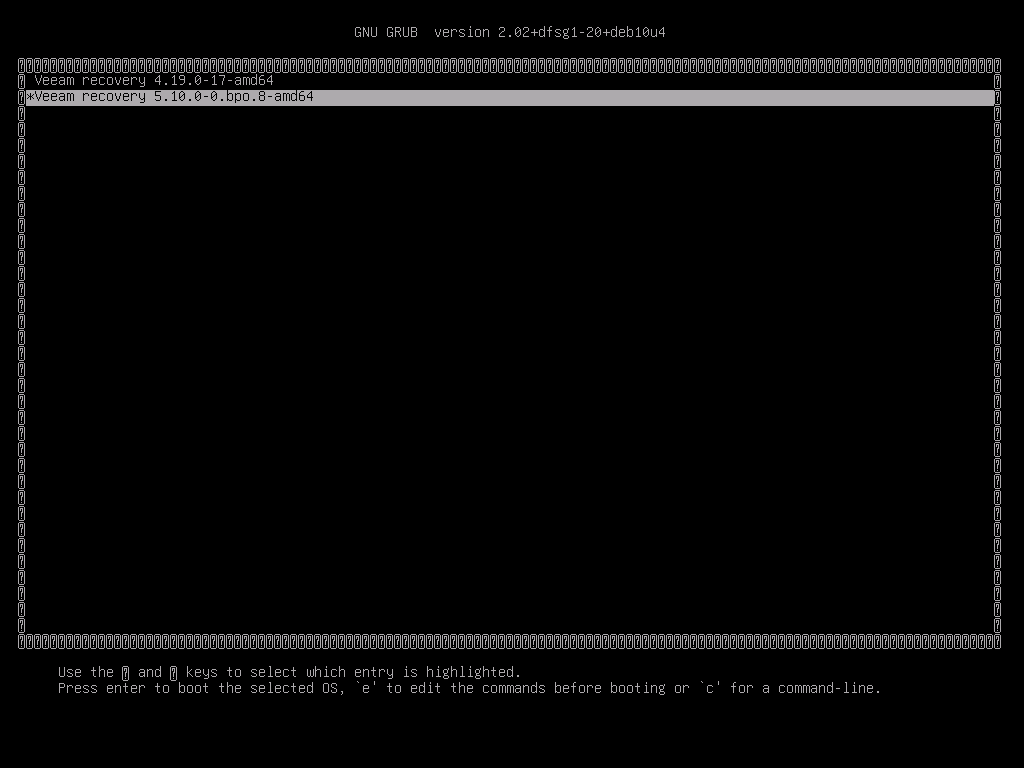
Select Veeam Recovery 5 …, press Enter, and the machine will boot from the recovery media.
When booted, you have the option to start the SSH server, allowing you to remote control the rest of the process:
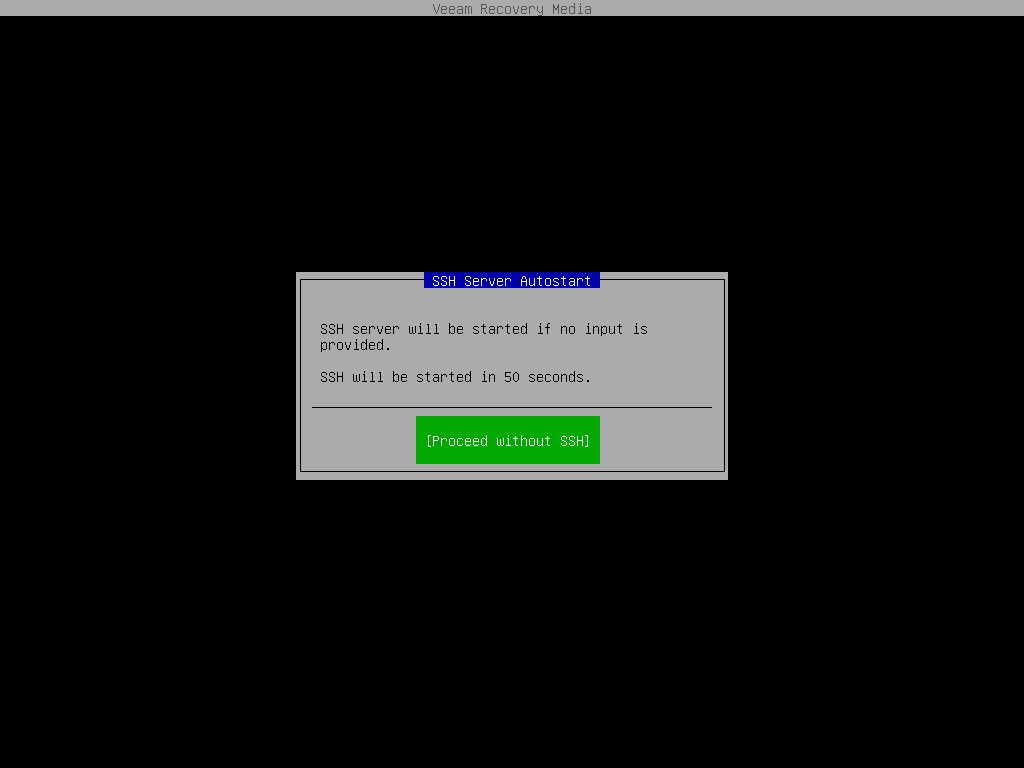
You have three options:
- To start the SSH server, press Esc
- If you are operating the server physically, press Enter to Proceed without SSH
- Do nothing and wait, and the autostart will time out after 60 seconds
The license screen will display:

Mark the two entries and press Continue to reach the main menu:
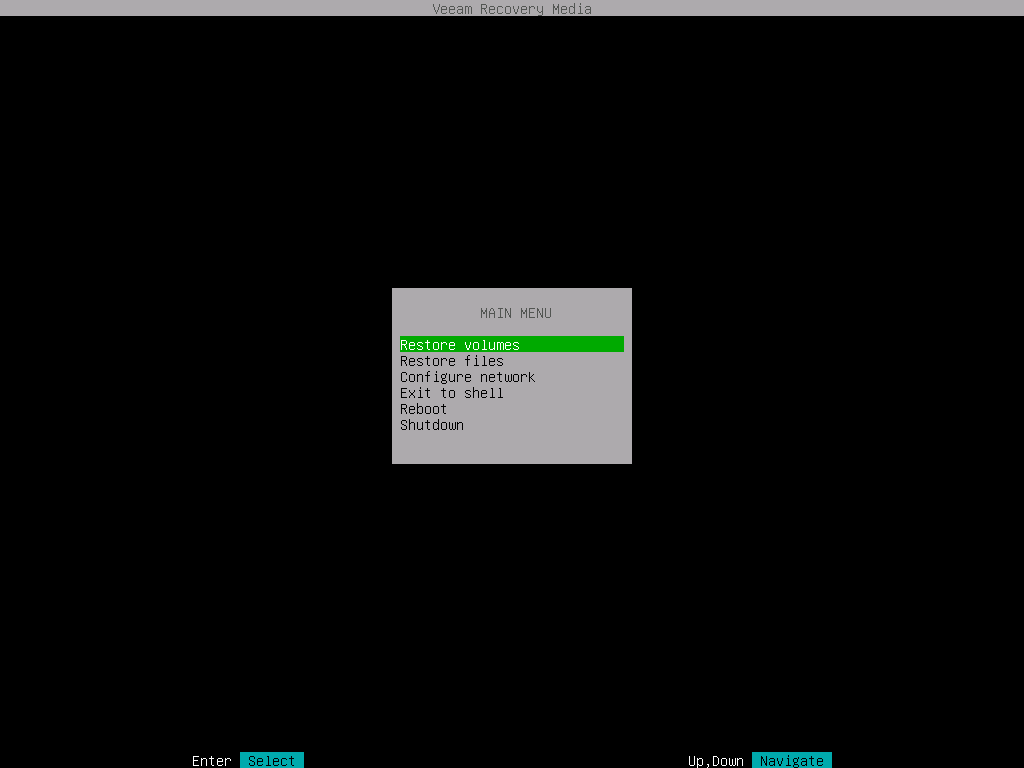
Select Restore volumes and press Enter to select the backup location.
Scroll to mark: Add VBR server (v10 or later) …:

Press Enter, and you can specify the name and port of the backup server and the credentials to use:
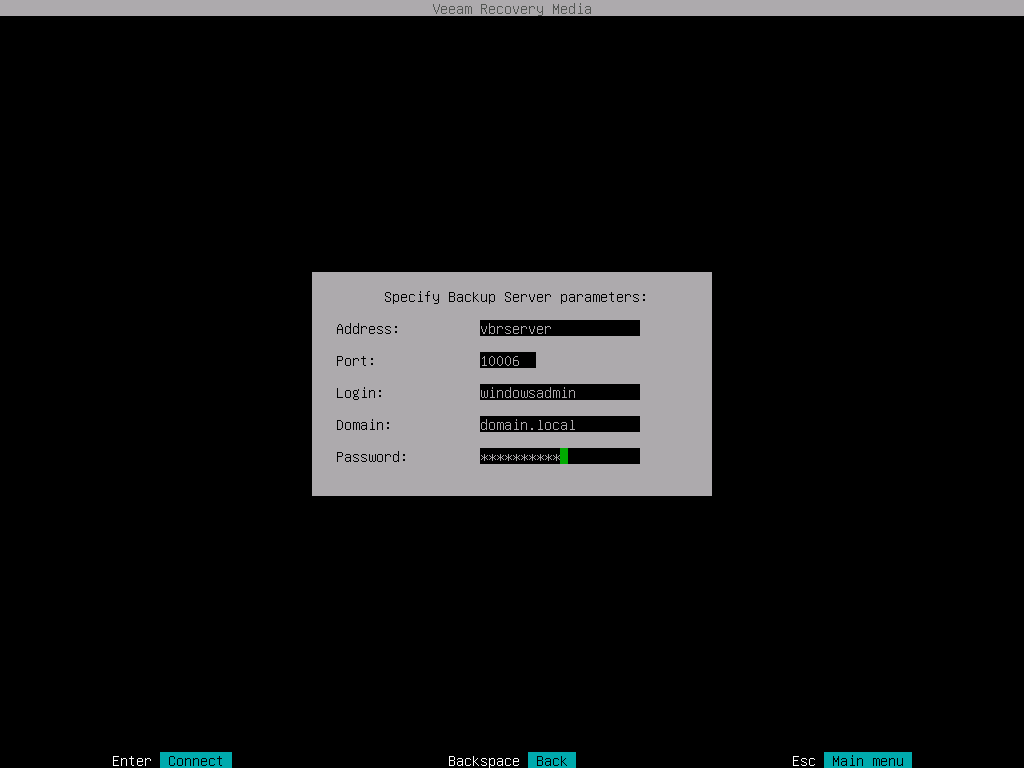
Press Enter to connect to the server, retrieve the stored restore points, and list these:
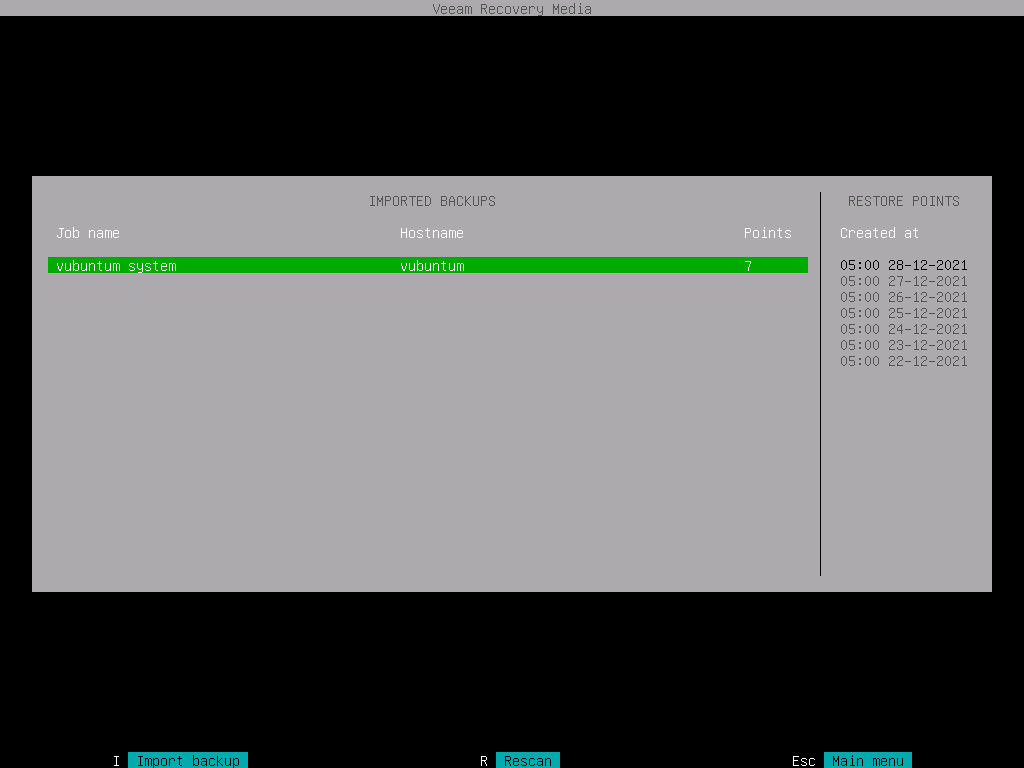
Select (green bar) the Job name to use, and then navigate to the list of Restore Points:
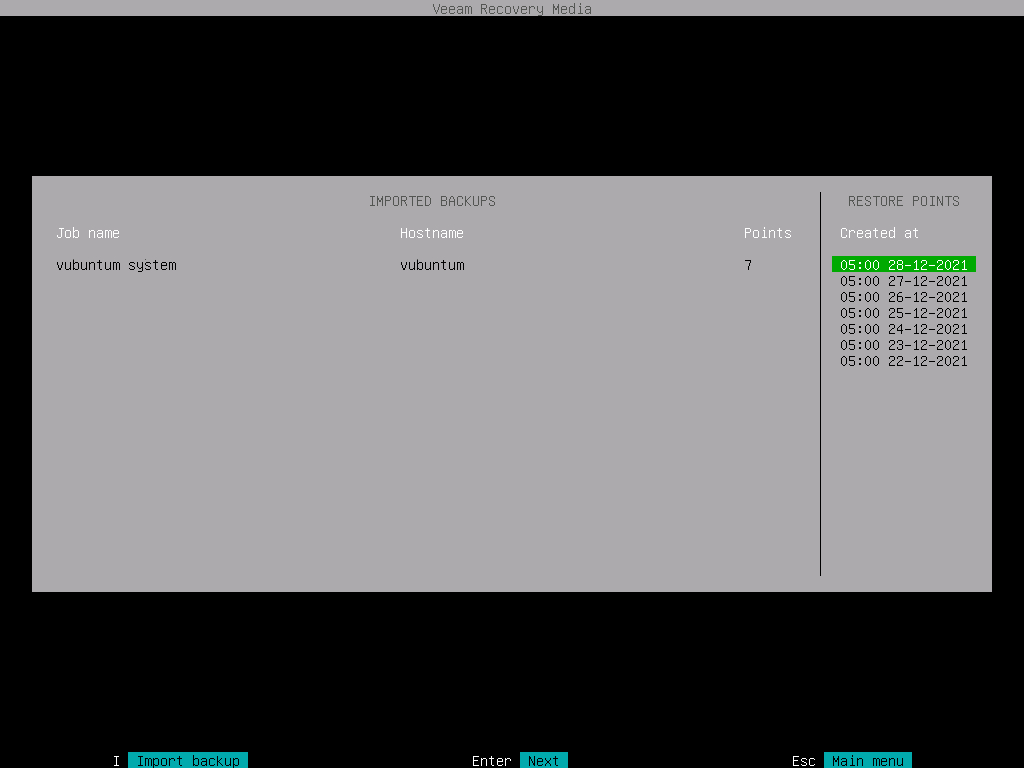
Mark the Restore Point to be used to restore the machine and press Enter.
You will now (at left) see a list of the current devices in the machine and (at right) of the devices held in the chosen backup:
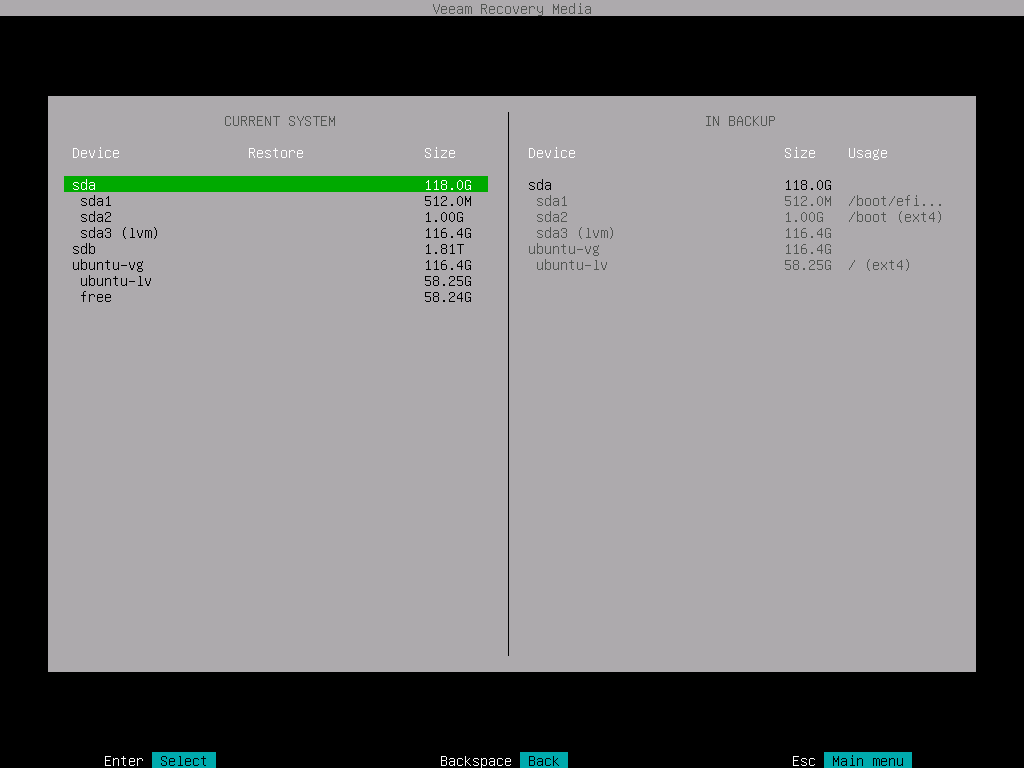
Mark the sda device, as this is the system drive, and press Enter to select what to do with the sda device:
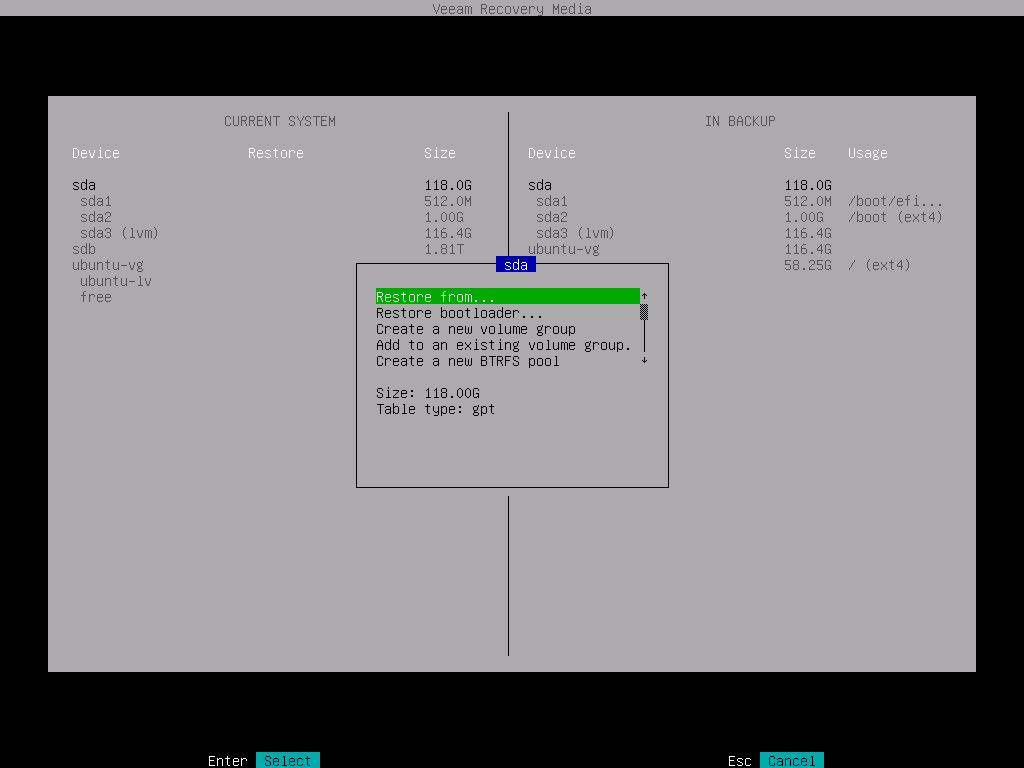
Select Restore from … and press Enter to select what to restore from:
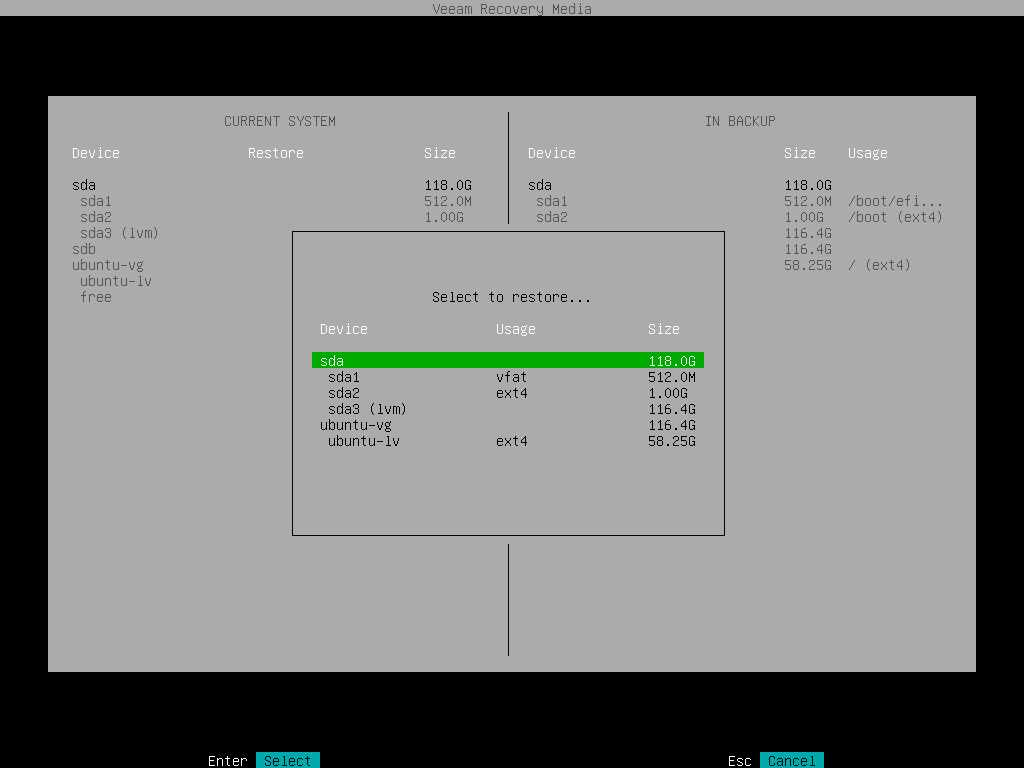
Select the sda device as shown, and press Enter to finish the selection:
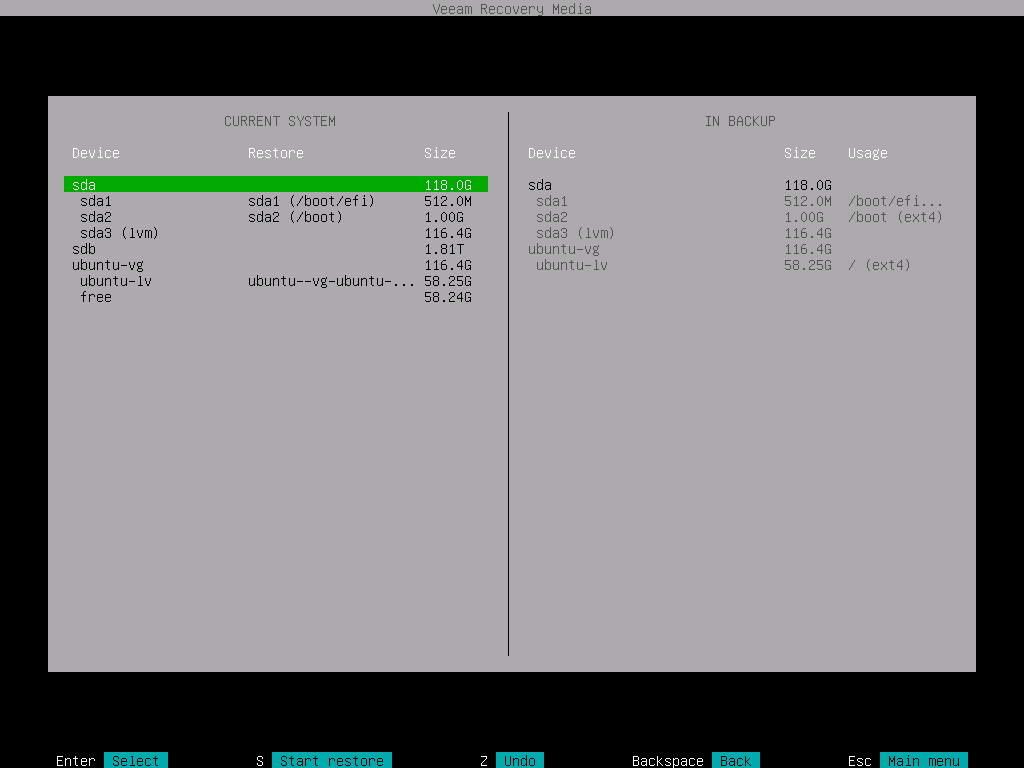
It may appear, as nothing has been altered, but notice, that the bottom menu options have been expanded.
Note: The menu option Start restore will not start the restore, only bring up the summary screen.Press S - to view the summary screen:
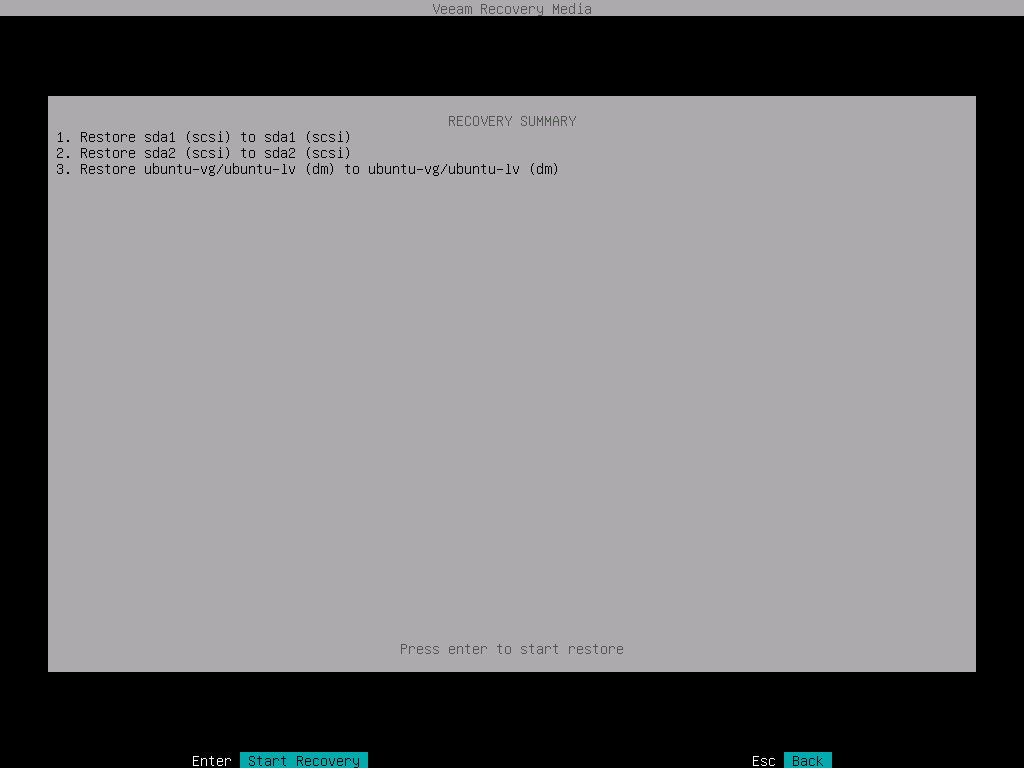
If everything seems OK, press Enter to actually start the restore.
In the usual Veeam style, every step of the process will be carefully listed, and you can watch the progress:

When the restore is completed, a status screen is displayed, documenting the full process:
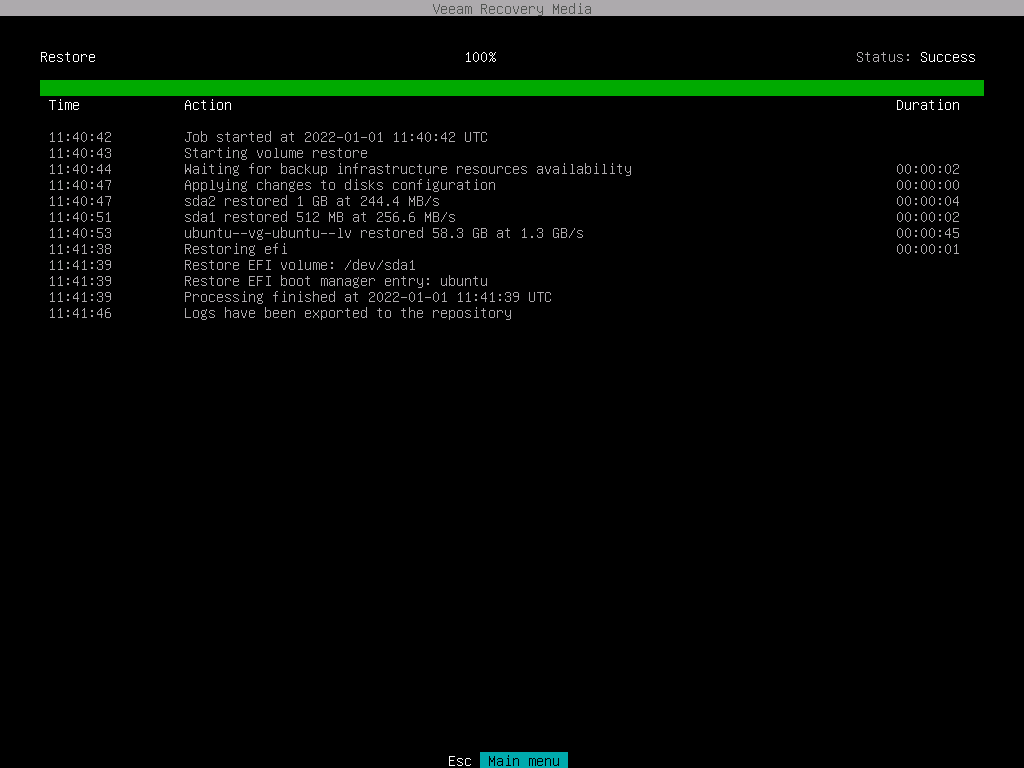
Note the last entry, that Logs have been exported to the repository.Press Esc to return to the main menu:
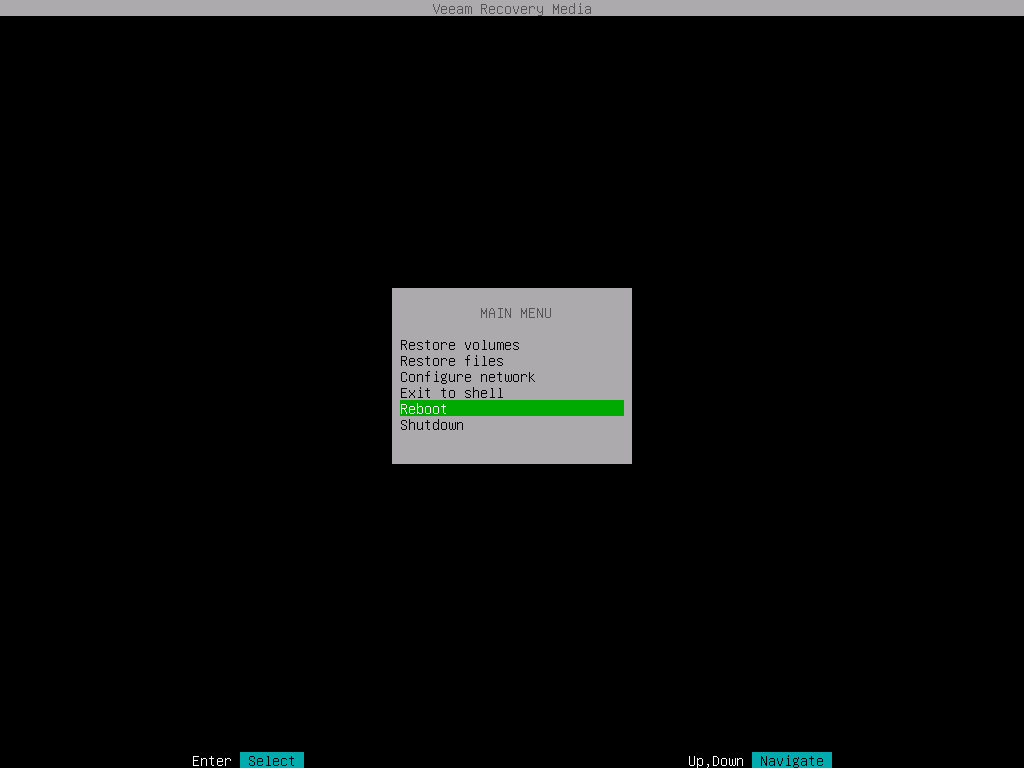
Select (as shown) Reboot, and press Enter to reboot the machine.
Also, remove the recovery media from the machine.
As noted above, the logs have been exported to the repository. However, at the VBR console, these are not to view directly, only that the restore has taken place and the status (Success or Failed) of this:
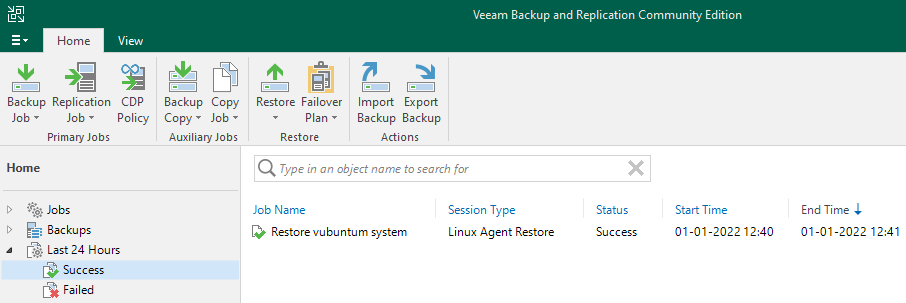
The server's Linux system has now been restored completely from the backup stored at your Veeam Backup & Replication server using the previously recovery media to boot from, and the restore is documented in the Veeam Backup & Replication console.
Conclusion
This concludes the basic setup of the immutable backup repository as well as an enterprise-level backup of the server itself.What's missing could only be some added security for protecting the server from a worst-case scenario. These steps and how to implement them will be explained in detail in Part 8 of this series:
Part 8 - Build an immutable backup repository for Veeam Backup & Replication.
I hope you found this article useful. You are encouraged to ask questions, report any bugs or make any other comments about it below.
Note: If you need further "Support" about this topic, please consider using the Ask a Question feature of Experts Exchange. I monitor questions asked and would be pleased to provide any additional support required in questions asked in this manner, along with other EE experts.
Please do not forget to press the "Thumbs Up" button if you think this article was helpful and valuable for EE members.

Have a question about something in this article? You can receive help directly from the article author. Sign up for a free trial to get started.
Comments (0)