How to create a distribution group in Exchange 2010.


Published:
Browse All Articles > How to create a distribution group in Exchange 2010.
Introduction
A distribution group is a mail-enabled Group in the Active Directory database used to make it easier to email a number of different recipients using a single contact. There are two types of distribution group. They are a mail-enabled universal distribution group and a mail-enabled universal security group. A mail-enabled security group can be used to assign permissions to resources, a mail-enabled security group cannot.We are going to concentrate on the mail-enabled universal distribution group.
Creating the group
A mail-enabled universal distribution group can be created using either the Exchange Management Shell or the Exchange Management Console.Firstly, to create them using the Exchange Management Console navigate to Recipient Configuration > Distribution Group. In the Action Pane on the right hand side select New Distribution Group.
The wizard will then start, the first screen gives us the option to choose an existing group to mail-enable or create a new one. if you have an Active Directory Group already created then select Existing Group. For the purposes of this article we are going to create a new group. See screenshot below of the Group Information.
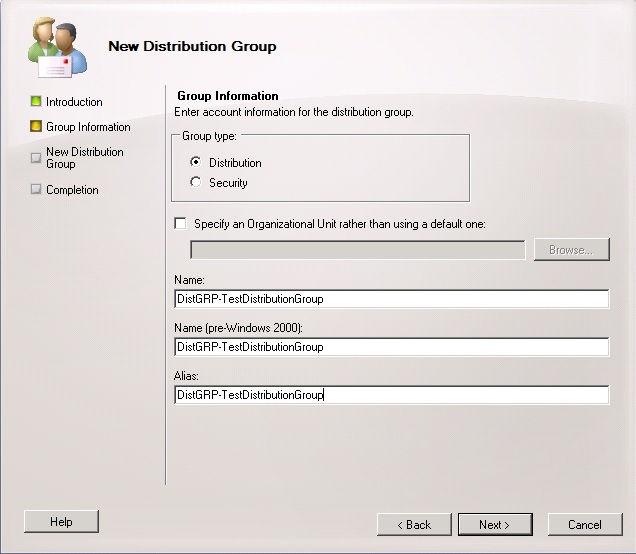 Once you have entered the details click Next and then New to create the group then finish on the confirmation screen.
To do the same task using the Exchange Management Shell you would run the following command:
New-DistributionGroup -Name "Test Distribution Group"Assigning Membership
Once the Distribution Group has been created we need to assign users to it. Selecting the properties of the Distribution Group and then under the Members tab we have the ability to add Mail-Enabled Users, Contacts or other Distribution Groups.To perform the same task with the Exchange Management Shell you would use the following:
Add-DistributionGroupMember -Identity "Test Distribution Group" -Member "demazter"With Exchange 2010 we also have the option of Self-Service Membership. This is where users have the ability to add themselves to groups. The options for this is under Membership Approval tab. We will cover this in more detail in another article.
We also have the ability to create a Moderated Distribution Group, already covered in my article here: https://www.experts-exchange.com/Software/Server_Software/Email_Servers/Exchange/A_3221-Configure-Moderated-Distribution-Group-in-Exchange-2010.html
Email Address
The final thing to check is the email address tab, you may or may not want this to use the same format as your email address policies. Here we can add/edit or remove the default email addresses and assign our own.Further Reading
Managing Distribution Groups: http://technet.microsoft.com/en-us/library/bb125256.aspxConfigure Distribution Group Prooperties: http://technet.microsoft.com/en-us/library/bb125178.aspx
Written by Glen Knight (demazter) as part of a series of how-to articles.
Have a question about something in this article? You can receive help directly from the article author. Sign up for a free trial to get started.
Comments (0)