Creating Pass-Through disks supported by SCVMM

Published:
Browse All Articles > Creating Pass-Through disks supported by SCVMM
Introduction
There are many ways to achieving a goal - some are wrong, some are right - and some just appear to be right, but are wrong. Hyper-V Clustering and VMM has taught me all three, and I'm here to share with you how to avoid the pitfalls I've fallen into when it comes to Pass-Through Disks.
What is a Pass-Through Disk?
A pass through disk is a disk which is given to a Virtual Machine using a partition visible on the host - and not through a VHD file. The benefits of a Pass-Through disk includes:
Pass-Through disks can be increased on the fly without shutting the virtual machine down
Faster IO throughput than a VHD file, because of the lesser overhead
Defragging a pass-through disk actually is useful (as opposed to defragging a dynamically expanding VHD file)
Prerequisites
This guide is assuming you already have shared storage in place, and have 1 or more hosts part of a cluster and connected to the same shared storage. This guide is not here to deal with creating a cluster, configuring shared storage, or configuring Cluster Shared Volumes.
This guide also requires you to do most of it using Failover Cluster Manager - at the time of writing SCVMM does not have the ability to add pass-through disks, but fortunately does support Virtual Machines which have them.
Step 1: Creating and Preparing the volume
Naturally, a pass through disk needs - well, a disk - to be able to pass through. Cluster Shared Volumes are not suitable for this task, however, Cluster Volumes are. The first step is to create a logical volume in your shared storage configuration, and then map it to the members of the cluster. Unfortunately, I can't take you step by step doing this because everybody's shared storage is different from mine. The important things to note are:
The volume must be presented (mapped) to all the hosts in the cluster - if you do not do this, the Virtual Machine which will use this disk cannot be Highly Available. You can use any LUN numbers on the hosts, but for clarity, it's best to use the same LUN for each host.
Once the volume has been presented to your hosts, use Disk Manager to REFRESH or RESCAN the storage of the server, and find the new disk which will appear as per the example.
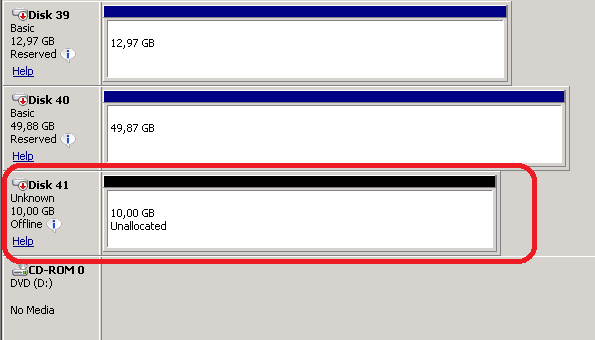
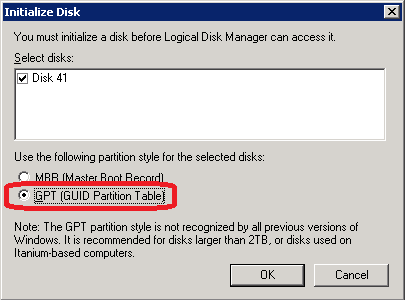
What you need to do now, is Right Click the pane on the left hand side (which contains the Disk name, Unknown, Size, and offline), and select Online. Right click that Pane again, and select "Initialize Disk". If you have more disks selected, uncheck the ones you don't want to initialize! Be sure to initialize it as GPT (GUID Partition Table). This is important!
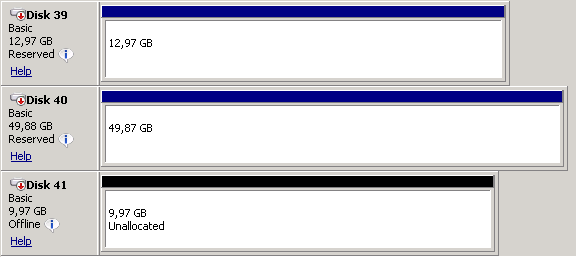
After the disk has been initialized, make it Offline again - do this by right clicking the same pane, and select "Offline". Your disk should look something like this now.
Step 2: Add Disk to Cluster
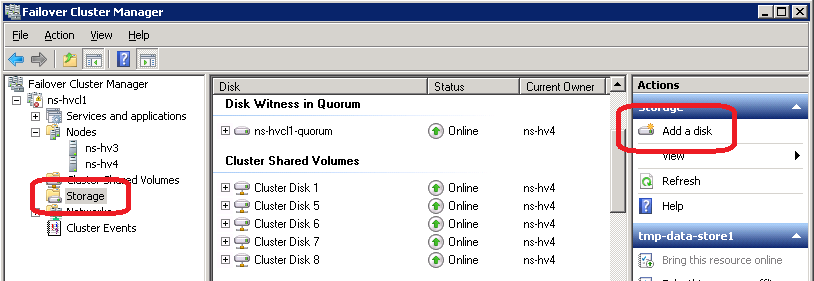
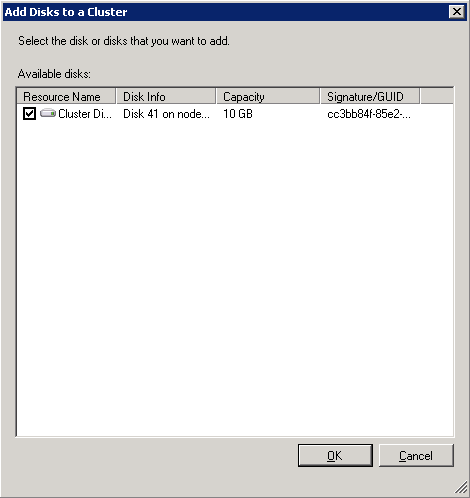
Using your Failover Cluster Manager, select your Storage section, and on the Actions window, click "Add a disk". You can also right Click the "Storage" node and select "Add a disk"
The disks which are found will appear under "Available disks:" and already be checked. You can go ahead and click OK here. Do you notice the part which says "Signature/GUID"? That's the Globally Unique IDentifier, which is how the different nodes in the cluster track this particular disk. It is possible for each node to have a different Disk Number for this particular disk, but the GUID will always be the same across all your nodes.
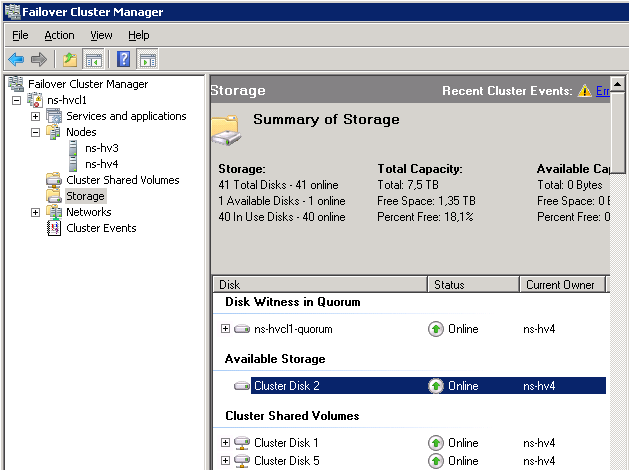
The Cluster Manager will now mark the disk as a cluster disk (which turns it into Reserved mode, as we saw with the other disks in the above screenshots), and then bring it into the Cluster as Available Storage, as we can see with the next image.
Prior to going to the next step, we're going to rename this disk to make it easier for us when viewing it in this window. Right click the volume, select "Properties" and on the first window which appears you can change the name. Change it to something meaningful. I'm going to change mine to "Abracadabra", so that we can identify this disk once it's added to the virtual machines.
Step 3: Add Pass-through disk to Virtual machine.
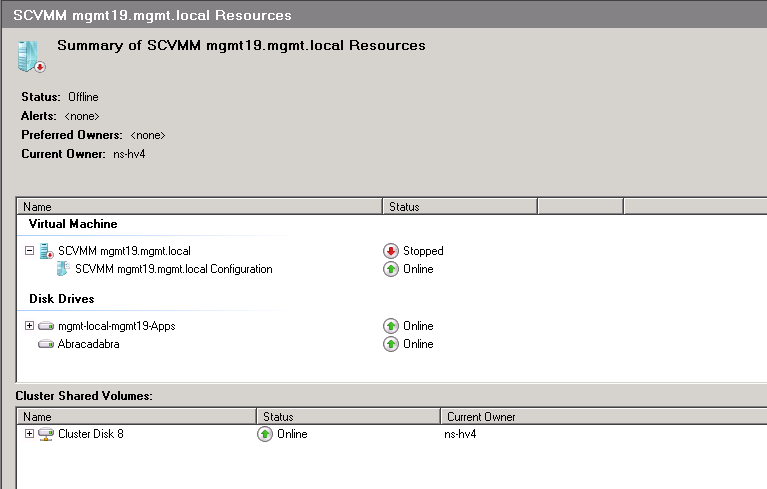
Again using Failover Cluster Manager, browse through Services and applications and then double-click the virtual machine which you want to add this pass-through disk to. You will get to the Resources pane of the Application, as shown below.
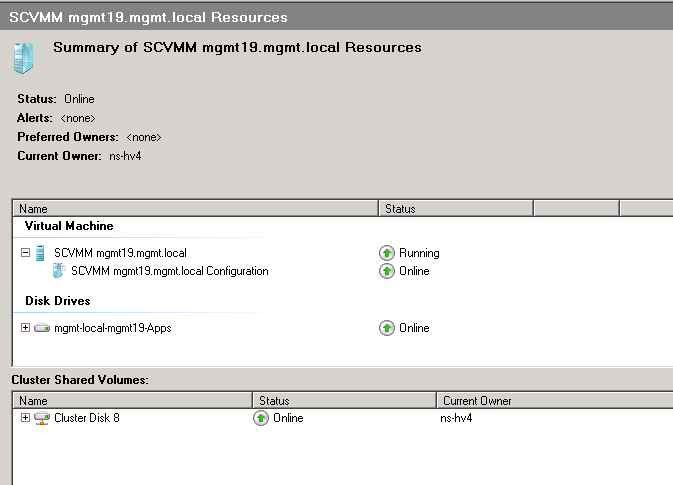
If your Virtual Machine is running like mine is, you have to shut it down first. Right click the Virtual Machine (not the Configuration which is directly below it), and then click "Shut Down" to cleanly shut down your guest.
Once your machine is shut down, right click the Virtual Machine again, and then click "Settings". You will bring up the ever so familiar Settings screen of your Virtual Machine. You will note that I already have a Pass-through disk attached, but we're going to now attach another one.

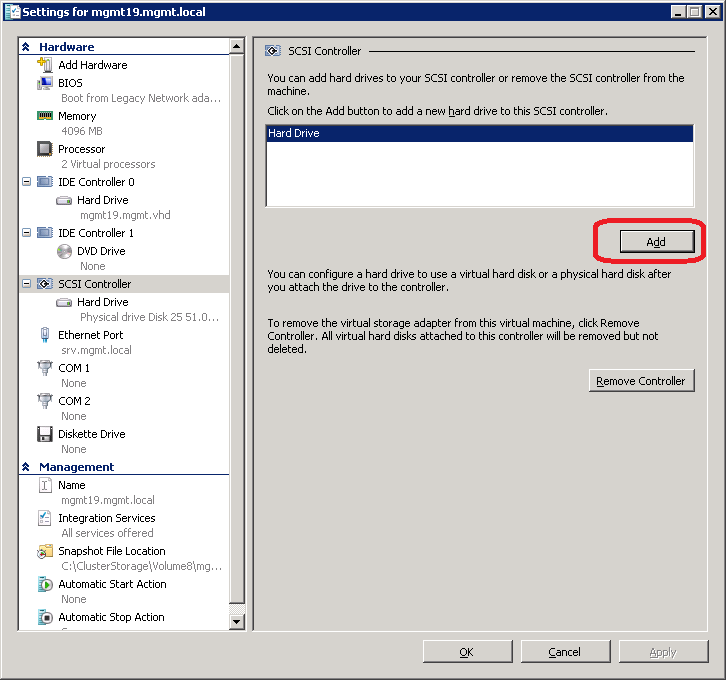
My Virtual Machine already has a SCSI Controller, and I intend to use that. If your Virtual Machine does not have a SCSI Controller then on the "Add Hardware" node, select "SCSI Controller" and then Add.
For people who already had a SCSI controller, click on it. You should now have "Hard Drive" available as an option, and it's selected by default. Just click Add.
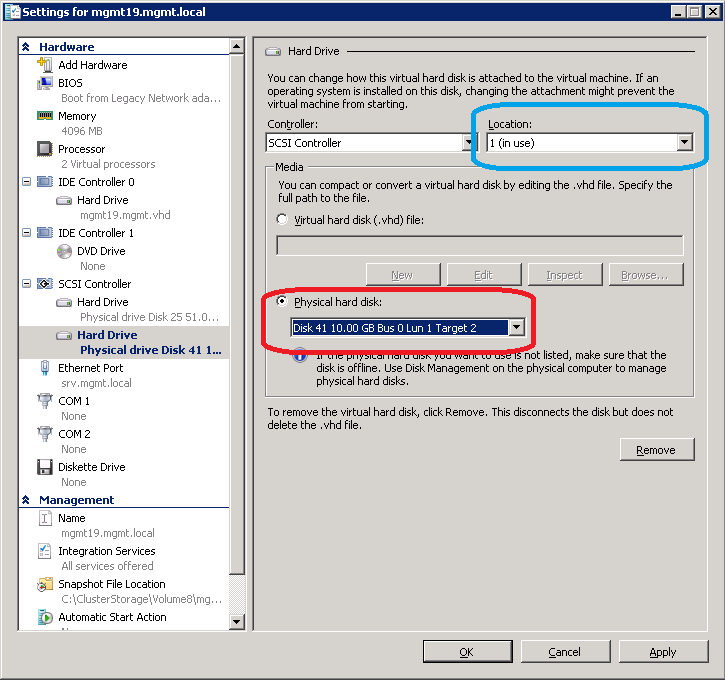
You will be presented with a Hard Drive selection screen. By default, "Virtual hard disk (.vhd) file:" is selected. Choose "Physical hard disk" instead, and then use the drop down to select your hard drive you added earlier. you will note that it only shows Disk numbers, Size and the regular Bus/Lun/Target. You may need to make notes of what it should be so that you don't inadvertently select the wrong disk - but if you do select the wrong disk, it's not a problem! Just change it to the right disk before starting the virtual machine. The location refers to the virtual LUN number, and you'll probably think that the 1 (in use) means you can't use it. Don't worry about this, the (in Use) is actually in use - by this new disk! You can leave it as is, or choose a different virtual LUN number if you like.
Make your other Virtual Machine changes where required (like memory, CPU's, etc), and when you're finished click OK. Failover Cluster Manager will now examine the configuration and you will notice that it will now Add the Disk Drive which we prepared earlier to the configuration. IMPORTANT - Never add this resource manually to a Virtual machine - always go through the steps I've just described. If you add the resource manually, it's very likely you will get I/O issues inside your Virtual machine! See what it looks like now.
ALL DONE! Now, just fire up your virtual machine, and partition and use the disk like you would in any Operating system.
Conclusion:
This is the only way to safely add pass-through disks in a cluster which Clustering, Hyper-V and VMM fully support. There are unfortunately drawbacks to having Pass-through disks when it comes to VMM, or Hyper-V and they include:
Inability to Storage Migrate the standard VHD files
Inability to use Snapshots
But other than that, these machines will give you a lot of good performance and usage out of your Hyper-V Cluster.
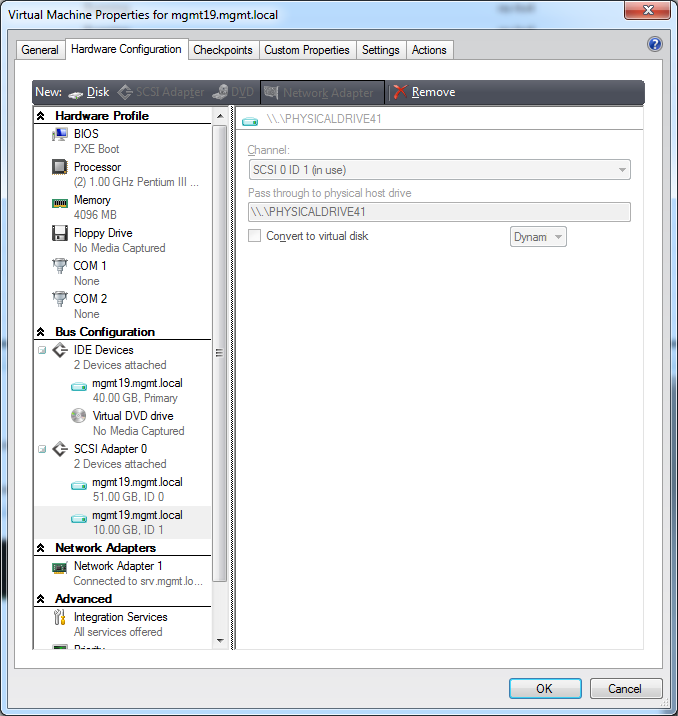
This is what your machine should look like in SCVMM.
Have a question about something in this article? You can receive help directly from the article author. Sign up for a free trial to get started.
Comments (1)
Commented:
Thank you.