

Browse All Articles > Creating Custom Menus In WordPress
WordPress is constantly evolving, and with each evolution appears to get better and better. One of the big drawbacks prior to version 3 was that there was no way to be able to set up a custom menu from the backend.
The Old Way
Adding menus is not hard for anyone adept at HTML and CSS. The basic structure for all menus is the same:
To add a submenu item to any menu item, simply include another unordered list tag <ul></ul> within the list-item <li></li> menu item you wish to add the submenu to:
You can carry this as far and as deep as you like by just repeating the above step:
From there, it is just a simple matter of adding classes and id’s as necessary to the tags and applying some well placed CSS.
The New Way
The new way still requires some good knowledge of CSS, but will do all the work of setting up the unordered list for you.
First off, check in your WordPress backend under Appearance->Menu to see if your theme supports custom menus. If you see the notice:
“The current theme does not natively support menus, but you can use the “Custom Menu” widget to add any menus you create here to the theme’s sidebar.”
Then you will need to do the following:
Assuming that you have upgraded to WordPress 3 (or above), you will need to add a couple lines of code to your theme files.
First add the following lines to your functions.php file:
register_nav_menu has two parameters here, the first is the slug we’ll use in our code and the second is the name our menu will have in the WordPress backend under Appearance->Menus, in the dropdown under the "Theme Locations" box. You can add as many register_nav_menu's as you want, simply changing the slug and menu name for each menu.
Second, place the following code in an appropriate place (normally your header.php file):
If you are installing several different menus (say, perhaps for several different headers) you would install the same code in each file, simply changing the slug to the corresponding slug of the menu you wish to use.
That’s all there is to it! You are now ready to set up your custom menu.
The Custom Menu Screen
Below is a screenshot of what the WordPress Custom Menu Screen looks like:
![WP Custom Menu Screen]()
To start, type in the name of your menu and click “Create Menu”.
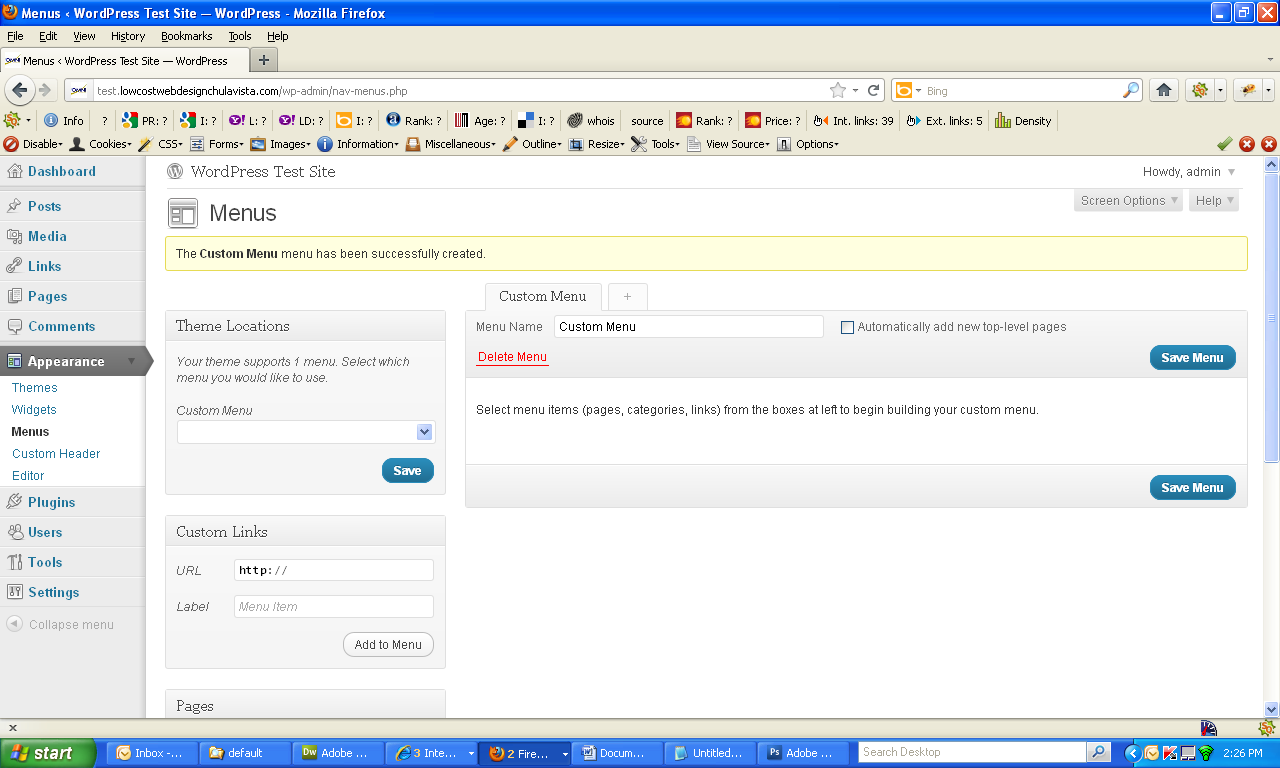
Your screen should then look something like this:
![After Creating Your Menu]()
In the column on the left side of the screen you will see several boxes labeled “Theme Locations”, “Custom Links”, “Pages”, and “Categories”. Let’s start at the first one and work our way down.
First, starting at the “Theme Locations” box, if you are using a theme that already has the custom menu coding in it, you will need to select the appropriate menu you wish to set up from the drop down menu. If you don’t know where these menus would appear, you will need to either check the theme’s documentation or do a manual search for the wp_nav_menu function occurrences.
If you went ahead and installed code per the instructions above, your work is easy. Simply select the name of the menu you wish to customize from the dropdown and click “Save”.
Next, if you would like to add any custom links (generally, links to places outside of your site) to your menu, type the url you want the link to direct to, and the title you want to show on your menu bar and click “Add to Menu”. You can repeat this as often as you wish. Each time you do this, a menu item will show up in the “Custom Menu” box on the right side of the screen. The menu items are drag and drop, so you can change the order later if you so desire.
The next box “Pages” has a list of all the pages you have available for your menu (you should set these up beforehand, however you can always modify the menu later if you do add or remove any pages.) Simply check off the pages you want added and click “Add to Menu”. This will add all the pages to the “Custom Menu” box on the right of the screen.
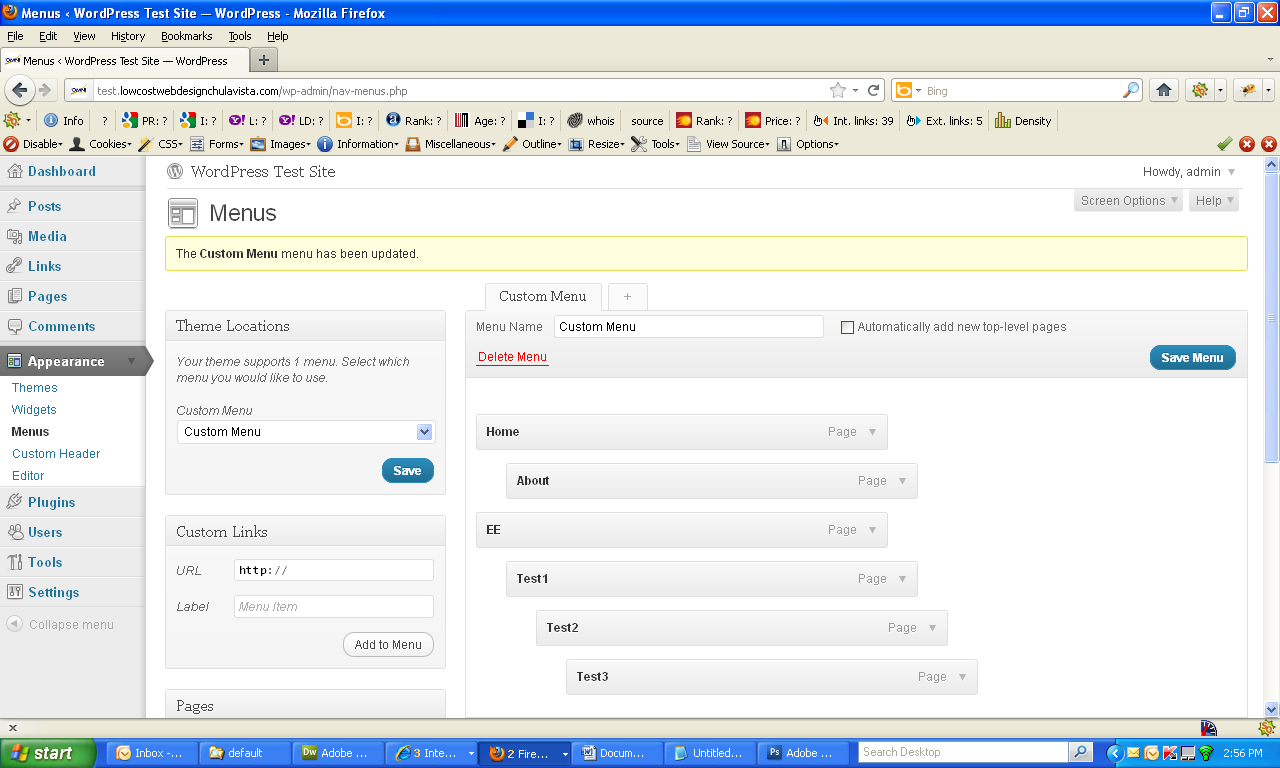
At this point you should have a lot of menu items in the “Custom Menu” box. Below is a screenshot of mine. Yours of course will have different menu items:
![After Adding Menu Items]()
Each of the menu items is drag and drop. You can easily change the order of the menu items by clicking on the menu item you want to move and dragging it up or down in the menu order.
You can also create submenu items by dragging the menu item to the right or to the left. A menu item is a submenu item of the menu item it is below and to the right of:
![Adding Submenu Items]()
In this case I have created two submenus, one sub-submenu, and one sub-sub-submenu. “About” is a submenu of “Home”, “Test3” is a submenu of “Test2” which in turn is a submenu of “Test1” which itself is a submenu of “EE”.
In order to remove a menu item, you need to click on the down arrow on the right of the menu item and click “Remove”. You see in the box that opens that you are also able to change the navigation label and the title attribute (the little info box that shows up when you hover over a menu item).
The last box on the right of the screen is the “Categories” box. This box is used if you have set up WordPress as a blog. There you can add your post categories to your menu in the same manner as you did the “Pages” described above.
Once you have made all the changes you want to your menu, click “Save Menu” in order to have the changes you made show up on your site.
Of course, odds are that initially, you will see nothing but a bunch of links on your page. Not to worry. With a little CSS (and maybe in some really unique situations, javascript), these ugly little links will look and operate as great and as professionally as you have seen operate on any site. The only problem is, you do need to know what you are doing.
The Custom Menu feature automatically adds id's and classes to every menu item. Simply do a view source on your page (or if you are using Firefox's Firebug plugin, right-click the menu item and select "Inspect Element" from the popup menu) to see the assigned id's and classes, and apply your CSS to those.
Unfortunately, the incredible variety of possibilities you have in setting up your menu display goes way beyond the scope of this article. Each menu is unique, and needs its own CSS.
Fortunately, one of the great experts here at EE, jason1178, suggested that I write an article on how to take the vertical unordered list and change it into horizontal, so at least we can cover just one of the possibilities. You can see it in the CSS zone. It is entitled, "Adapting an Unordered List for a Horizontal Menu With Dropdowns and Popups". The CSS tips and tricks described in the article can help you to design a variety of horizontal type menus.
If you still are having problems, you have a great forum here at EE and a great pool of experts to help you. Guaranteed answers in about half an hour!
I look forward to seeing your questions and checking out your creativity with these WordPress Custom Menus.
Happy menu making!
The Old Way
Adding menus is not hard for anyone adept at HTML and CSS. The basic structure for all menus is the same:
<ul>
                      <li><a href=”http://somesite.com/menu-item-1”>Menu Item 1</a></li>
                      <li><a href=”http://somesite.com/menu-item-2”>Menu Item 2</a></li>
                      <li><a href=”http://somesite.com/menu-item-3”>Menu Item 3</a></li>
</ul>To add a submenu item to any menu item, simply include another unordered list tag <ul></ul> within the list-item <li></li> menu item you wish to add the submenu to:
<ul>
                      <li><a href=”http://somesite.com/menu-item-1”>Menu Item 1</a>
                      <ul>
                      <li><a href=”http://somesite.com/submenu-item-1”>Submenu Item 1</a></li>
                      <li><a href=”http://somesite.com/submenu-item-2”>Submenu Item 2</a></li>
                      </ul>
                      </li>
                      <li><a href=”http://somesite.com/menu-item-2”>Menu Item 2</a></li>
                      <li><a href=”http://somesite.com/menu-item-3”>Menu Item 3</a></li>
</ul>You can carry this as far and as deep as you like by just repeating the above step:
<ul>
                      <li><a href=”http://somesite.com/menu-item-1”>Menu Item 1</a>
                      <ul>
                      <li><a href=”http://somesite.com/submenu-item-1”>Submenu Item 1</a>
                      <ul>
                      <li><a href=”http://somesite.com/sub-submenu-item-1”>Sub -submenu Item 1</a></li>
                      <li><a href=”http://somesite.com/sub-submenu-item-2”>Sub-submenu Item 2</a></li>
                      </ul>
                      </li>
                      <li><a href=”http://somesite.com/submenu-item-2”>Submenu Item 2</a></li>
                      </ul>
                      </li>
                      <li><a href=”http://somesite.com/menu-item-2”>Menu Item 2</a></li>
                      <li><a href=”http://somesite.com/menu-item-3”>Menu Item 3</a></li>
</ul>From there, it is just a simple matter of adding classes and id’s as necessary to the tags and applying some well placed CSS.
The New Way
The new way still requires some good knowledge of CSS, but will do all the work of setting up the unordered list for you.
First off, check in your WordPress backend under Appearance->Menu to see if your theme supports custom menus. If you see the notice:
“The current theme does not natively support menus, but you can use the “Custom Menu” widget to add any menus you create here to the theme’s sidebar.”
Then you will need to do the following:
Assuming that you have upgraded to WordPress 3 (or above), you will need to add a couple lines of code to your theme files.
First add the following lines to your functions.php file:
add_action('init', 'register_custom_menu');

                      function register_custom_menu() {
                      	register_nav_menu('custom_menu', __('Custom Menu'));
}register_nav_menu has two parameters here, the first is the slug we’ll use in our code and the second is the name our menu will have in the WordPress backend under Appearance->Menus, in the dropdown under the "Theme Locations" box. You can add as many register_nav_menu's as you want, simply changing the slug and menu name for each menu.
Second, place the following code in an appropriate place (normally your header.php file):
<?php wp_nav_menu(array('menu' => 'custom_menu')); ?>If you are installing several different menus (say, perhaps for several different headers) you would install the same code in each file, simply changing the slug to the corresponding slug of the menu you wish to use.
That’s all there is to it! You are now ready to set up your custom menu.
The Custom Menu Screen
Below is a screenshot of what the WordPress Custom Menu Screen looks like:

To start, type in the name of your menu and click “Create Menu”.
Your screen should then look something like this:
In the column on the left side of the screen you will see several boxes labeled “Theme Locations”, “Custom Links”, “Pages”, and “Categories”. Let’s start at the first one and work our way down.
First, starting at the “Theme Locations” box, if you are using a theme that already has the custom menu coding in it, you will need to select the appropriate menu you wish to set up from the drop down menu. If you don’t know where these menus would appear, you will need to either check the theme’s documentation or do a manual search for the wp_nav_menu function occurrences.
If you went ahead and installed code per the instructions above, your work is easy. Simply select the name of the menu you wish to customize from the dropdown and click “Save”.
Next, if you would like to add any custom links (generally, links to places outside of your site) to your menu, type the url you want the link to direct to, and the title you want to show on your menu bar and click “Add to Menu”. You can repeat this as often as you wish. Each time you do this, a menu item will show up in the “Custom Menu” box on the right side of the screen. The menu items are drag and drop, so you can change the order later if you so desire.
The next box “Pages” has a list of all the pages you have available for your menu (you should set these up beforehand, however you can always modify the menu later if you do add or remove any pages.) Simply check off the pages you want added and click “Add to Menu”. This will add all the pages to the “Custom Menu” box on the right of the screen.
At this point you should have a lot of menu items in the “Custom Menu” box. Below is a screenshot of mine. Yours of course will have different menu items:

Each of the menu items is drag and drop. You can easily change the order of the menu items by clicking on the menu item you want to move and dragging it up or down in the menu order.
You can also create submenu items by dragging the menu item to the right or to the left. A menu item is a submenu item of the menu item it is below and to the right of:
In this case I have created two submenus, one sub-submenu, and one sub-sub-submenu. “About” is a submenu of “Home”, “Test3” is a submenu of “Test2” which in turn is a submenu of “Test1” which itself is a submenu of “EE”.
In order to remove a menu item, you need to click on the down arrow on the right of the menu item and click “Remove”. You see in the box that opens that you are also able to change the navigation label and the title attribute (the little info box that shows up when you hover over a menu item).
The last box on the right of the screen is the “Categories” box. This box is used if you have set up WordPress as a blog. There you can add your post categories to your menu in the same manner as you did the “Pages” described above.
Once you have made all the changes you want to your menu, click “Save Menu” in order to have the changes you made show up on your site.
Of course, odds are that initially, you will see nothing but a bunch of links on your page. Not to worry. With a little CSS (and maybe in some really unique situations, javascript), these ugly little links will look and operate as great and as professionally as you have seen operate on any site. The only problem is, you do need to know what you are doing.
The Custom Menu feature automatically adds id's and classes to every menu item. Simply do a view source on your page (or if you are using Firefox's Firebug plugin, right-click the menu item and select "Inspect Element" from the popup menu) to see the assigned id's and classes, and apply your CSS to those.
Unfortunately, the incredible variety of possibilities you have in setting up your menu display goes way beyond the scope of this article. Each menu is unique, and needs its own CSS.
Fortunately, one of the great experts here at EE, jason1178, suggested that I write an article on how to take the vertical unordered list and change it into horizontal, so at least we can cover just one of the possibilities. You can see it in the CSS zone. It is entitled, "Adapting an Unordered List for a Horizontal Menu With Dropdowns and Popups". The CSS tips and tricks described in the article can help you to design a variety of horizontal type menus.
If you still are having problems, you have a great forum here at EE and a great pool of experts to help you. Guaranteed answers in about half an hour!
I look forward to seeing your questions and checking out your creativity with these WordPress Custom Menus.
Happy menu making!
Have a question about something in this article? You can receive help directly from the article author. Sign up for a free trial to get started.
Comments (0)