PTRUSCOTT
asked on
How can I use Photoshop to select and crop away the white pixels surronding a statistical table
Dear Experts,
I have the following problem that is probably simple for a Photoshop expert.
I have a set of JPG files that consist of a statistical table with some random amount of Whitespace around the edges. I am using Photoshop CS2.
Previously when I wanted to cut away the white space for a publication I did this:
1. I used the Magic Wand tool and clicked the whitespace at the edge. This gave me a marquee all the way around the part of the file I wanted to delete.
2. I then did SELECT --> INVERSE
3. I now had a marquee just around the part that I wanted to keep
4. I did a SELECT --> COPY
5. I created a New File which was automatically created with the pixel dimensions of my selected area.
6. I did a Paste and the clipboard inserted just the image I wanted to keep into the new file ready for the book layout.
Now for some reason Photoshop rescales the selection and so it creates a smaller version of the original file but with the unwanted white border. How do I solve this? The TRIM command does not seem to work.
Best Wishes,
Phil
Dave Baldwin
Show us a sample image. Details can be obscured but it must show the effect you're trying to deal with.
After you Copy the selection, do you see an option under the Edit menu to "Paste As New Image"?
I don't have Photoshop and tend to use an older (pre-Corel) version of Paint Shop Pro. In that, after Inverting the selection, there is the menu option of:
"Selection > Modify > Contract" which allows you to move the selection inwards to cut out any leftovers of the area that was outside the selection before copying it.
The "Paste As New Image" in Paint Shop Pro makes it very easy to paste the copied selection so that the new image is right up to the sides and the new background is transparent. Saved as a PNG file, the background will remain transparent, but saved as a JPG it will be made white.
In either case, you can then use the Image menu > "Canvas Resize", of which there should be an equivalent in Photoshop, to add additional "canvas" around the image and this increase the actual image size without changing the size of the chart you pasted. In other words, you are padding it back out. If you background is still transparent, then the additional background added will also be transparent. If it is white, ie. you already saved the new image as JPG and then re-opened it later to increase the "canvas size", then the additional background added will be of whatever background colour is currently selected.
I appreciate that I am not providing the "Photoshop" menu options here, but perhaps they will be similar enough for you to find them and test.
As Dave Baldwin has asked, perhaps you could upload the orignal image for us to look at.
I think what the questioner is doing is 'erasing' the part of the image he doesn't want and then saving it without cropping it. When you do that with a JPEG (which doesn't support transparency), it just fills in a background color in the areas that he thought he erased which would be normal. The 'erased' section must be cropped out to prevent that from happening.
My understanding was that Phil selected the white background and inverted that selection so only the chart was selected. He then copied the selection, ie. only the chart. He then created a new image the same pixel dimensions as the selected chart and pasted the chart into it. (It's not clear whether the new image had a transparent background or white fill). He expected the chart to fit snugly right up to the edges of the new image, but instead the CHART was DOWNSIZED INSIDE the new image leaving the same kind of white background as he had in the original image.
My suggestion was to miss out the step of creating a new image to paste the chart into, and to look for the Photoshop option of pasting the chart AS A NEW IMAGE. No scaling of the chart SHOULD occur with that method.
Depending on the "tolerance" of the Magic Wand selection tool, occasionally a little of the background is left surrounding the selection in places, in this case the chart, and I in this event I suggested moving the selection marquee inwards by a pixel to exclude this.
Adding more "canvas" (background) was an optional step if he needed to get the actual image size back up to the size of the full original image while keeping the background transparent.
I cannot replicate the behaviour in Paint Shop Pro, because NEITHER the "Edit > Paste as New Image" option OR pasting into a new presized image downsized my copied selection.
Details and screenshots are in the attached PDF file.
Copy-Paste-Selection-As-New-Imag.pdf
The screenshot images in it are NOT scaled. They are just representations of the steps involved.
So, there seems to be a quirk with Photoshop when it comes to pasting a selection into a new image, OR there has been some miscalculation of the actual size of the graph inside the original image with the white background.
If the "Edit > Paste As NEW IMAGE" option can be translated into "Photoshop" options, then it is worth a try, but it would probably just be easier just "erasing" the white background while it is selected in Photoshop, then cropping the overall image down so that it contains very little of the surrounding new background.
Of course, to maintain the transparent background, the final image should be saved as a PNG, otherwise it will be rendered white again and the exercise will have been pointless where a simple crop would have done the same.
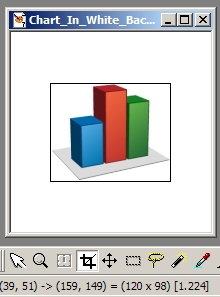
My original JPG test image (200 x 200 pixels, white background, graph in centre approx 120 x 98 pixels):
 My resultant PNG (120 x 98 pixels, transparent background, graph 120 x 98 pixels):
120x98-Chart-Trans-Bckgr-120x98.png
My suggestion was to miss out the step of creating a new image to paste the chart into, and to look for the Photoshop option of pasting the chart AS A NEW IMAGE. No scaling of the chart SHOULD occur with that method.
Depending on the "tolerance" of the Magic Wand selection tool, occasionally a little of the background is left surrounding the selection in places, in this case the chart, and I in this event I suggested moving the selection marquee inwards by a pixel to exclude this.
Adding more "canvas" (background) was an optional step if he needed to get the actual image size back up to the size of the full original image while keeping the background transparent.
I cannot replicate the behaviour in Paint Shop Pro, because NEITHER the "Edit > Paste as New Image" option OR pasting into a new presized image downsized my copied selection.
Details and screenshots are in the attached PDF file.
Copy-Paste-Selection-As-New-Imag.pdf
The screenshot images in it are NOT scaled. They are just representations of the steps involved.
So, there seems to be a quirk with Photoshop when it comes to pasting a selection into a new image, OR there has been some miscalculation of the actual size of the graph inside the original image with the white background.
If the "Edit > Paste As NEW IMAGE" option can be translated into "Photoshop" options, then it is worth a try, but it would probably just be easier just "erasing" the white background while it is selected in Photoshop, then cropping the overall image down so that it contains very little of the surrounding new background.
Of course, to maintain the transparent background, the final image should be saved as a PNG, otherwise it will be rendered white again and the exercise will have been pointless where a simple crop would have done the same.
My original JPG test image (200 x 200 pixels, white background, graph in centre approx 120 x 98 pixels):
My resultant PNG (120 x 98 pixels, transparent background, graph 120 x 98 pixels):120x98-Chart-Trans-Bckgr-120x98.png
Whoops, wrong first image. I attached the screenshot instead.

"Of course, to maintain the transparent background, the final image should be saved as a PNG, otherwise it will be rendered white again and the exercise will have been pointless where a simple crop would have done the same."
Yes. The only question is if he ended up with a rectangular image. Your example shows what to do when the initial result is not rectangular.
Yes. The only question is if he ended up with a rectangular image. Your example shows what to do when the initial result is not rectangular.
ASKER
Dear Experts,
Thanks for all your help for some reason I do NOT see the option "Save as a new image" after I select the Inner area (the chart only) and click "edit --> copy".
I used to see this option and this was definitely the cleanest and quickest way to do the copying.
I am attaching two of the files that I am using as examples.
Whether I use a JPG or a PSD file the "Save as new image" option has mysteriously disappeared.
-Phil Table4p.psd
Thanks for all your help for some reason I do NOT see the option "Save as a new image" after I select the Inner area (the chart only) and click "edit --> copy".
I used to see this option and this was definitely the cleanest and quickest way to do the copying.
I am attaching two of the files that I am using as examples.
Whether I use a JPG or a PSD file the "Save as new image" option has mysteriously disappeared.
-Phil
Table4p.psd
I see "Save As" but I've never seen "Save As New Image". I just Ctrl-C copy the selection and go to "New" on the file menu and it will bring up a "new" dialog with the dimensions of the selection you just copied. With the image you have posted, I would just crop it to get rid of the extra white space. When you use the Magic Wand, there are too many off white pixels on the left side. You have to crop it one way or another anyway, either with the Crop Tool or by Selection.
ASKER
Dear DaveBaldwin,
I'm sorry I did not find either of these approaches successful. I used the CTRL-C and new image approach. This created a new image with an inner rectangle of (I assume) the correct size with a transparent background. If I do CTRL-V to paste the pixels from the old Image I get and unwanted transparent border (SEE ATTACHED FILE TABLE4_INSERTED).
If I crop it I cannot seem to get rid of the entire unwanted border. Some of the unwanted pixels go but not all. I have tried playing with the tolerance value to no avail. (SEE ATTACHED FILE TABLE4_CROPPED). Please not I do not see a "CROP" option directly, I only see an active option to "TRIM" the file.
Phil Table4-INSERTED.psd Table4-CROPPED.psd
ASKER CERTIFIED SOLUTION
membership
This solution is only available to members.
To access this solution, you must be a member of Experts Exchange.
Aaaah, I see it's a text-based Table rather than a "chart". Sorry, I was visualising a graph, pie chart, or similar graphic. You are in expert hands with Dave now ;-)
ASKER
Dear DaveBaldwin,
When I use the crop tool it seems that I am supposed to use it freehand to define the rectangle that I want to keep. My own preference is to avoid any freehand actions. Am I correct or is there some way to use it without making any freehand selections?
Best Wishes,
Phil
When I use the crop tool it seems that I am supposed to use it freehand to define the rectangle that I want to keep. My own preference is to avoid any freehand actions. Am I correct or is there some way to use it without making any freehand selections?
Best Wishes,
Phil
You are correct. What you were doing does not crop the picture though. Erasing the pixels does not change the Image size in Photoshop. And JPEG does not support transparency so when you save it as a JPEG, it fills the background color in place of the transparent parts.
Part of the problem is that some of the pixels around the border are a slightly different 'white' than the rest which prevents the magic wand from selecting them. If you use the Curves on the Image->Adjust menu, you can increase the contrast and clean up the image enough to use the magic wand to select the border, Select->Inverse, and then select Crop from the Image menu and get decent results.
Part of the problem is that some of the pixels around the border are a slightly different 'white' than the rest which prevents the magic wand from selecting them. If you use the Curves on the Image->Adjust menu, you can increase the contrast and clean up the image enough to use the magic wand to select the border, Select->Inverse, and then select Crop from the Image menu and get decent results.
ASKER
Dear DaveBaldwin,
So what you are saying is that there is no way to get rid of the unwanted whitespace without doing a freehand selection? It feels as if Photoshop should have a way to automatically select and delete it.
-Phil
So what you are saying is that there is no way to get rid of the unwanted whitespace without doing a freehand selection? It feels as if Photoshop should have a way to automatically select and delete it.
-Phil
You're asking Photoshop to be smarter than you are. Do you understand why the magic wand is not selecting exactly what you want?
ASKER
Yes. I understand why the magic wand does not do a perfect selection but I used the method I described for a publication and it was good enough for the publisher's purposes. I'm not sure why Photoshop is not behaving in the same way. I'll accept your solution but if you have any other ideas I'd be grateful.
I've never seen Photoshop act any differently. The quality and consistency of the image make a big difference in what the magic wand selects. Each image will be a little different and you have to adapt your methods a little each time.