put 2 scans over each other
i have made "in illo tempore" several electronic devices for which i made prints
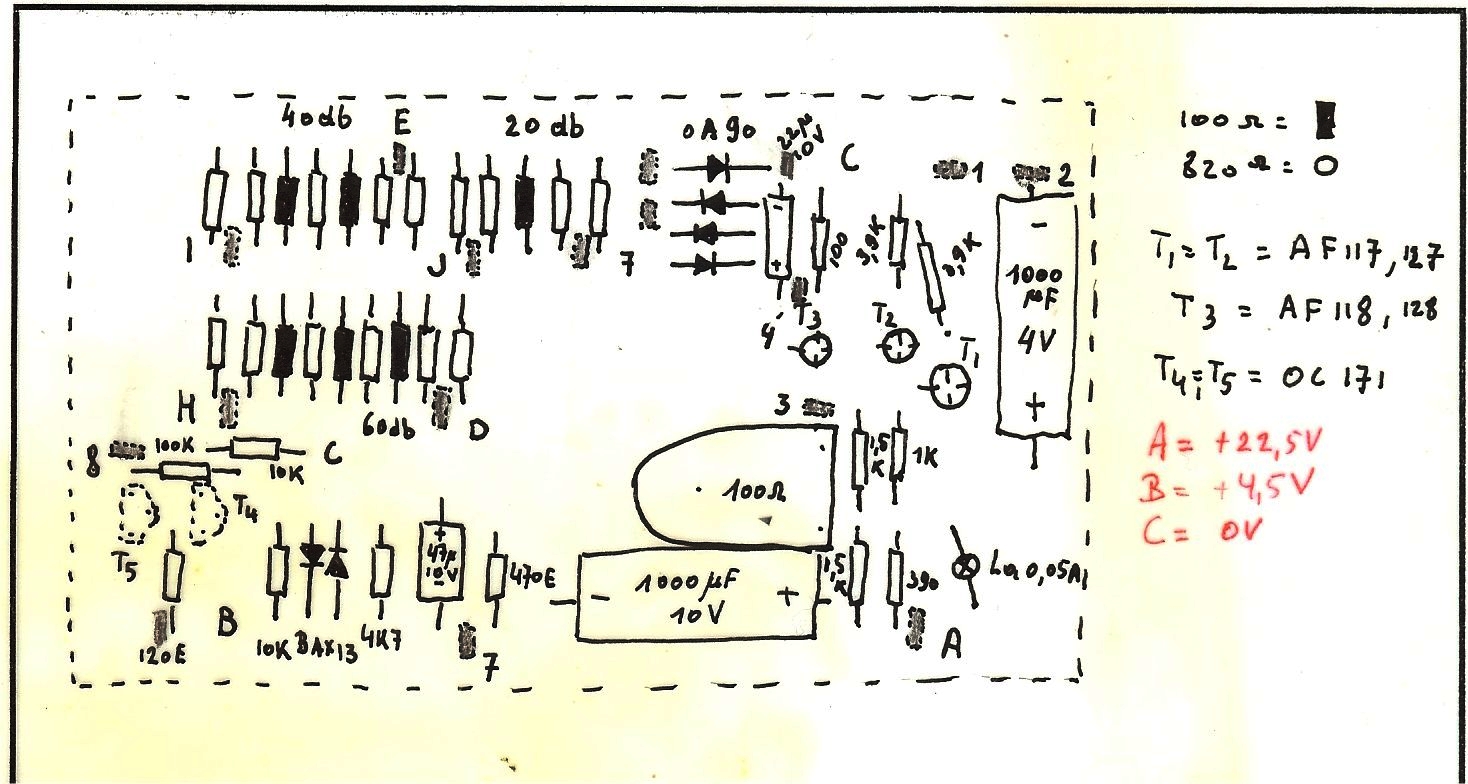
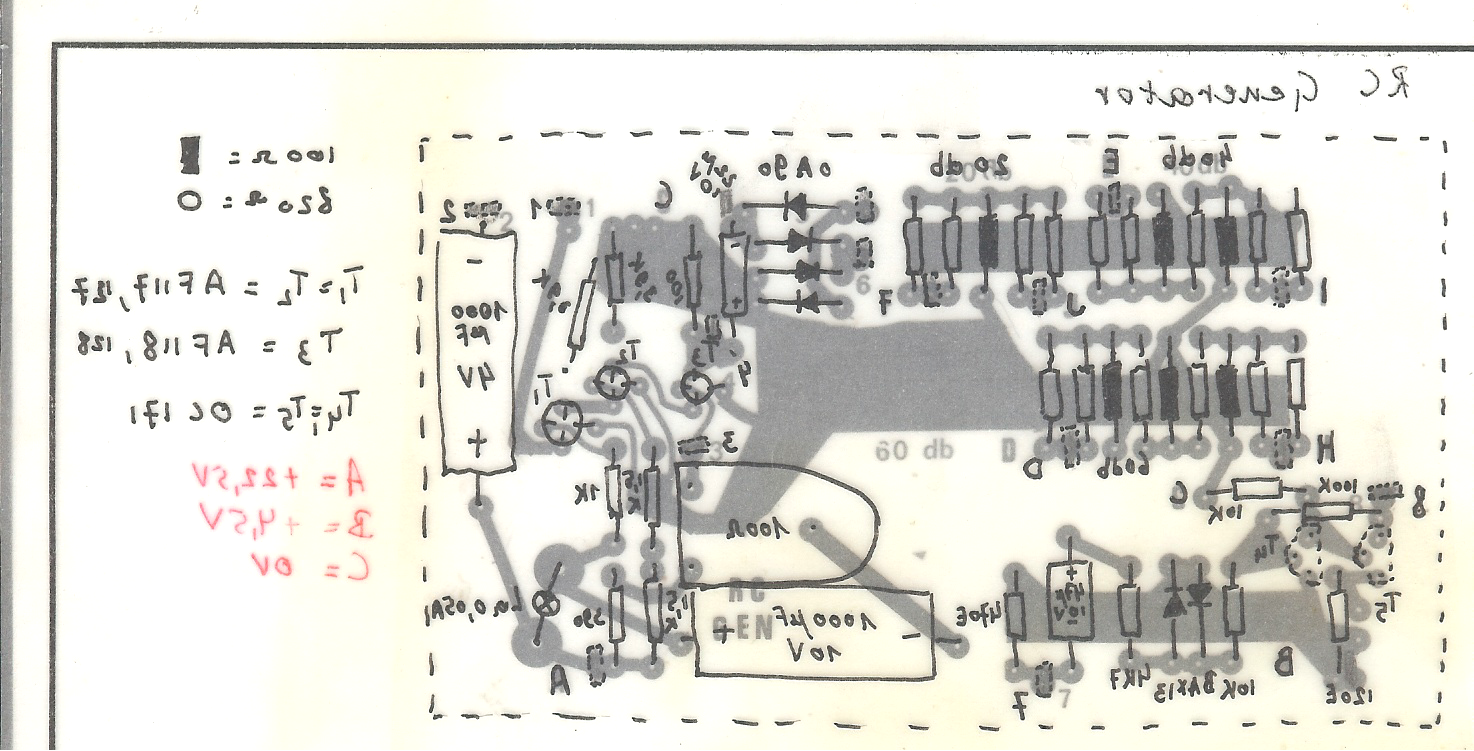
so i made a copper layout for making the print, and a parts layout for that print, and scanned these on my scanner
now i want these on my PC, and for easy working, and finding parts, i'm looking for any software so i can put each over the other on my PC, just like the original documents, made on transparant paper, aka tracing paper
preferably free, but paid versions are welcome too
ASKER
>> What photo editor do you have Nobus? << Paint
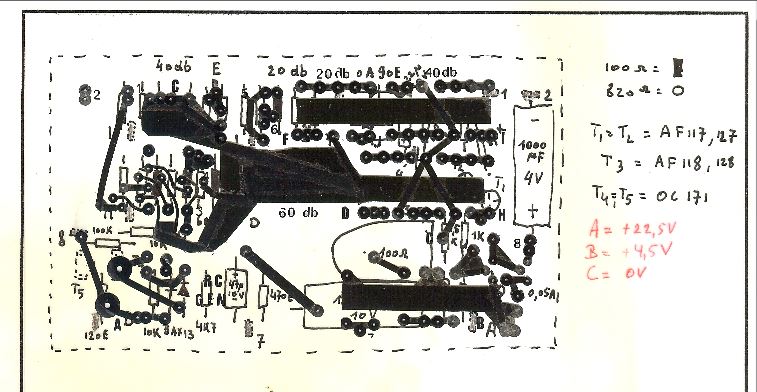
here the 2 pics as example - both in 1 picture; but you can separate them - right?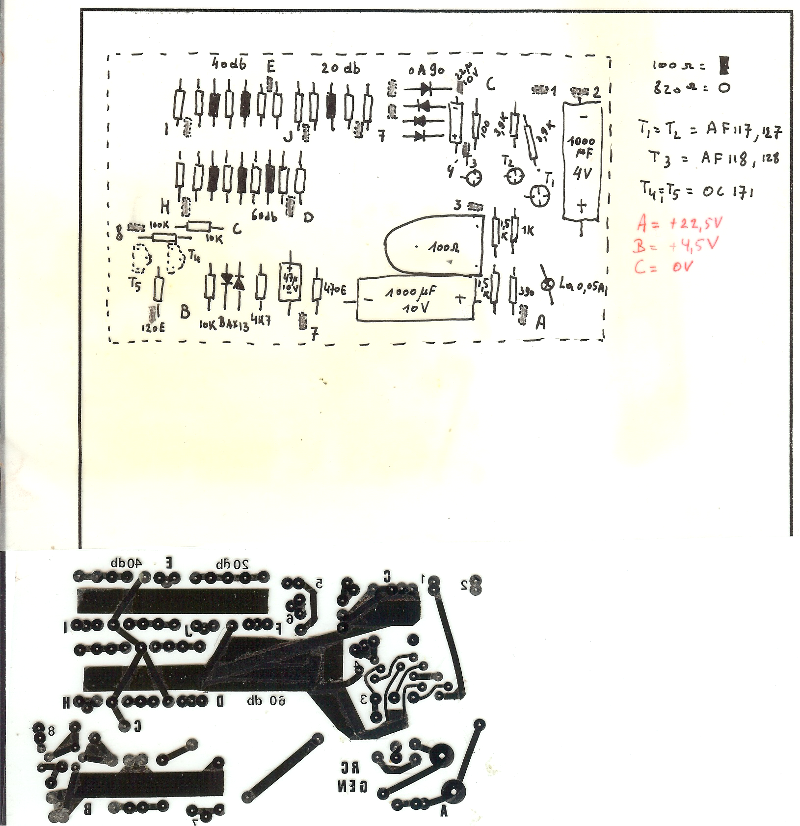 you need to flip the lower one in order to get it correct for putting it over the other one
the youtube is NOT what i need, nor is the gimp youtube the correct solution
here the 2 pics as example - both in 1 picture; but you can separate them - right?
 you need to flip the lower one in order to get it correct for putting it over the other one
the youtube is NOT what i need, nor is the gimp youtube the correct solution
Nobus, in order to put the diagram circute part over the base I would have to lift the actual circute off the white background and make it transparent.
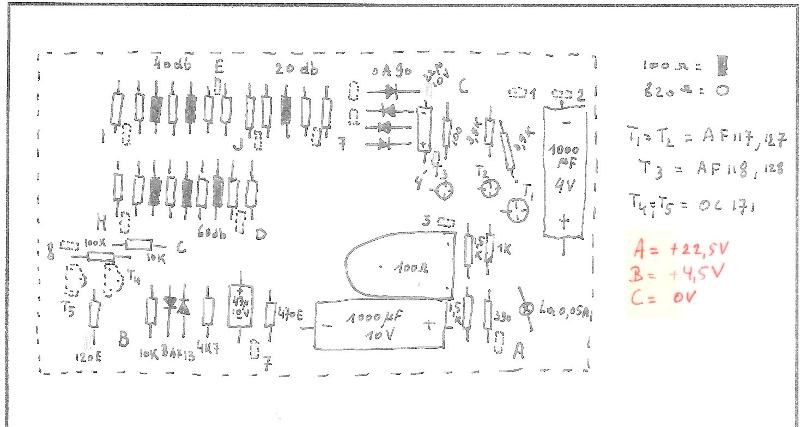
here is the one at the bottom >mirrored transparent png, do you want png or jpeg?
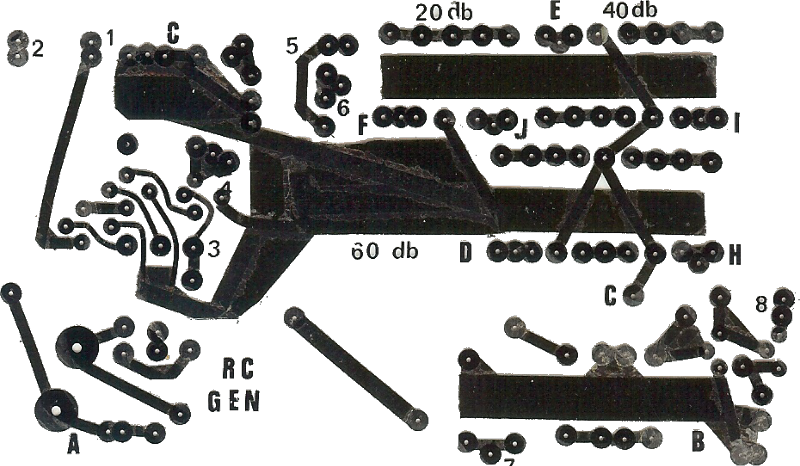 the other jpeg

here is the one at the bottom >mirrored transparent png, do you want png or jpeg?
 the other jpeg
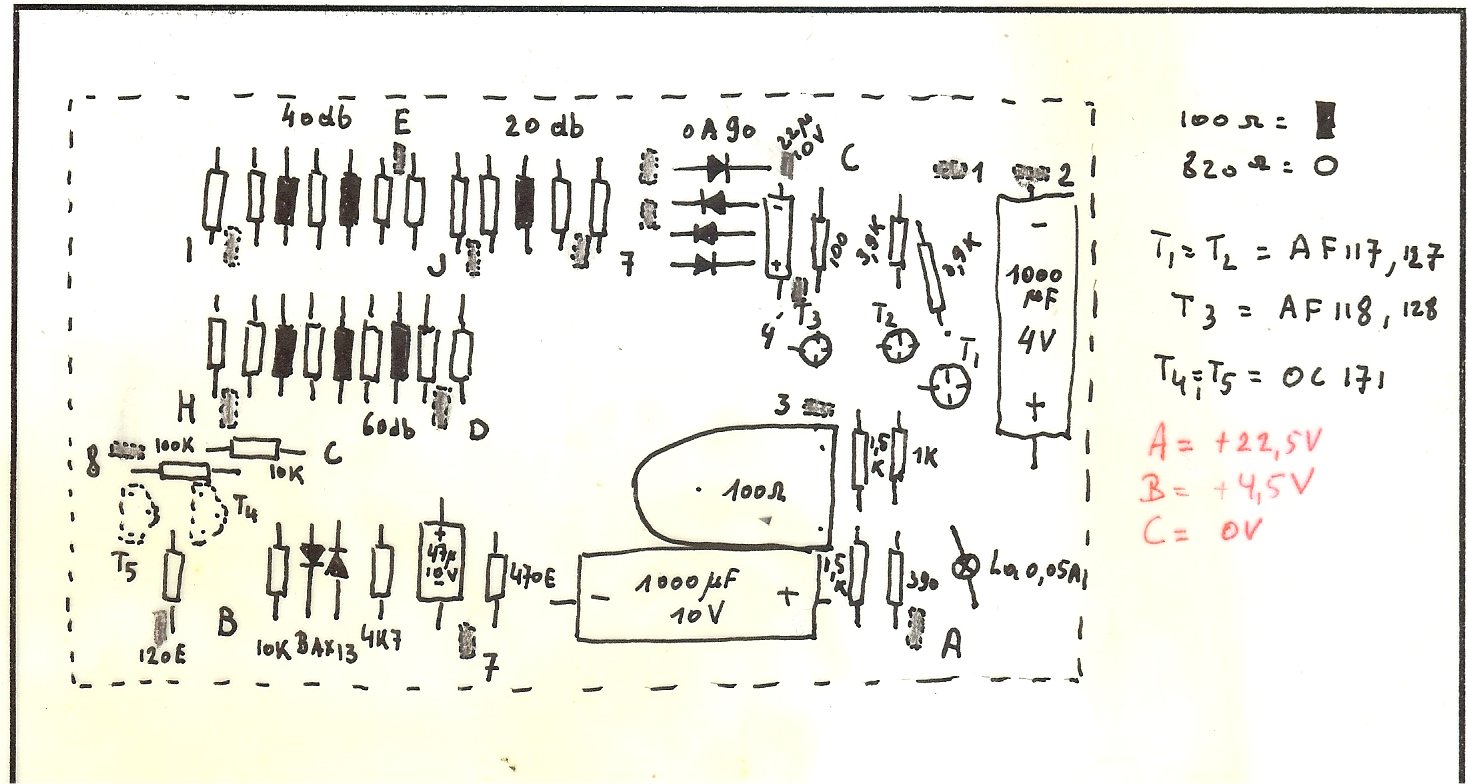
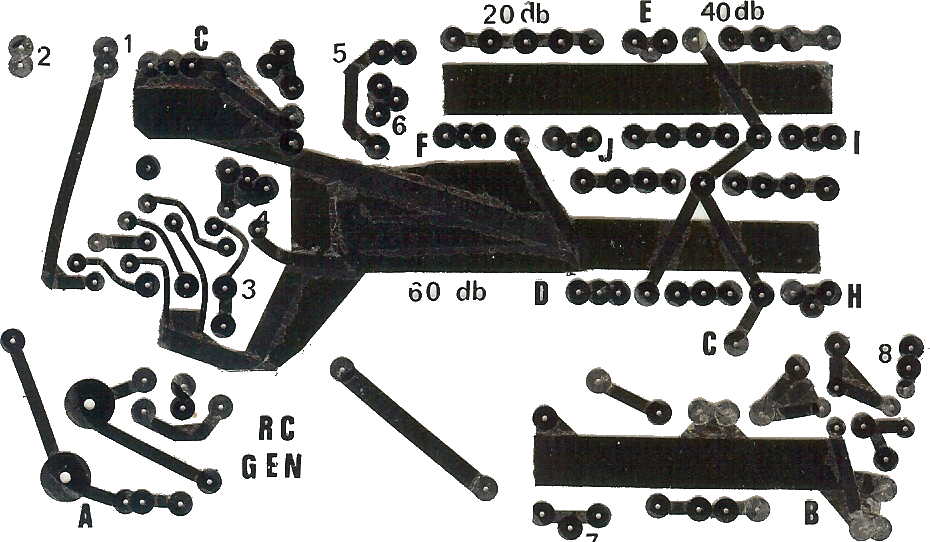
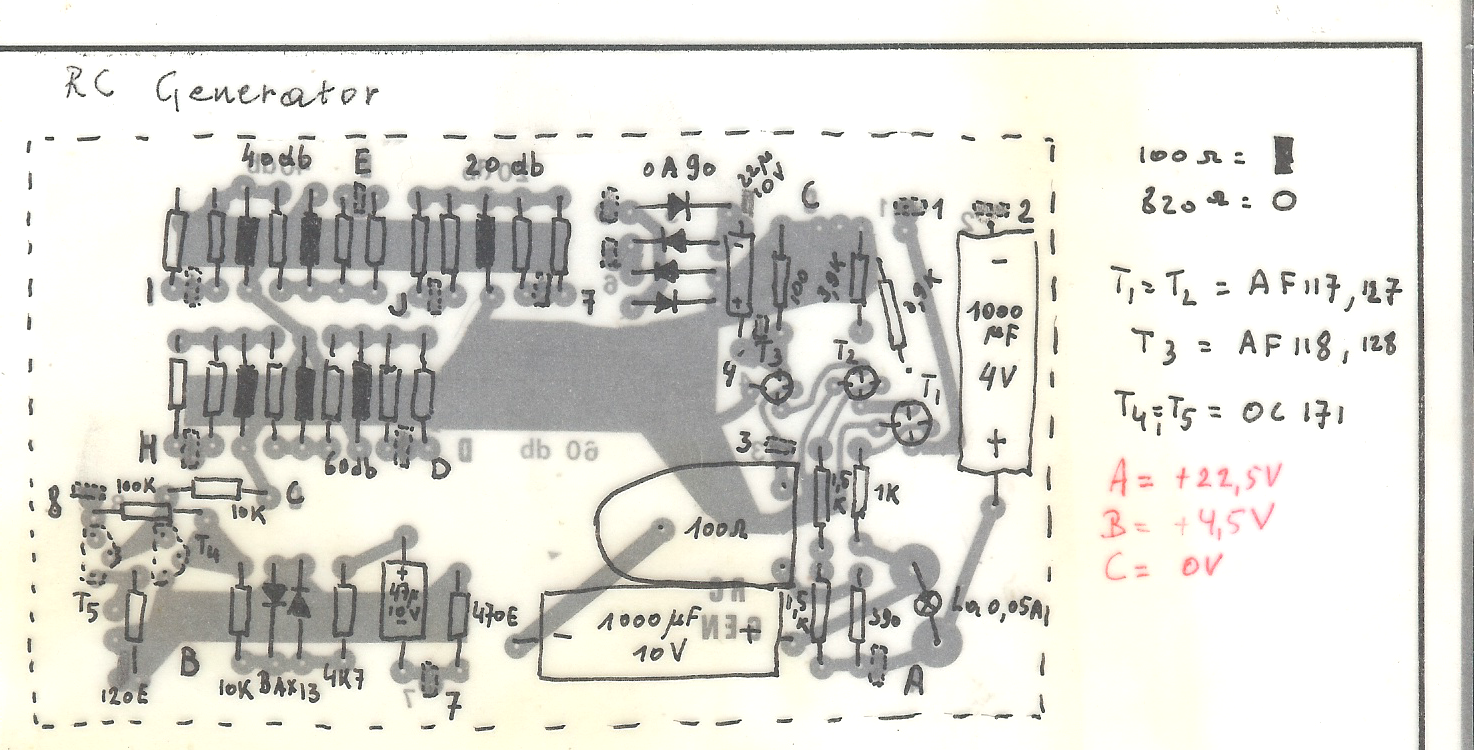
Over layered it looks like this, I can move it around to align but didn't know where it actually sits against the copper board, as you see it is not like tracing paper.
 Were you able to print it onto a transparent sheet like a clear plastic that'd work. You could then print out the base onto normal paper and put the clear sheet over the top
How to Print on Transparent Plastic
Read more : http://www.ehow.com/how_6682824_print-transparent-plastic.html
Were you able to print it onto a transparent sheet like a clear plastic that'd work. You could then print out the base onto normal paper and put the clear sheet over the topHow to Print on Transparent Plastic
Read more : http://www.ehow.com/how_6682824_print-transparent-plastic.html
ASKER
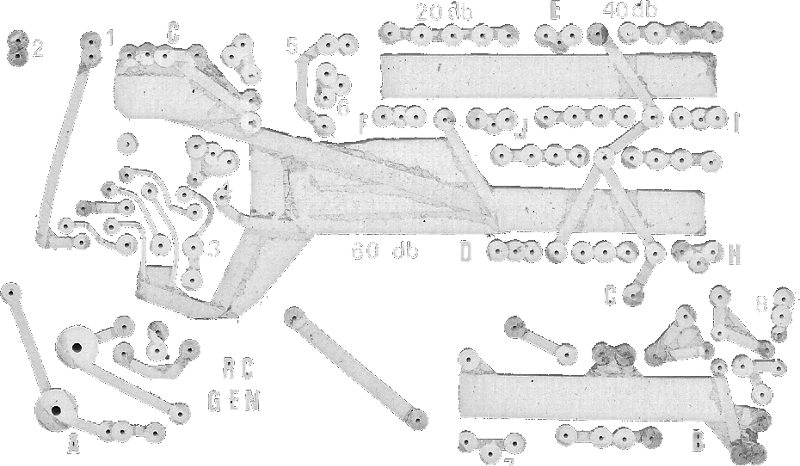
merete, the overlayered one is what i need, only the copper should be in very light gray, so i can see the parts clearly
i assume we're nearly there?
i assume we're nearly there?
Nobus will you accept the transparent parts I have already posted just save it it is png.
https://www.experts-exchange.com/questions/28497417/put-2-scans-over-each-other.html?anchorAnswerId=40262128#a40262128
Base greyed, is this light enough? Anymore the letters disappear, the red disappeared so added it back in
https://www.experts-exchange.com/questions/28497417/put-2-scans-over-each-other.html?anchorAnswerId=40262128#a40262128
Base greyed, is this light enough? Anymore the letters disappear, the red disappeared so added it back in

ASKER
merete, the above stays in black, the Copper part in light grey in the over layered you posted
The names are a bit confusing Nobus

ASKER
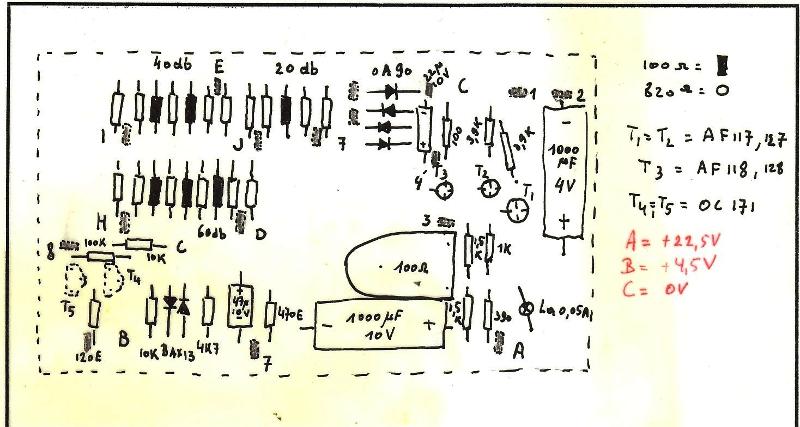
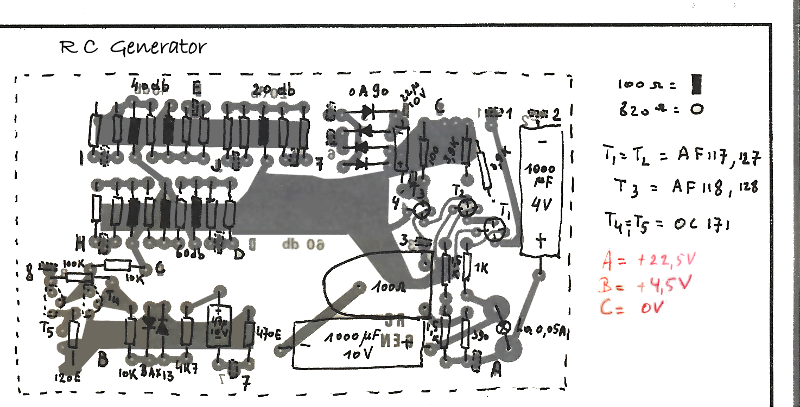
and superimposed? should look like
but better quality
but better quality

ASKER
Merete, how did you get the "better quality" view?
that's what i want !
that's what i want !
Very Good Nobus glad you like it.
I enjoy doing photo restoration and with some tricks I taught myself and ingenuity I can do wonders with simple tools.
I use a combination of tools from my two versions of Paintshop pro Ultimate and Nero image editor.
in Nero image editor adjusted the exposure and and then sharpen it save it
Load it back into my paintshop pro and using the selection tool manually put a line or circle or vertical line horizontal dotted line around specific areas I clone two colour for swatches and bucket fill each segment where the dotted line is using left for white right for that greenish colour
Using the two images side by side I copy the red text from old to the other and put it over the top, then while dots on I go to adjust colour and brightness of each letter. Preview them and when it looks good ok it.
I had a hand writing font so just cut out your R C Generator and using Text tool replaced yours since the Font matched but was nicer.
I've been working onit a bit more getting rid of the jaggered edges. A bit time consuming but fun to do.
load the two I have done into the browser then you flick between them and see the differences before after before after lol
You will see the slight adjustments I have done.

ASKER
what version you have? and can the copper still be made a shade lighter ?
ASKER CERTIFIED SOLUTION
membership
This solution is only available to members.
To access this solution, you must be a member of Experts Exchange.
ASKER
thanks for the info, Merete -now it's time for me to try it
Happy to help Nobus thank you.
As Nero Photosnap is no lonager available in newer versions of Nero try this free
PhotoScape, I'm testing it out.
http://www.photoscape.org/ps/main/screenshot.php
As Nero Photosnap is no lonager available in newer versions of Nero try this free
PhotoScape, I'm testing it out.
http://www.photoscape.org/ps/main/screenshot.php
ASKER
tx Merete; a free one is just what i need for this one time job (maybe later one or 2 more)
could you drop your two images over here so I can just do it then show how I did it and if they are suitable to overlay.
If the top image is has too many colours it will not transfer ontop it will just block out the bottom.
If the top layer has pieces you can use the magic wand to put a dotted line around those parts and copy that out paste as a transparent layer on top of the copper base.
take your copper image and add it to your image editor, then add your parts layout, click on the parts layout image and then edit copy go over to the copper image click on the top edge and then rightclick it paste as transparent position it and then flatten layers
I use Paintshop pro but photoshop should be similar.
Photoshop How-To: Image Into Another Image
https://www.youtube.com/watch?v=SR0AlfAnwB4 ( video)
http://blog.rockymountaintraining.com/adobe-photoshop-combining-two-photos-for-a-perfect-image/
Microsoft paint
How to merge 2 pictures in MS Paint (Windows 7)
https://www.youtube.com/watch?v=nMy_GmPWFns
How to combine two pictures together using GIMP
https://www.youtube.com/watch?v=H-7zPWLW4BA