WeThotUWasAToad
asked on
Fill a non-rectangular object in PowerPoint with an underlying image
Hello,
Is there a way, in PowerPoint (2010), to fill a non-rectangular object with some specific portion of an underlying image and then have the object retain that same fill even when the object is moved?
I have been able to accomplish this for a rectangular area using the Windows Snipping Tool but I'm wondering if there's a way to bypass the Snipping Tool and do the same thing directly in PowerPoint for any object, regardless of the shape.
For example, the following screenshots show the steps used in the Snipping Tool method for capturing a rectangular area as well as a non-rectangular area for which using the Snipping Tool is not an option:
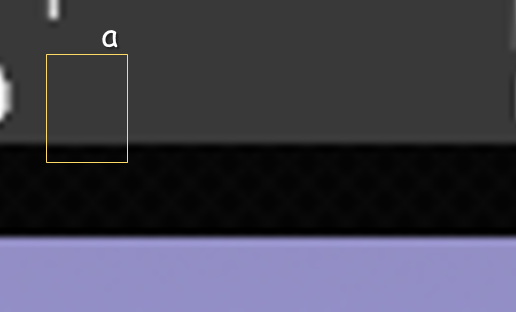
Fig. 1 shows a small but zoomed-in portion of a multicolored image which was inserted into a PowerPoint slide:
 In the next screenshot (Fig. 2), the rectangular area labeled a shows a portion of the image
captured by the Snipping Tool:
 This captured portion is then saved as an image file which can then be reinserted (object b in Fig. 3) back into the PowerPoint slide:
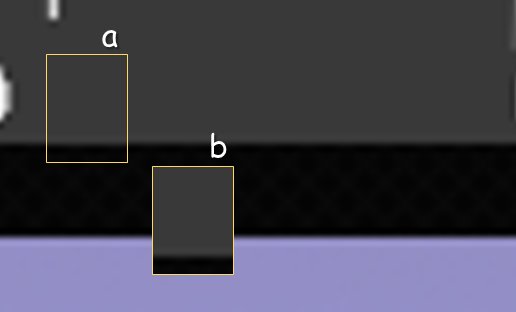 Note that although object b is positioned at a different location than where the original snip occurred (a), it continues to retain the fill from that location. This is the effect I'm after but it obviously cannot be obtained in the same way (using the Snipping Tool) when the object is non-rectangular.
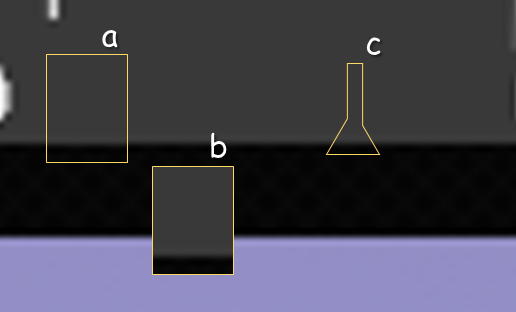
For example, the next screenshot (Fig. 4) shows a non-rectangular object (c) (which was created from a triangle and vertically-elongated rectangle using: Drawing Tools > Merge Shapes > Union):
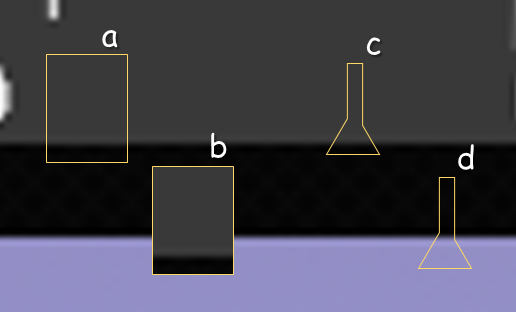
 Selecting "No fill" in the Format Shape panel renders the object transparent (ie the underlying image can be seen through the object). However, moving the object to a new location causes the fill to change as would be expected. And saving and reinserting the object (d in Fig. 5) is no different.
 Does PowerPoint have a tool which will fix (ie insert & retain) a specific background fill in an object?
If not, is there a workaround which will produce that same effect?
Thanks
Is there a way, in PowerPoint (2010), to fill a non-rectangular object with some specific portion of an underlying image and then have the object retain that same fill even when the object is moved?
I have been able to accomplish this for a rectangular area using the Windows Snipping Tool but I'm wondering if there's a way to bypass the Snipping Tool and do the same thing directly in PowerPoint for any object, regardless of the shape.
For example, the following screenshots show the steps used in the Snipping Tool method for capturing a rectangular area as well as a non-rectangular area for which using the Snipping Tool is not an option:
Fig. 1 shows a small but zoomed-in portion of a multicolored image which was inserted into a PowerPoint slide:
In the next screenshot (Fig. 2), the rectangular area labeled a shows a portion of the imagecaptured by the Snipping Tool:
This captured portion is then saved as an image file which can then be reinserted (object b in Fig. 3) back into the PowerPoint slide: Note that although object b is positioned at a different location than where the original snip occurred (a), it continues to retain the fill from that location. This is the effect I'm after but it obviously cannot be obtained in the same way (using the Snipping Tool) when the object is non-rectangular.For example, the next screenshot (Fig. 4) shows a non-rectangular object (c) (which was created from a triangle and vertically-elongated rectangle using: Drawing Tools > Merge Shapes > Union):
Selecting "No fill" in the Format Shape panel renders the object transparent (ie the underlying image can be seen through the object). However, moving the object to a new location causes the fill to change as would be expected. And saving and reinserting the object (d in Fig. 5) is no different.Does PowerPoint have a tool which will fix (ie insert & retain) a specific background fill in an object? If not, is there a workaround which will produce that same effect?
Thanks
John Wilson
It's not totally clear what you need but try drawing a non rectangular shape with the freeform tool. set fill to slide background and then right click and save as image.
If it's not a background fill image as JSRWilson is guessing, then try right-clicking the shape and choosing Format Shape. Then on the Fill tab, choose Picture or Texture Fill, Insert from File. Tick the box to Tile Picture as Texture and use the offsets and alignment to move it into position.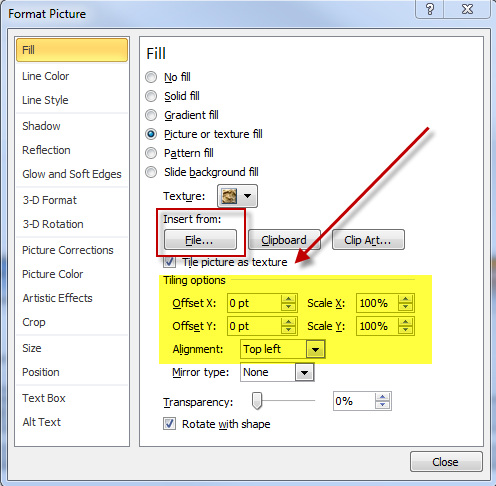
You'll also find the Background Fill setting in this dialog. Use that to fill the shape with the slide background image, which also might be what you're after.
You'll also find the Background Fill setting in this dialog. Use that to fill the shape with the slide background image, which also might be what you're after.
ASKER CERTIFIED SOLUTION
membership
This solution is only available to members.
To access this solution, you must be a member of Experts Exchange.
ASKER
Thanks for the responses.