WeThotUWasAToad
asked on
Display only selected borders of object in PowerPoint
Hello,
Is there a way to display only some of the borders of an object in PowerPoint but not display others?
For example, suppose you want a half circle with the round border displayed but the straight border not displayed.
Half circles are not available from the objects menu but can easily be created by starting with a full circle as shown here:

Then after superimposing a second object which perfectly covers half of the circle:
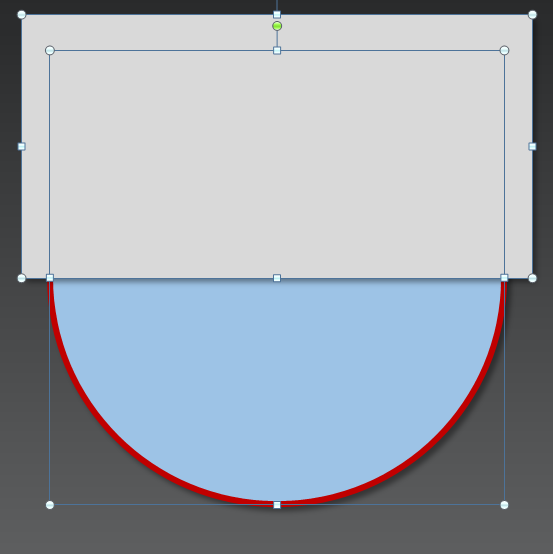
and clicking Shape Intersect:

The desired half circle is obtained:
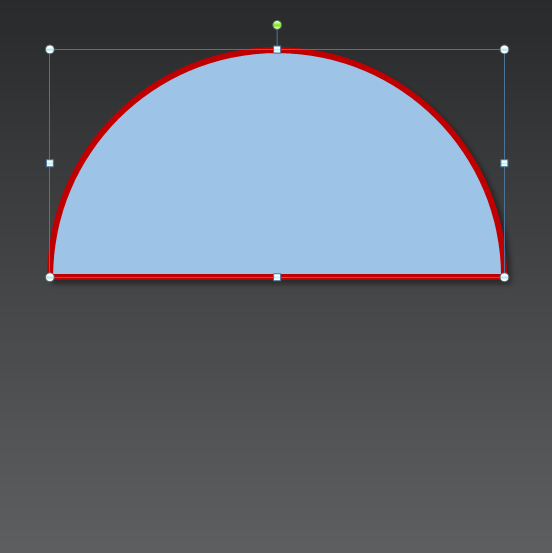
However, in the process, a red border was added to the new edge of the half circle.
Is there a way to prevent the addition of the new border or remove it once it is present?
Thanks
Is there a way to display only some of the borders of an object in PowerPoint but not display others?
For example, suppose you want a half circle with the round border displayed but the straight border not displayed.
Half circles are not available from the objects menu but can easily be created by starting with a full circle as shown here:
Then after superimposing a second object which perfectly covers half of the circle:
and clicking Shape Intersect:
The desired half circle is obtained:
However, in the process, a red border was added to the new edge of the half circle.
Is there a way to prevent the addition of the new border or remove it once it is present?
Thanks
ASKER CERTIFIED SOLUTION
membership
This solution is only available to members.
To access this solution, you must be a member of Experts Exchange.
That's a great idea, Jamie!
SOLUTION
membership
This solution is only available to members.
To access this solution, you must be a member of Experts Exchange.
ASKER
Thanks for the responses.
Expert Comment by: Jamie Garroch
You can right click on the shape, click Edit Points, then...
Expert Comment by: Rob HensonScreenshots would really be helpful in your posts — in general, but especially in this thread. As examples, you can refer to most of my EE questions and almost any posts by Joe Winograd. Also, if you are interested in a quick method for creating and inserting screenshots, feel free to send me a pm and I'd be happy to share it — although I'm sure there are many others.
See attached slide.
In this case Screenshots would not have been much use. A file enabled seeing the difference between the two arc shapes, in a screenshot they would have just been the same.
When I do include screenshots I use the in built Snipping tool to get a section of screen. It doesn't matter what you have in the background as you can snip to just the bit of screen you need.
Thanks
Rob H
When I do include screenshots I use the in built Snipping tool to get a section of screen. It doesn't matter what you have in the background as you can snip to just the bit of screen you need.
Thanks
Rob H
SOLUTION
membership
This solution is only available to members.
To access this solution, you must be a member of Experts Exchange.
ASKER
Thanks for the help.
Sometimes you can fake it with a shadow positioned appropriately and set to 0 blur.