5:15
This video tutorial explains how to create an Blueprint within vCloud Automation Center 6. A Blueprint is the complete source for VM deployment. It ties together machine specifications, attributes and policy settings which ultimately end up within the catalog if published. There are two types of Blueprints, Machine and Service. Only Machine blueprints are being represented here.
Video Steps
1. Login to vCAC engineering tenant
2. Machine Blueprints provide all previous configurations together.
A user who is logged into vCAC, will be able to define and compute storage min and maximums on a per VM level, define build profiles, and define the VM deployment in the catalog.3. Go to Infrastructure/Blueprints/Blueprints
Navigate to Infrastructure in the left hand navigation, and then go to the "Blueprints" sub-tab in the left hand navigation once and then again.4. Create a new blueprint under vSphere (vCenter)
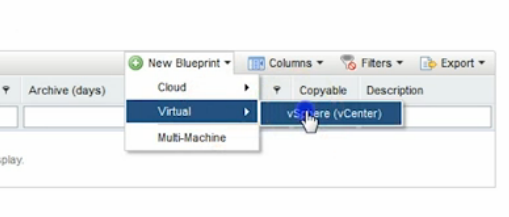 Go to "+ New Blueprint", "Virtual", "vSphere (vCenter)".
5. Give blueprint a name.
6. Set blueprint options
You may make the Blueprint copy-able, you may display the location on request to allow the requester to deploy to a specific location, and make the blueprint available across business groups.7. Set reservation policy, machine prefix and archive period
reservation Policy defines where the VM that comes from this Blueprint is deployed to. Archive days are the number of days past the lease time the VM will continue to be available.8. Go to Build Information tab
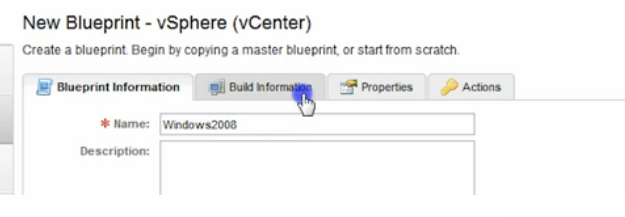 The "Build Information" tab is found at the top of the Blueprint creation interface.
9. Set blueprint type, action, provisioning workflow and clone from option
10. Set machine resource, minimum and maximums.
For example, with CPU, a minimum of 2 CPUs and a maximum of 4 means a requester can select 2, 3, or 4 CPUs.You can set mins and maxes for CPUs, Member, Storage, and Lease Time.
11. Set storage volume if required
12. Use Build Profiles on the "Properties" tab to set further specifics.
Build profiles are used for pre and post actions.13. Use Machine Operations on the "Actions" tab to allow machine owners to perform more actions on the VMs deployed from this Blueprint.
14. Select "OK" to create the Blueprint.
14. Publish blueprint once it is saved
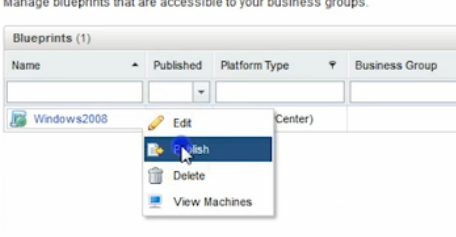 Once you are returned to the Blueprints list, select the arrow next to the Blueprint Name and select the "Publish" Option. Select "OK" in the confirmation interface.

0 Comments
Suggested Videos

HOW TO: Install and Connect a VMware vCenter Server 7.0 in linked mode.

Looking to migrate your existing VMware environment to VMware Cloud Foundation? Below is a brief summary of what is involved in making this transition based on my personal experience.
VMware vRealize Automation
- How to Create an Entitlement within VMware vCloud Automation Center 6.0(4:18)
- How to Create a Blueprint within VMware vCloud Automation Center(5:15)
- How to create a Cost Profile within VMware vCloud Automation Center(3:49)
- How to Create a Business Group within VMware vCloud Automation Center 6.0(5:25)
- How to Create a Fabric Group within VMware vCloud Automation Center 6.0(4:12)
- How to Create a Network Profile within VMware vCloud Automation Center 6.0(4:40)
- How to Create a Reservation Policy within VMware vCloud Automation Center(4:03)
- How to Create a Tenant within VMware vCloud Automation Center 6.0(5:15)
- How to Create a Reservation within VMware vCloud Automation Center 6.0(7:16)
- How to Create an Endpoint within VMware vCloud Automation Center 6.0(5:21)
Total Time: 49:39